Showing posts with label painting. Show all posts

Tuesday, 18 May 2021

Steampunk British Infantry - 18/05/21 Update

 I've given up on 'part numbers' for these posts as I'm working on a couple of related 'regiments' at the same time!😁

So, the story so far...

After getting my recent creative diversions out of the way I have returned to my 'Invasion Mars, 1899' project by starting to paint my first 'regiment' of British for the campaign. These are my heavy assault infantry - Grenadier Guards - with the Mk. 1 (diving suit) space clobber!

It's nice to see a unit of my peg soldiers in progress, it reminds me of why I started this blog in the first place (even if they are not Molatarian infantry)!

The scarlet I am using for the suits is Vallajo's 'Gory Red', crimson was a bit to bright for my liking and this more muted red is more to my liking though it's a bit of a pain to paint with and needs a couple of coats to get good coverage. Still, it's worth it.

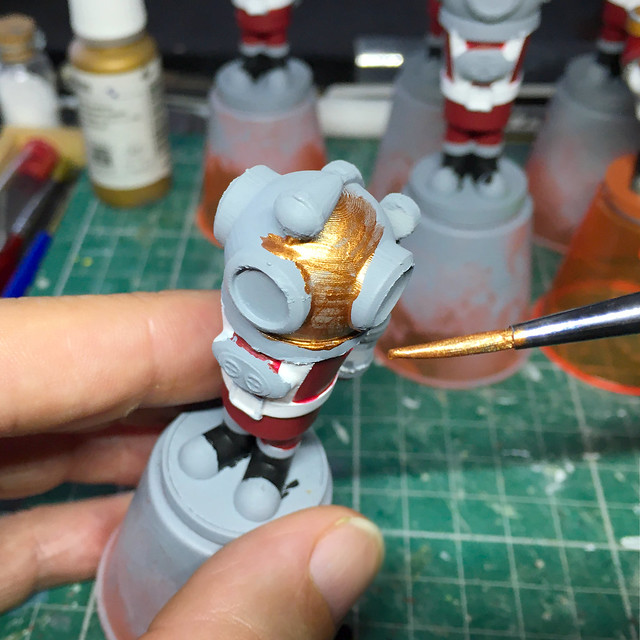
I'm gone for a coppery brass for the diving helmets and again - just my luck - this paint is a bit of a pain to use as well...

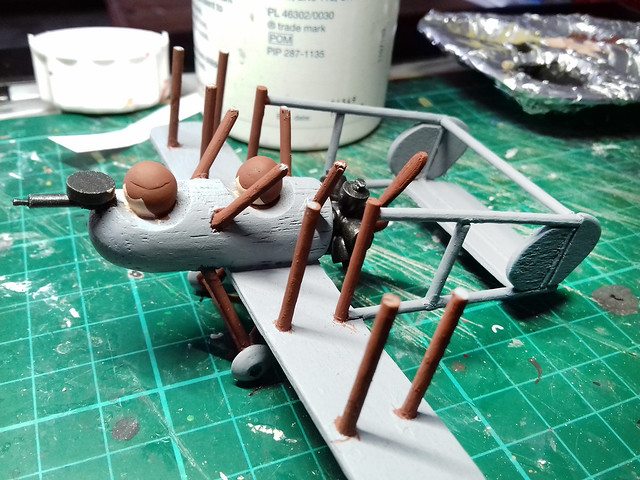
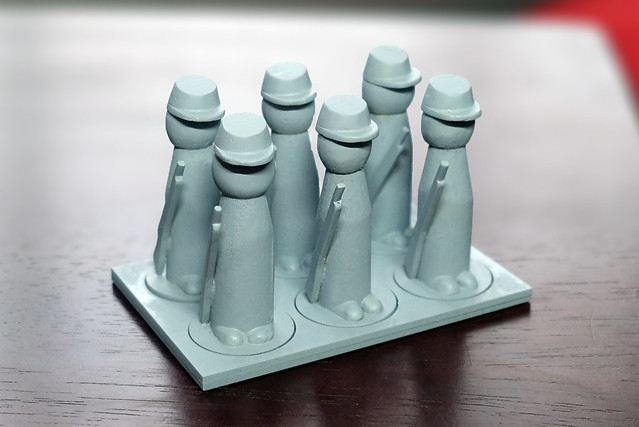
It's going to be a bit of a slow slog to work my way through these five figures in order to complete the unit AND I haven't even completed the 3D printing of the arms yet! The delay here was due to my fancy-nancy 'space rifle' design which is turning out to be a pain to print properly. I think I got a bit over-ambitious for the scale and should have stuck to my super simplified design ethos of my earlier peg soldiers' weapons. 

Anyway, in the end I managed to get a passable print, though it still needs some cleaning up...

Above: Hard to tell what's going on when all the print supports are
on but hopefully it will do the job once it's cleaned-up!

And in the meantime...
While scratching my head over my Grenadiers' guns I cracked on with the prototype for my second British unit - a Light Infantry trooper in a Mk. 2 suit...

You can get an idea from the above pick how the space rifles should turn out as I have primed the arms for this little chap. And while I had my red paint out I made a start on painting his uniform.

In all I hope to make three British infantry units (of six soldiers each), the Grenadiers, a Light Foot and a Marine detachment. I'm going for six in a unit as in this 50mm scale and using a version of the Portable Wargame rules for a small table 'battlefield' this will keep the overall numbers manageable for a game.

Aside from the infantry there will also be a section of 'cavalry' (steam mechs) and a artillery section (one gun). The mechs will pose quite a challenge as they will be quite big.

And that's all for today, it's just banging on with these figures in a little painting production line!

Thursday, 22 April 2021

Innsmouth Bad Boys - Progress

While I'm getting there with my 'Innsmouth Bad Boys' I wanted to show the intermediate progress rather than simply going straight to the completion photos (which are about a day away). That would be a bit too much like those frustrating Blue Peter 'and here is one I made earlier' reveals! 😁

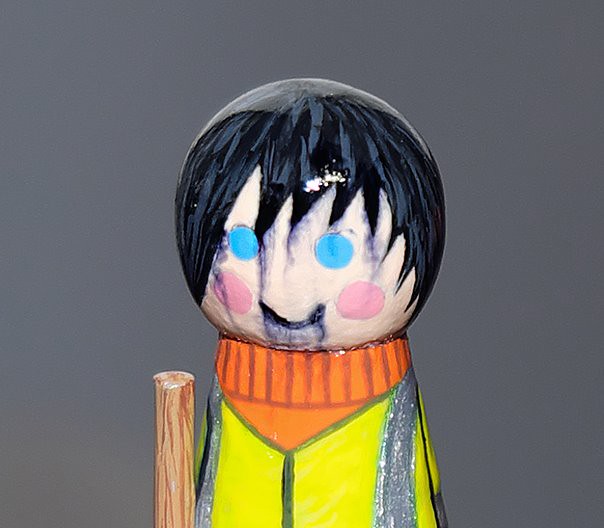
While most of these figures have been pretty straight forward. I have topped the project with some painting that is a little more involved than usual...

In particular, my 'frog-man' has been given a facial that is more detailed than my normal cartoonish peg figures, with some graduated tones and textures.

The reason for this little departure from my usual super-simplified style is that I wanted to emphasise the monstrousness of these characters as compared to the 'normal' human peg characters in the series.

They are still - obviously - not 'realistic' by any means, but it was an interesting small departure for my painting style, if only to see what I could do for fun.

Thursday, 12 November 2020

The Prussian Blues

[Operation Pickelhaube Part 5]

While making and painting a large selection of different peg projects at one time is interesting it does mean that everything is taking longer to do and each individual project is only progressing in small steps. So, sorry about that, it doesn't make for exciting blog posts! 😟

My Prussians are a case in point. Normally, were I *just* working on this Prussian set on it's own I would expect to have dealt with them over the course of a week or so. Sadly, my little Prussians are dragging on an on and my 'updates' are pretty lacklustre. 

Ah well, anyway, here's what I've been up...

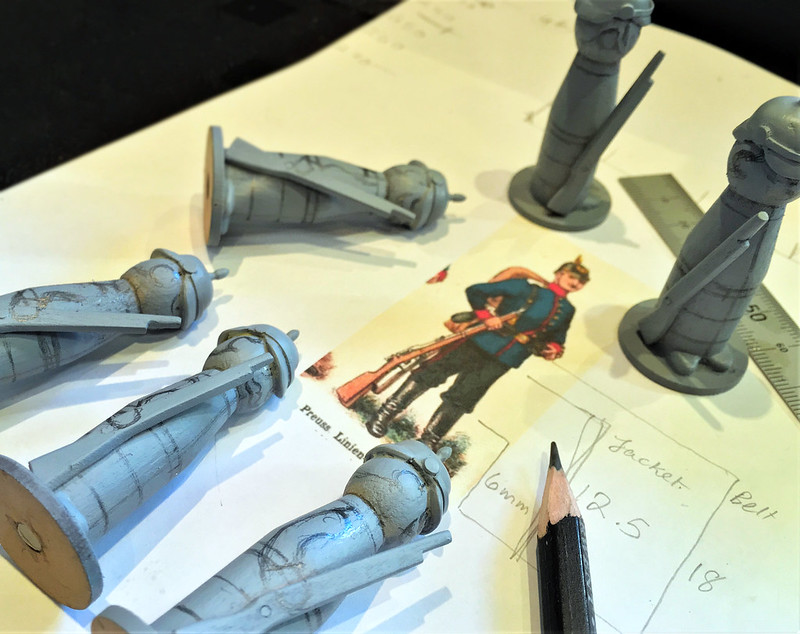
Having primed my figures I then had to decide on a uniform design - from reference - which I would replicate. Obliviously, I had a a design in mind from the start - which was the basis of my construction - but there were several colour options and even some disagreements about exact colour shades (as there always is in the world of military modelling)!

In the end, despite some doubt being voiced about the accuracy of the reference picture I chose to base my Prussian's uniform on (see middle figure bellow) I decided to use this as my template...

I have no other excuse for going for this 'look' other than I thought that it looked very smart! 😁 Although, for a brief moment I flitted with the idea of the light blue uniform ('Bavarian' according to the pictures titles) but in the end I plumped for the darker blue design.

So, let's pop some paint pots!

I always start by painting the flesh tones [using Valajo zzz] and work my way 'out'. So it's (usually something like) skin, hat and boots, trousers, then jacket, accessories (webbing and weapons) and then - finally - details like facial features and insignia...

As I have mentioned before, building up the colour areas from bottom to top gives you some latitude to clean up mistakes (like accidentally painting over into other areas). Believe me, I make a lot of mistakes and have to do plenty of touching up! 😁

About Types of Paints...
I should mention here that I am using acrylic (water based) modelling paints, because that is what I had to hand. This is OK if your peg models are for your own please of for display BUT if your are making your peg figure for use as toys for younger children then you should look into using child safe paints.

I'll be experimenting with a small range of child safe paints (like 'Painter's Touch' made by Rust-Oleum) for a test figure I will be making just to see what these type of paints are like to work with. The down side of converting to child safe painting is that I will have to purchase all new paints and it will take time - and some expense - to build up as good a range of colours that I have at the moment with my Vallejo collection. 😕

Aside from the Vallejo brand I like using Tamiya acrylics as they cover very well.
But what you decide to chose may very well depend on what range is most
readily available in your locale.

As I say, if you are making peg figures for your own pleasure - as I am - then you do not have to worry so much about this. Just bear this in mind if you are thinking of giving one of your models to a young child as a gift.

The Prussian Blues...
OK, moving one. Naturally the highlight of this unit's uniforms is the jacket colour - which is usually the defining recognition colour of any military unit. For the Prussians of this period we are talking [a] 'dark blue' and - indeed - Vallejo does have what it called a 'Prussian Blue' in it's range. HOWEVER, as usual, there is some debate among military modellers (as there usually is, because they like to be contrary) about what 'Prussian Blue' actually is! But, to be fair, if you look at the available reference illustrations it can varies quite a lot, as you can see in these two examples (both of which differ from the picture I am using as reference, see above)... 
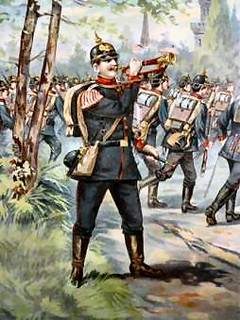

...From a kind of charcoal grey-blue to and deep navy blue there's a bit of a discrepancy among illustrations. Even when I referred to the usually reliable fall-back - which is Osprey's Men at Arms books ('German Armies 1870-71') - I only managed to confuse myself further with a rendition of 'Prussian Blue' which was more of a rich Royal Blue! 😖

Will the real Prussian Blue stand up, please? 😄

So... For the sake of my own sanity - and recognising that my soldiers are toy soldiers and not museum quality display pieces - I'm just going to use Vallejo's Dark Prussian Blue straight out the bottle! One of the advantages of doing this is that it is then easy to replicate this exact uniform colour in the future should I want to do more Prussians.

[Side note: OK, I took the easy way out BUT there is method in my madness. I had already done some preliminary research for this project and a little problem I noted straight away was that most of the uniforms of the Franco-Prussian War - French or German Confederation - were dark blue! So there is a danger of not being easily able to discern one of my model units from another on the game table. So, if I can at least moderate the range of blues a bit there will at least be some welcome variation in uniform types. Not historically accurate, but they are just pegs soldiers!]

Back to the Painting...
Working up through the layers of the uniform - repeating the process for each of the soldiers in the unit -  I slowly build up a completely painted figure. It can be a little laborious, but I am just doing six figure units due to the fact that I am utilising Bob Cordery's 'Portable Wargame' rules. I can only imagine how long it would take were I to make the larger units required by other traditional wargame rules! 😫

Above: Example of the 'Portable War Game' rules in action! You can see how
this small scale format is more akin to a board-game in it's use of a tile system
which can fit on a dining table (though it is scale-able). Likewise, the units in
use are representative, which means they include fewer numbers of individual
figures standing in for large regiments. Photo credit: John's Wargame Page Blog.

Phew! That scary thought to one side, I do find the repetitive nature of doing the same figure over and over quite relaxing. It's quite calming and takes my mind off the stresses of life - which is nice as we all go through some of the big challenges that are being thrown at us.

Beginning with the big areas I slowly move until I end up with the smallest detail and that's when things start to get tricky. These peg soldiers are of my original 'Mk. 1' style, which means most of the detail is painted on - from arms to belts and from piping, insignia and buttons - so things tend to get slower as you approach the end of the job. I usually end up painting on the face and the tricky bits like unit badges last, the cherry on the cake so to speak.

Above: I decided to go with a bluer blue for my Prussians, in line
with the original reference picture I chose (see top of page). 

(This laborious amount of detail is the reason I evolved my 'Mk. 2' figures with the addition of modelled accessories and added parts. So there is less intensive painting.)

Unfortunately, I had already started this project using my original peg soldier style, so I will have to continue with that format in order to get a consistent look. I am a bit OCD like that! 😉

The moment I put that last bit of paint on is sooooo satisfying! Yay! I tend to finish off the painting process by adding the facial features of my model, it seems appropriate as the face is what gives my little peg people their character. 

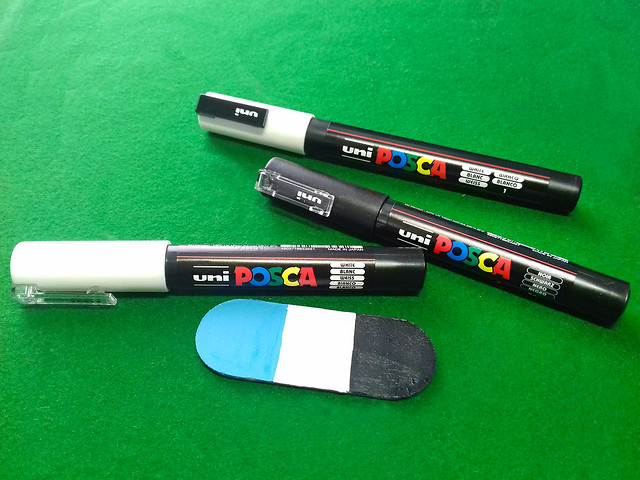
I should note at this point that for some of these tiny details  which I add last that I tend to use acrylic-based POSCA pens the nibs of which are great for applying little dots of paint...

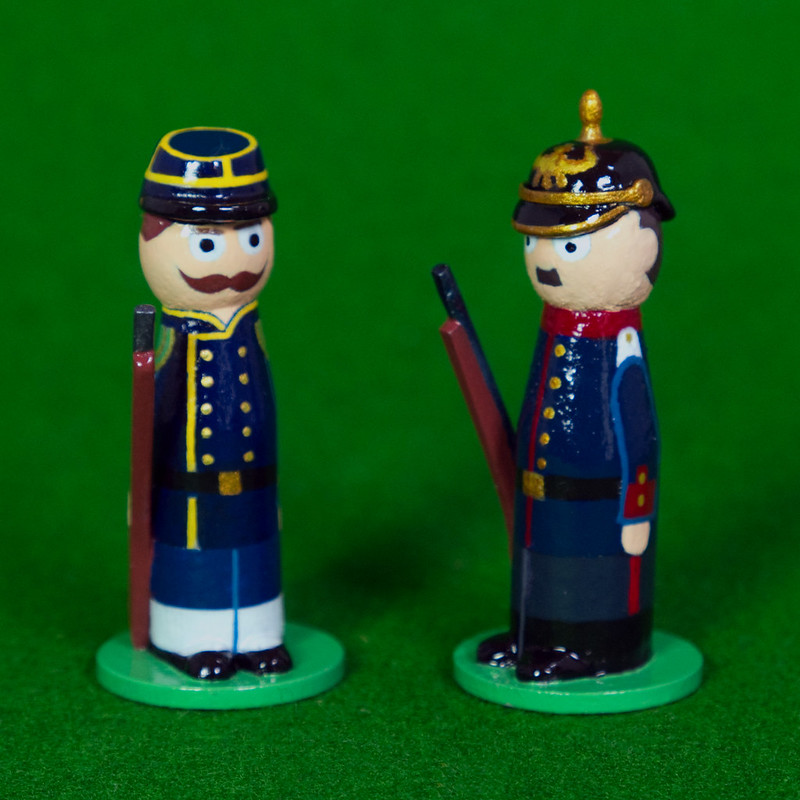
Above: Painting of my Prussian completed and compared to a French
counterpart. Both are now ready to varnish...

But that's not the end, there are jobs like the unit base to paint as well and then there is the application of the protective coat of varnish. The unit base is painted with the same grass green as my figures mini bases, I has flirted with the idea of painting the larger unit base with national colours to make unit identification easier (or at least painting the factions flag on the base). Alternatively, I guess I could have drilled a hole and fixed a national flag in the base? But, I kinda prefer the simpler, cleaner look of plain green

Varnishing is the absolutely final job and I find this a little stressful. I use a aerosol spray lacquer and just every so often things can go a bit wrong. Over-spraying and temperature can play their part in my fears of what can go wrong at the last moment.

Over-spraying is a danger as the misconception for novices is that spraying a think coat of gloss varnish will result in a commensurately high-gloss finish. Not so, over-spraying can lead to dripping where the excess gloss can runs down the model spoiling it. Worse, than that though is when the temperature is too cold or the weather too damp (if you spray outside) and the cold and moisture can adversely affect the gloss - you can also get sputtering - and I have had a couple of models end up with the varnish discolouring with a cloudy sheen.

So, varnishing must be done with care, patience and preparation. If you chose to spray on your varnish it should be done in a clean area of moderate temperature (preferable well ventilated). The coat should be applied in multiple light coats and not in one thick one. Spray a light coat and wait and then only apply another if you feel you need to.

Above all let your varnish dry (cure) properly. This may take up to a few days!

Cover your model after spraying to avoid dust settling on the wet varnish. There is nothing worse than having done a careful job making and painting your figure than getting a speck of dust right in the middle of a light area (so it's really obvious). I usually place my freshly varnished models under a box or clear food dome of some kind.

[I am currently planning to experiment with painting on my varnish coats rather than spraying. There are pros and cons to this change in my method of application.]

In Conclusion...
Well, that's the (my) painting process. I'm definitely not say this is 'the' way to paint your models as you have to develop your own painting strategy, but this is what is working for me at the moment.


Link: See the complete series of 'Operation Pickelhaube' project posts.

Sunday, 20 September 2020

Peg Monoplane No. 1 Scheme & Decals

 My original idea for this little monoplane was for it to be the next addition to my Molatarian Air Force. It was going to have a purple and orange based colour scheme and emblems, BUT then...

As I mentioned in a previous post, this little aircraft's design is loosely based on the 1930's Boeing P. 26 pursuit fighter of the U.S. Army Air Force and - frankly - the historical schemes are so darn attractive that I found that I just could not persuade myself to do anything but one of these colourful designs. Here's an example...


Very pretty, and very typical of the era. So, you see, I couldn't resist having a crack at a real world scheme (maybe I can pretend it's on loan to the Molaterian Air Force). 😆

Well, the next thing was to transfer the scheme and it's lovely emblems onto the primed model ready to paint. I thought the easiest way to do this would be to trace the designs onto the plane using old fashioned carbon paper. But first I needed to create a suitably sized emblem template, this I did by drawing a copy using Affinity Designer (vector design software)...

The design drawn to the right size for the wings I convert it to a black outline and printed it out with guidelines to make sure I place it in the correct position on the model's wings...


I've never done a 'realistic' peg model aircraft before so I was a bit unsure how to go about doing all the detailed emblems and - indeed - how much to do (as this is a simplified model). So I decided to try a mix of masking and transferring the USAAF roundels and painting on the rest of the 'decals' straight on.

At the same time I painted on the two primary base colours of yellow and blue... (Can you tell that I'm making this up as I go along, as usual?)

Well, that's where I got to as I have so many projects on my workbench at the moment so I'm having to careful manage my time. The list of Christmas presents grows ever longer BUT I am making sure - for my own sanity - that I am doing some personal projects in between the 'jobs'! 😉

Indeed, I should have some good old toy soldiers to show you again very soon!

Sunday, 22 July 2018

Peg WW1 Light Bomber - Part 4

And so, the painting begins...

I've decided to go with a pretty plain and widely used colour scheme for my bomber, a 'canvas' buff. While this was associate with earlier WW1 aircraft - from, say, 1914-17 - I'm imagining that my Molatarian Rebels of the 1918 uprising might be using older aircraft (I'm making this up as I go along - like everything else I do).

I thought the overall buff colour went nicely with the older 'pusher' design of aircraft. But will be adding a rather novel rebel slogan to the upper wing to add some interest to the scheme. The faction colour will be the blue, white and black scheme that I have designed for my rebels.

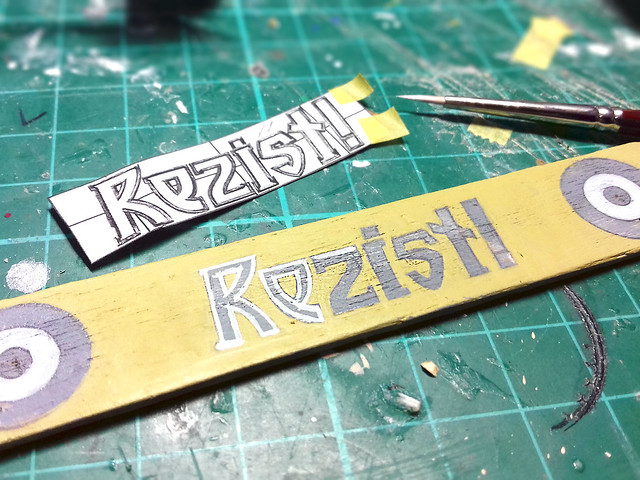
I designed my revolutionary slogan in Adobe Illustrator using a
vaguely Romanian/Cyrillic looking font. Then I printed it out
and traced the design onto the top wing...
My imaginary nation of Molatero is loosely based on Romania (ish)
and so I have used the modern political slogan of 'Rezist' as it
seemed so apt for a catchphrase of a civil uprising.

Otherwise, the rest of the painting is very straight forward and pretty easy. Being a simplified and stylised model detailing is pretty much non-existent and there will be few colours used. I'll start 'inside' and work 'out'...


To be honest, this paint job - being family plain - shouldn't take too long finish...Hopefully!

Thursday, 12 July 2018

Handy Gadget

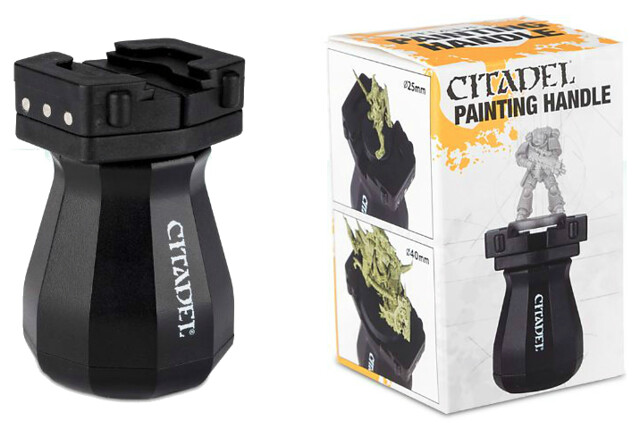
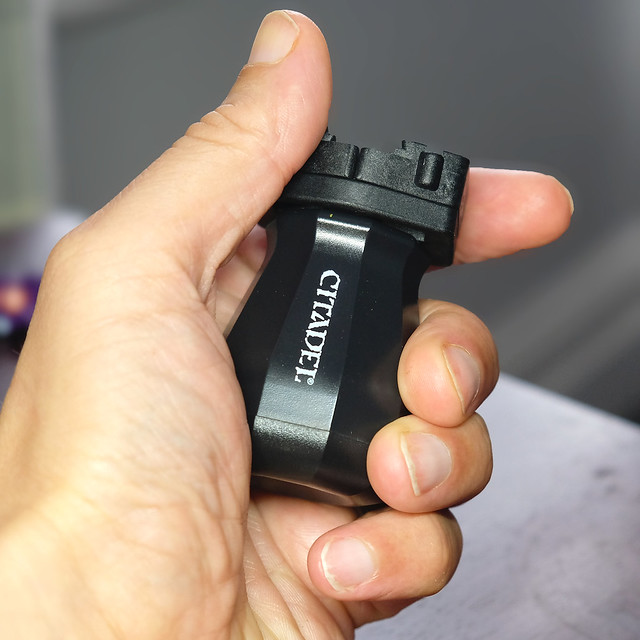
Just a quickie about a new useful piece of kit I've just bought - the Citadel Painting Handle.


Now, I know a lot of people think that Citadel products are rather over-priced for what they are, but this item is fairly niche and so 'value for money' is harder to gauge in this case. At £5 for a plastic grip that clamps figures and so holds them steady it's usefulness kinda seems worth the cost.

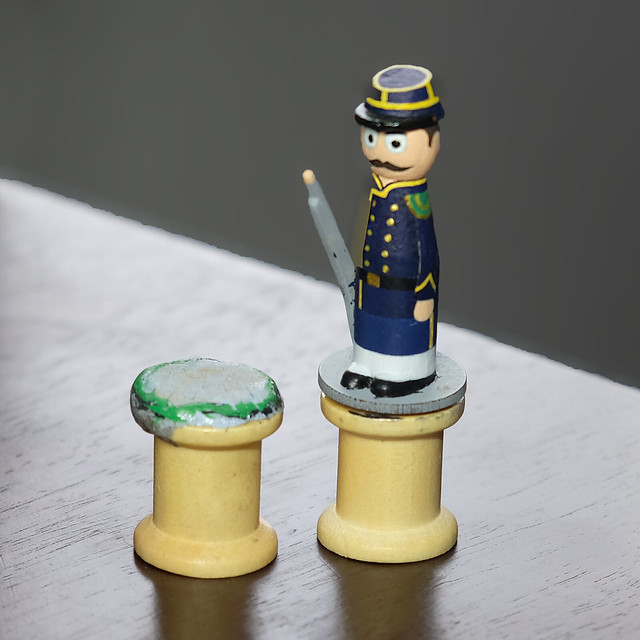
I've been using a home-brew grip - a cotton reel with a piece of Blu Tack on top - but, while a cheap solution, it has let me down on a couple of occasions. Blu Tack seems to loose it's stickiness just at the most inopportune moment sometimes.


So, I bit the bullet and forked out a fiver, but I'm pretty glad I did.

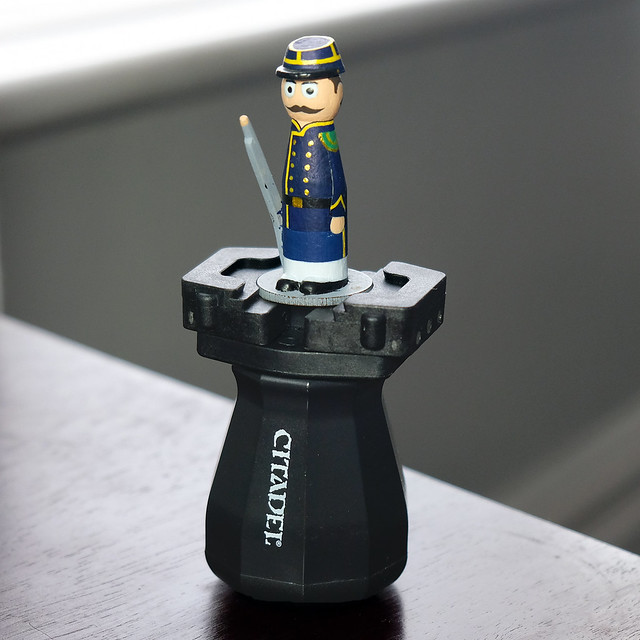
I have big hands and I appreciate the chunkiness of this grip and the weight of it compared to my featherweight cotton reel. Also, the clamp is sprung which means the jaws are always under tension and they grip the figures base nice and tight (but not so tight that you can't easily remove the figure when you want).

I much prefer this sprung grip to something like a screw grip where you have to laboriously screw and unscrew the jaws every time you want to pop a model in or out.


Yes, everything is plastic (except the spring gear I guess), but it's good quality none the less.

And finally, and most importantly, it's very comfortable in use. It's reasonably big and fits snug in the palm of my hand enclosed by all my fingers.


Fiver well spent.

PS...Final factoid - the jaws are designed to open up to 40mm diameter bases. Mine are smaller, being pretty standard 25mm round bases. The shaped jaws seem to be designed to accommodate bases of other shapes too (square and hexagonal, for example).

Friday, 6 July 2018

Something for the Weekend, Sir?

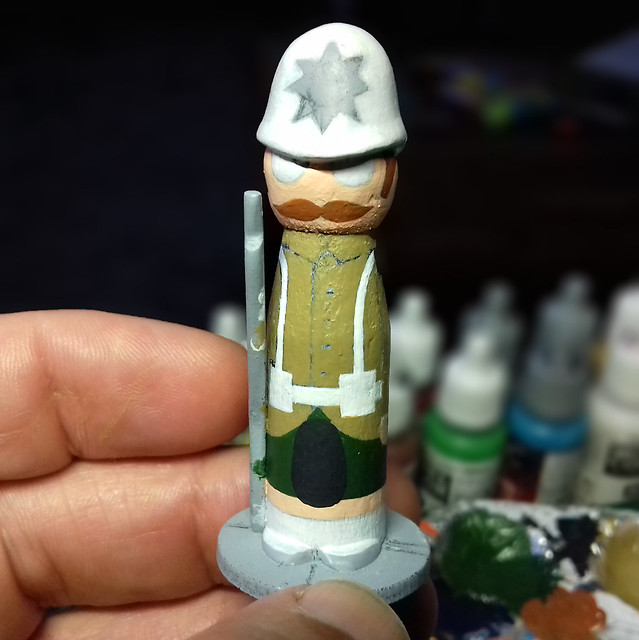
I had a spare prototype figure lurking on a shelf, it was one of the tests I did of the pith helmet casting. So, I thought, let's give it a go...


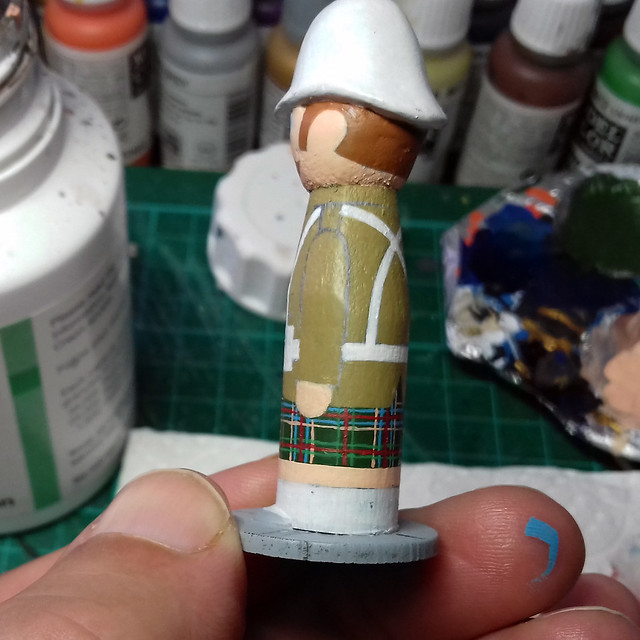
I'd already painted up one of the prototypes in 'Zulu' (the movie) style, so I thought it'd be nice to have a bit of fun with this one and based it on 'Carry On Up the Khyber' - a soldier of the '3rd Foot & Mouth'. :)

Got quite a lot done this afternoon and imagine I will have it finished by the end of the weekend.

UPDATE: Saturday.

Just thought I'd pop this in as it's a tiny bit progress, but - boy - did it challenge me. This is the very first time that I've ever tried to paint a tartan pattern...


Er, not exactly top notch line painting, but I'm hoping it might pass for this 'cartoon' style project.

Wednesday, 27 June 2018

Production Post - Paint Pens

I didn't know there was such a thing as 'paint pens', but there is!

Why this is of relevance to me and my figure painting is that you may remember the problems I had when I tried out 'permanent markers' for drawing on fine detail. The issue seemed to be the type of varnish I prefer to use for glossing my soldiers, it's an aerosol spray which I believe contains a propellant which contains some form of spirit...The result was that my pen ink lines bled! :(

The result of using 'permanent' ink pens in combination
with my usual spray on gloss lacquer.

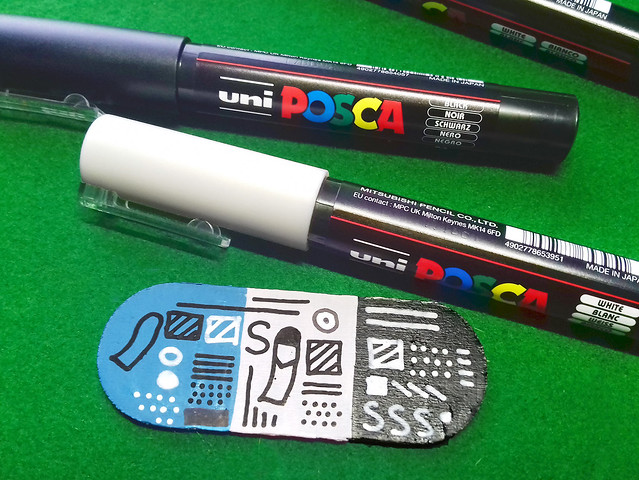
Anyway, I happened to be talking to a fellow 'creative' (who also paints on wood) and she used a brand of pen called Posca and suggested that I give them a try. I was skeptical, but painting on fine lines on my peg figures by brush is such a pain - especially as I'm getting older and my line painting is getting wobbly - that I thought it was worth a punt.

The slight downside is that the Posca pens are a wee bit expensive (£2.99 a pop) but in for a penny in for a pound, so I painted up a test piece of wood...


I managed to afford two 'extra-fine' nibbed pens (a black and a white) and a 'fine' white as well. White is quite important for contrast outlining on dark colours, but pens are also great for doing dots!

For a test, I just scribbled some lines and squiggles (and dots) on the board...


And now the tense bit...The varnishing.

I should explain, I do like using aerosol lacquer as it give a nice smooth thin and even coat. However, there is a downside - apart from this pen problem - and that is spraying is a little wasteful as about half your spray doesn't hit your model and ends up in the back of your spray booth.

There is a forthcoming test using some brush on varnish, but liquid varnish has it's own drawbacks. We shall see.

But, in the meantime, my spray test had me holding my breath as I sprayed...


No bleed! Very good news.

Were I picky (and I am) I would say that the lines aren't quite as opaque as using normal acrylic paint with a brush - the black looks a little faded - but this is a minor point compared to the convenience of drawing lines with a pen.

Now, I think I should try out a these pens on a live project and I think I have the ideal model for trying them out on!

Wednesday, 6 June 2018

First Molatero Warplane Painted

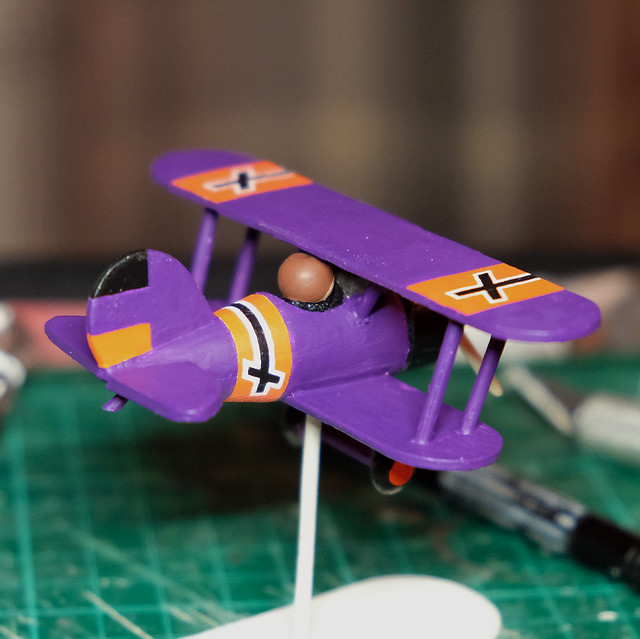
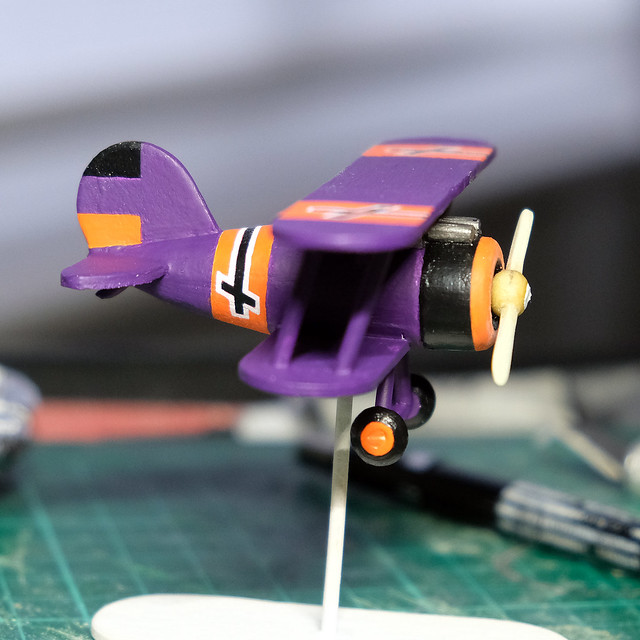
Just some quick snapshots of my little peg bi-plane as it nears completion.

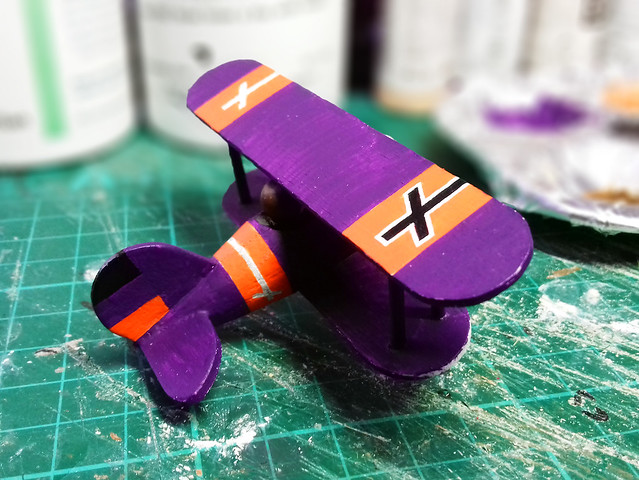
I'm pleased as I thought I might be with the purple colour scheme, though it did take a couple of coats  as it's a bitch of a colour to get good opacity. Also, I decided to paint the 'Royalist' emblems (the crosses) freehand, so lots of painting with my tongue out!


You can probably see how streaky the first boat of purple was in the above picture. But it all came together nicely with the application of a second coat...


The photos make the crosses seem neater than it actually is! SO, I'm pleased...Hee hee.

Friday, 4 May 2018

French 'Chasseurs à pied', 1870 - Part 3

Having constructed my very first peg unit, it's time to get down to the nitty-gritty with some painting. As I mentioned in part 1 of this series I had taken the time to do a colour sketch of how I wanted my soldiers to look (having simplified the uniform design a little to suit the peg soldier format).

However, I think I have resolved the one issue I had with the uniform colour - based on the contradictory information provided by some of the historical illustrations I had gathered - and that was the colour of the Chasseurs trousers. I found an excellent website called 'Images De Soldat'...


The website of the author-illustrator André Jouineau, it contains about 1500 colour plates which reference the uniforms of various nations from 18th century to World War 2. And I was delighted to find a wonderful plate with the uniforms of the Chasseurs à pied from1870. (You pay a nominal sum to download the full-sizes plates, but it's worth the €2 if you are serious about your modelling projects.)

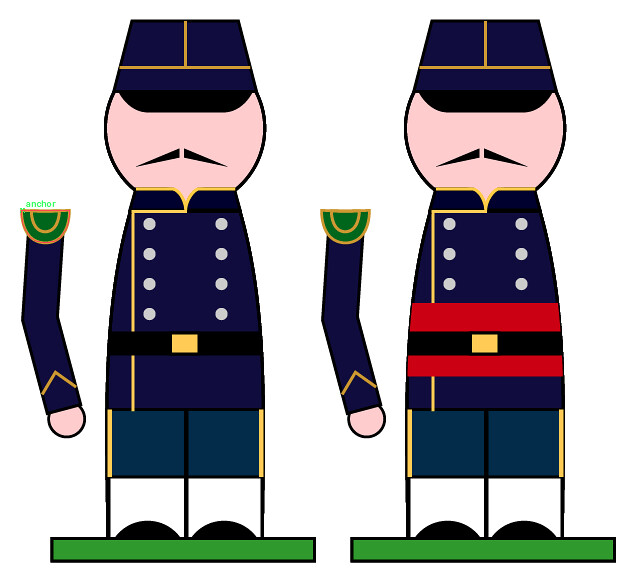
While I can't show you the copyrighted illustrations I can confirm that the trousers were, indeed, in a lighter blue (somewhat akin to RAF uniform blue, but a shade darker). So my uniform sketch has now been amended...


The soldier on the right is wearing a rather flamboyant red cummerbund (or cummerband). I'm in two minds whether to include this item in my peg models as - although it is very dashing - I cannot pin down what the actual meaning was of it's inclusion as part of the regiment's uniform. All I have found is this short mention in Wikipedia:

"The units of the French Army of Africa (such as the Zouaves or the Chasseurs d'Afrique) wore cummerbunds of 2 different colours: blue for European soldiers and red for Native recruits."

This does not seem to fit in with the pictorial reference I have from Images De Soldat, as the example soldier was clearly of European origin, so the red sash clearly has some other meaning. They may have been worn, perhaps, to indicate that the unit has seen colonial service (but this is a guess on my part).

[Edit: Nope, I cannot resolve this conundrum, so I will not include the sash - however pretty it is - as the majority of reference I have does not include it.]

Now, On with the Painting...
I'm sticking to my grey primer as it seems a really good base for bright colours (white can be a little bit of a pain to cover sometimes)...


Downside of doing these little fellas in grey is that - with the keeps - it makes me very tempted to do an ACW Confederates! :) (Maybe another time?)

Picking Paints & Colours
One thing I don't like to do so much is mix up special colours, I'd rather buy the exact colour match (or closest thing) in bottle form. It's not that I'm lazy, it's just that - from experience - I know that if I want to duplicate a mixed colour further down the line it's a pig to get an precise match. It's far easier to just know what number Vallejo or Humbrol to buy.

So here's my paint list for my French Chasseurs:


• Gold Piping:
- Vallejo Model Color [948] Golden Yellow

• Dark Blue (jacket & kepi):
- Black undercoat base with Vallejo Model Color [899] Dark Prussian Blue over the top.

• Airforce Blue (trousers):
- Citadel Kantor Blue.

• Flesh: 
Vallejo Model Color [815] Basic Skintone.

• Wood:
-Vallejo Model Color  [846] Mahogany Brown.


I decided to tackle this paint scheme by starting with the 'gold' piping, in the hope I could get some nice (fairly) even lines!


A Case of the Blues
I've been here before...Quite a while ago I had a go at painting a Black Hat 1/32 scale white metal 1890 French Infantryman. Getting the right deep dark blue caused me lots of grief, I just couldn't get the shade right. Eventually, I managed to achieve a colour I was happy with, but only by means of a complicated mix of various blues - something I don't want to go through again...


Depending on the lighting it's nearly black, but not quite...I think it's what's called 'midnight blue'.

This time I decided to go for a simpler approach and in an attempt to make the richness of the blue colour more intense, though still dark. What I decided to do was to lay down an undercoat of straight black, and then to paint a rich Prussian Blue over the top. The resultant effect was for the black undercoat to darken the subsequent blue coat BUT the blue retained it's richness.

Now, Slap it On...
Enough over-thinking about colours, let's get on with some hairy-stick action! I begin by filling in the spaces between my yellow piping on the hats (and will eventually work my way down to the jackets) with a black base coat...


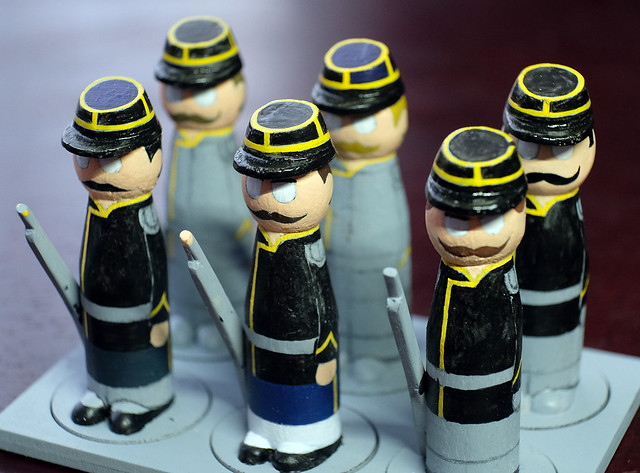
I also laid down the flesh tones and the whites of the soldiers eyes. I've tried to vary the hair styles and the shape of the moustaches, hopefully these will be suitably French looking (to contrast with the more teutonic curled moustaches of the German opposition).

At this point the jackets are just the black undercoat.
And now the slow slog as I repeat the painting until the figures are complete! (Though, to keep me from getting a bit bored with the repetition - thank goodness I'm only doing a unit of 6 - I am already making a start on the first of my Prussian troops.)

Sunday, 11 March 2018

Mini-Nutcracker Soldier - Part 2

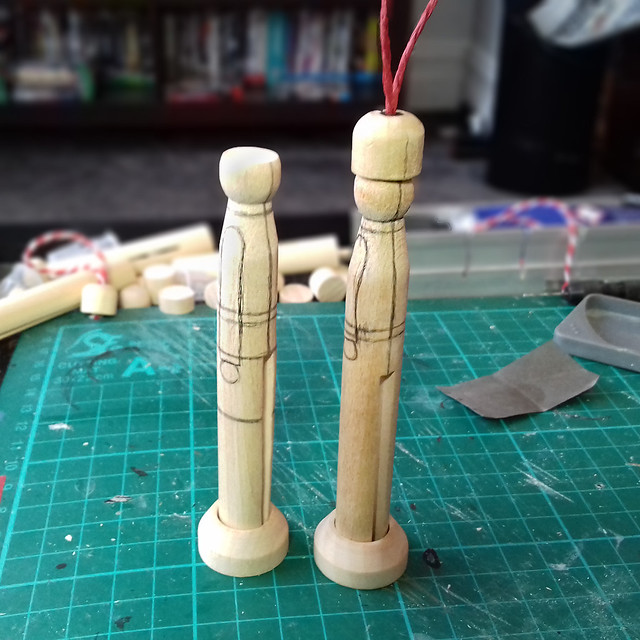
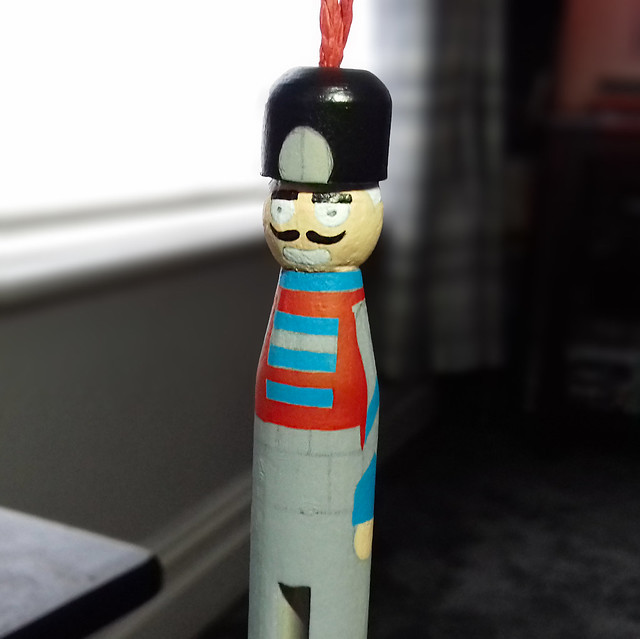
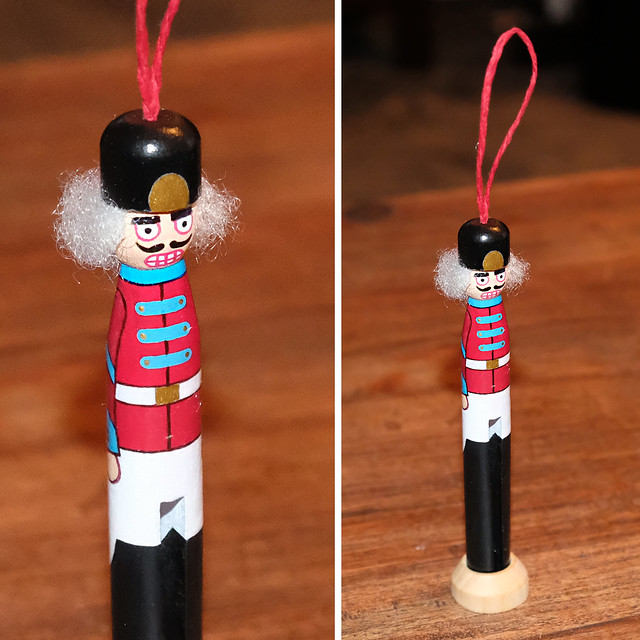
I'm playing this - as with most everything I do - somewhat by ear. So far I have refined my design for the mini-nutcracker soldier by sketching the figure's proportions onto the pegs that I am using. In the following photo you can see my first attempt on the left - which had balanced proportions - compared to my final attempt with more stretched and stylised proportions...


I have attached the hat and hanging thread on my final design. It actually took a while and several tests to find the 'right' sort of thread to use with this (my original idea of using thin wire just didn't look right).

Additionally, I have these pegs sitting in the custom ring stands. Although I mean these are Xmas tree decorations, I kinda like the idea that they could also be places on the mantlepiece if I so desire (so alternative versions I have on the drawing board are a candleholder or place name holder for the Xmas dinner table).

Priming and Painting
As this is my first test of the nutcracker style of wooden soldier - especially in this miniaturised form - this is where things could go a bit wrong! In fact, I'm pretty sure they will as I will be experimenting  with my own ways of doing things like the facial features...I am not altogether confident. :)


It's bit frustrating that I will only know what has 'worked' once I finish this model, so I have to persevere and carry on to the end. Then I can use what has worked on the next model.

(I'm maybe being a little impatient here!) :)

Anyway, the uniform design is a fantasy 'toy soldier' one (nothing historic about this one) and I'm still using my Vallejo paints. The cheaper craft acrylics I have are OK, but don't apply quite as smoothly as the slightly more expensive modelling ones. I think I will try out some furniture paint next, but in the meantime I have a wide range of Vallejo colours so I will stick with them.
The next tricky issue will be how to make the hair...

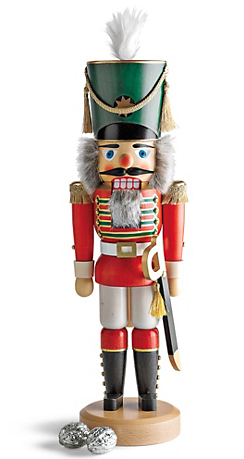
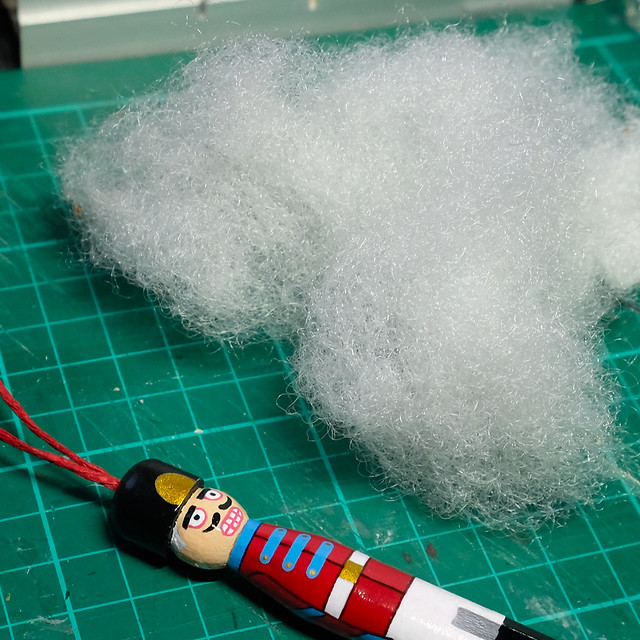
The real Christmas Nutcracker Soldiers have a distinctive mop of white 'hair', and the tutorial I have for the mini peg version suggests that you use 'fluff' (soft-toy stuffing flock) to create the rather crazy looking 'powdered wig' look of a 17th century soldier. I was lucky here, as we have a family dog who has a intense grudge against soft toys and so we have a regular supply of newly toy innards to hand!

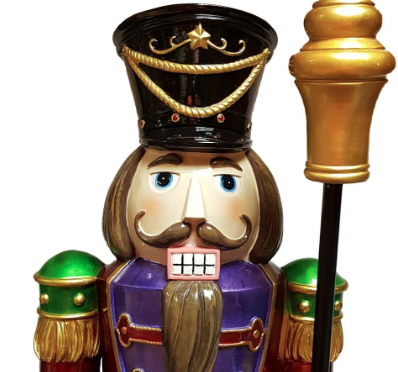
Left: A traditional Nutcracker Soldier displaying a head of hair. From what I remember this was 'fake fur', which poses the question of how I recreate a similar effect on a smaller scale?

I just had to give some thought on how best to stick the fluff to the peg-soldier. In the end, I decided to finish painting and then apply the gloss varnish to the model *except* on the part of the head that the 'hair' will be attached.

There'll be no beard. I just had the feeling that gluing fluff on for facial hair would end up looking like the nutcracker was foaming at the mouth! :)


 I would then use PVA glue to stick on patches of fluff until the bald scalp was covered. The tutorial suggests to stick on more than you need, initially, and then trim the hair into a neater style when the glue drys...


I have to admit, I'm not really a fan of the fluffy hair (it's difficult to stick on securely, and too loose and fibrous and pulls out far too easily) so for my next test I may try out something a little different - solid stylised hair. I found a picture of a full-sized nutcracker with this sort of hair-do...


This would entail my making the hair out of modelling putty (Milliput) which sounds like a lot of work, but if I wanted to reproduce lots of these I would probably cast and mould copies from resin.

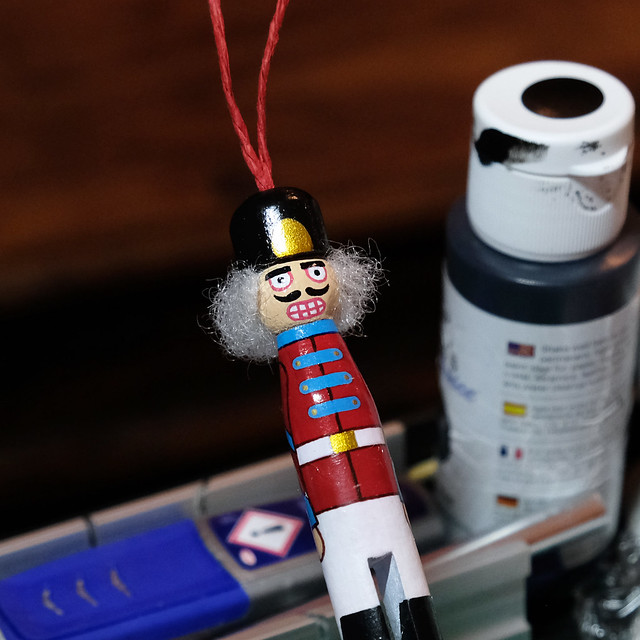
But, now, the finished mini-nutcracker test model...

Obviously, I've had to stand the soldier up using a ring base, but it would
look far better hanging from a Christmas tree, as intended (I just wasn't
willing to put up a tree just for this photo)! :)

I have a few niggles with this prototype, but it's nearly there so I'm confident I'll rectify the problems with my next attempt. It's all good and I'm getting better with each new test model.

Anyway, onto the next project test...

Next up: More 'Midi' Peg Soldiers (my mid-sized pegs, but in historical uniforms).