Showing posts with label 19th Century. Show all posts

Wednesday, 14 April 2021

Invasion of Mars, 1899 - Part 1

 I'm juggling projects at the moment (yet another reason it takes me forever to get a job complete) and I've even started a new one! 😆

I've always been a bit of a closet Steampunk fan and particularly like the fantastical yarns by the likes of H.G Wells, Edgar Rice Burroughs and Jules Verne where the conquest of space began - fictionally - in the 19th century! Typical of this type of early science-fiction were stories like 'The First Men in the Moon' (H.G Wells) and the Barsoom Stories (E.R Burroughs) where 19th century adventurers managed - in various ways - to journey to other planets in the Solar System. 

Above: Bedford (Edward Judd)  and Cavel (Lionel Jeffries) land on the moon in 1899.
Picture from 1964's British movie 'First Men in the Moon'.

Aside from the fictional stories I have always been tempted by the RPG 'Space 1889', a tabletop role-playing game of Victorian-era space-faring, created by Frank Chadwick...

"The game presented an alternate history in which certain discredited Victorian scientific theories were instead found to be true and have led to the existence of new technologies. In the setting, Thomas Edison invented an "ether propeller" which could propel ships through the "luminiferous aether" (the universal medium that permeates space, based on a now outdated scientific theory)...By the time of the game's setting in 1889, the great powers have used Edison's invention to extend their colonies and interests to the inner planets of the solar system. Venus and Mars have been colonized by the United Kingdom, Germany, France, and Russia. Belgium has only colonized Mars and Italy has only colonized Venus whilst Japan and the United States maintain economic and scientific enclaves on Mars. ..."['Space 1889', Wikipedia.]

The Invasion of Mars - A Table-Top Skirmish
When I started my Molatero blog the original idea was to journal my making of a H.G Well's 'Funny Little Wars' army and it's subsequent use in a war-game. This never actually came off as I was repeatedly disappointed in the figures I acquired for this use. Gradually I moved towards the idea of - first - converting figures to my own liking and then - eventually - to actually making my own figures. This has finally ended up where I am today, making my little 'peg figures' - a style of cartoony looking little chaps that suit my less than serious tongue-in-cheek attitude to the hobby.

However, for a long time now I've been making single stand-alone characters while I perfect my current style of model soldier, so I thought that its a bout time I get back to my original idea - making a little army for use in a table-top game.

Above: There is plenty of inspiration, reference material and even game rules for a
Steampunk/Victorian interplanetary campaign. Osprey Publishing has a few books
that provide a great source of ideas.

The idea for 'The Invasion of Mars, 1899' - although still generally a concept which I can attribute to H.G Wells - allows me to work on a limited one-off project, while still gaining some experience of making multiple figures and units which I can then later use to make a full blown FLW war-game.

I'll be restricting my armies to limited units of three infantry, one artillery and one cavalry on each side, which I deem achievable even at my slow pace of construction! 😁

Making a Prototype Soldier
As usual, I start working out a new concept by making a prototype figure. In this case I jumped straight in by making one of the central figures for my Victorian Steampunk army by creating a 1889 Aether-Grenadier for my British expeditionary force...

This design is very much influenced on the models I had just created for my 'Assault on Innsmouth' series, where I had created a larger body so I could mouth an oversized head on a modified 'peg' body.

I really liked the idea of making a unit based on the Victoria diving suites as worn in 'The First Men in the Moon'. Game-wise, my notion was this would be a 'heavy, elite unit' which is why I am calling them Grenadiers. These would be armed with heavier weaponry and could add some variation to the look of my British forces.

While this design added a bit more detail than I usually apply to my cartoon-style of pegs, it's still quite simplified and didn't posed much problem to make in TINKERCAD...

Steampunk Spaceman

Satisfied with the look of this model I 3D printed the component parts out on my Flashforge Adventurer 3 printer. The multipart 'kit' took several individual prints to make as I prefer to try and make print 'jobs' in smaller groups so that I can get the best quality I can (in theory, I could have - perhaps - have printed this model out in one go by using a LOT of print supports, but this could've got quite messy).

This would be a officer figure, so I created a little 'ray gun' but - as a nod to the Victorian Steampunk style - also gave him a sword. 😁

Above: My Space Grenadier (left). You can see how my recent Innsmouth mutant
inspired this bigger than usual 'peg' design.

Having constructed and primed my 'kit' I noted some things I might change for the rest of the unit but was generally pleased with the way this was going. The rest of my British units would be based on my original, slightly less bulky, peg body design and have different uniforms and equipment - just to mark my grenadiers out as being 'special' (elite).

I then moved onto the painting. Again, this is a kind of prototyping too as I have to work out the colour palette that I will be using. NOW... I don't usually like showing my painting in progress, mainly because it shows off just what a sloppy painter I really am! BUT... I think it's only fair I should show you my process.

Here (above pic) you can see how I apply blocks of colour working from the back (or bottom) most part of the model and work outwards. At this point you can see how I am a bit slap-dash, going over 'lines' and not exactly being very precise! The idea here is that, as I add each additional layer - working outwards - I gradually work a little more neater and effectively cover over any over-painting I may have done on the previous layers. AND SO... In theory, by the time I get to the outermost - top - layer I should end up with a nicely painted little model! (Sorry to disappoint anyone who thought I was - by nature or skill - a good painter. I'm not!) 😂

NEXT: I finish off this prototype and start banging out the rest of the unit.

Edit (17/4/21): The day after I posted the above entry I came across a set of gaming rules that seem absolutely pertinent to my idea of a Steampunk skirmish, these are Osprey's 'In Her Majesty's Name', by Craig Cartmell and Charles Murton and published by Osprey...

Annoyingly, these rules seem to be out of print now (typically) BUT there still seems to be some support and updates for them here: The Ministry of Gentlemanly Warfare

Friday, 14 August 2020

Amazing Throw-Back Prussian Parade in Chile!

 This is quite wonderful - Chile has been long influenced by Germanic military traditions dating back to the late 19th century. The Chilean armed forces have retained these Prussian affectations and puts them on display in annual parades...

Mark Felton has put a nice little history of the Chilean 'Prussian connection' along with some information about the uniforms used...

Tuesday, 30 June 2020

The Good, The Bad & The Ugly

Sometimes creative projects don't turn out how you imagined they would and sometimes a project becomes somewhat unstoppable even though you ca see it's going wrong...So you just have to finish it and learn from the experience.

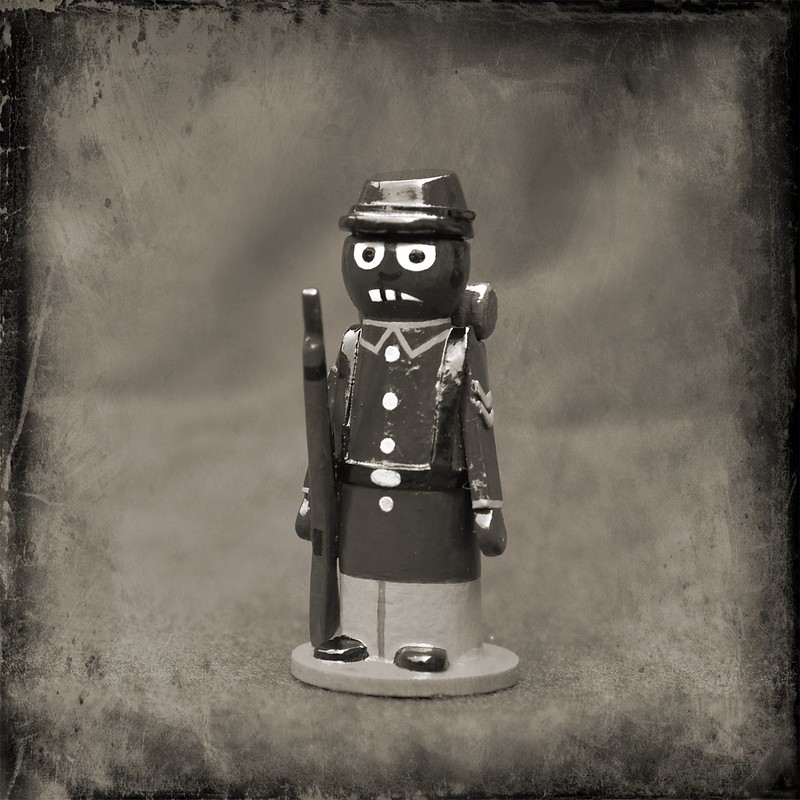
This was the story of my latest peg soldier...


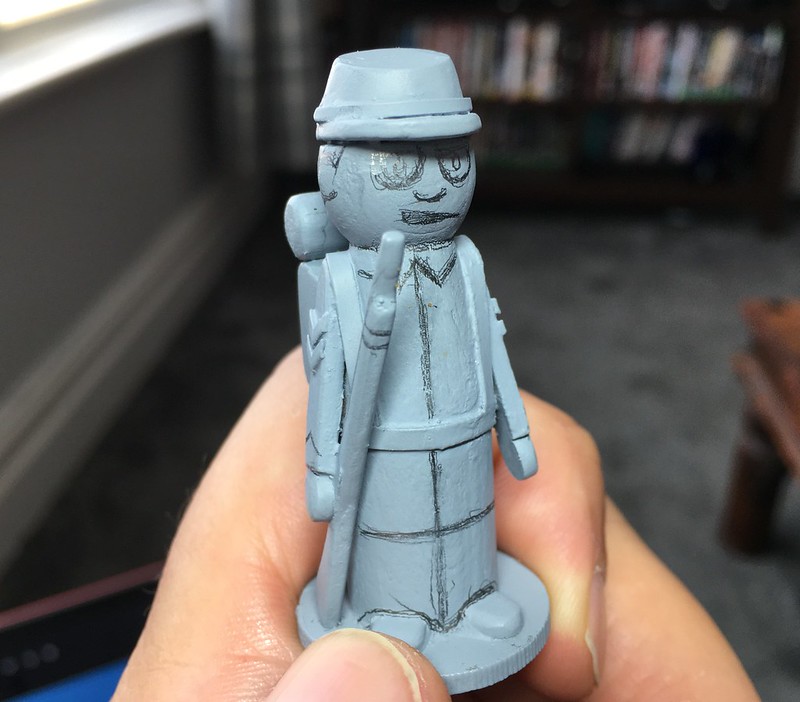
What I was trying to do was try out a few different ways of making a peg soldier - I tried out a new way of adding the figures arms and it's feet and it's equipment. The choice of uniform for this figure was completely incidental but I happen to love the 1989 movie 'Glory', with Matthew Broderick, Denzel Washington, Morgan Freeman, et al.


Set during the American Civil War, it's a story about the 54th Massachusetts Infantry Regiment, one of the first all-black regiments in the Union Army. It made a great impression me, not least because of some superb acting , which in turn made me into a big fan of Denzel Washington!

So, I wanted to honour the 54th by painting my peg figure in the uniform of the regiment...And that's when things started to go a bit pear shaped...


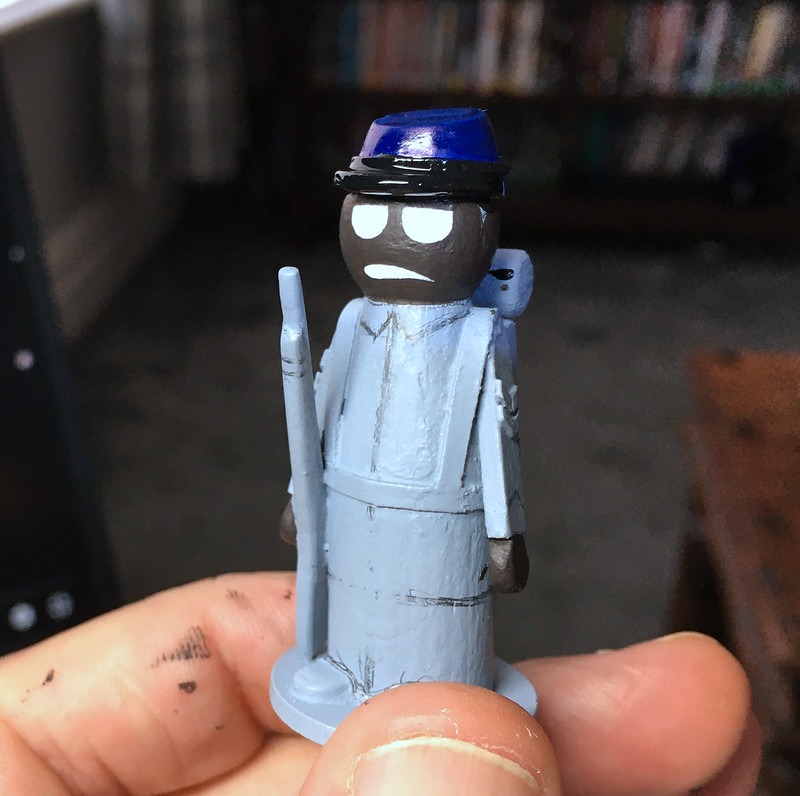
I did things pretty much the way I've done most of my peg soldiers so far, a caricature figure in the style of a children's toy soldier. Everything came together quite easily until I started painting the face. It followed the same pattern as I had done numerous times before, all except that - for the first time - I was painting an African-American face.


As the face started to take shape I began to feel a little uneasy, but as I inherently lack self-confidence about my work I put it down to creative nerves, so I continued on hoping to simply work through my 'normal' jitters...


So often in my creative experience I have never been quite sure about whether a project is 'working out' right up until I put the last stroke of the pencil, piece of sculpture or lick of paint to the work. This is how it was with this little soldier, I wasn't absolutely sure about what was wrong with it until I finished it...


You would think that in the current climate of BLACK LIVES MATTER that I would have been a tad more sensitive to the inappropriate use of racial stereotypes. I'm afraid, despite the fact that my figure was simply following the format established by my previous peg soldiers and their 'cartoon' features applying a 'black face' to my model made a strikingly insensitive and historically derogatory look.

That's the UGLY truth... Lesson learned.

So, that out the way, what was the GOOD and the BAD of this model?
Moving back to the technical aspect of the model there are a few other things that I'm still not happy with. Still concerning the facial features - but from a different perspective - I am finding that the painted on nose in't working for me, particularly when looked at in profile.
Additionally, I'm starting to question whether the simplified 'legs' - or lack of them - is the way to go. A simple painted line to indicate the separation of the legs is perhaps a little too simple...Maybe?

I'll try some alternative solutions for these BAD (?) aspects to my models...

Moving on to the positive, the GOOD bits of this iteration of my peg soldiers must be the new way I am doing the arms and the new simplified feet. I know this all seems trivial but I'm trying to improve my peg models to the point they are easier to put together than my earliest versions and yet still remain - substantially - as attractive.
...And so, on to my next experiment!

Saturday, 27 June 2020
Peg Figure Experiment - Part 4

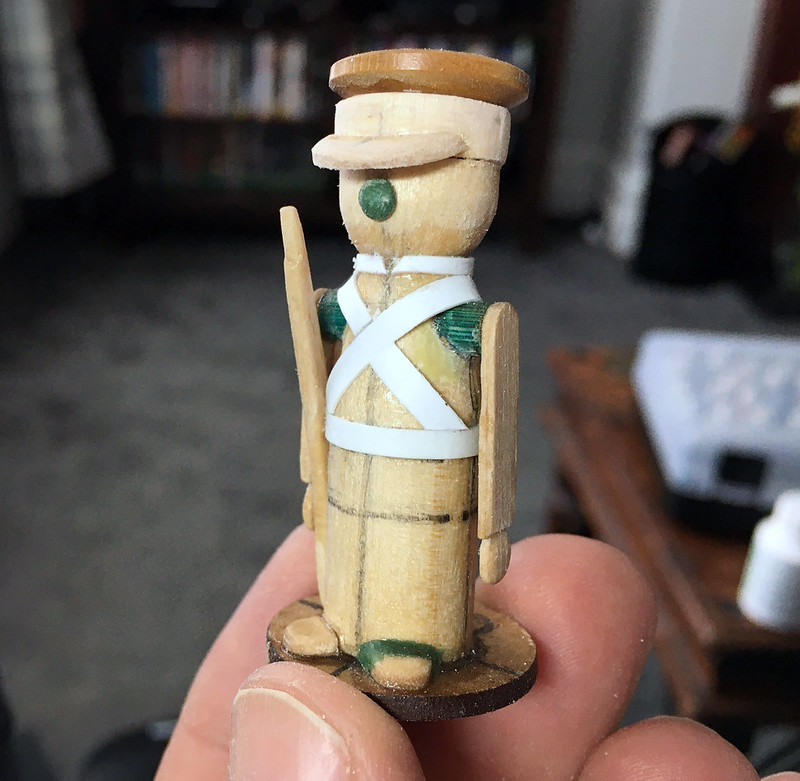
Moving on with my peg soldier experiments, Figure 1 (ACW Union soldier) is progressing well and I should have a reveal of it up in the next few days - while Figure 2 is definitely starting to take shape.

Before I show you how Fig. 2 is looking I suppose I better introduce you to a bit of reference material that I collected for these experiments...


I've been 'reading' (listening to) Douglas C. McChristian's audiobook 'Regular Army O!: Soldiering on the Western Frontier, 1865 - 1891', an wonderfully evocative insight into the Western period US Army. This got me interested in the evolution of the US soldier and so I decided that when I am making peg prototypes I would take the opportunity to produce some of the uniforms showing the American soldier throughout history. And so...


This is my take on an American infantryman from the Mexican War (1846-48). It's an interesting uniform that I *think* I vaguely remember from the movie 'The Alamo' (possibly)? This was an exceedingly engaging period as - along with the 1812 War - it gives you a bit of an insight as to how the American Army was comparable to European ones during the Napoleonic influenced period of military history.

U.S. Army full dress and campaign uniforms, 1835-1851.
Anyway, nearly finished the construction, just some equipment to attach and then it's ready for priming and painting.

Saturday, 2 May 2020

The History of Molatero (in Progress)

As I made the mistake of not making any notes for my Molatero backstory I now cannot remember where I was going with the project! So, I'm sorta having to start from scratch...

Now, I realise that not everyone needs a backstory for their Funny Little Wars faction - in fact you can opt for a 'off the peg' army using the pre-generated ones, such as 'Army Red' or 'Army Blue' which are loosely based on historical national armies - but I, personally, enjoy making up 'stuff'! 😄

Anyhoo, so back to the drawing board. Now, I am a visual sorta guy - I prefer to doodle than write - so it's easier for me to construct a backstory using pictures. My starting point, then, is to sketch a map of 'Molatero' - where it is in it's fictional, alternative version of our world and what kind of cultural it would therefore have...


To my mind 'Molatero' is a fictional equivalent to Bulgaria (and/or Roumania), occupying a south-eastern position beside an inland sea which mirrors the Black Sea. Though I have borrowed Molatero's cultural flavour from a few different Balkan states, you get the idea.

Having sketched out my map and got a feeling for it's place in 'my world' in relation to the real world I filled in - tentatively - it's neighbours. These would be the protagonists in my make believe war-gaming arena with Turania being the principal 'baddies'! 😉

Situating Molatro's 'culture' gives me a jump off point by which I can then start fleshing out the rest of it's history - political, military and social. And as my interest was in creating a small army for war-gaming a Funny Little Wars campaign chronologically I was particularly interested in a period that equated to the late 19th century (I actually had in mind a date of around 1890).

Romanian soldiers c. 1913 - some historic reference material on which
I based my idea on what Molatarian uniforms might look like.

And that's as far as I got when I originally started this blog - though I had already started getting a little side tracked when I started making little 'peg aircraft' and was already looking at Molatero's later history (1919-1921). But that's a by-product of my fertile (some would say over-active) imagination! 😄

Sunday, 8 July 2018

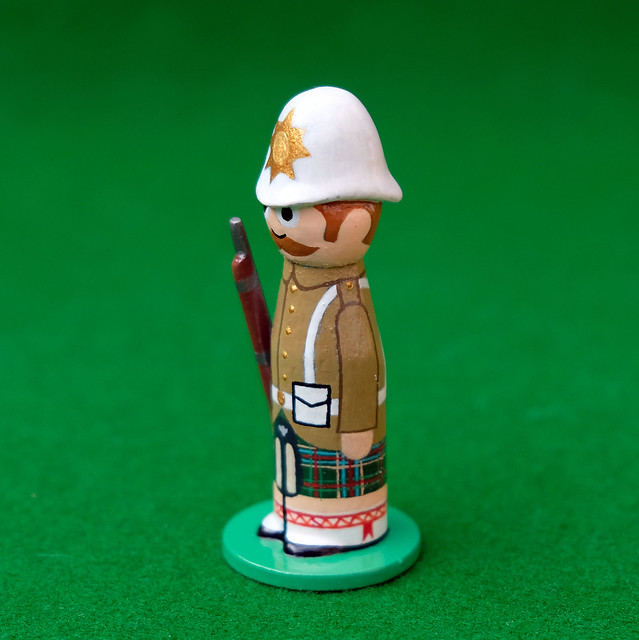
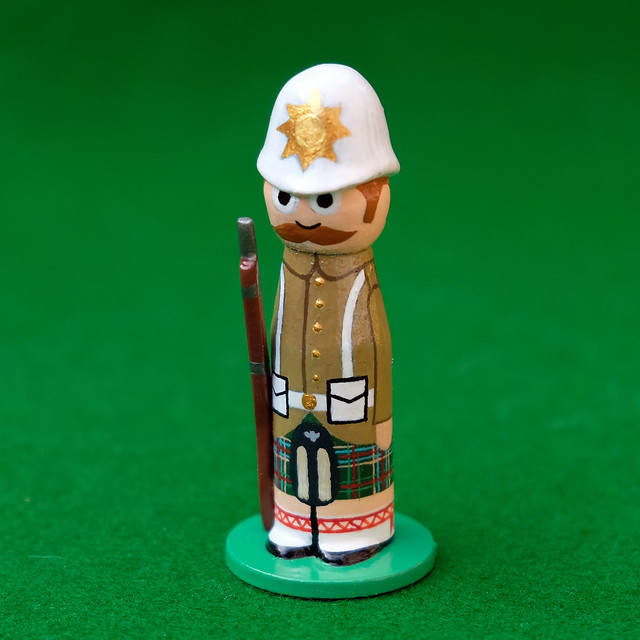
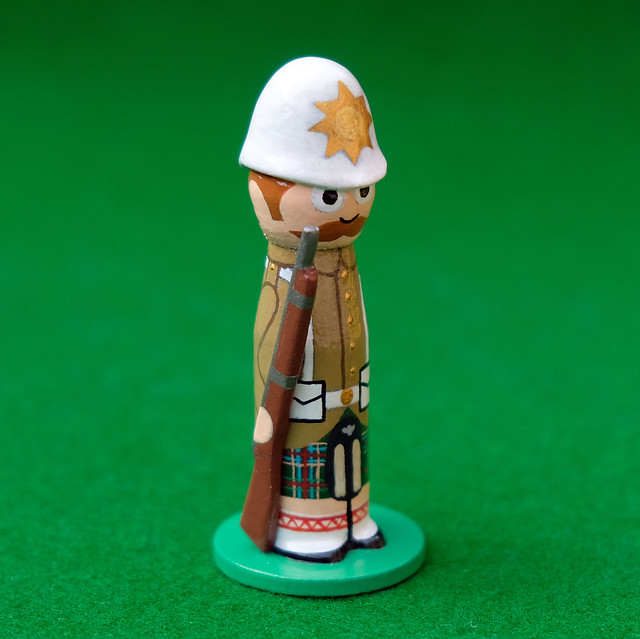
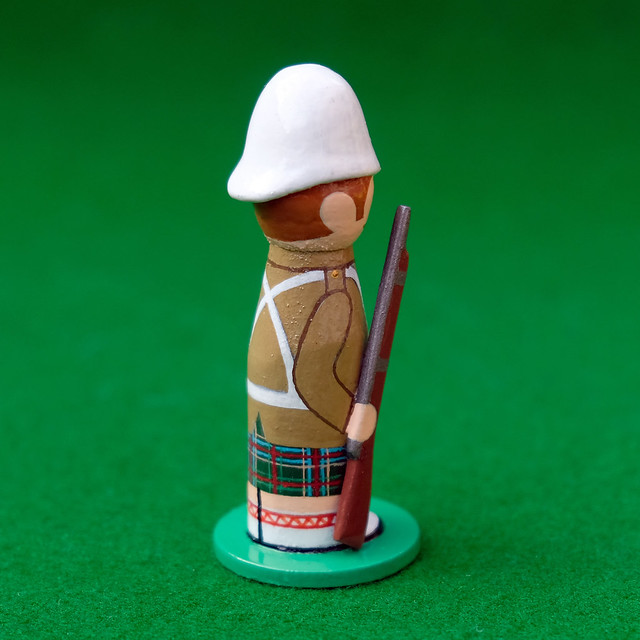
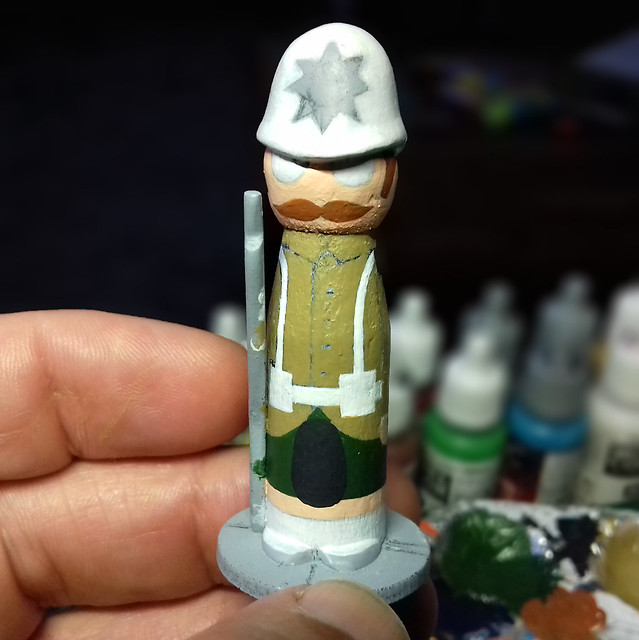
Highlander of the 3rd Foot & Mouth, 1895

Well, I'm getting faster at doing this if nothing else! Just as I estimated, I got my little Highlander completed this afternoon...


This is about the last of my prototype tests and I feel confident enough to actually get back on with my 'Franco-Prussian War' Portable War Game project. After that I would like to build up my Molatarian forces in this format!

Hope you all had a good weekend! :)

Friday, 6 July 2018

Something for the Weekend, Sir?

I had a spare prototype figure lurking on a shelf, it was one of the tests I did of the pith helmet casting. So, I thought, let's give it a go...


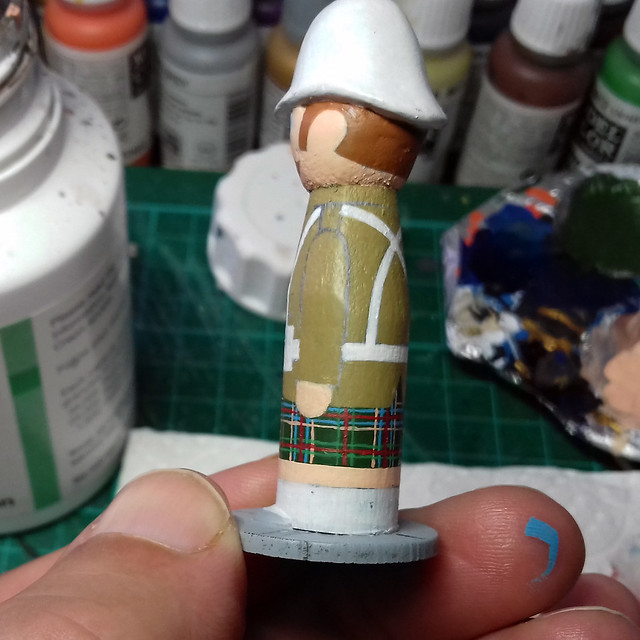
I'd already painted up one of the prototypes in 'Zulu' (the movie) style, so I thought it'd be nice to have a bit of fun with this one and based it on 'Carry On Up the Khyber' - a soldier of the '3rd Foot & Mouth'. :)

Got quite a lot done this afternoon and imagine I will have it finished by the end of the weekend.

UPDATE: Saturday.

Just thought I'd pop this in as it's a tiny bit progress, but - boy - did it challenge me. This is the very first time that I've ever tried to paint a tartan pattern...


Er, not exactly top notch line painting, but I'm hoping it might pass for this 'cartoon' style project.

Thursday, 21 June 2018

He Wore a Yellow Ribbon.

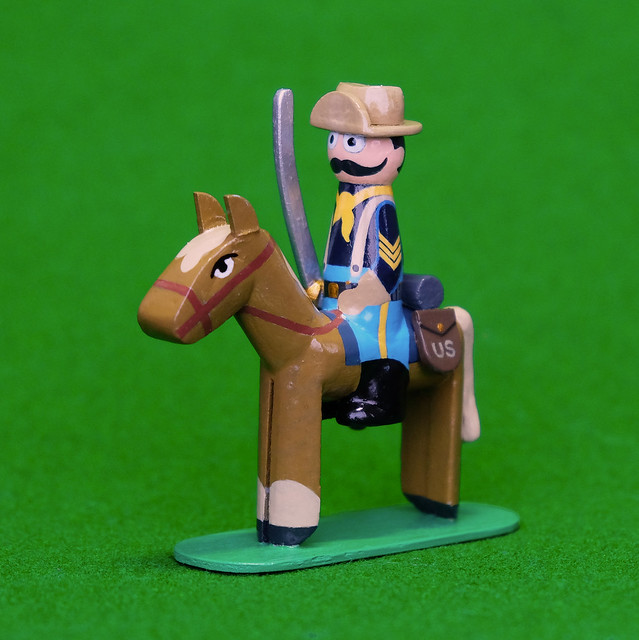
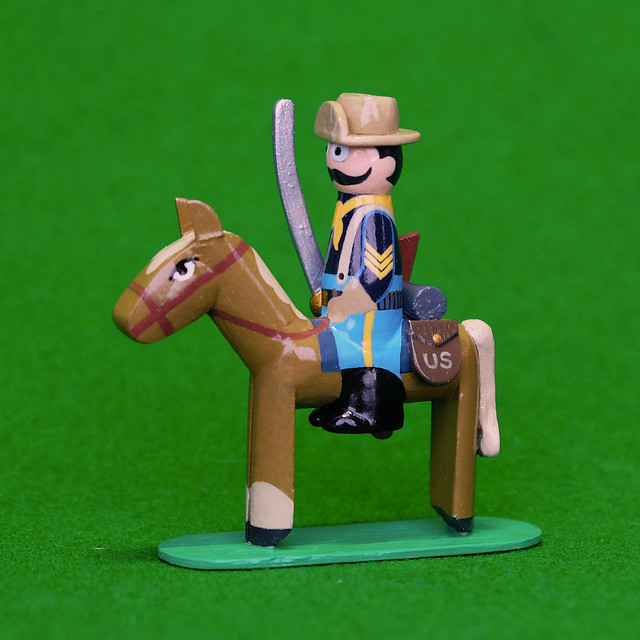
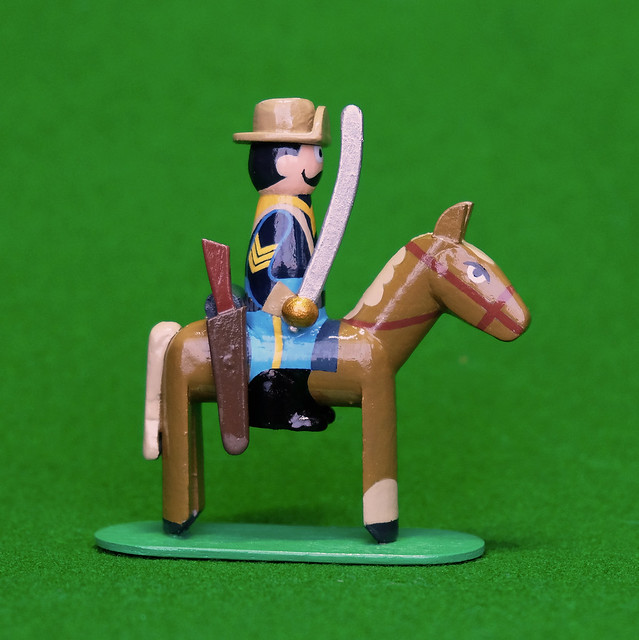
I couldn't resist doing this model...Absolutely, nothing to do with anything, except a bit of nostalgia about Tempo plastic soldiers (if you remember them)!

As inspiration, I guess I have fond memories of that old 1947 John Wayne movie 'She Wore a Yellow Ribbon'. But, I also recently bought a copy of G.I.'s 'Sound the Charge: The U.S. Cavalry in the American West, 1866-1916'.


I'm a bit happier with the way I did the rider's legs with this model, but there's still room for improvement (as usual).

Enjoy!

Wednesday, 13 June 2018

More Peg Prototypes - June Part 1

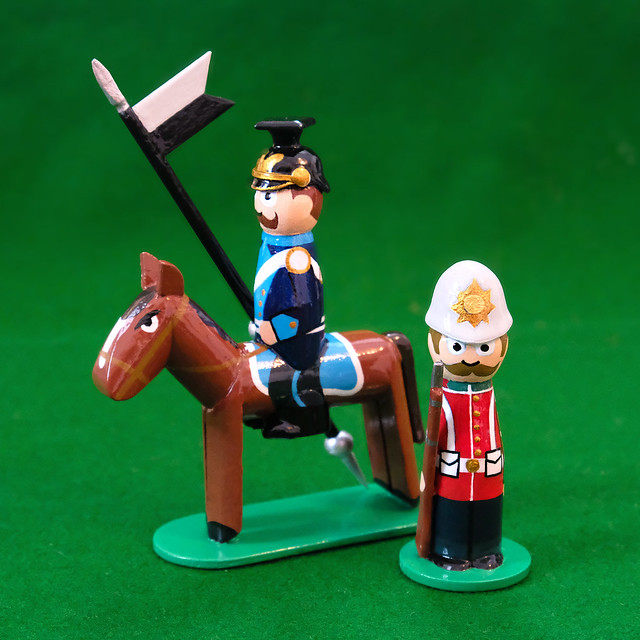
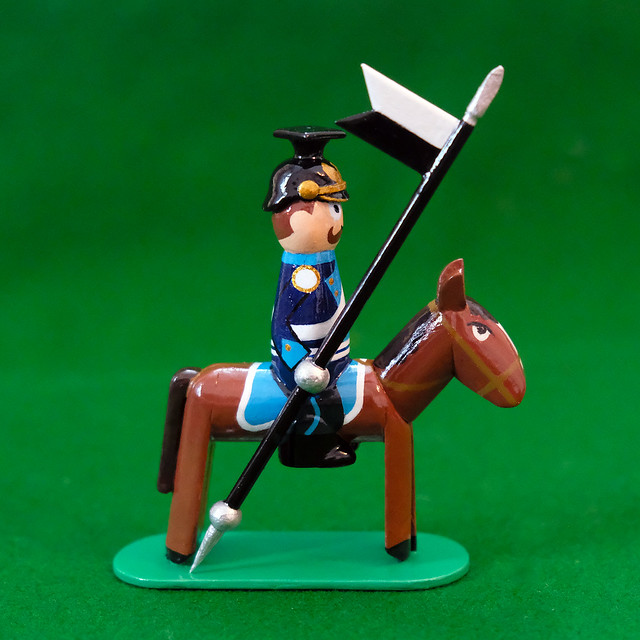
I'm still trying to hone my skill and style for making my little peg soldiers. Here's my latest prototypes, an 1870 Prussian Uhlan (lancer) and an 1900 British Infantryman...


I'm still learning lots as I go along but I feel I'm making some headway. The infantryman seems about there as a template for the proportions and style of painting the peg 'body'. But, I still have a little way to go with my cavalryman. Still not 100% sure about the way I model the rider's legs.

Another concern is that I'm still using aerosol spray lacquer (Wilko's brand rattlecan) and this is very wasteful. Spray-on gloss does give a lovely even coat, but it's very indiscriminate and despite the fact I use a small spray both (with extractor fan) I can fell the stickiness of the varnish on my skin when I'm done. I'm guessing about 40% or maybe even more of the varnish doesn't go on the model at all!

I've ordered a can of paint-on varnish and will knock up yet another prototype this week to test this brush on varnishing technique - will it pool and drip?

(Will have to think about getting a little display cabinet soon as my collection of peg figures is growing rapidly!)

Sunday, 15 April 2018

April Update

Well, it's been an unproductive month since my last update due to illness (again). I'm afraid that when I don't feel well I don't feel 'creative', so things tend to grind to a halt. BUT, I'm starting to feel a bit better now, so I've spent the weekend tidying my work-tray and remembering where I left off.

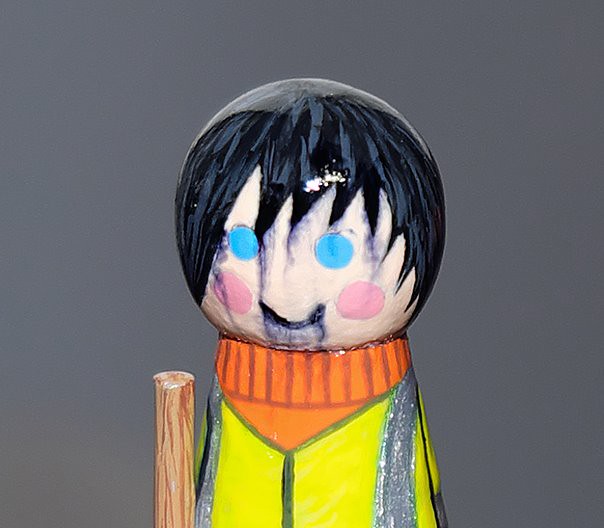
I also did a pit of peg-painting, though, although not military related it did get me some practise. It was just a couple of peg-people gifts for some friends...


As I say, not military but these little figures did teach me a couple of things that I can bring forward and apply to my peg-soldiers.

One of the main lessons was about using 'permanent' markers. I tried using water-proof pens for drawing the fine outlines and to begin with it looked like it was working well (I invested in some good quality permanent markers this time). But, much to my horror, the spray varnish I used to gloss the finished figures reacted with the pen ink and the lines all ran!


After the initial shock, I picked myself up and did a careful repair job and managed to salvage this model. The lesson for me was - stick to outlining with acrylics and a brush!

I *believe* that the spray acrylic lacquer I use although 'acrylic' contains a spirit based propellant (?) and this is what reacted and reactivated the pen ink and made it run. I've bough a can of brush on varnish to experiment with to see if this makes any different, as using pens is a quick and effective way of drawing sharp lines. We shall see.

Anyway, back to military themes...
My plan is to do a small army of peg-soldiers for a tabletop game based on the Portable War-game rules. In the format I have chosen 'regiments' will be symbolic and made up of six figures in each unit (for infantry).

The campaign I am interested in is the Franco-Prussian War of 1870/71, ideal Victorian 'toy soldier' inspiration. This conflict featured a plethora of colourful uniforms on both sides, particularly because (and forgive me here because I am not a historian) because at this point Germany was still a sort of confederation of allied independent kingdoms.

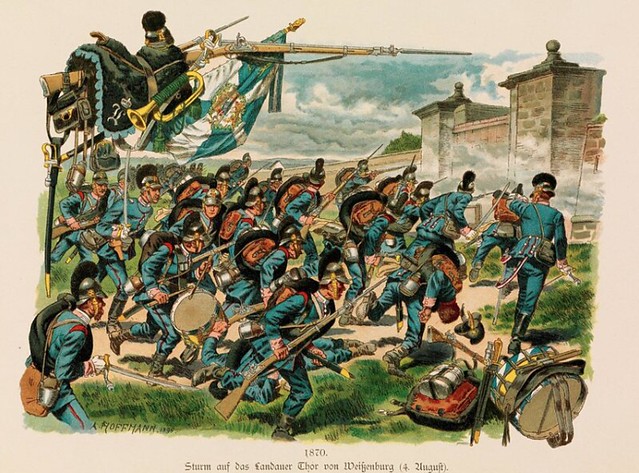
Just one of the many varied uniforms of the German Allies, here Bavarian
troops are involved in an assault at the battle of Wissembourg, 1870.

France, of course, was it's usual flamboyant self and fielded some wonderfully romantic uniforms (which had already had a big influence on the earlier American Civil War of the 1860s). But the German confederation - while perhaps a little more sober - had not quite yet succumbed to a unified and standardised 'field grey' and each minor kingdom had it's own distinctive collection of uniforms.

I hope to illustrate this diversity in a - as yet - non-unified greater Germany by including some of the less well-known troop types and not just the infamous, Pickelhaube helmeted Prussians!

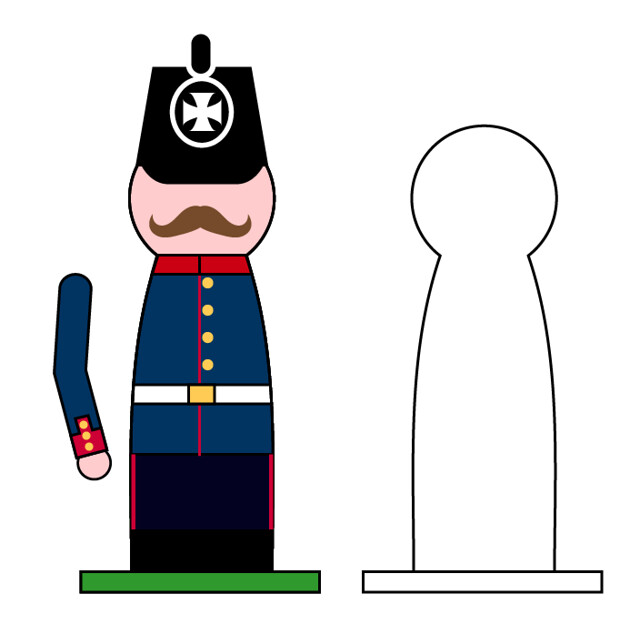
My sketch for a German infantryman (Landwehr). I've simplified the
uniform and equipment to compliment the peg format and also to
be a little more 'toy soldier' looking.

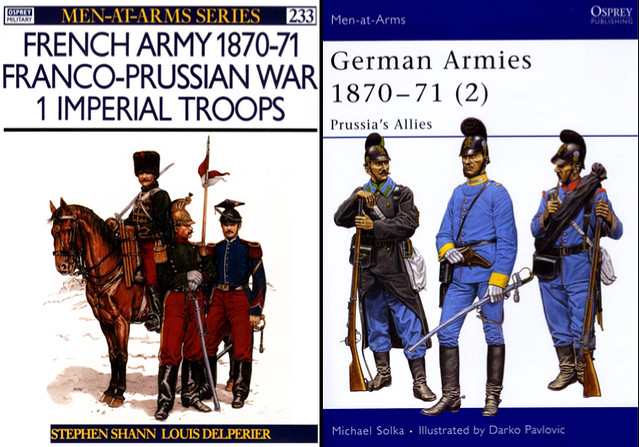
To help me along in my uniform choices I am referring to Osprey's excellent Men-at-Arms 'German Armies' 1870-71 (vols. 1 & 2) and their 'French Army 1870-71' (vols. 1 & 2).


Production Issues - Helmets
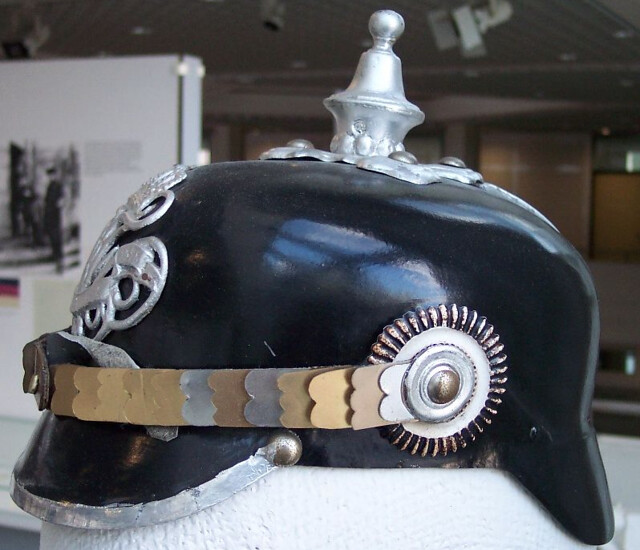
Something I've mentioned before is my worries over how to replicate the distinctive headgear. Cutting all my 'parts' from just the basic wooden peg, while satisfying in it's way, is a bit limiting, especially if you want to create more complex components. (Think about the unique German Pickelhaube helmet and you'll understand the problem...How do I cut that out of a cylindrical piece of wood?)

A Prussian Pickelhaube, how would I make that from a peg?

So, after a long think I decided to 'cheat' and make the headgear as composite object using as much wood as I can but then adding the tricky details using modelling putty to make a master prototype. Once done, I will them copy the design by creating mould and casting a clone in Milliput putty...Simples. (?)

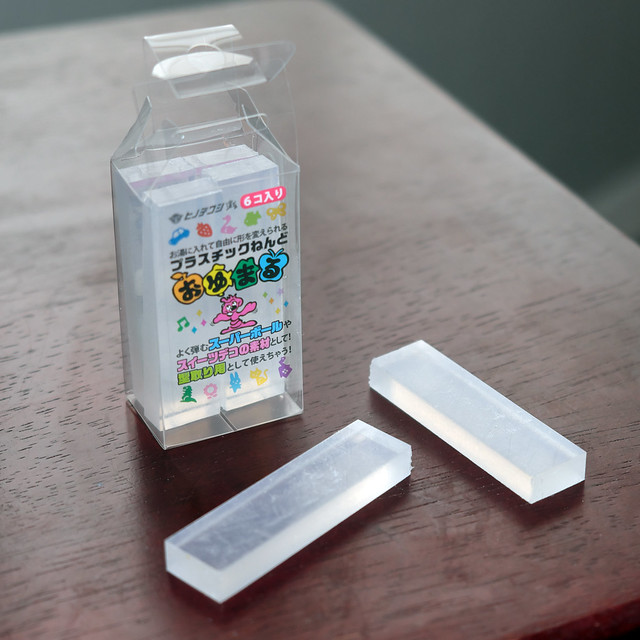
I'll be having a crack at this process using a product called 'Instant Mold' (I don't want to get into resin casting for these short run duplications.


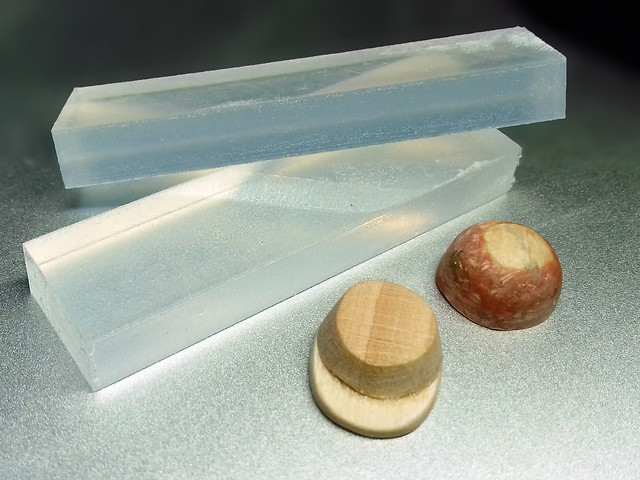
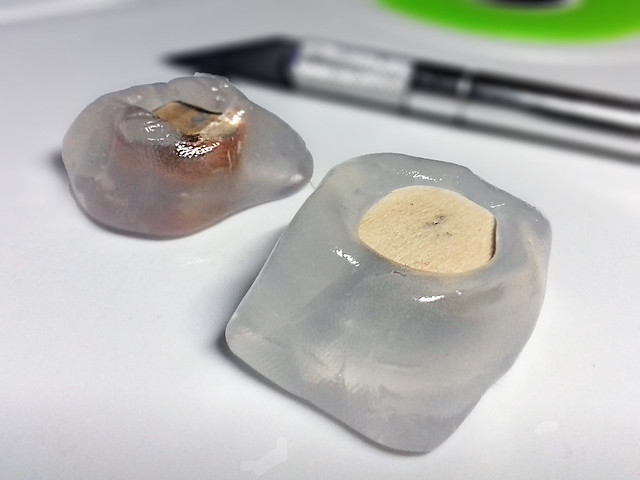
So, to begin I need some basic wooden geometric or primary shapes to start off with. I'm starting with a French Kepi and the dome for a Prussian Pickelhaube. Although the Kepi is complete and made from wood it is a bit tricky to duplicate because of the sloped and obliquely cut top, which is why I want to cast it instead. The Pickelhaube dome will be the basis for further sculpting using Milliput putty, but I want a shaped blank to start with, so I'm casting this too...


This *should* be a easy process (according to the YouTube tutorials I have watched) and should simply entail my pressing the hat shapes into the softened Instant Mold to create copies of the shapes I want to cast. Going on my experience, though, nothing is ever straight forward the first time you do it!

First issue...How many sticks of Instant Mold do I use? I guess this is the sort of knowledge that will only come with experience...I'm going to guess two...


Good guess! Turns out you need to allow a good margin of Instant Mold to surround your object (remember you are *pressing* the object into the mould material) and you have to make sure you have enough depth of Instant Mould (so you don't press the object right through the Instant Mold).

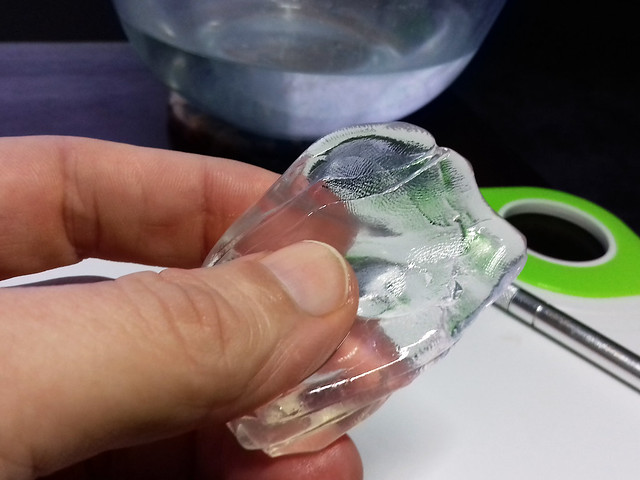
Anyway, to the process...You can measure the temperature and boil your water in a pan (or nuke it in a microwave) but I simply boiled the kettle and that seemed to suffice. The Instant Mold was dropped into the water (in a Pyrex bowl) and began to soften in the boiling water after about two to three minutes...

Mind you fingers getting the Instant Mold out the boiling water. I used a craft
knife to get it out.
Now, the trick seems to be - work fast! You need to make your mould as quick as you can while the Instant Mold is at it's softest. This ensures that you can push the Instant Mold tightly into your object, without gaps and surround the object completely...

It took me two goes as I worked too slowly the first time and it started to harden as I was moulding the Instant Mold around my objects (you live and learn)...BUT, the great thing about Instant Mold is that if you are not happy with your mould, then just pop it back into more boiling water and start gain!


I tried to form the Instant Mold into a sort of block(ish) around the object and press it firmly against the object to ensure I get an exact clone of my original shape. Being clear helps to spot air pockets, gaps or bubble I guess. I then left the mould to cool and harden, I didn't really time this but it didn't take all that long.

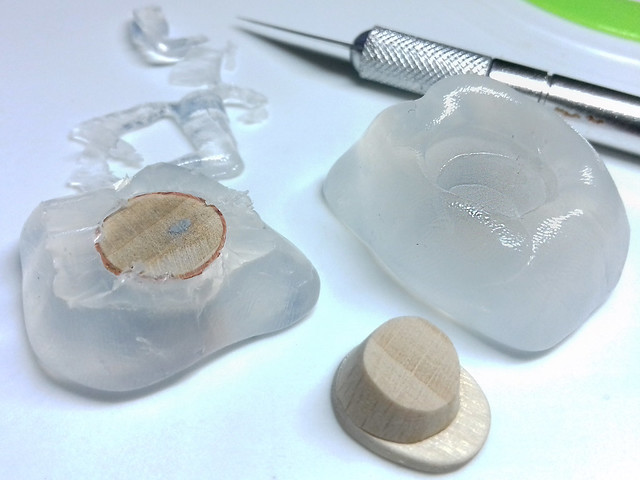
One thing I tried out, though, was that I used a new craft knife blade and trimmed the hardened Instant Mold down, roughly level with the top of the Pickelhaube blank. I did this to see if I could do a neat casting exactly to the shape of my object, without too much excess that I will have to trim off later. The Kepi mould was left alone to see what would happen...


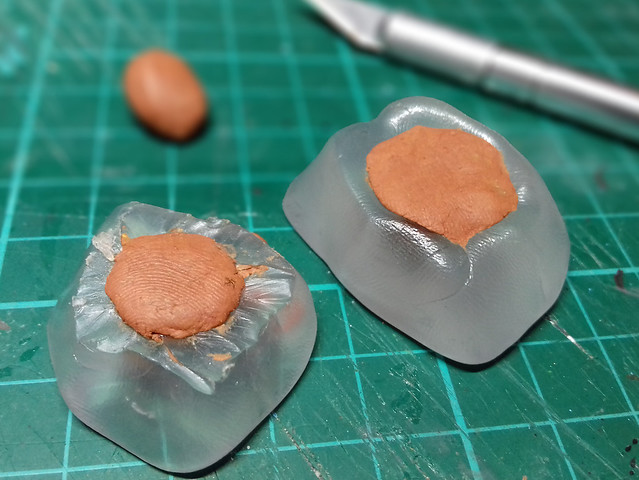
And so, finally, onto the casting stage. Again, this should be simple, I just need to press my chosen casting medium (Milliput in my case) into the mould - hopefully without air bubbles or gaps (here the transparency of Instant Mold helps gain) - and then leave the casting to dry. Milliput normally takes overnight to cure, but there are other mediums that dry a lot quicker (I'll try some of these later), but I like the final hardness of Milliput so I'm willing to wait...


Now, obviously, my mould is a very simple single-piece press mould, but Instant Mold is capable of being used to create a more advanced two-part mould. These might create a neater casting with a little less waste, but I think I might get a bit more economical in my casting with a bit of practise.

Anyway, the wait begins. So I'll end here and see how my castings work out. But it's good to get producing again.

Thursday, 16 March 2017

A Call to Arms!

A lot of the work on my Black Hat French soldiers is cleaning up. Tedious filing and trimming of excess white metal seam lines and flash. But the fitting of parts also needs a fair amount of attention as getting the heads or limbs to sit right on the torso is a wee bit tricky (or it is with me, as I keep changing my mind about whether an arm looks straight, etc).

Ironically, Black Hat does give the arms a little nub or 'peg' of sorts (it's tiny) which would be helpful in locating the correct place to mount the arm IF they had also added a hole in the torso's shoulder for it to fit into. They didn't...So, it's down to you to decide where the arm should fit exactly...


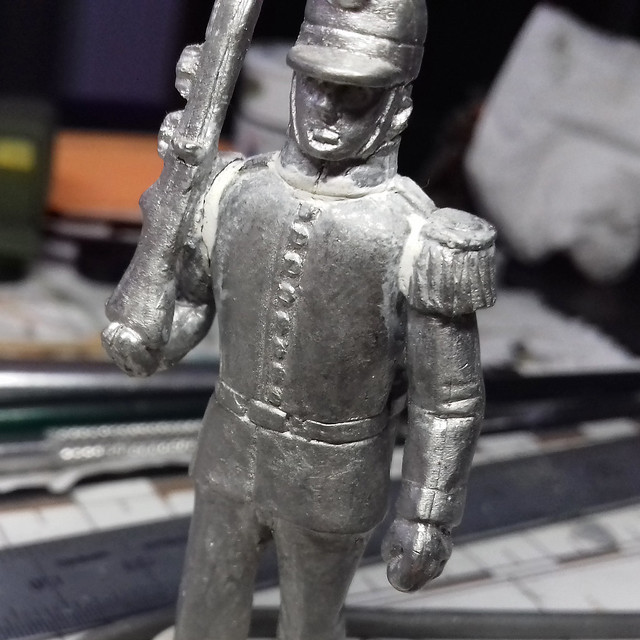
Even when you do eventually decide that you have the arm attached just right there is still the little matter of gaps between the top of the arm and the shoulder. This has to be filled with more white Milliput putty...


After filing and sanding away at seven right arms and the seven left arms you feel like a bit of a rest (it's one of those dull repetitive jobs). I'd already been through this process with the seven heads, plus had to fill the gaps between the collar and the top of the torso so the head blended into the body correctly. More putty was needed to complete the process.

Still, once all the arms are on I just have to attach the bayonet frogs (and sword scabbard for the officer) and the jobs a good 'un! On to the priming after that!