Showing posts with label British. Show all posts

Tuesday, 18 May 2021

Steampunk British Infantry - 18/05/21 Update

 I've given up on 'part numbers' for these posts as I'm working on a couple of related 'regiments' at the same time!😁

So, the story so far...

After getting my recent creative diversions out of the way I have returned to my 'Invasion Mars, 1899' project by starting to paint my first 'regiment' of British for the campaign. These are my heavy assault infantry - Grenadier Guards - with the Mk. 1 (diving suit) space clobber!

It's nice to see a unit of my peg soldiers in progress, it reminds me of why I started this blog in the first place (even if they are not Molatarian infantry)!

The scarlet I am using for the suits is Vallajo's 'Gory Red', crimson was a bit to bright for my liking and this more muted red is more to my liking though it's a bit of a pain to paint with and needs a couple of coats to get good coverage. Still, it's worth it.

I'm gone for a coppery brass for the diving helmets and again - just my luck - this paint is a bit of a pain to use as well...

It's going to be a bit of a slow slog to work my way through these five figures in order to complete the unit AND I haven't even completed the 3D printing of the arms yet! The delay here was due to my fancy-nancy 'space rifle' design which is turning out to be a pain to print properly. I think I got a bit over-ambitious for the scale and should have stuck to my super simplified design ethos of my earlier peg soldiers' weapons. 

Anyway, in the end I managed to get a passable print, though it still needs some cleaning up...

Above: Hard to tell what's going on when all the print supports are
on but hopefully it will do the job once it's cleaned-up!

And in the meantime...
While scratching my head over my Grenadiers' guns I cracked on with the prototype for my second British unit - a Light Infantry trooper in a Mk. 2 suit...

You can get an idea from the above pick how the space rifles should turn out as I have primed the arms for this little chap. And while I had my red paint out I made a start on painting his uniform.

In all I hope to make three British infantry units (of six soldiers each), the Grenadiers, a Light Foot and a Marine detachment. I'm going for six in a unit as in this 50mm scale and using a version of the Portable Wargame rules for a small table 'battlefield' this will keep the overall numbers manageable for a game.

Aside from the infantry there will also be a section of 'cavalry' (steam mechs) and a artillery section (one gun). The mechs will pose quite a challenge as they will be quite big.

And that's all for today, it's just banging on with these figures in a little painting production line!

Sunday, 2 May 2021

Invasion Mars - 2nd British Infantry (Pt. 1)

As mentioned in the previous post, I am well on the way to making my first British unit for my 'Invasion Mars, 1899' project. This unit is a 'heavy' infantry Grenadier unit - an elite with special weapons - so I next wanted to start on my more basic 'light' infantry.

I had in mind something along the lines of the idea of 'Zulu on Mars' when it came to designing the light infantry figures, using the 1879 pattern of uniform worn by the British at the Battle of Rorke's Drift. Taking this as a basis I would then modify the original design to give it a more Steampunk look!

Luckily for me this is already a pretty popular theme and there is a reasonable amount of reference and ideas knocking about on the internet and in print and even in popular media...

British infantry on Mars! Doctor Who, series 36, episode nine – Empress of Mars

For me the most iconic bit of the uniform has to be the British Army's 'Foreign Service pith helmet, so I wanted this to be at the heart of my design. But unlike some early science fiction I did not want to endow Mars with a earth-like atmosphere, so this helmet would have to be modified into some sort of environmental protection.

Using TINKERCAD as my 3D modelling software of choice (at the moment, until I can get to grips with something more sophisticated) I quickly mucked about with some shapes until I got something approximating my idea. I won't lie, the helmet was a bit of a bitch to do and it took me a while to get something that I was happy with...

Steampunk Soldier - 'Invasion Mars, 1899'

There was then a lot of tinkering around with sizes. I always tend to over-size things when I free-hand my designs and the first attempt at the helmet was way too big in proportion to the body and when compared to the Grenadiers I did...

Back to the drawing board and I rescaled the helmet a couple of times until I think I hit the 'Goldilocks' zone. Yes, it still is a little over-sized but that's part of my cartoon style and also so that it works as a 'space helmet'...

The next issue was the design of the 'space gun', again I didn't want to do what some game miniature designers have done and simply make a Martini-Henry rifle (as used in 'Zulu') for a science-fiction figure. I don't know about the effects of ballistics in space or what effects a different gravity has on projectiles but I'm sure a 'one gun suits all' (space and differing gravities) would mean some special considerations...

So, I went for a fanciful Steampunk design with an unspecified firing mechanism - could be a rail gun, could be a ray gun sorta thingy that would suit all situations! 😂 

Sorry this is upside-down, but the above picture show how I orientate my
objects for 3D printing for the best quality.

Design Done - The Printing Begins!
Now the nerve wracking bit, although I am starting t gain a little confidence with my 3D printing workflow. The primary concern is print quality and how to orientate designs on the print bed to get the best print I can. 

There is actually two concerns, orientation and whether to add supports. In the above picture of my space gun I orientate the arm and gun component in such a wat that I get the smoothest print quality on the main straight line (the upper arm). There were several options but I decided this offered the most advantages. Others might disagree.

Supports are the second - but related - consideration. I might orientate my model so that I can minimise the use of supports (supports being scaffolding that supports over-hanging elements of the model). So it turns into a bit of a puzzle working out which way to place the component to get the best quality with the least support! 😵

Here I have orientated the body & legs in the vertical BUT I have, then, had
to add a lot of tree-like supports to aid in the printing of the helmet over-hang.

Yes, it's all a bit crazy, but after a time it becomes second nature and you eventually just 'know' instinctively what's going to cause problems in a particular model. Er, mostly!


Print done I then carefully compare it to the other model I have made in the series, my Grenadier. As mentioned above, my first attempt at my new helmet resulted in it being obviously over-large when compared to my Grenadier's 'diving helmet'. But this latest print turned out to be proportionally correct (I think)...

Above: Checking mutual proportions, but also notice that I have added
my 'magnetisation' system to the bases, steel washers! LOL

Well, this is all going swimmingly! Er, except.......!

On fitting the arms to the body I noticed that the arm holding the gun didn't fit properly due to the splayed feet I had done. It's not noticeable in this photo due to the angle I took it, but believe me that the arms are not fitting the way that they should be...


...Back to the drawing board again! This is what prototypes figures are for though, working out all the kinks before running off a whole unit of figures. In this case I had to go back into TinkerCad and alter the angle of the feet so there was more space for the gun to sit on the base properly...


And that's it for now. A very good start I think (?), I'm quite pleased with my design for a Steampunk soldier and I'm really enjoying this series. AND it's actually taking me back to the original idea for this blog which was to do wargame armies (rather than the single figures I have been doing for a long time).

I may even get round - eventually - to doing the FLW Molatero army I intended to do in the first place! 😁

NEXT: Painting my Infantryman.

Thursday, 29 April 2021

Steampunk Grenadiers - Magnetised Bases

 Having completed printing the remainder of the first unit for my 'Invasion Mars, 1899' project I realised I had made a bit of a boo-boo! But, first of all let's have at the progress so far...

So far so good - although I am still working on the arms and weapons - and this is when I had a bit of a 'duh-oh' moment. I like to magnetise war game figures so I can easily move units in unit trays, this entails fitting a small magnet into the base of the figure - guess what I HADN'T done! 😖

I didn't really want to start drilling or carving out holes in the figures' bases so I could insert magnets, this would be quite messy.  SO... Plan B, I decided it would be easier just to glue steel washers to the bottom - then I'll magnetise the unit trays with magnetic sheets.


This is a bit of a fudge but it does have one positive effect - it gives my PLA printed figures a little bit of weight - which I prefer. Every cloud has a silver lining!

NEXT: I finish the construction and painting of my Grenadiers.

Saturday, 17 April 2021

Invasion of Mars, 1899 - Grenadier Officer

Well, I completed my first prototype figure for my 'Invasion of Mars, 1899' series. It was a bit more involved than my normal 50mm peg soldiers but I did enjoy making it.


I can now get on with the rest of this unit (six figures total) with the 'ordinary ranks' carrying heavy rifles with under-slung rockets. 

Unfortunately, I didn't take into consideration the magnetising of this unit which would have been handy as the air tanks make it rather top-heavy. I am now wondering if I can modify it with a tiny magnet which I could fit into the shallow base. ???

If I can manage to fit a magnet I could then make a unit base with it's own small magnets. Hmmm (today's project).

Wednesday, 14 April 2021

Invasion of Mars, 1899 - Part 1

 I'm juggling projects at the moment (yet another reason it takes me forever to get a job complete) and I've even started a new one! 😆

I've always been a bit of a closet Steampunk fan and particularly like the fantastical yarns by the likes of H.G Wells, Edgar Rice Burroughs and Jules Verne where the conquest of space began - fictionally - in the 19th century! Typical of this type of early science-fiction were stories like 'The First Men in the Moon' (H.G Wells) and the Barsoom Stories (E.R Burroughs) where 19th century adventurers managed - in various ways - to journey to other planets in the Solar System. 

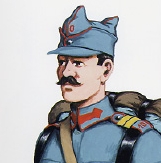
Above: Bedford (Edward Judd)  and Cavel (Lionel Jeffries) land on the moon in 1899.
Picture from 1964's British movie 'First Men in the Moon'.

Aside from the fictional stories I have always been tempted by the RPG 'Space 1889', a tabletop role-playing game of Victorian-era space-faring, created by Frank Chadwick...

"The game presented an alternate history in which certain discredited Victorian scientific theories were instead found to be true and have led to the existence of new technologies. In the setting, Thomas Edison invented an "ether propeller" which could propel ships through the "luminiferous aether" (the universal medium that permeates space, based on a now outdated scientific theory)...By the time of the game's setting in 1889, the great powers have used Edison's invention to extend their colonies and interests to the inner planets of the solar system. Venus and Mars have been colonized by the United Kingdom, Germany, France, and Russia. Belgium has only colonized Mars and Italy has only colonized Venus whilst Japan and the United States maintain economic and scientific enclaves on Mars. ..."['Space 1889', Wikipedia.]

The Invasion of Mars - A Table-Top Skirmish
When I started my Molatero blog the original idea was to journal my making of a H.G Well's 'Funny Little Wars' army and it's subsequent use in a war-game. This never actually came off as I was repeatedly disappointed in the figures I acquired for this use. Gradually I moved towards the idea of - first - converting figures to my own liking and then - eventually - to actually making my own figures. This has finally ended up where I am today, making my little 'peg figures' - a style of cartoony looking little chaps that suit my less than serious tongue-in-cheek attitude to the hobby.

However, for a long time now I've been making single stand-alone characters while I perfect my current style of model soldier, so I thought that its a bout time I get back to my original idea - making a little army for use in a table-top game.

Above: There is plenty of inspiration, reference material and even game rules for a
Steampunk/Victorian interplanetary campaign. Osprey Publishing has a few books
that provide a great source of ideas.

The idea for 'The Invasion of Mars, 1899' - although still generally a concept which I can attribute to H.G Wells - allows me to work on a limited one-off project, while still gaining some experience of making multiple figures and units which I can then later use to make a full blown FLW war-game.

I'll be restricting my armies to limited units of three infantry, one artillery and one cavalry on each side, which I deem achievable even at my slow pace of construction! 😁

Making a Prototype Soldier
As usual, I start working out a new concept by making a prototype figure. In this case I jumped straight in by making one of the central figures for my Victorian Steampunk army by creating a 1889 Aether-Grenadier for my British expeditionary force...

This design is very much influenced on the models I had just created for my 'Assault on Innsmouth' series, where I had created a larger body so I could mouth an oversized head on a modified 'peg' body.

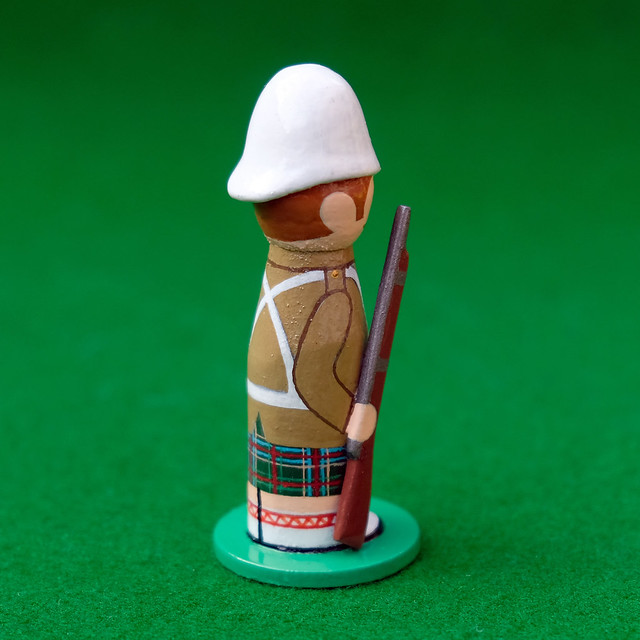
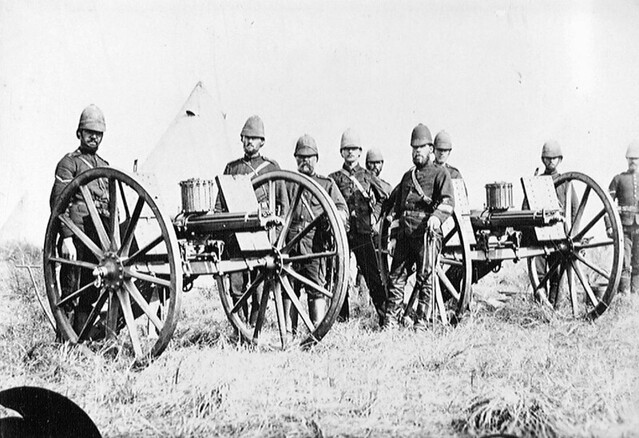
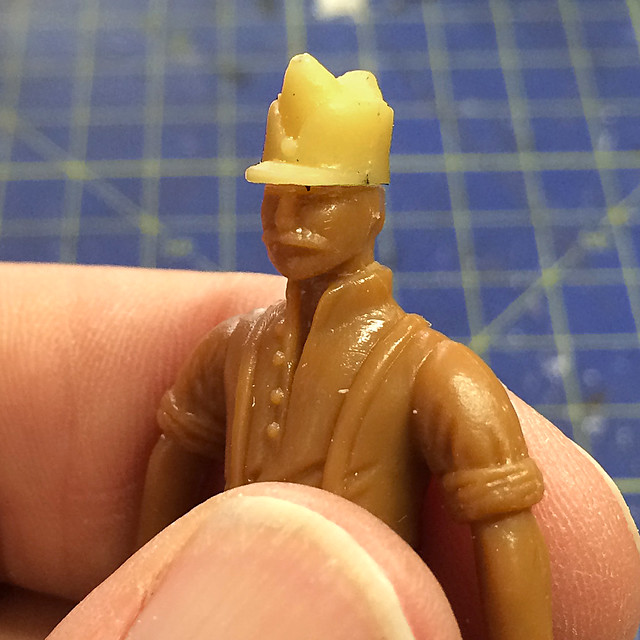
I really liked the idea of making a unit based on the Victoria diving suites as worn in 'The First Men in the Moon'. Game-wise, my notion was this would be a 'heavy, elite unit' which is why I am calling them Grenadiers. These would be armed with heavier weaponry and could add some variation to the look of my British forces.

While this design added a bit more detail than I usually apply to my cartoon-style of pegs, it's still quite simplified and didn't posed much problem to make in TINKERCAD...

Steampunk Spaceman

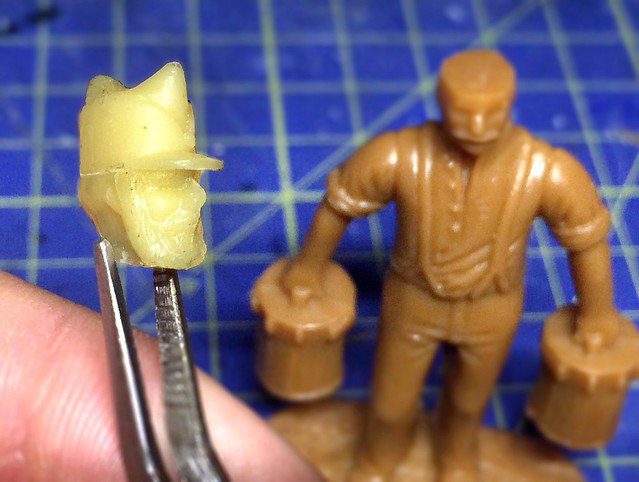
Satisfied with the look of this model I 3D printed the component parts out on my Flashforge Adventurer 3 printer. The multipart 'kit' took several individual prints to make as I prefer to try and make print 'jobs' in smaller groups so that I can get the best quality I can (in theory, I could have - perhaps - have printed this model out in one go by using a LOT of print supports, but this could've got quite messy).

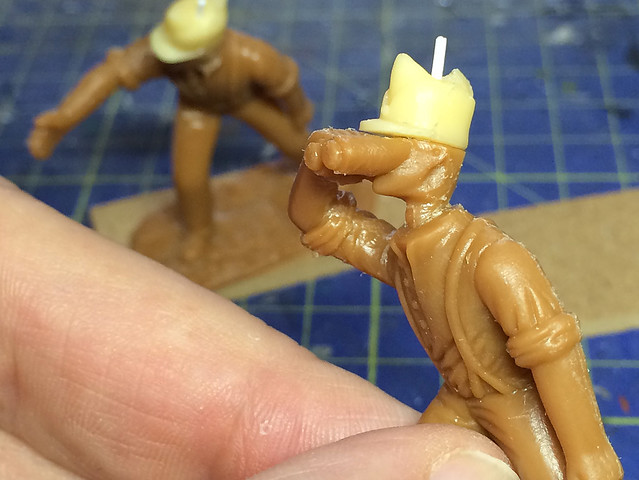
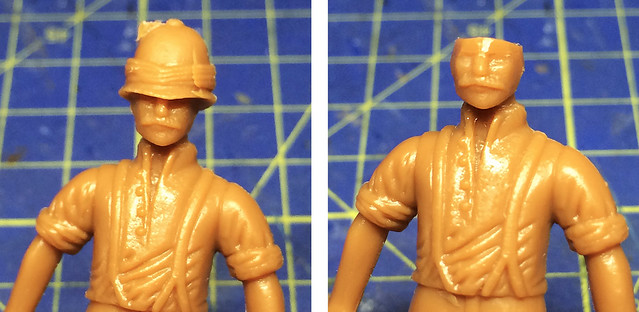
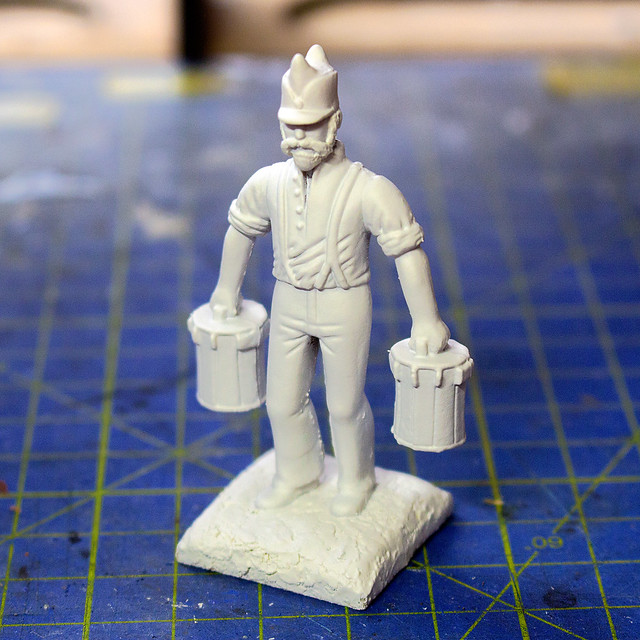
This would be a officer figure, so I created a little 'ray gun' but - as a nod to the Victorian Steampunk style - also gave him a sword. 😁

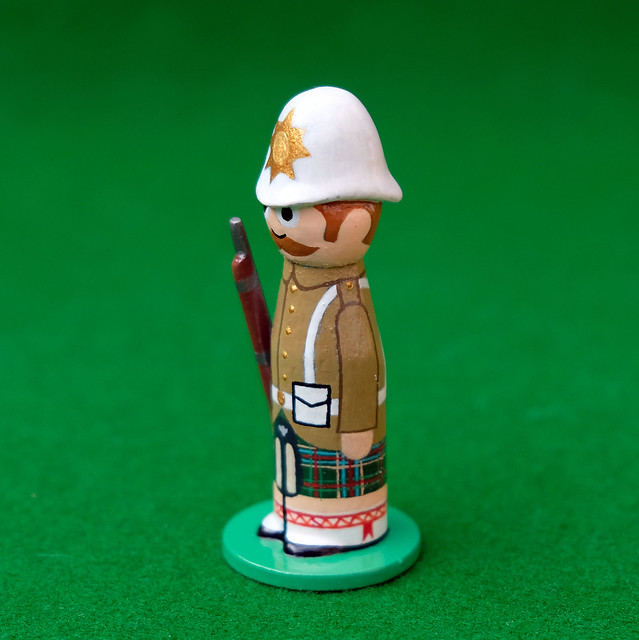
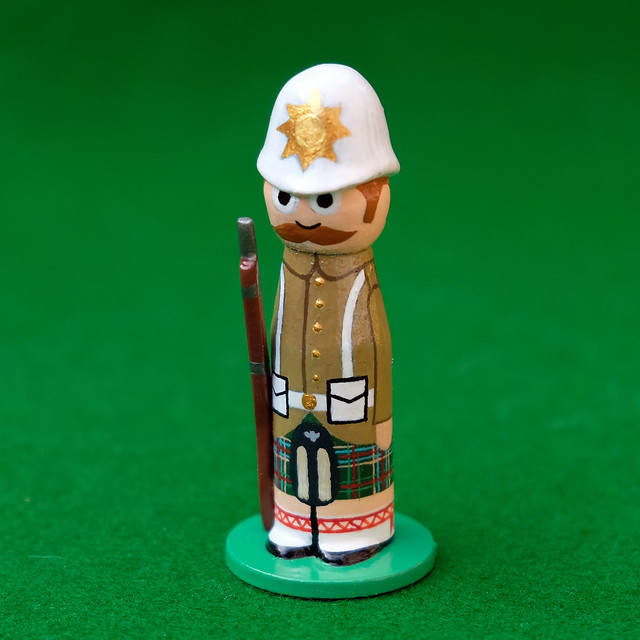
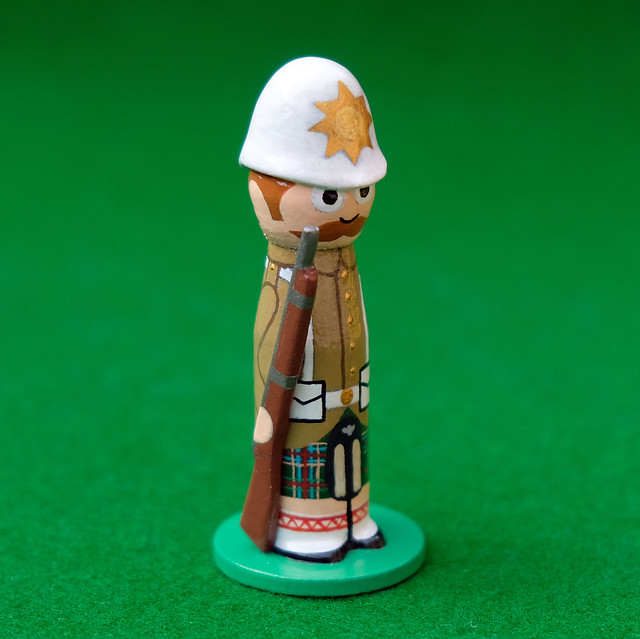
Above: My Space Grenadier (left). You can see how my recent Innsmouth mutant
inspired this bigger than usual 'peg' design.

Having constructed and primed my 'kit' I noted some things I might change for the rest of the unit but was generally pleased with the way this was going. The rest of my British units would be based on my original, slightly less bulky, peg body design and have different uniforms and equipment - just to mark my grenadiers out as being 'special' (elite).

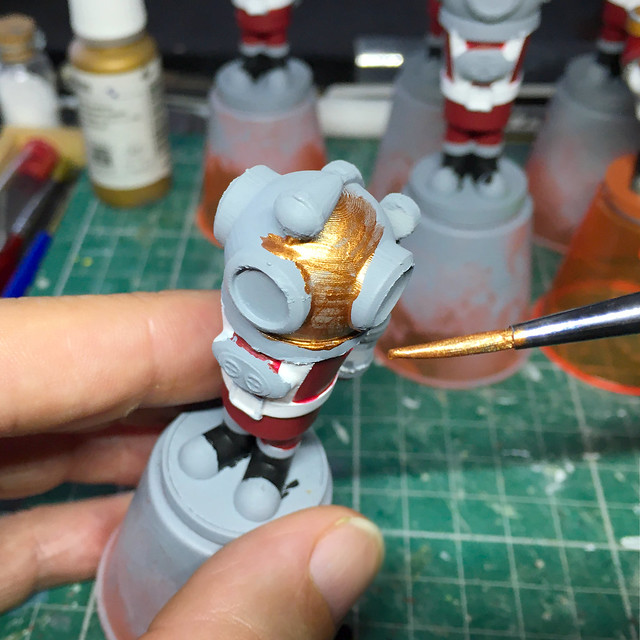
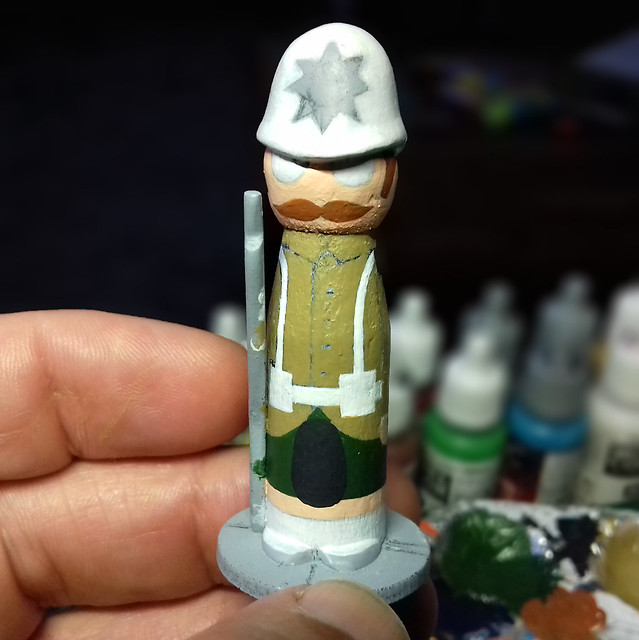
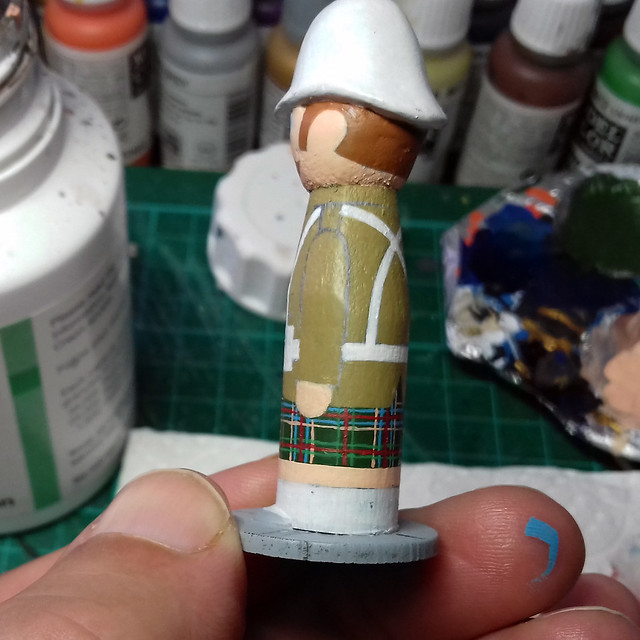
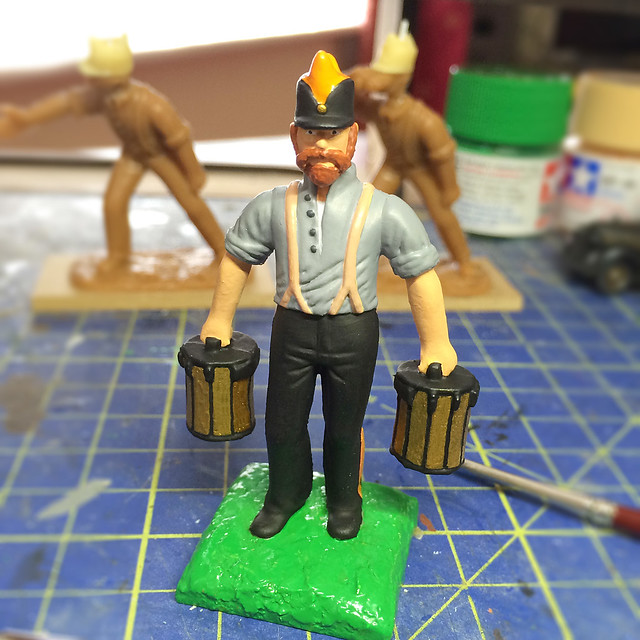
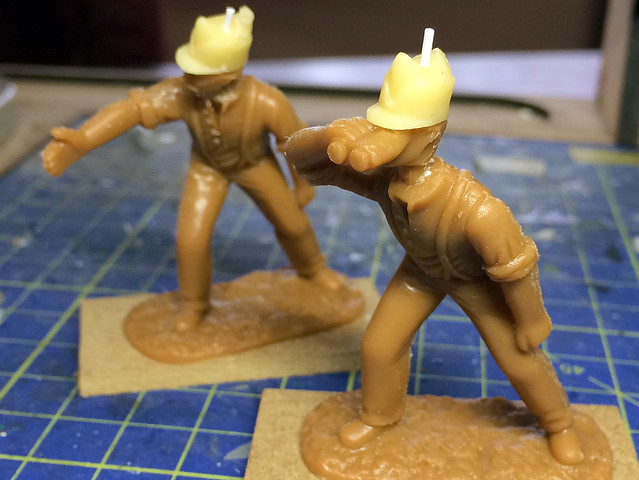
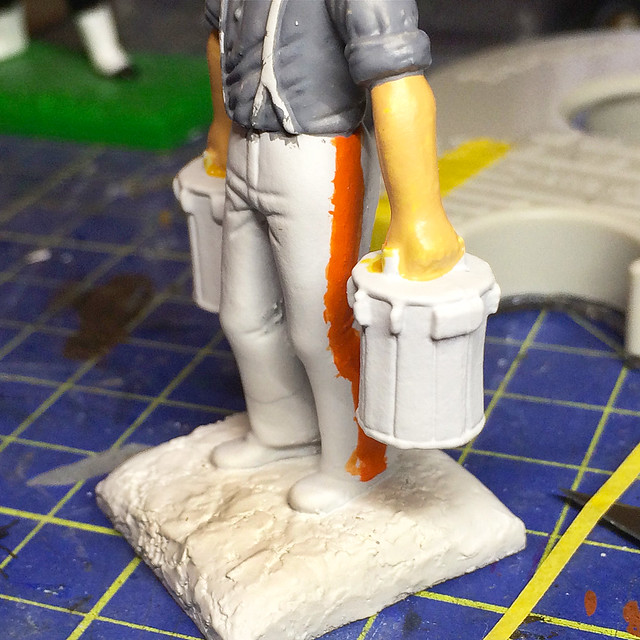
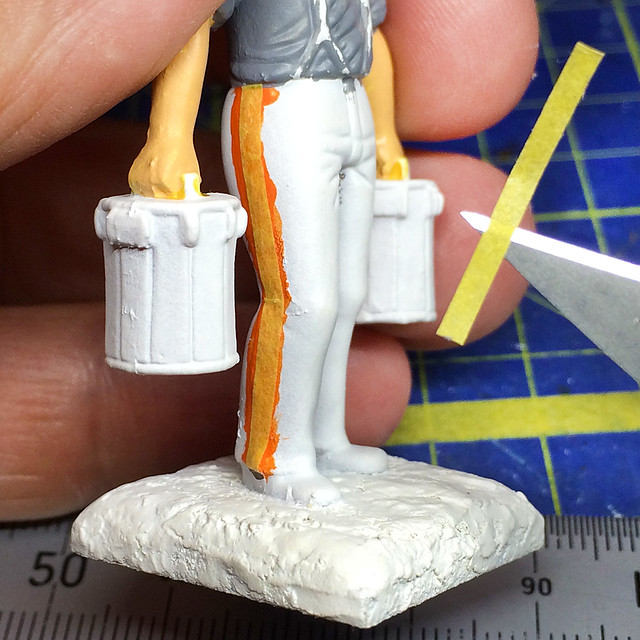
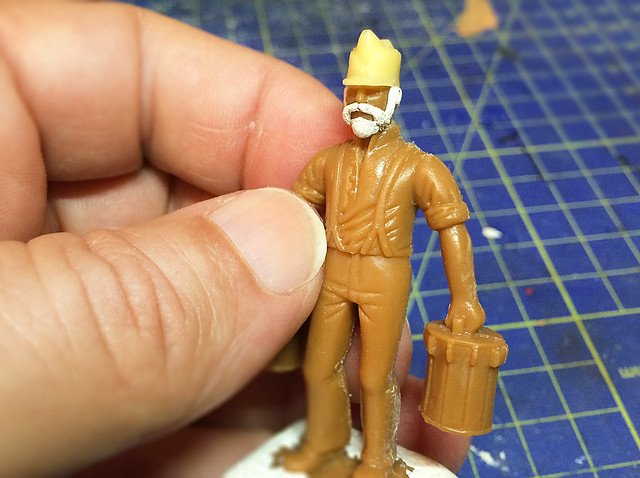
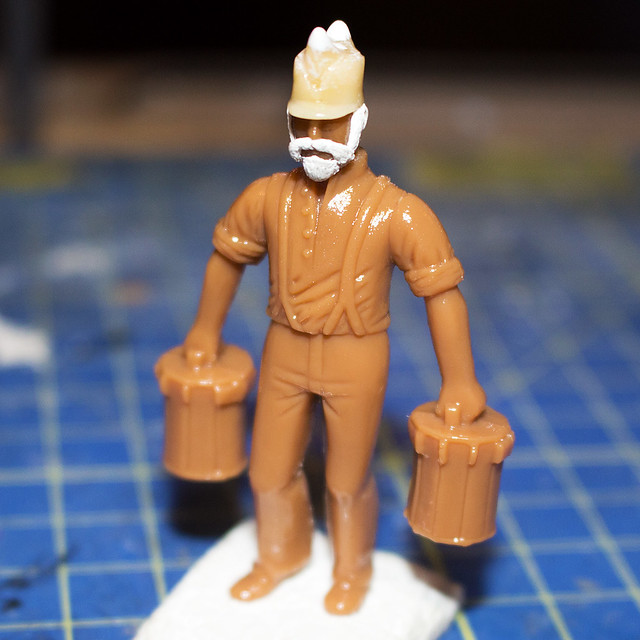
I then moved onto the painting. Again, this is a kind of prototyping too as I have to work out the colour palette that I will be using. NOW... I don't usually like showing my painting in progress, mainly because it shows off just what a sloppy painter I really am! BUT... I think it's only fair I should show you my process.

Here (above pic) you can see how I apply blocks of colour working from the back (or bottom) most part of the model and work outwards. At this point you can see how I am a bit slap-dash, going over 'lines' and not exactly being very precise! The idea here is that, as I add each additional layer - working outwards - I gradually work a little more neater and effectively cover over any over-painting I may have done on the previous layers. AND SO... In theory, by the time I get to the outermost - top - layer I should end up with a nicely painted little model! (Sorry to disappoint anyone who thought I was - by nature or skill - a good painter. I'm not!) 😂

NEXT: I finish off this prototype and start banging out the rest of the unit.

Edit (17/4/21): The day after I posted the above entry I came across a set of gaming rules that seem absolutely pertinent to my idea of a Steampunk skirmish, these are Osprey's 'In Her Majesty's Name', by Craig Cartmell and Charles Murton and published by Osprey...

Annoyingly, these rules seem to be out of print now (typically) BUT there still seems to be some support and updates for them here: The Ministry of Gentlemanly Warfare

Sunday, 8 July 2018

Highlander of the 3rd Foot & Mouth, 1895

Well, I'm getting faster at doing this if nothing else! Just as I estimated, I got my little Highlander completed this afternoon...


This is about the last of my prototype tests and I feel confident enough to actually get back on with my 'Franco-Prussian War' Portable War Game project. After that I would like to build up my Molatarian forces in this format!

Hope you all had a good weekend! :)

Friday, 6 July 2018

Something for the Weekend, Sir?

I had a spare prototype figure lurking on a shelf, it was one of the tests I did of the pith helmet casting. So, I thought, let's give it a go...


I'd already painted up one of the prototypes in 'Zulu' (the movie) style, so I thought it'd be nice to have a bit of fun with this one and based it on 'Carry On Up the Khyber' - a soldier of the '3rd Foot & Mouth'. :)

Got quite a lot done this afternoon and imagine I will have it finished by the end of the weekend.

UPDATE: Saturday.

Just thought I'd pop this in as it's a tiny bit progress, but - boy - did it challenge me. This is the very first time that I've ever tried to paint a tartan pattern...


Er, not exactly top notch line painting, but I'm hoping it might pass for this 'cartoon' style project.

Wednesday, 13 June 2018

More Peg Prototypes - June Part 1

I'm still trying to hone my skill and style for making my little peg soldiers. Here's my latest prototypes, an 1870 Prussian Uhlan (lancer) and an 1900 British Infantryman...


I'm still learning lots as I go along but I feel I'm making some headway. The infantryman seems about there as a template for the proportions and style of painting the peg 'body'. But, I still have a little way to go with my cavalryman. Still not 100% sure about the way I model the rider's legs.

Another concern is that I'm still using aerosol spray lacquer (Wilko's brand rattlecan) and this is very wasteful. Spray-on gloss does give a lovely even coat, but it's very indiscriminate and despite the fact I use a small spray both (with extractor fan) I can fell the stickiness of the varnish on my skin when I'm done. I'm guessing about 40% or maybe even more of the varnish doesn't go on the model at all!

I've ordered a can of paint-on varnish and will knock up yet another prototype this week to test this brush on varnishing technique - will it pool and drip?

(Will have to think about getting a little display cabinet soon as my collection of peg figures is growing rapidly!)

Wednesday, 15 February 2017

I remember...

In fact, this is not an abandoned blog. It's just that the past year has been a bit of a funny one filled with a multitude of life events in one rather uncomfortable package! (I won't bore you, but suffice to say I've had a lot on my plate!)

Anyway, as it happens I've just been doing some work that has reminded me how much I enjoyed painting 1/32 scale figures, so I thought I'd post it up as it seems vaguely relevant...


This 1/32 scale British WW2 Tommy is, of course, a good old Airfix figure. I was using it to test out some painting techniques and colours for a 28mm figure project that I am planning.

After doing this happy little chap, I did consider maybe carrying on and doing a few more from the 'British Support Weapons' set that I have (I recall buying it so I had some 1/32 Vickers .303 machine guns to tinker with). But, I can ill afford yet another diversion.

However, it has caused me to get out some of my 1/32 Molatarian figures and stick them back in the project cue, so that I have some variation from the WW2 themed models that I am starting to amass.

I still prefer my flat 'toy soldier' painting style for my Molatarians over the shaded technique shown above. But, it's interesting to compare the two styles....

>Dust blown off blog! <

Sunday, 17 May 2015

Molatarian Gatling gunners - test figure, complete...

Well, the test figure is complete bar the gloss coat. But it's really nice to get back into the swing of FLW 'traditional' toy soldier painting - I had forgotten how relaxing it is. Then again painting with Tamiya paints can be challenging, they are like treacle and have to be thinned with Tamiya's own thinner for best results...

It was pointed out to me that this chap looks a like Chuck Norris!
The reason I like the Tamiya paints is because they do have a nice opaque quality to them and look a little like enamels, which suits this job (sometimes the Vallejo paints can be a bit thin resulting in a semi-transparent and streaky finish). But I have given up trying to use the the Tamiya for my normal plastic modelling, where the thinner opacity is an advantage for washes and weathering effects.

I chose a colour pattern for the Broadwell drums (Gatling magazines) incorporating 'brass' side panels. I will probably include a brass element on the gun itself with the overall colour of it and the gun carriage being black. I do think the Gatling rather splendid when done in brass!

(I *believe* the use of brass is an indication of earlier models of the Gatling [?]. Certainly by the Boer War the British Army seemed to prefer a fully painted Gatling - perhaps for tactical reasons. I really must buy Osprey's book on the Gatling come pay day.)

Anyway, now I'm happy I remember the process for painting FLW figures I'll get started on the other two members of the Gatling team...


Same procedure, the only noticeable difference being the stance of the figures which will require the use of larger rectangular bases. AiP have chosen to do quite dynamic poses for these gunner, I suppose you could say they are less 'traditional' compared to the style of original Edwardian toy soldiers but they look interesting.

However, there were a couple of problems while doing the head conversions. It turns out that there were a few shortcuts AiP had taken with the sculpting of the heads because they were effectively hidden by the big pith helmet the figures came with. Removing the helmets revealed my chaps had 'skinny' necks and practically no ears!


So now I have fitted my Molatarian hats I will have to rebuild some of the features of the heads. But no biggy as I kind of do that anyway with the extra facial hair I decided to do.

Next: The figures shouldn't take too long so now it's time to start on the Gatling Gun!

Thursday, 14 May 2015

Molatarian Gatling gunners - test figure, undercoat

Moving on to the painting of my Gatling crew test figure I have to solve one minor puzzle - how best to paint the trouser stripes. Better modellers than I might do this freehand, but even if I had the brush skill to do this there is the small matter of the figures arms being in the way!

Once I solve how to do the stripes the rest is pretty straight forward so let's get that out the way...


For these undercoat colours I am using my normal Vallejo Model Color paints. I began by painting a broad line down the side of the trousers, not easy with the magazines in the way. Then I cut some strips of masking tape to the correct width of the stripe I wanted...


I can then paint over these which - hopefully - will give me a fairly neat guideline when I peal the tape off.  It should just, then, be a matter of neatening these up with the Tamiya top coat.

Anyway, the stripes dealt with I can move on to the rest of the figure. The more opaque the base coat the more successful the Tamiya top coat will be - the Tamiya paint is tricky stuff so a good foundation coat really makes the job a little easier.


The painting was a little rough, but that doesn't matter so much as I do the real neatening up when I do the top coat. Still it gives an idea of what the finished figure might look like.

Update: Haven given the black trousers time to dry I removed the strips of masking tape to reveal the orange stripes. It sort of worked, a bit rough at the edges but wasn't meant to be a 'finished' effect but rather a guide for when I paint the top coat. 


Wednesday, 13 May 2015

Converting AiP's 1880/1902 British gunners into Molatarian gunners

Technically speaking turing AiP's British Gatling crew into my FLW Motaraians is a pretty straight forward conversion. As the 'short sleeve' uniform was pretty universal for artillery men in action during this period the main body of the model can remain unchanged. Only the hat need be modified.

A British Gatling Gun detachment using 'high capacity' Broadwell Drums, South Africa c.1879
These fine chaps are not in 'shirt sleeve' order but are the period templates for the AiP Gatling
set. Turning them into 'Eastern Europeans' is my next challenge. Note the beards!
Source: National Army Museum Copyright
I already decided that the Romanian style 'capela' field cap would be the standard military dress for Molaterian lower ranks and had made a model of this which I then had duplicated by my brother. So it should be a case of a straight swap.

Left: The Romanian 'capela' field cap. I had imagined my FLW creation of Molatero as being an Eastern European nation *near* where Romania lays in our - real -  modern day Europe. So, naturally, my fictional realm would share much of the cultural flavour of what we would call the Balkan Peninsula.

First I have to cut off the British pith helmet, but even this is easy as the soft plastic of the model works in my favour. All that's required is a sharp craft knife and a steady hand and off comes the top of the my soldier's head just above the eye-brows...


One small consideration is facial hair. At the moment the soldiers all sport a very neat and very British looking moustache! But my preference is for rather more elaborate whiskers and I also favour big bushy beards as the fashionable trend for the well dressed Molaterian!

As I mentioned, the capelas are already made - in resin - and I have a bag of donor heads ready to either transplant directly onto the necks of model hosts or I can cut off just the hat and pop that on a head, as I have described above...


A little gruesome, but this Frankenstein approach is an easy and fun way of personalising commercial toy soldiers that even the beginners can employ. It's part of the FLW philosophy to 'do your own thing' and I really like the fact I can create my own mythology (if that's the right word) for my little army, with it's own traditions and fashions. It means that my army is completely unique from that of another FLW enthusiast's creation, even if we both use the same commercial soldiers. (And nobody can tell you that your design isn't historically correct!)

Anyhoo, having super-glued your replacement part onto the host body - and I tend to try and include some sort of securing pin where I can - it's time to fill any gaps with your favourite modelling putty.

And now it's a straight forward mounting and painting job. The process I have adopted - for soft plastic figures - is to apply a couple of coats of spray varnish onto the bare model before adding a colour priming coat. This helps stiffen the plastic, which is particularly important with riflemen, where soft plastic guns are notorious for bending.

Note: It should be remembered that if your soft plastic soldier does come out the box with a bent part (oh er, Matron!) that this can usually be remedied by immersing the part in very hot water for a short time and then pulling the part back into shape. You then quickly dunk the part into cold water, which 'sets' the new shape, and re-hardens the plastic molecules.


A nice big bushy beard! Nothing say 19th Century more than a extravagant
display of facial whiskers...On a man of course, otherwise that just says 'carnival'!

Having allowed the varnish a good amount of time to dry properly you can then add the colour priming coat of paint. Colour choice for primer vary but as my Molatarians are rather brightly coloured little chaps I prefer to start with a white primer - usually Hycote Matt White aerosol - as that makes primary colours 'pop'. It can be a little tricky painting dark colours onto white as you may have to apply a couple of coats to ensure opaqueness but it's worth it.

Hard to tell but the figure has now had two good coats of acrylic
gloss varnish. This not only helps stiffen the soft plastic but also
somewhat smooths out some of the rough edges.
The white primer applied we now have a nice bright canvas onto
which we can apply the colour coats.

And now your little soldier is ready for painting. I'll pause here, as I'm chomping at the bit to make the same amount of progress with the Gatling Gun piece.

Next: Tamiya paints (it's like painting with treacle)!