Showing posts with label French. Show all posts

Friday, 13 November 2020

French 'Chasseurs à pied', 1870 - Part 4

 A long, long time ago I began my Franco-Prussian War project only to then decide to have a hiatus from the hobby for some time. Now up and running again I now am in the position of not only working on new projects but also have several old moth balled projects to dust off - my French 'Chasseurs à pied' are one of these forgotten armies! 😃

Above: Painting 'French Soldiers in the Snow' by Paul Louis Narcisse Grolleron (c. 1880).
Grolleron produced a range of wonderful paintings depicting French troops of the 1870
war. This one caught my imagination and was the basis of my Chasseurs a pied.

It's actually a bit crazy that I stopped where I did with these soldiers as they were quite near completion. However, one of the reasons that I had not completed these sooner - having returned from my 'hobby holiday' - is that these figures were what I call my 'Mk. 1' peg soldier design and I had subsequently moved on to a different design...


Above: Comparison of my early 'Mk. 1' peg soldier construction (left)
with my current 'Mk.2' method (right).

I was of a mind to abandon this project and start again using my revised method of construction but - in the end - did not want to waste the work I had already done. It was a bit frustrating as I really like my newer method for making my soldiers, but I thought it would be a nice way to formally transition from the old to the new by completing this project as intended.

Anyway... Where had I got to? Here's a reminder of where I left off...

As I said, these models were so near completion! The principal job was to do all the outlining of detail - things like the arms and leg division, etc (things that were the very reason that I created my simplified Mk. 2 models , so I didn't have to spend time laboriously outlining things).

Ironically, I ended up producing my prototype Frenchman right along side my prototype Prussian! It's my habit to complete a single example of a unit's figure in order that I can check that I am happy with my colour choices and check for any potential problems before continuing with the rest of the unit's figures...

Indeed, I did come across a little issue, that being the outlining of detail that is base painted with dark colours. An example would be the outlining of the soldiers arms, normally I would outline in black but this just wouldn't show up very well against a dark blue. The solution - obviously enough - was to outline using a lighter version of the base colour, in this case a light blue.

In the above photo you will notice I had to outline (if that's really the appropriate term) the leg division line using a light blue. This is not a method that I am completely happy with and why I ended up changing the way I did the legs of my models.

Anyway, niggley bits out the way, it didn't take long to apply the final details and - finally - I added the facial features. Things like buttons and and eye-pupils were actually applied using acrylic pens.

This all leads to the varnishing. I continue to be a fan of the traditional glossy toy soldier and I think it actually helps produce a better looking peg figure. The application of a gloss layer smooths out some of the imperfections - rough textures - inherent in cheap mass-produced wooden pegs. If you look at the above picture you will notice a mottled texture on the Prussian soldier, the wood was particularly rough on this peg (so much so that even a fair amount of sanding could not get rid of it).

This is just part and parcel of using pegs for modelling, they are what they are. But varnishing helps alleviate most but the worse blemishes. And here's what we ended up with...


I'm pleased with the result and will crack on with the five remaining figures in this unit (plus the unit base). After that I have to decide which will be the next French regiment that I will model - I'm already had a lot of requests that I do a 'red trousered' infantry of the line! We shall see.

Link to all the posts in this 'Chasseurs à pied' project.

Friday, 4 May 2018

French 'Chasseurs à pied', 1870 - Part 3

Having constructed my very first peg unit, it's time to get down to the nitty-gritty with some painting. As I mentioned in part 1 of this series I had taken the time to do a colour sketch of how I wanted my soldiers to look (having simplified the uniform design a little to suit the peg soldier format).

However, I think I have resolved the one issue I had with the uniform colour - based on the contradictory information provided by some of the historical illustrations I had gathered - and that was the colour of the Chasseurs trousers. I found an excellent website called 'Images De Soldat'...


The website of the author-illustrator André Jouineau, it contains about 1500 colour plates which reference the uniforms of various nations from 18th century to World War 2. And I was delighted to find a wonderful plate with the uniforms of the Chasseurs à pied from1870. (You pay a nominal sum to download the full-sizes plates, but it's worth the €2 if you are serious about your modelling projects.)

While I can't show you the copyrighted illustrations I can confirm that the trousers were, indeed, in a lighter blue (somewhat akin to RAF uniform blue, but a shade darker). So my uniform sketch has now been amended...


The soldier on the right is wearing a rather flamboyant red cummerbund (or cummerband). I'm in two minds whether to include this item in my peg models as - although it is very dashing - I cannot pin down what the actual meaning was of it's inclusion as part of the regiment's uniform. All I have found is this short mention in Wikipedia:

"The units of the French Army of Africa (such as the Zouaves or the Chasseurs d'Afrique) wore cummerbunds of 2 different colours: blue for European soldiers and red for Native recruits."

This does not seem to fit in with the pictorial reference I have from Images De Soldat, as the example soldier was clearly of European origin, so the red sash clearly has some other meaning. They may have been worn, perhaps, to indicate that the unit has seen colonial service (but this is a guess on my part).

[Edit: Nope, I cannot resolve this conundrum, so I will not include the sash - however pretty it is - as the majority of reference I have does not include it.]

Now, On with the Painting...
I'm sticking to my grey primer as it seems a really good base for bright colours (white can be a little bit of a pain to cover sometimes)...


Downside of doing these little fellas in grey is that - with the keeps - it makes me very tempted to do an ACW Confederates! :) (Maybe another time?)

Picking Paints & Colours
One thing I don't like to do so much is mix up special colours, I'd rather buy the exact colour match (or closest thing) in bottle form. It's not that I'm lazy, it's just that - from experience - I know that if I want to duplicate a mixed colour further down the line it's a pig to get an precise match. It's far easier to just know what number Vallejo or Humbrol to buy.

So here's my paint list for my French Chasseurs:


• Gold Piping:
- Vallejo Model Color [948] Golden Yellow

• Dark Blue (jacket & kepi):
- Black undercoat base with Vallejo Model Color [899] Dark Prussian Blue over the top.

• Airforce Blue (trousers):
- Citadel Kantor Blue.

• Flesh: 
Vallejo Model Color [815] Basic Skintone.

• Wood:
-Vallejo Model Color  [846] Mahogany Brown.


I decided to tackle this paint scheme by starting with the 'gold' piping, in the hope I could get some nice (fairly) even lines!


A Case of the Blues
I've been here before...Quite a while ago I had a go at painting a Black Hat 1/32 scale white metal 1890 French Infantryman. Getting the right deep dark blue caused me lots of grief, I just couldn't get the shade right. Eventually, I managed to achieve a colour I was happy with, but only by means of a complicated mix of various blues - something I don't want to go through again...


Depending on the lighting it's nearly black, but not quite...I think it's what's called 'midnight blue'.

This time I decided to go for a simpler approach and in an attempt to make the richness of the blue colour more intense, though still dark. What I decided to do was to lay down an undercoat of straight black, and then to paint a rich Prussian Blue over the top. The resultant effect was for the black undercoat to darken the subsequent blue coat BUT the blue retained it's richness.

Now, Slap it On...
Enough over-thinking about colours, let's get on with some hairy-stick action! I begin by filling in the spaces between my yellow piping on the hats (and will eventually work my way down to the jackets) with a black base coat...


I also laid down the flesh tones and the whites of the soldiers eyes. I've tried to vary the hair styles and the shape of the moustaches, hopefully these will be suitably French looking (to contrast with the more teutonic curled moustaches of the German opposition).

At this point the jackets are just the black undercoat.
And now the slow slog as I repeat the painting until the figures are complete! (Though, to keep me from getting a bit bored with the repetition - thank goodness I'm only doing a unit of 6 - I am already making a start on the first of my Prussian troops.)

Saturday, 21 April 2018

French 'Chasseurs à pied', 1870 - Part 2

Cracking on with my first unit of peg soldiers, I've added the feet and the bases and it's nice to get an idea of what whole troop of peg soldiers might look like...


Next job was the headgear - the kepi - and I've managed to cast six copies of my original model of the hat. It's taken a few days due to the slow hardening time of the Milliput putty I have used to mould the hats...


The other accoutrement for my toy soldier is the rifle. Its a stylised model gun and not really a reproduction of the actual French rifle of the time (1870), the breech-loading Chassepot. My model is more 'pop-gun' than military weapon, in keeping wth the toy soldier theme...


I don't have to be too precise, a rough rifle-like shape is good enough. Also, keeping it simple means it's easier to cut these shapes quickly out of the lolly sticks. All they need is a very quick sand with wet & dry just to take the rough edges off and round off some of the corners.

The final component of these peg soldiers is the magnets. As these are for wargaming and will constitute a complete unit of infantry I really wanted to try them out in combination with a unit tray to make moving them about as a consolidated piece easier. And to ensure that figures don't fall over during the process of moving the unit I also decided to magnetise the figures so that they would 'stick' to the unit tray...

Adding the small magnets to my unit tray and to the bottom of my peg
soldiers. The lolly stick with attached magnet is a trick I picked up from
a guy called Herbert Erpaderp and it helps to ensure I mount all my magnets
with the correct polarity.
And that's the construction complete. This is the beauty of the peg-soldier format, it's a wonderfully simple model to make, particularly the streamlined and uncluttered version I've settled on.

I'm still not completely happy with the way I'm doing 'feet' - all individually hand-made with Milliput - I'd like a 'prefabricated' option for the boots. This maybe something else I can cast and then simply stick on. I will have to experiment.

That small niggle aside (it's still a learning experience for me) It's really exciting to have completed my very first peg soldier 'regiment'. Ranks of toy soldiers look terrific and really give me a buzz both as a display piece and as a wargaming item...


And that's the construction phase. A few minor niggles - which I hope to iron out with practise - but in the main I'm pleased with the Chasseurs so far. The next challenge, though, will be the painting.

Wednesday, 18 April 2018

French 'Chasseurs à pied', 1870 - Part 1

This is very exciting for me. It's not only a chance to really get back into making Victorian/Edwardian era 'toy soldiers' but it should be a relatively quick project in which I produce a full French 'regiment' in one go!

The French Light Rifle Infantry - Chasseurs - circa 1870. The inspiration
for my first 'peg regiment'.
Of course, the trick to this is that - under the 'Portable Wargame' rules that I am using as a guide - I only have to make six figures to represent a 'regiment'.

A late evening start to my project. I assemble five additional pegs and
begin to sketch out the cutting and sanding dimensions on them
with a pencil.

Having already started my prototype peg-soldier for this project I begin by preparing the other five 'dolly pegs' to make my formation. These traditional beechwood pegs need to be trimmed down to the 42mm scale figures that I am using for this job.

Pegs prepped and ready to mount on their bases.
The 'Chasseurs à pied' of the Franco-Prussian War
Just a quick overview about the French troop type I'm making. From what I understand, the title 'Chasseurs' translates into something like 'hunters'. They were light infantry (and also occassionally mounted units) that were the rapid response force of their day.

French Chasseurs à pied in the snow. 
...As such I suppose they are the equivalent of the German Jäger (which also translates into 'hunter') and were intended to act as skirmishers, scouts and sharpshooters.

What attracted me to them was that they fielded a uniform that was a lot more subdued than the usual - flamboyant - French infantry get-ups of the day. Historically, the distinctive colour of this sort of light rifle regiment is dark green (as with the German Jäger or British Royal Green Jackets) and the unit insignia is the hunting horn. But the French Chasseurs were dressed mainly in a very dark blue, although they sported dark green epaulettes and wore the hunting horn on their kepi.

Designing the Peg Uniform
Obviously, my peg-soldiers are highly simplified caricatures and not historic figurines. I don't want to clutter and embellish the 'peg doll' idea so I have to streamline uniform designs to fit in with this format. Things like backpacks and webbing gear, water bottles and other military accoutrements are ditched in favour of the 'toy soldier' look...


The only thing I was a bit unsure about was whether the trousers should be slightly lighter blue as the various pictorial reference I have found seems a little contradictory about this (compare the two contemporary illustrations I have included at the top of this post). Otherwise, I'm quite happy with this look, I just have to find comparable Vallejo acrylic paints in my collection.

Well, that's it for now, I have a lot of basic construction to do - not least the addition of the kepi hats that I am currently casting - before I start to think about painting. I also have six little rifles to make out of wooden lolly sticks! :)

Monday, 16 April 2018

Casting Headgear Experiment

Continuing on from my last post where I tried to restart my project plan for this blog (create a 'peg soldier' army), today I took a look at my initial casting experiments. This very quick and simple experiment was really so I could witness the process involved in using Oyumaru Instant Mold. I didn't put much planning into it, I just followed the instructions to see if I could produce some castings.

Well, the good news is that the process worked fine!


My only criticism is that I pressed in too much Milliput putty so left myself with a little too much excess, which I would now have to cut away. But, it's no biggy as the main goal was just to see if I got anything to cast at all.

Moving forward I could be a little more careful about filling my moulds OR (as some have commented) don't build up my moulds so that they allow so much overflow (another comment suggested that I cut down my hardened mould, as I did with the Pickelhaub mould, so that the putty I use just comes up to the top of the mould casting). Either way, I'll move on to making more economical and better shaped moulds the next time.


The level of detail is good enough for me and - as I suspected - using Milliput means that I have a very hard cast object. (So it was worth the wait.)

Getting into Hot Water!
By the way, on a procedural issue, I have to confess that I didn't monitor the temperature of my hot water - with a thermometer, as in some tutorials - when I soaked my Instant Mold. I took the easy route and just boiled a kettle and used the boiling water straight out of that. The Instant Mold softened in three minutes, so you don't have to be absolutely exact in your temperature monitoring! :)

Finishing Off the Casting
Well, how difficult was it to trim away the excess Milliput? Actually, it was easy - I used a Tamiya Craft Saw (like a craft knife with a fine saw-blade) and it went through the Milliput very quickly...


Not bad (for a first attempt)! I'll start banging these out for my first peg-soldier 'regiment' - some French Chasseurs à Pied (light infantry) - I just need six Kepis.

Oyumaru Instant Mold Summery
Well, it turned out not to be rocket science and it's a great little product for what it is. If you are a plastic kit or miniatures modeller this is a fantastic 'emergency' component copier. I've lost small kit parts before and if they are part of a pair Instant Mold can allow you to duplicate the part you need or make extra parts if you want.

It is what it is though, don't think it's ideal for banging out a large number of objects. I'm probably stretching it's capabilities with my need for half a dozen duplicates, particularly because I am using slow hardening Milliput. (I'll look into some other faster hardening casting mediums, like plumbers silicone for example, etc).

But there you go. Quick and easy duplication - I think I'll try a two part mould at some point.

Sunday, 15 April 2018

April Update

Well, it's been an unproductive month since my last update due to illness (again). I'm afraid that when I don't feel well I don't feel 'creative', so things tend to grind to a halt. BUT, I'm starting to feel a bit better now, so I've spent the weekend tidying my work-tray and remembering where I left off.

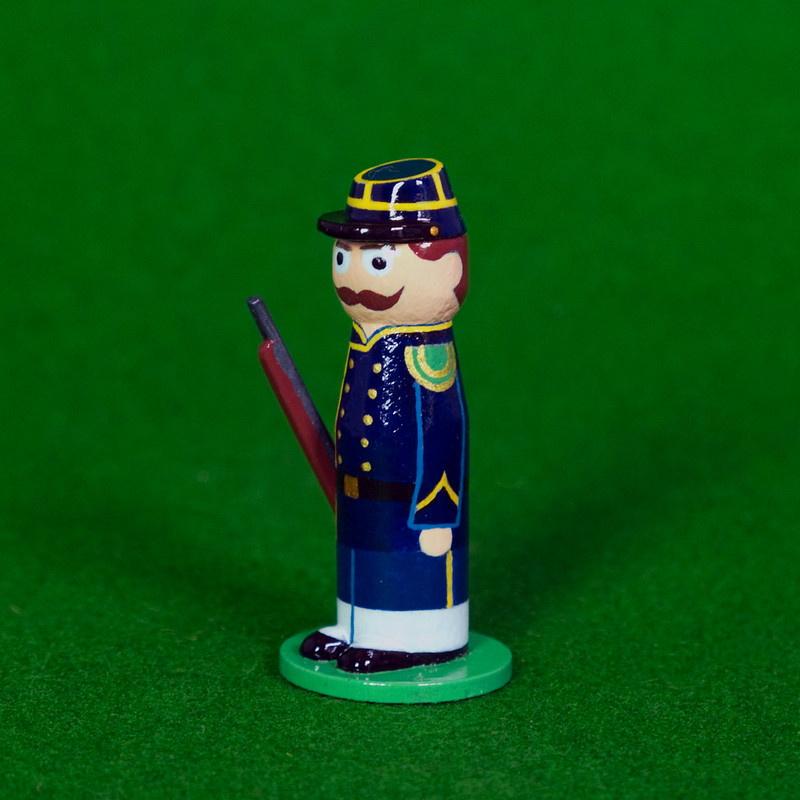
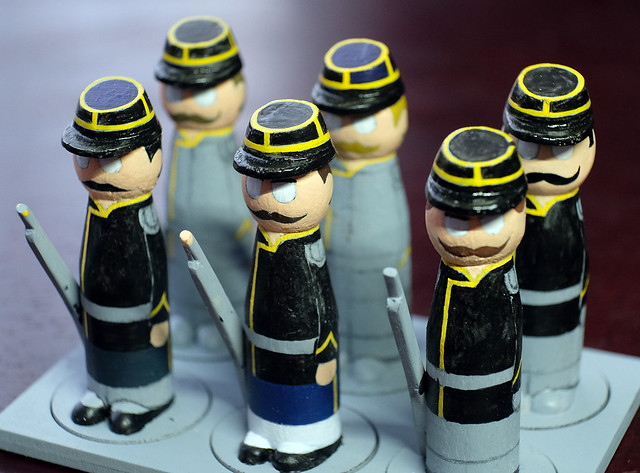
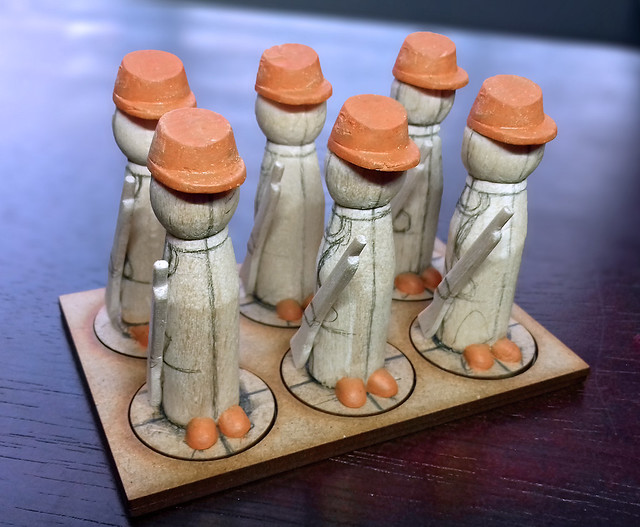
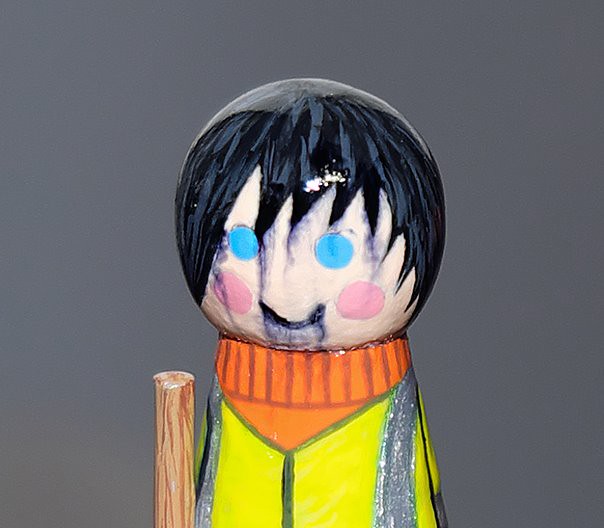
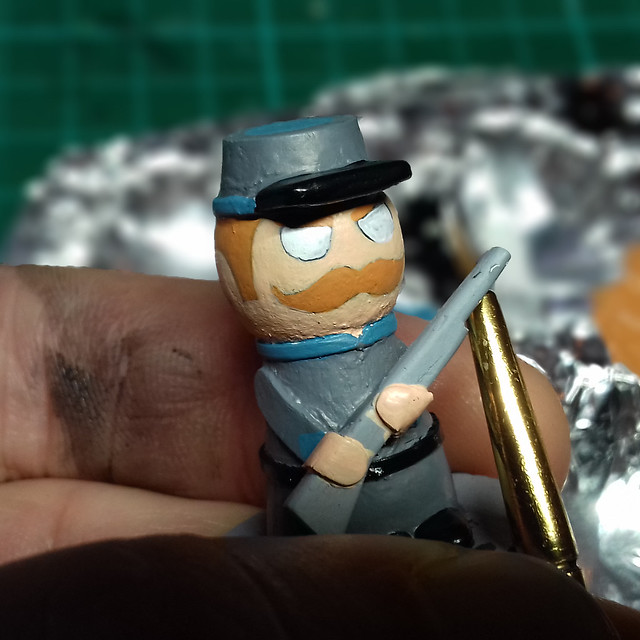
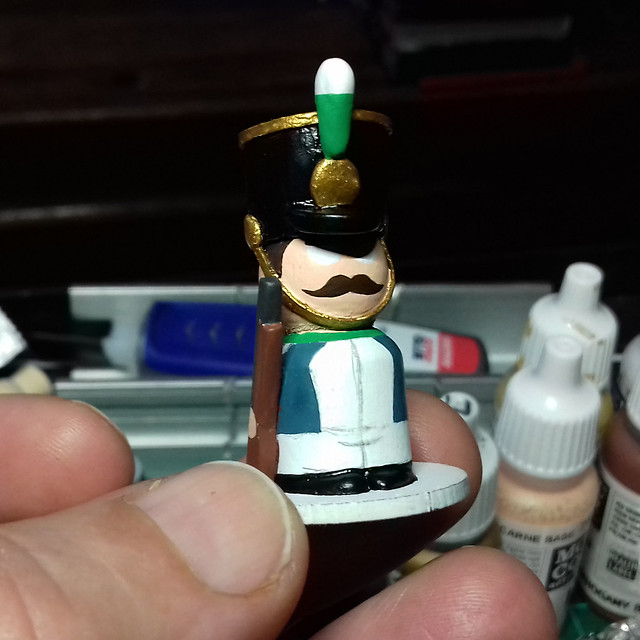
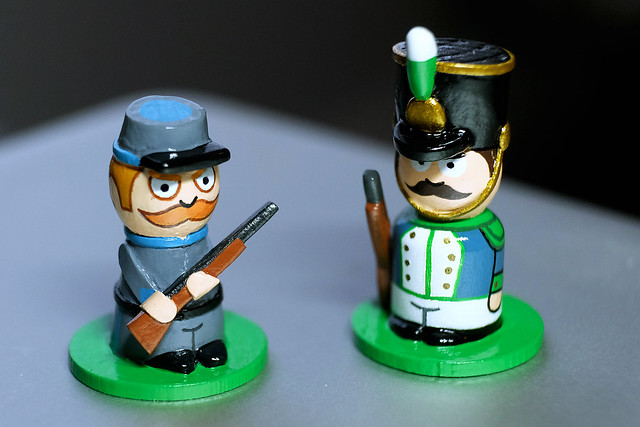
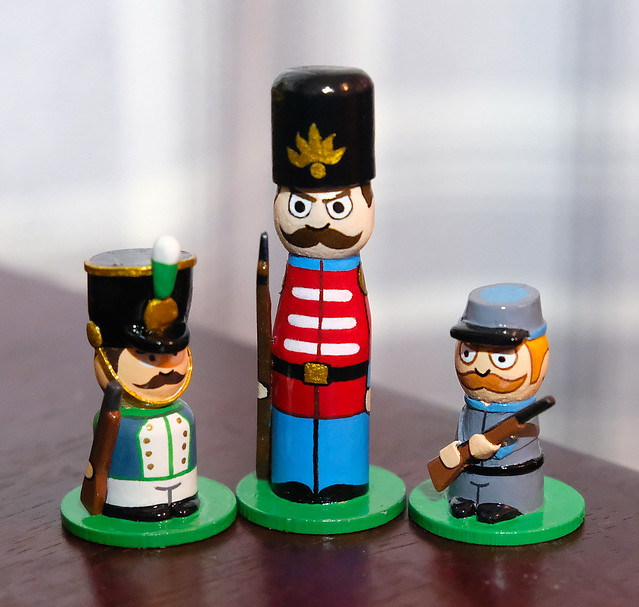
I also did a pit of peg-painting, though, although not military related it did get me some practise. It was just a couple of peg-people gifts for some friends...


As I say, not military but these little figures did teach me a couple of things that I can bring forward and apply to my peg-soldiers.

One of the main lessons was about using 'permanent' markers. I tried using water-proof pens for drawing the fine outlines and to begin with it looked like it was working well (I invested in some good quality permanent markers this time). But, much to my horror, the spray varnish I used to gloss the finished figures reacted with the pen ink and the lines all ran!


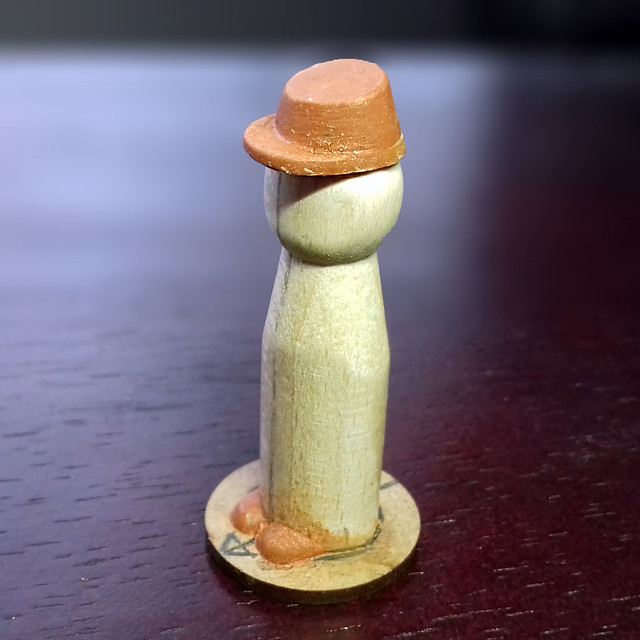
After the initial shock, I picked myself up and did a careful repair job and managed to salvage this model. The lesson for me was - stick to outlining with acrylics and a brush!

I *believe* that the spray acrylic lacquer I use although 'acrylic' contains a spirit based propellant (?) and this is what reacted and reactivated the pen ink and made it run. I've bough a can of brush on varnish to experiment with to see if this makes any different, as using pens is a quick and effective way of drawing sharp lines. We shall see.

Anyway, back to military themes...
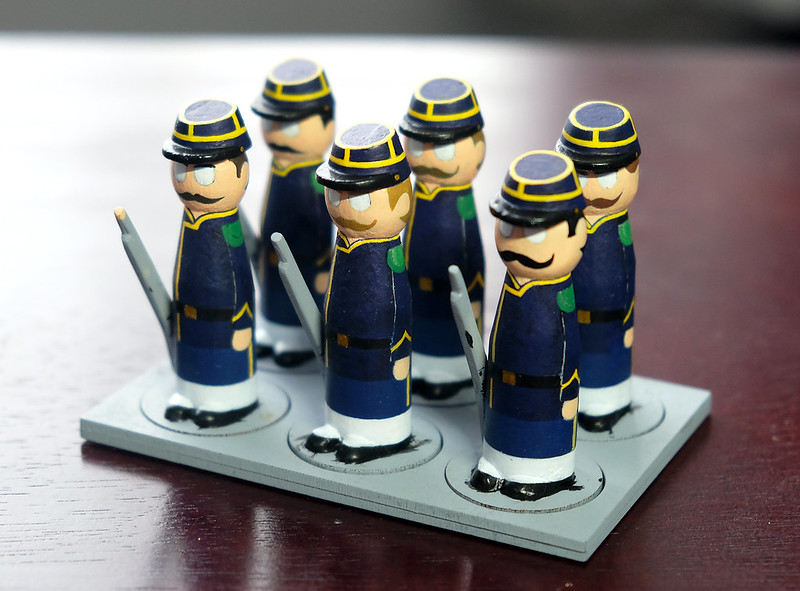
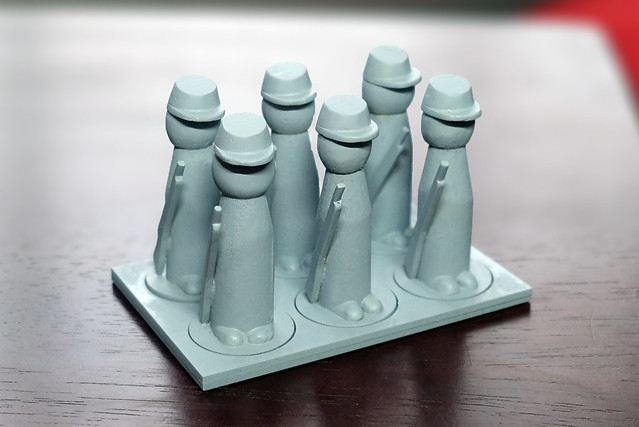
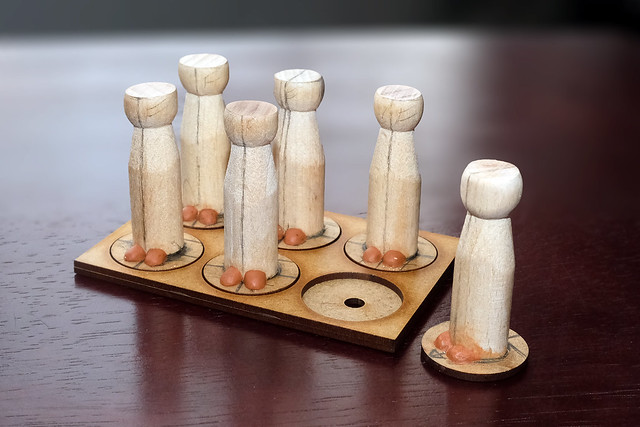
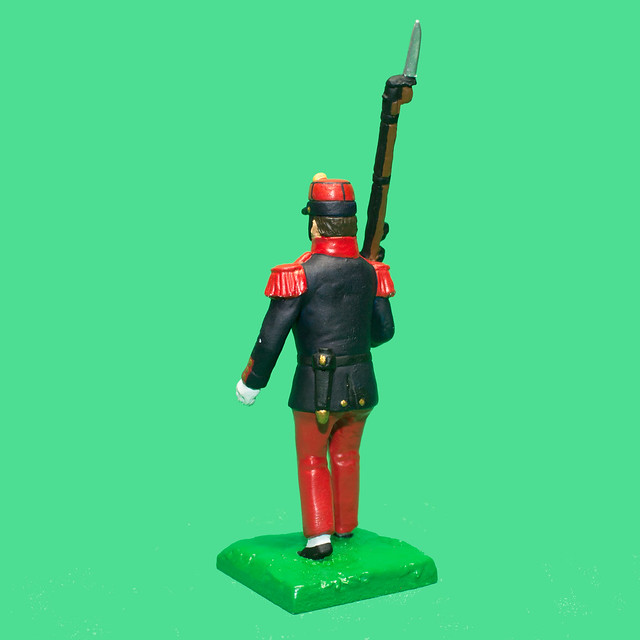
My plan is to do a small army of peg-soldiers for a tabletop game based on the Portable War-game rules. In the format I have chosen 'regiments' will be symbolic and made up of six figures in each unit (for infantry).

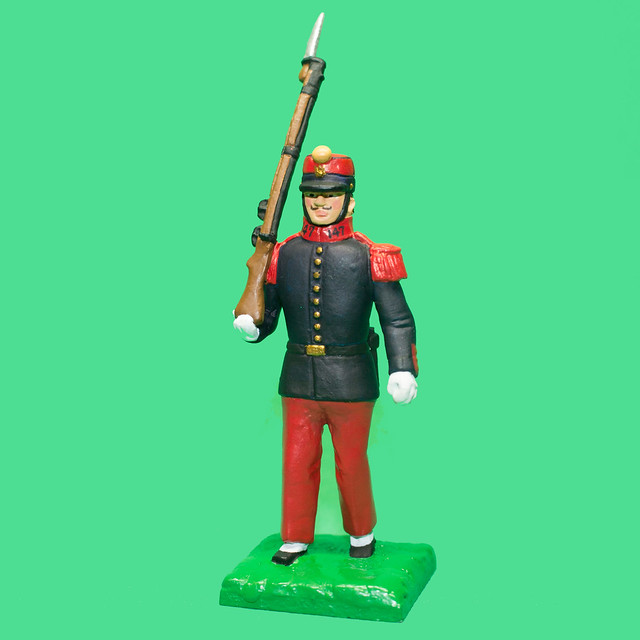
The campaign I am interested in is the 
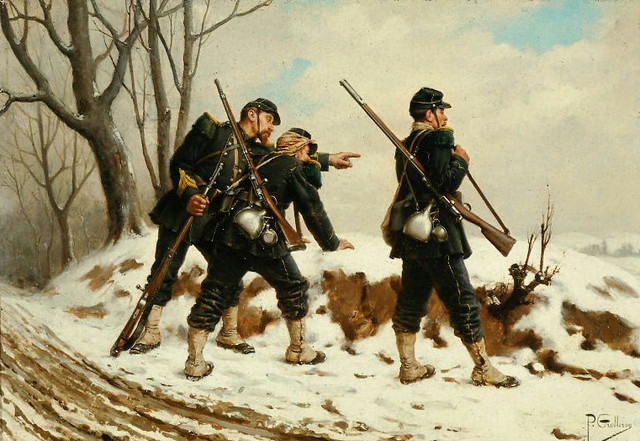
Franco-Prussian War of 1870/71, ideal Victorian 'toy soldier' inspiration. This conflict featured a plethora of colourful uniforms on both sides, particularly because (and forgive me here because I am not a historian) because at this point Germany was still a sort of confederation of allied independent kingdoms.

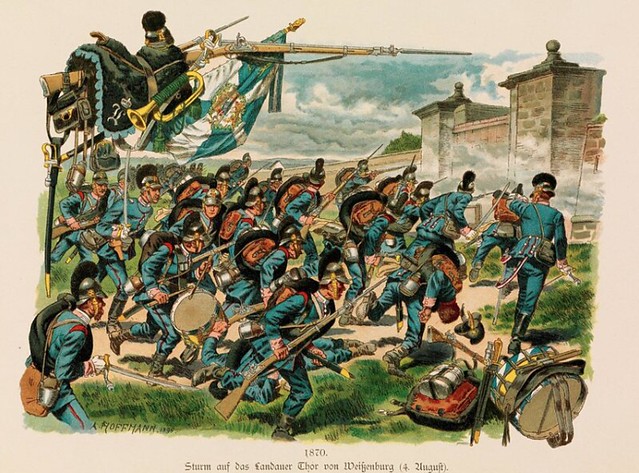
Just one of the many varied uniforms of the German Allies, here Bavarian
troops are involved in an assault at the battle of Wissembourg, 1870.

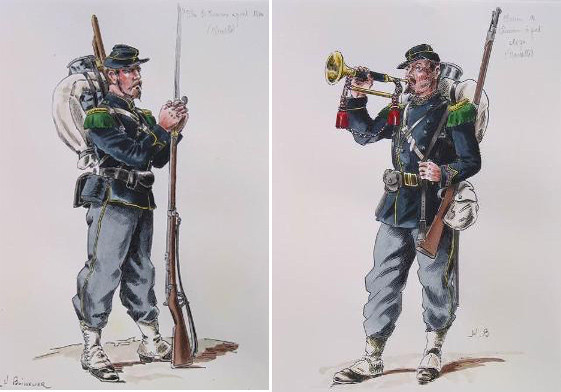
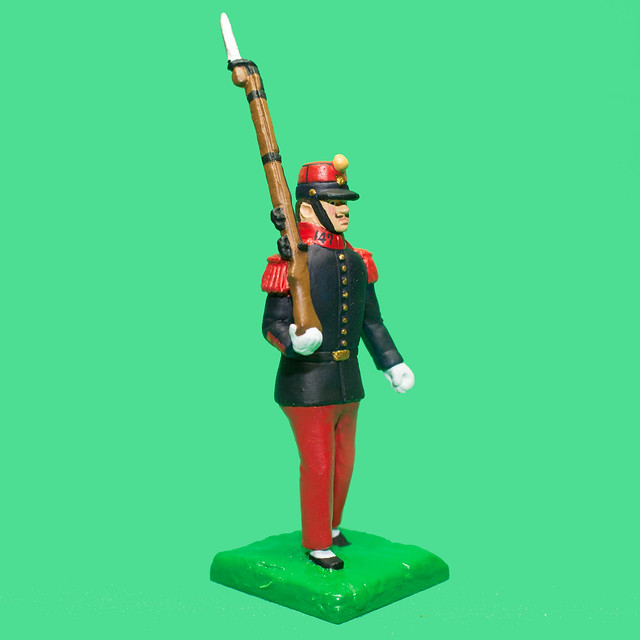
France, of course, was it's usual flamboyant self and fielded some wonderfully romantic uniforms (which had already had a big influence on the earlier American Civil War of the 1860s). But the German confederation - while perhaps a little more sober - had not quite yet succumbed to a unified and standardised 'field grey' and each minor kingdom had it's own distinctive collection of uniforms.

I hope to illustrate this diversity in a - as yet - non-unified greater Germany by including some of the less well-known troop types and not just the infamous, Pickelhaube helmeted Prussians!

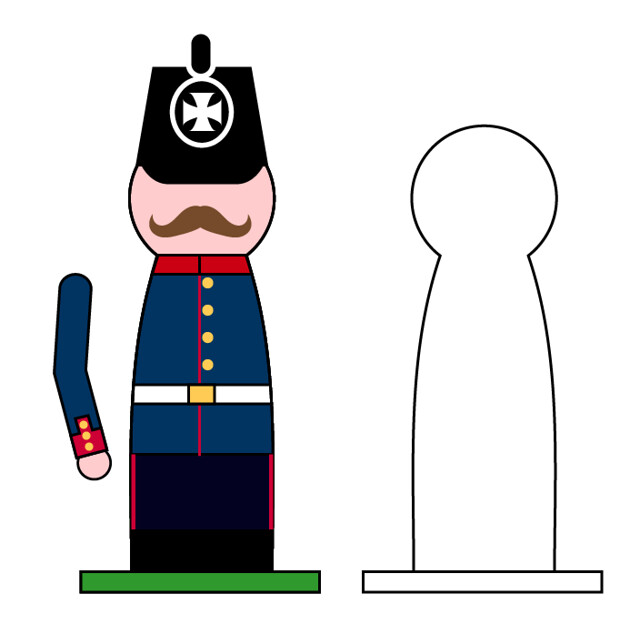
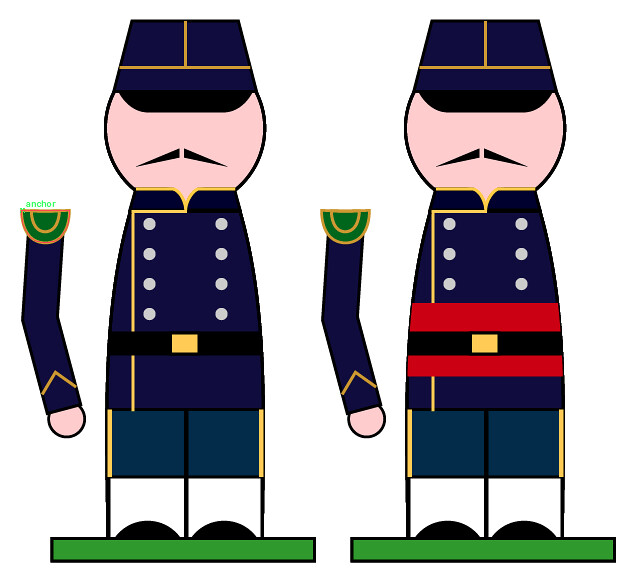
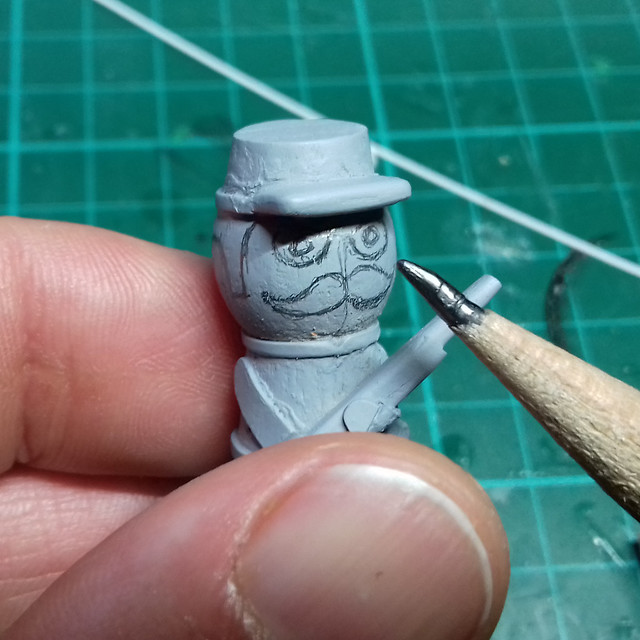
My sketch for a German infantryman (Landwehr). I've simplified the
uniform and equipment to compliment the peg format and also to
be a little more 'toy soldier' looking.

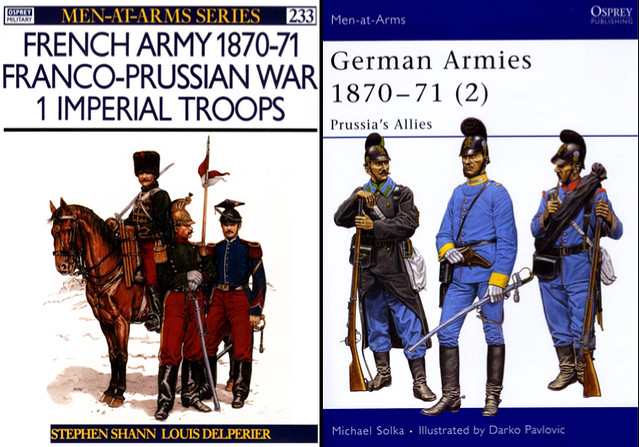
To help me along in my uniform choices I am referring to Osprey's excellent Men-at-Arms 'German Armies' 1870-71 (vols. 1 & 2) and their 'French Army 1870-71' (vols. 1 & 2).


Production Issues - Helmets
Something I've mentioned before is my worries over how to replicate the distinctive headgear. Cutting all my 'parts' from just the basic wooden peg, while satisfying in it's way, is a bit limiting, especially if you want to create more complex components. (Think about the unique German Pickelhaube helmet and you'll understand the problem...How do I cut that out of a cylindrical piece of wood?)

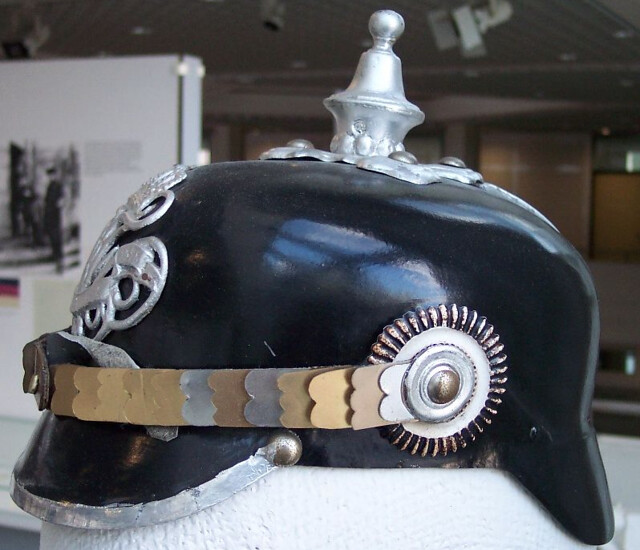
A Prussian Pickelhaube, how would I make that from a peg?

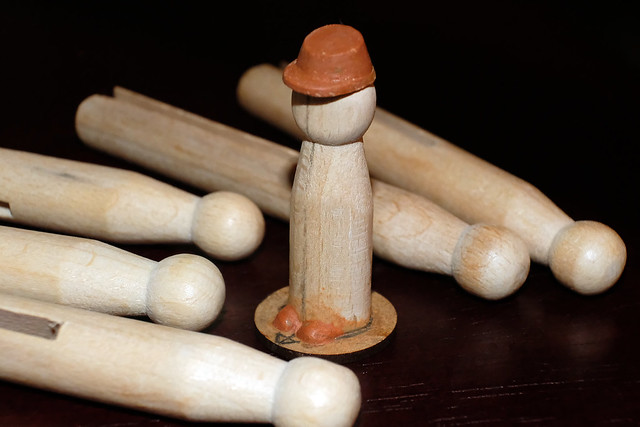
So, after a long think I decided to 'cheat' and make the headgear as composite object using as much wood as I can but then adding the tricky details using modelling putty to make a master prototype. Once done, I will them copy the design by creating mould and casting a clone in Milliput putty...Simples. (?)

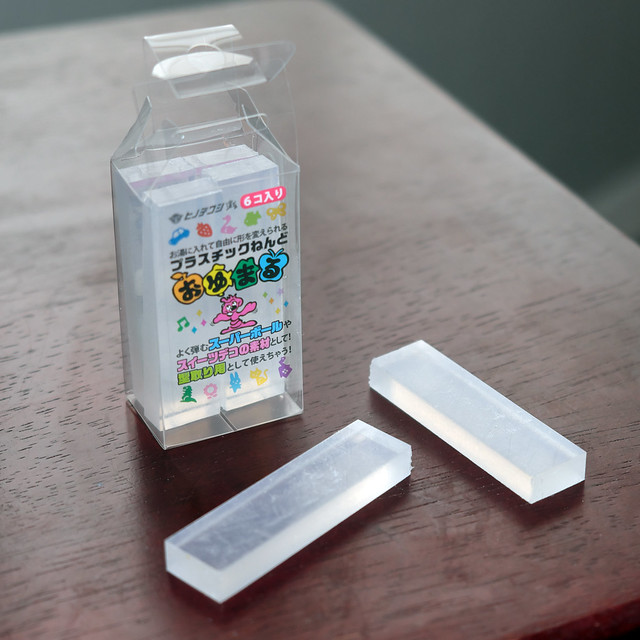
I'll be having a crack at this process using a product called 'Instant Mold' (I don't want to get into resin casting for these short run duplications.


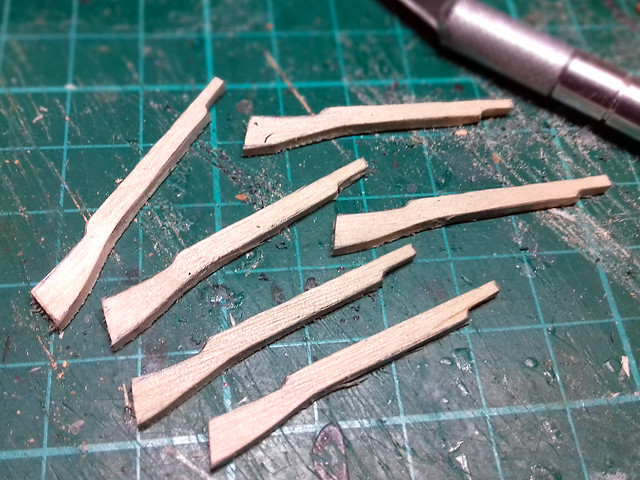
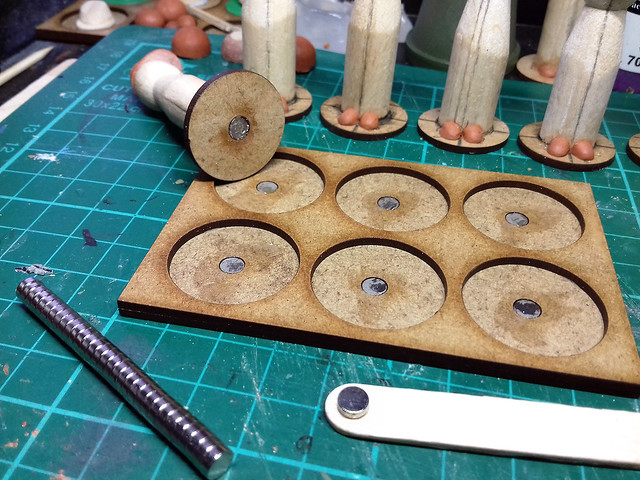
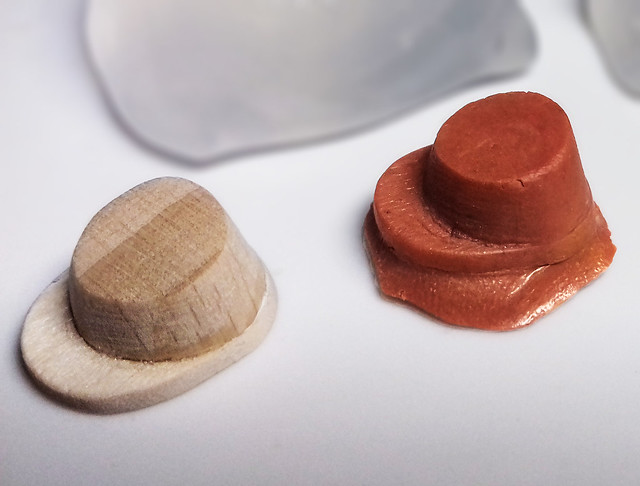
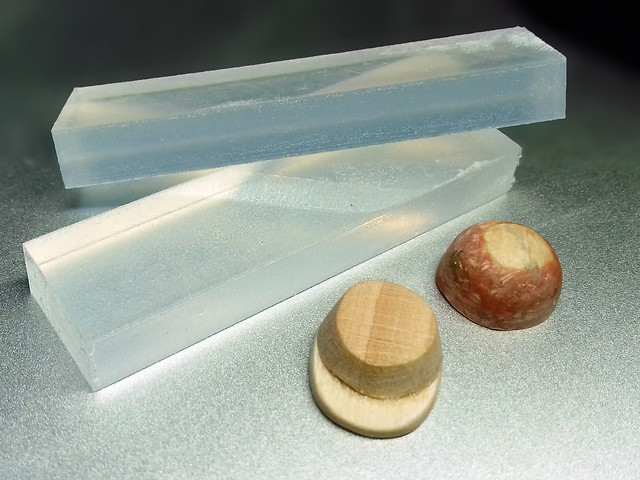
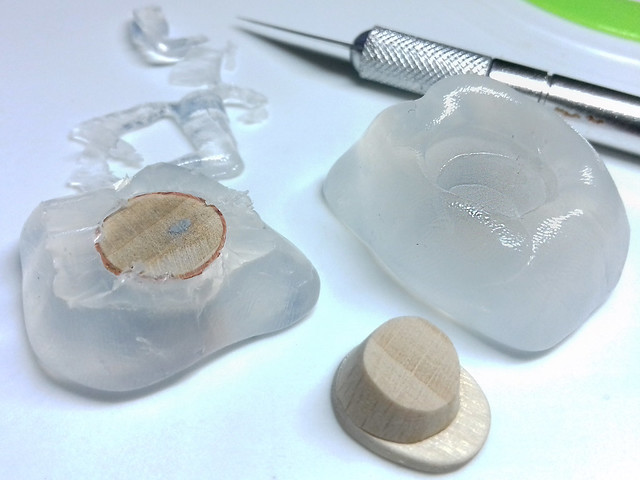
So, to begin I need some basic wooden geometric or primary shapes to start off with. I'm starting with a French Kepi and the dome for a Prussian Pickelhaube. Although the Kepi is complete and made from wood it is a bit tricky to duplicate because of the sloped and obliquely cut top, which is why I want to cast it instead. The Pickelhaube dome will be the basis for further sculpting using Milliput putty, but I want a shaped blank to start with, so I'm casting this too...


This *should* be a easy process (according to the YouTube tutorials I have watched) and should simply entail my pressing the hat shapes into the softened Instant Mold to create copies of the shapes I want to cast. Going on my experience, though, nothing is ever straight forward the first time you do it!

First issue...How many sticks of Instant Mold do I use? I guess this is the sort of knowledge that will only come with experience...I'm going to guess two...


Good guess! Turns out you need to allow a good margin of Instant Mold to surround your object (remember you are *pressing* the object into the mould material) and you have to make sure you have enough depth of Instant Mould (so you don't press the object right through the Instant Mold).

Anyway, to the process...You can measure the temperature and boil your water in a pan (or nuke it in a microwave) but I simply boiled the kettle and that seemed to suffice. The Instant Mold was dropped into the water (in a Pyrex bowl) and began to soften in the boiling water after about two to three minutes...

Mind you fingers getting the Instant Mold out the boiling water. I used a craft
knife to get it out.
Now, the trick seems to be - work fast! You need to make your mould as quick as you can while the Instant Mold is at it's softest. This ensures that you can push the Instant Mold tightly into your object, without gaps and surround the object completely...

It took me two goes as I worked too slowly the first time and it started to harden as I was moulding the Instant Mold around my objects (you live and learn)...BUT, the great thing about Instant Mold is that if you are not happy with your mould, then just pop it back into more boiling water and start gain!


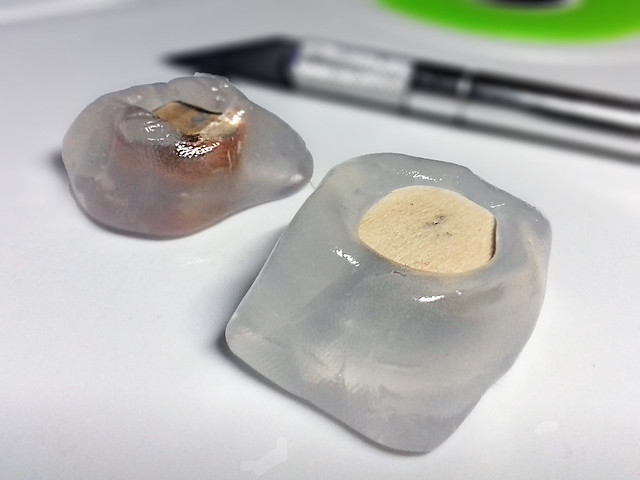
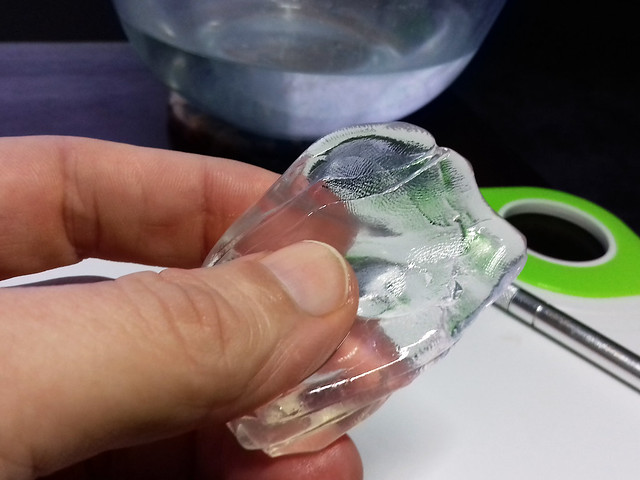
I tried to form the Instant Mold into a sort of block(ish) around the object and press it firmly against the object to ensure I get an exact clone of my original shape. Being clear helps to spot air pockets, gaps or bubble I guess. I then left the mould to cool and harden, I didn't really time this but it didn't take all that long.

One thing I tried out, though, was that I used a new craft knife blade and trimmed the hardened Instant Mold down, roughly level with the top of the Pickelhaube blank. I did this to see if I could do a neat casting exactly to the shape of my object, without too much excess that I will have to trim off later. The Kepi mould was left alone to see what would happen...


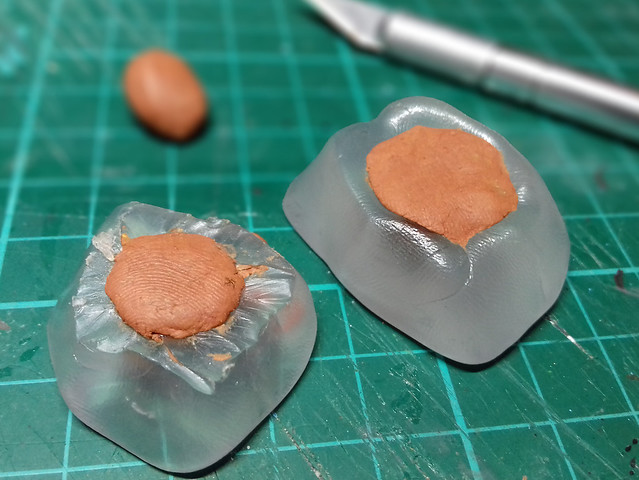
And so, finally, onto the casting stage. Again, this should be simple, I just need to press my chosen casting medium (Milliput in my case) into the mould - hopefully without air bubbles or gaps (here the transparency of Instant Mold helps gain) - and then leave the casting to dry. Milliput normally takes overnight to cure, but there are other mediums that dry a lot quicker (I'll try some of these later), but I like the final hardness of Milliput so I'm willing to wait...


Now, obviously, my mould is a very simple single-piece press mould, but Instant Mold is capable of being used to create a more advanced two-part mould. These might create a neater casting with a little less waste, but I think I might get a bit more economical in my casting with a bit of practise.

Anyway, the wait begins. So I'll end here and see how my castings work out. But it's good to get producing again.

Sunday, 4 March 2018

28mm Pawn Starts - Part 3

Painting...
As you can imagine, this is pretty straight forward and not highly intensive. Unlike other types of wargaming or figure painting there's no thought of shading or highlighting or other special effects. It's just nice blocks of flat colour, which delights the graphic designer in me!

But, even before that, there's the priming (grey for the Confederate and white for the Napoleonic) and then onto the sketching of the features...


I'm still using my normal modelling acrylics, but I'm looking at other more cost effective alternatives. Next model I do I may try furniture paint, which comes in bigger pots. But anyway, in the meantime, it's on with the small pots...


As you can see, there's a great chance to compare the 'arms versus no arms' technique for making these mini-figures. I still haven't made my mind up yet, but - obviously - the 'arms' do make a greater amount of poses viable. The 'no-arms' technique limits you a little to what you can realistically (or rather 'believably') represent without the gun just magically hanging on the body without being visibly supported by something...I'm a bit 'OCD' like that. Still, 'no-arms' is a simpler and quicker and if you have to make a 'regiment' of these figures that might be the better solution.

Back to painting...I was a bit disappointed wth the the-nibbed black Sharpie I bought, it still had trouble drawing cleanly on top of acrylic paint. I ended up outlining with a paintbrush, so back to wobbly lines again.

The Sharpie Metallic pens worked great, though, for buttons. I don't know if it's a different type of ink, but they don't seem to have any problem with the acrylic paint at all.


So...Looking at the finished figures, which do I prefer?

Well, as much as I think 'Johnny Reb' is a more dynamic and believable pose - and as much as I cringe at my wobbly line drawing - I think I like the simplicity of my little Frenchman.

This all seaways quite nicely into the next of my peg projects - the Christmas Nutcracker soldier - as the French soldier has a lot more of the techniques that I will use on my next peg figure.

One last thing, I am pleased with how the feet turned out BUT I will have t remember to mount the peg a little further back on the circular base so that the figure looks central. And of the two, I like the way I did the Frenchman's shoes better.


Thursday, 16 March 2017

A Call to Arms!

A lot of the work on my Black Hat French soldiers is cleaning up. Tedious filing and trimming of excess white metal seam lines and flash. But the fitting of parts also needs a fair amount of attention as getting the heads or limbs to sit right on the torso is a wee bit tricky (or it is with me, as I keep changing my mind about whether an arm looks straight, etc).

Ironically, Black Hat does give the arms a little nub or 'peg' of sorts (it's tiny) which would be helpful in locating the correct place to mount the arm IF they had also added a hole in the torso's shoulder for it to fit into. They didn't...So, it's down to you to decide where the arm should fit exactly...


Even when you do eventually decide that you have the arm attached just right there is still the little matter of gaps between the top of the arm and the shoulder. This has to be filled with more white Milliput putty...


After filing and sanding away at seven right arms and the seven left arms you feel like a bit of a rest (it's one of those dull repetitive jobs). I'd already been through this process with the seven heads, plus had to fill the gaps between the collar and the top of the torso so the head blended into the body correctly. More putty was needed to complete the process.

Still, once all the arms are on I just have to attach the bayonet frogs (and sword scabbard for the officer) and the jobs a good 'un! On to the priming after that!

Wednesday, 15 March 2017

Workbench Update - March 2017

Getting back into FLW Toy Soldiers has been a little more convoluted and slow going than I expected. Even before I picked up a little soldier I had to begin to reorganise the complete mess that is my 'man cave' (stroke home junk yard). But, the good news is I can actually see some carpet now, though the mountain of boxes of 'crap' I've moved to one side of the room is threatening to avalanche on top of me every time I venture upstairs!

However, I did manage to dig out a couple of hibernating projects and I have managed to make some progress with them. So, here's what's on my workbench (come TV Dinner tray) at the moment...

1890 French Infantry of the Line
I do love my little Belle Époque French soldiers - Black Hat mouldings - and I'm really pleased to get this little half-regiment back on the march again.


They are a tiny bit taxing as there is a reasonable amount of preparation work to be done on these white metal figures. The fit is a wee bit of an issue, and pitting is the other. I've had to resort to the liberal use of white Milliput putty to fill in and smooth out some of the gaps and holes. But hey, that's white metal models for you!


Faux 1900 Heavy Artillery
I also dusted off my 'poor man's Britain's Gun'. This die cast model - by Crescent - is actually a WW2 era 4.5 inch gun, but I'm modifying it to make it look more like a turn of the century piece.


The whole reason for doing this is so I can paint this gun in 1890 Molatero artillery colours (black and white). And while I already have two examples of the lovely Britain's 3.5 Naval Gun model, I do not want to desecrate either of these by painting them. (Crescent die casts are  cheap and widely available on eBay.)

I'm just working on fixing the scratch built gun shield onto the model's chassis. And then - once I know all my plastic parts fit correctly - I will remove them again and begin to strip the green paint off the metal model.

Monday, 19 October 2015

French 1905 uniform - test complete

Australia 35 - Scotland 34...If nothing else this result got me to pour my despondency into my painting! So much so that I actually completed my test painting of my Black Hat 54mm c. 1890 French Infantryman. Every cloud has a silver lining I suppose.

So here's the result (unvarnished)...


There are certain parts of my interpretation of the uniform that I am a bit unsure about - reference material of this exact period being somewhat scarce or ambiguous - but hopefully experts will find my soldier a spirited attempt.

Next I will give it a coat of varnish and then work on completing the construction of the rest of his regiment.

Postscript: About the rifle - The French rifle of the time should have been the Lebel Model 1886 rifle, which this 'toy' soldier clearly doesn't have. I suspect that Black Hat have produced a 'generic' model of a rifle which it uses for all it's late 19th century 54mm soldiers.

I think this model is based on a British Lee-Metford judging by the magazine. Perhaps I should have filed off the magazine and painted a fake receiver to make it look more like a Lebel?