[Operation Pickelhaube Part 5]
While making and painting a large selection of different peg projects at one time is interesting it does mean that everything is taking longer to do and each individual project is only progressing in small steps. So, sorry about that, it doesn't make for exciting blog posts! 😟
My Prussians are a case in point. Normally, were I *just* working on this Prussian set on it's own I would expect to have dealt with them over the course of a week or so. Sadly, my little Prussians are dragging on an on and my 'updates' are pretty lacklustre.
Ah well, anyway, here's what I've been up...
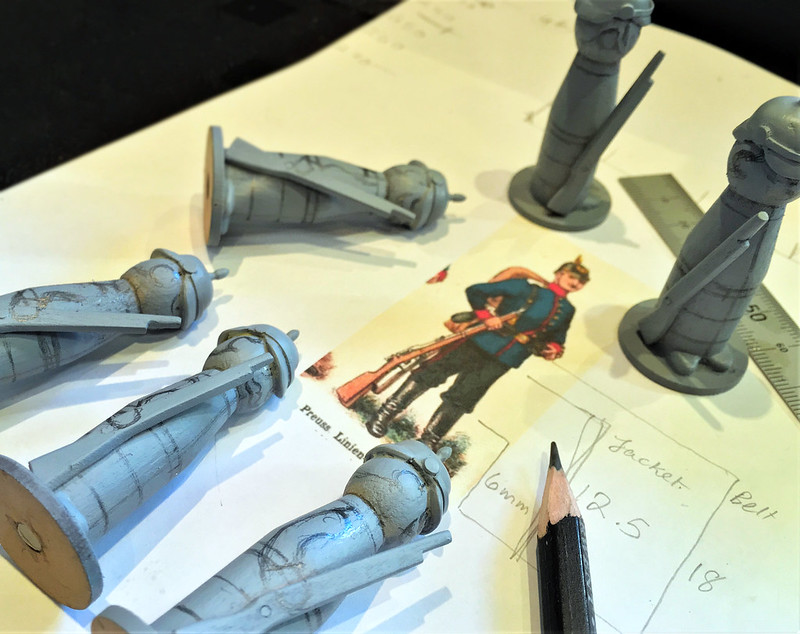
Having primed my figures I then had to decide on a uniform design - from reference - which I would replicate. Obliviously, I had a a design in mind from the start - which was the basis of my construction - but there were several colour options and even some disagreements about exact colour shades (as there always is in the world of military modelling)!
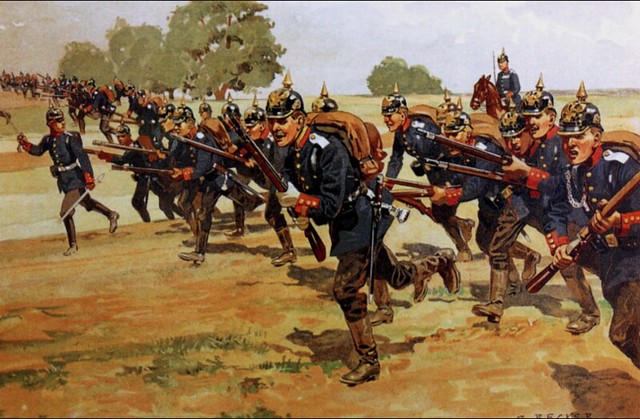
In the end, despite some doubt being voiced about the accuracy of the reference picture I chose to base my Prussian's uniform on (see middle figure bellow) I decided to use this as my template...
I have no other excuse for going for this 'look' other than I thought that it looked very smart! 😁 Although, for a brief moment I flitted with the idea of the light blue uniform ('Bavarian' according to the pictures titles) but in the end I plumped for the darker blue design.
So, let's pop some paint pots!
I always start by painting the flesh tones [using Valajo zzz] and work my way 'out'. So it's (usually something like) skin, hat and boots, trousers, then jacket, accessories (webbing and weapons) and then - finally - details like facial features and insignia...
As I have mentioned before, building up the colour areas from bottom to top gives you some latitude to clean up mistakes (like accidentally painting over into other areas). Believe me, I make a lot of mistakes and have to do plenty of touching up! 😁
About Types of Paints...
I should mention here that I am using acrylic (water based) modelling paints, because that is what I had to hand. This is OK if your peg models are for your own please of for display BUT if your are making your peg figure for use as toys for younger children then you should look into using child safe paints.
I'll be experimenting with a small range of child safe paints (like 'Painter's Touch' made by Rust-Oleum) for a test figure I will be making just to see what these type of paints are like to work with. The down side of converting to child safe painting is that I will have to purchase all new paints and it will take time - and some expense - to build up as good a range of colours that I have at the moment with my Vallejo collection. 😕
 |
| Aside from the Vallejo brand I like using Tamiya acrylics as they cover very well. But what you decide to chose may very well depend on what range is most readily available in your locale. |
As I say, if you are making peg figures for your own pleasure - as I am - then you do not have to worry so much about this. Just bear this in mind if you are thinking of giving one of your models to a young child as a gift.
The Prussian Blues...
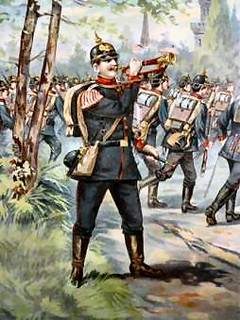
OK, moving one. Naturally the highlight of this unit's uniforms is the jacket colour - which is usually the defining recognition colour of any military unit. For the Prussians of this period we are talking [a] 'dark blue' and - indeed - Vallejo does have what it called a 'Prussian Blue' in it's range. HOWEVER, as usual, there is some debate among military modellers (as there usually is, because they like to be contrary) about what 'Prussian Blue' actually is! But, to be fair, if you look at the available reference illustrations it can varies quite a lot, as you can see in these two examples (both of which differ from the picture I am using as reference, see above)...
...From a kind of charcoal grey-blue to and deep navy blue there's a bit of a discrepancy among illustrations. Even when I referred to the usually reliable fall-back - which is Osprey's Men at Arms books ('German Armies 1870-71') - I only managed to confuse myself further with a rendition of 'Prussian Blue' which was more of a rich Royal Blue! 😖
 |
| Will the real Prussian Blue stand up, please? 😄 |
So... For the sake of my own sanity - and recognising that my soldiers are toy soldiers and not museum quality display pieces - I'm just going to use Vallejo's Dark Prussian Blue straight out the bottle! One of the advantages of doing this is that it is then easy to replicate this exact uniform colour in the future should I want to do more Prussians.
[Side note: OK, I took the easy way out BUT there is method in my madness. I had already done some preliminary research for this project and a little problem I noted straight away was that most of the uniforms of the Franco-Prussian War - French or German Confederation - were dark blue! So there is a danger of not being easily able to discern one of my model units from another on the game table. So, if I can at least moderate the range of blues a bit there will at least be some welcome variation in uniform types. Not historically accurate, but they are just pegs soldiers!]
Back to the Painting...
Working up through the layers of the uniform - repeating the process for each of the soldiers in the unit - I slowly build up a completely painted figure. It can be a little laborious, but I am just doing six figure units due to the fact that I am utilising Bob Cordery's 'Portable Wargame' rules. I can only imagine how long it would take were I to make the larger units required by other traditional wargame rules! 😫
 |
| Above: Example of the 'Portable War Game' rules in action! You can see how this small scale format is more akin to a board-game in it's use of a tile system which can fit on a dining table (though it is scale-able). Likewise, the units in use are representative, which means they include fewer numbers of individual figures standing in for large regiments. Photo credit: John's Wargame Page Blog. |
Phew! That scary thought to one side, I do find the repetitive nature of doing the same figure over and over quite relaxing. It's quite calming and takes my mind off the stresses of life - which is nice as we all go through some of the big challenges that are being thrown at us.
Beginning with the big areas I slowly move until I end up with the smallest detail and that's when things start to get tricky. These peg soldiers are of my original 'Mk. 1' style, which means most of the detail is painted on - from arms to belts and from piping, insignia and buttons - so things tend to get slower as you approach the end of the job. I usually end up painting on the face and the tricky bits like unit badges last, the cherry on the cake so to speak.
 |
| Above: I decided to go with a bluer blue for my Prussians, in line with the original reference picture I chose (see top of page). |
(This laborious amount of detail is the reason I evolved my 'Mk. 2' figures with the addition of modelled accessories and added parts. So there is less intensive painting.)
Unfortunately, I had already started this project using my original peg soldier style, so I will have to continue with that format in order to get a consistent look. I am a bit OCD like that! 😉
The moment I put that last bit of paint on is sooooo satisfying! Yay! I tend to finish off the painting process by adding the facial features of my model, it seems appropriate as the face is what gives my little peg people their character.
I should note at this point that for some of these tiny details which I add last that I tend to use acrylic-based POSCA pens the nibs of which are great for applying little dots of paint...
 |
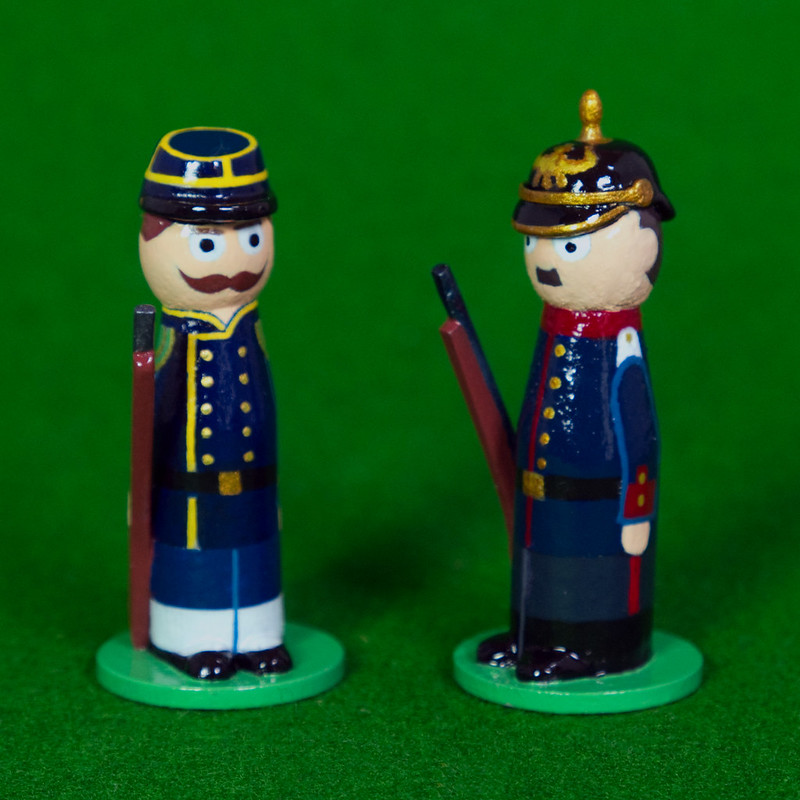
| Above: Painting of my Prussian completed and compared to a French counterpart. Both are now ready to varnish... |
But that's not the end, there are jobs like the unit base to paint as well and then there is the application of the protective coat of varnish. The unit base is painted with the same grass green as my figures mini bases, I has flirted with the idea of painting the larger unit base with national colours to make unit identification easier (or at least painting the factions flag on the base). Alternatively, I guess I could have drilled a hole and fixed a national flag in the base? But, I kinda prefer the simpler, cleaner look of plain green
Varnishing is the absolutely final job and I find this a little stressful. I use a aerosol spray lacquer and just every so often things can go a bit wrong. Over-spraying and temperature can play their part in my fears of what can go wrong at the last moment.
Over-spraying is a danger as the misconception for novices is that spraying a think coat of gloss varnish will result in a commensurately high-gloss finish. Not so, over-spraying can lead to dripping where the excess gloss can runs down the model spoiling it. Worse, than that though is when the temperature is too cold or the weather too damp (if you spray outside) and the cold and moisture can adversely affect the gloss - you can also get sputtering - and I have had a couple of models end up with the varnish discolouring with a cloudy sheen.
So, varnishing must be done with care, patience and preparation. If you chose to spray on your varnish it should be done in a clean area of moderate temperature (preferable well ventilated). The coat should be applied in multiple light coats and not in one thick one. Spray a light coat and wait and then only apply another if you feel you need to.
Above all let your varnish dry (cure) properly. This may take up to a few days!
Cover your model after spraying to avoid dust settling on the wet varnish. There is nothing worse than having done a careful job making and painting your figure than getting a speck of dust right in the middle of a light area (so it's really obvious). I usually place my freshly varnished models under a box or clear food dome of some kind.
[I am currently planning to experiment with painting on my varnish coats rather than spraying. There are pros and cons to this change in my method of application.]
In Conclusion...
Well, that's the (my) painting process. I'm definitely not say this is 'the' way to paint your models as you have to develop your own painting strategy, but this is what is working for me at the moment.
Link: See the complete series of 'Operation Pickelhaube' project posts.

