Tuesday 30 June 2020

The Good, The Bad & The Ugly

Sometimes creative projects don't turn out how you imagined they would and sometimes a project becomes somewhat unstoppable even though you ca see it's going wrong...So you just have to finish it and learn from the experience.

This was the story of my latest peg soldier...


What I was trying to do was try out a few different ways of making a peg soldier - I tried out a new way of adding the figures arms and it's feet and it's equipment. The choice of uniform for this figure was completely incidental but I happen to love the 1989 movie 'Glory', with Matthew Broderick, Denzel Washington, Morgan Freeman, et al.


Set during the American Civil War, it's a story about the 54th Massachusetts Infantry Regiment, one of the first all-black regiments in the Union Army. It made a great impression me, not least because of some superb acting , which in turn made me into a big fan of Denzel Washington!

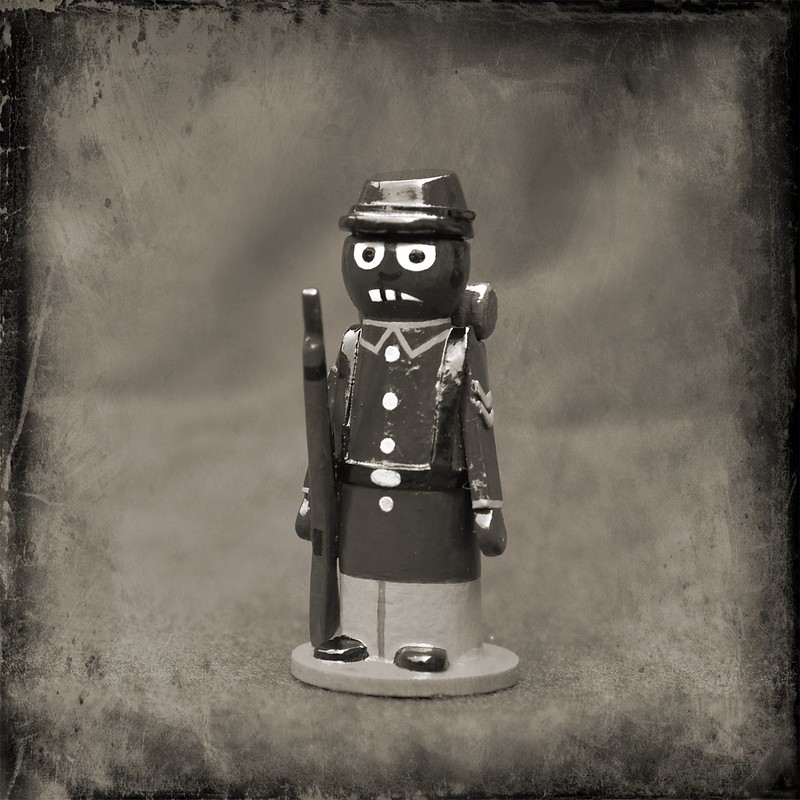
So, I wanted to honour the 54th by painting my peg figure in the uniform of the regiment...And that's when things started to go a bit pear shaped...


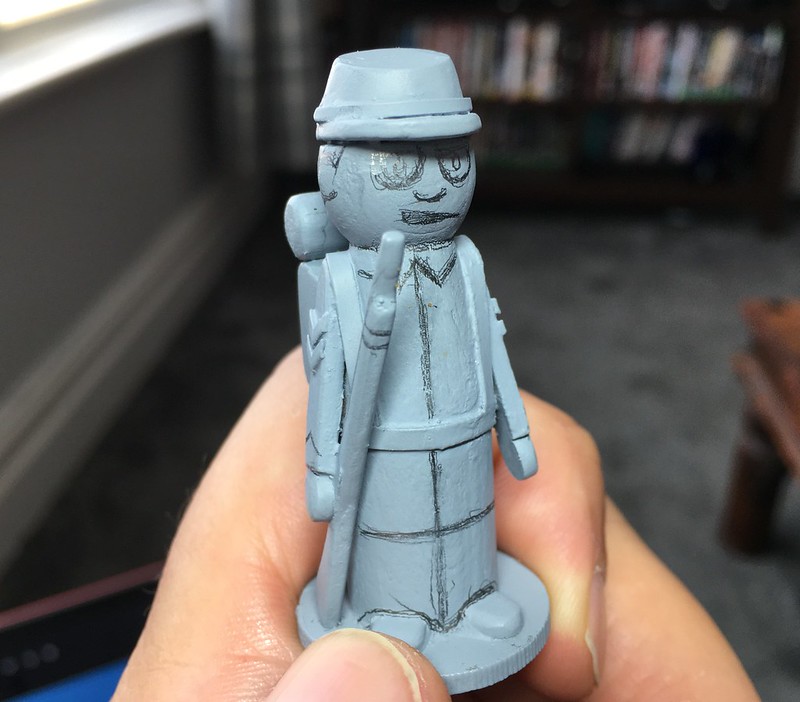
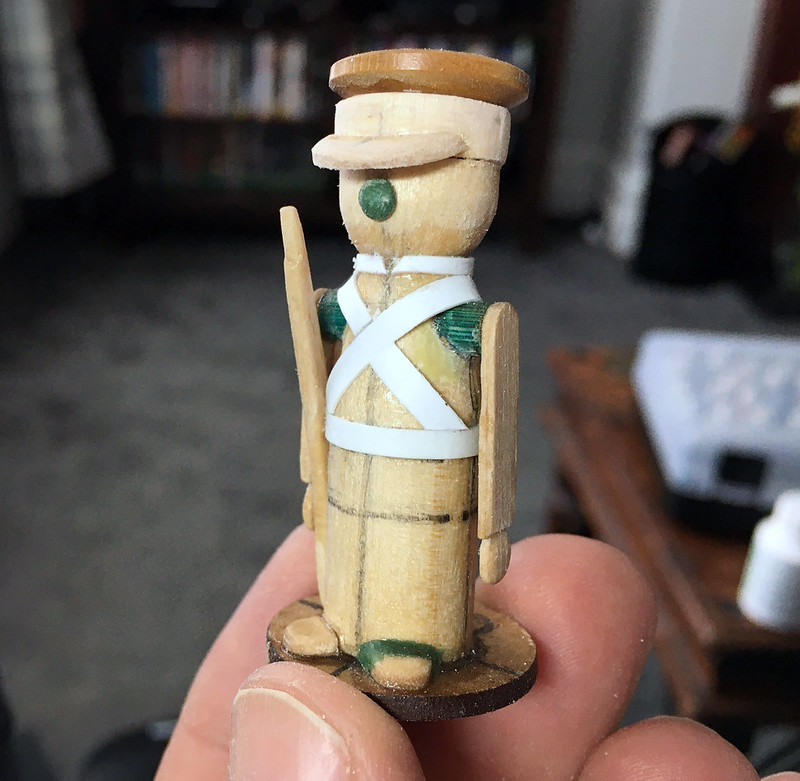
I did things pretty much the way I've done most of my peg soldiers so far, a caricature figure in the style of a children's toy soldier. Everything came together quite easily until I started painting the face. It followed the same pattern as I had done numerous times before, all except that - for the first time - I was painting an African-American face.


As the face started to take shape I began to feel a little uneasy, but as I inherently lack self-confidence about my work I put it down to creative nerves, so I continued on hoping to simply work through my 'normal' jitters...


So often in my creative experience I have never been quite sure about whether a project is 'working out' right up until I put the last stroke of the pencil, piece of sculpture or lick of paint to the work. This is how it was with this little soldier, I wasn't absolutely sure about what was wrong with it until I finished it...


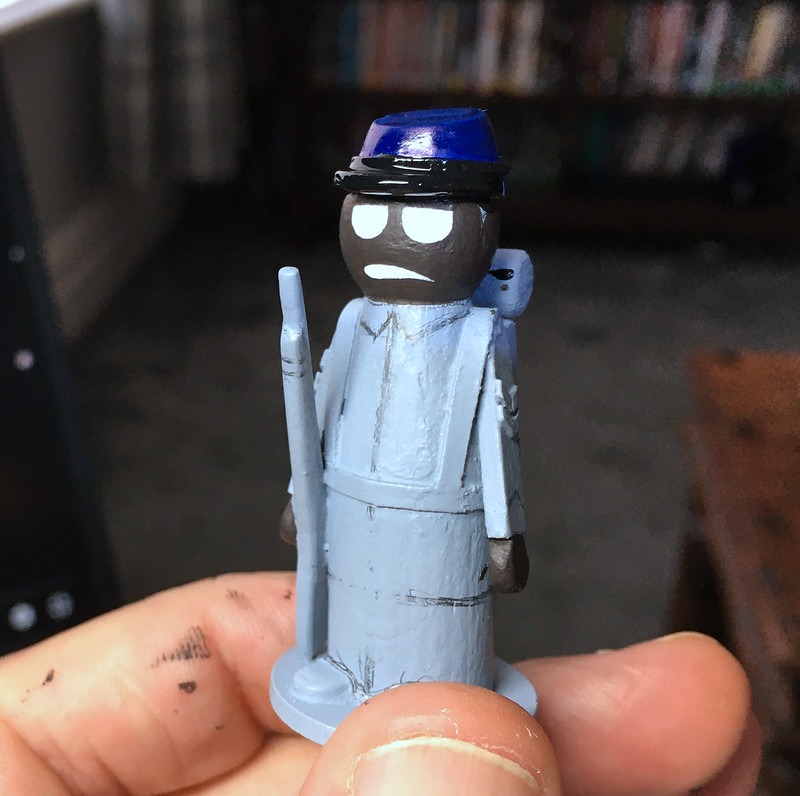
You would think that in the current climate of BLACK LIVES MATTER that I would have been a tad more sensitive to the inappropriate use of racial stereotypes. I'm afraid, despite the fact that my figure was simply following the format established by my previous peg soldiers and their 'cartoon' features applying a 'black face' to my model made a strikingly insensitive and historically derogatory look.

That's the UGLY truth... Lesson learned.

So, that out the way, what was the GOOD and the BAD of this model?
Moving back to the technical aspect of the model there are a few other things that I'm still not happy with. Still concerning the facial features - but from a different perspective - I am finding that the painted on nose in't working for me, particularly when looked at in profile.

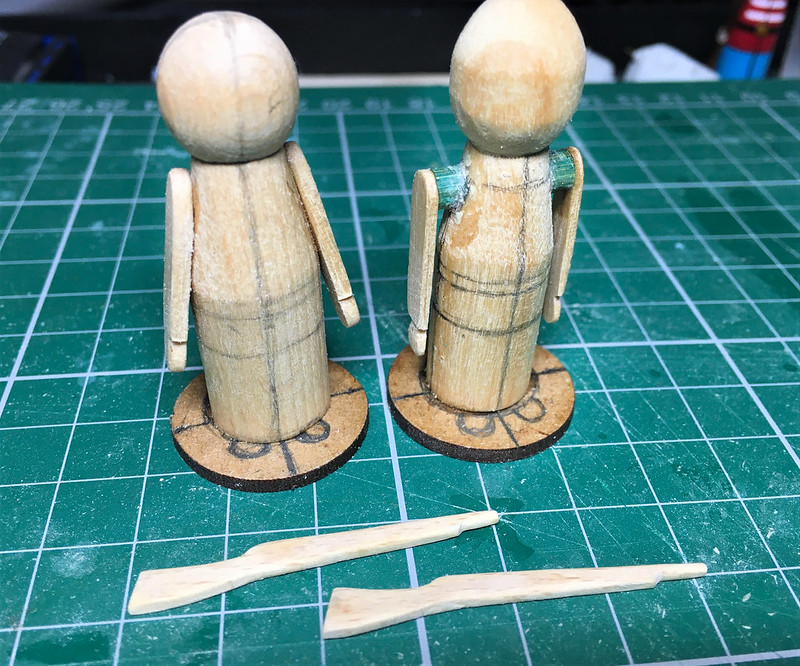
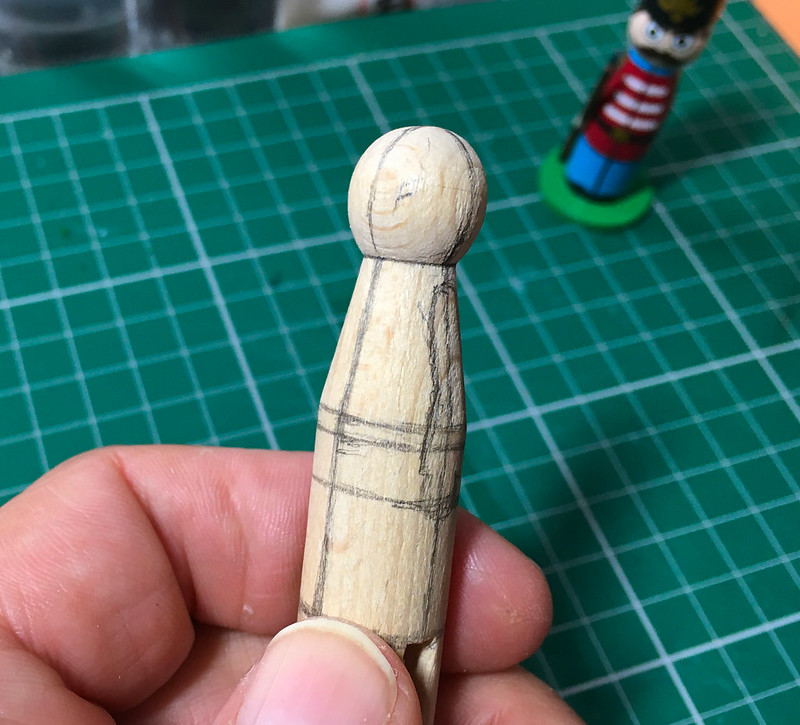
Additionally, I'm starting to question whether the simplified 'legs' - or lack of them - is the way to go. A simple painted line to indicate the separation of the legs is perhaps a little too simple...Maybe?

I'll try some alternative solutions for these BAD (?) aspects to my models...

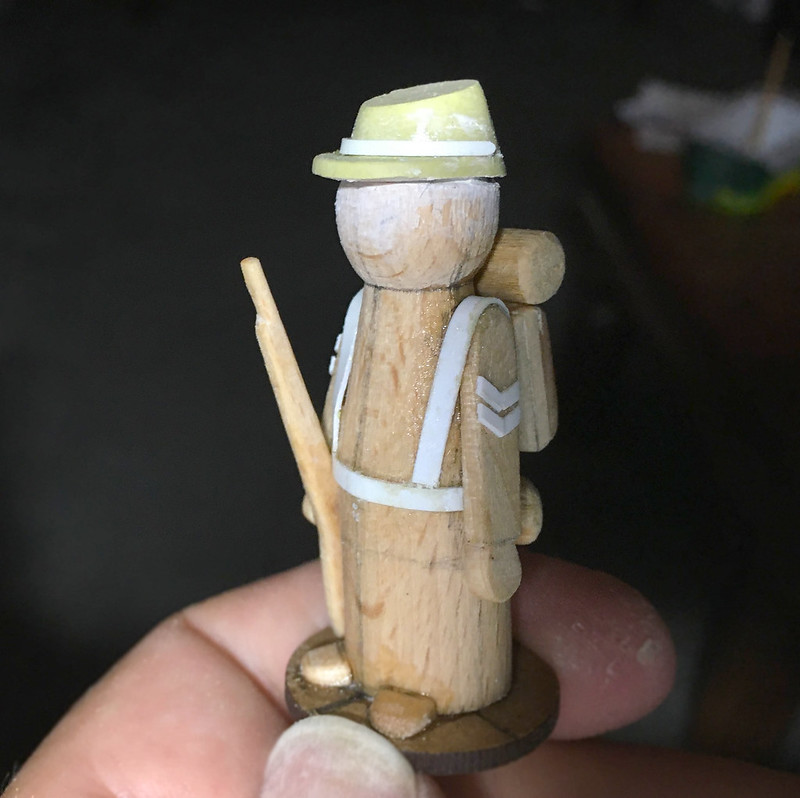
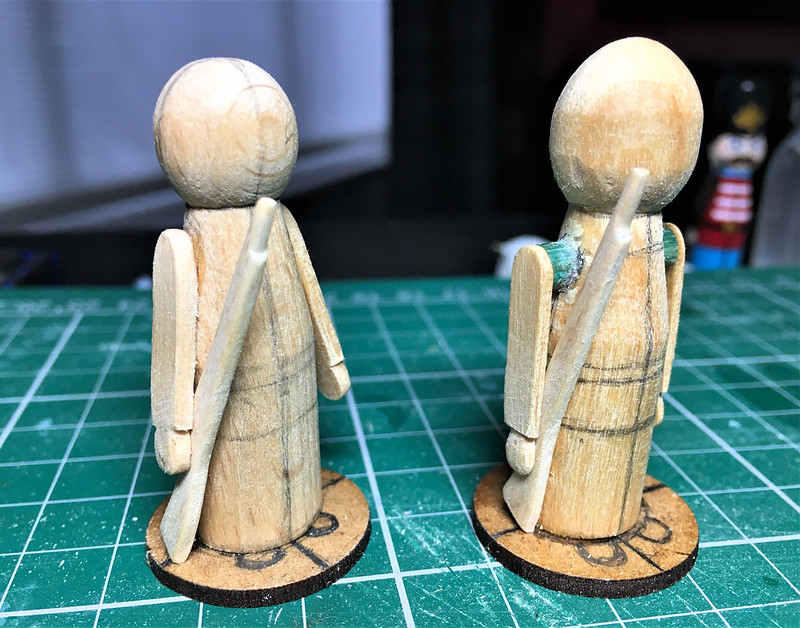
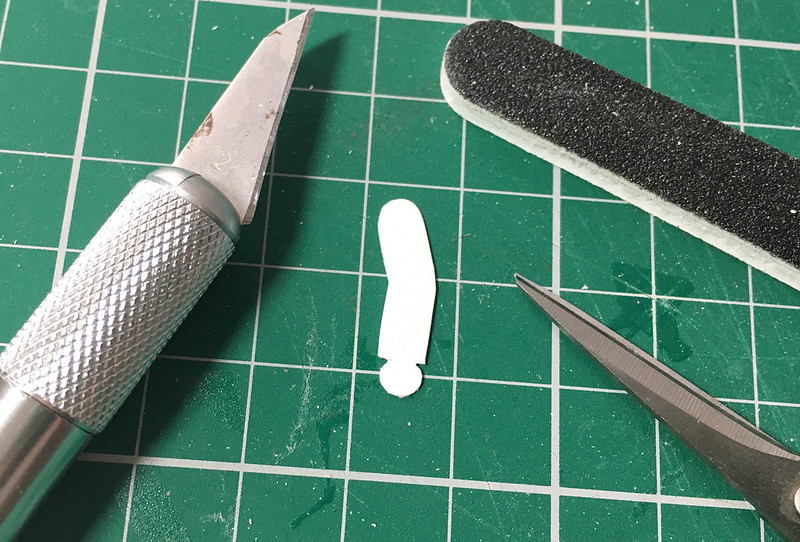
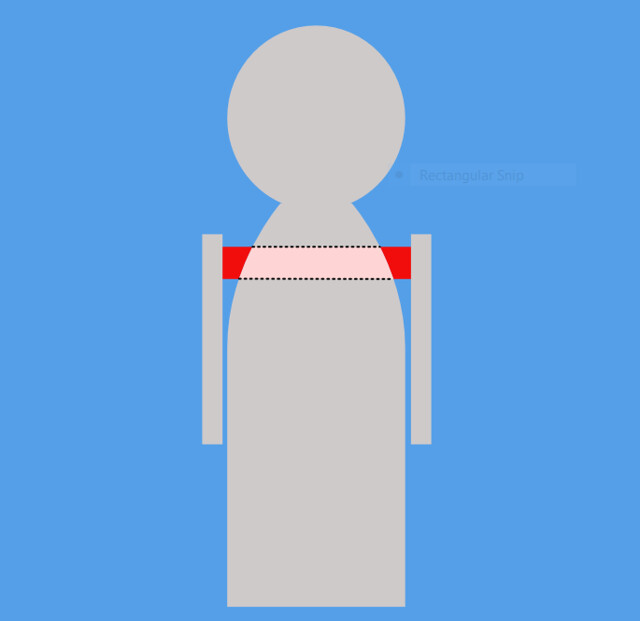
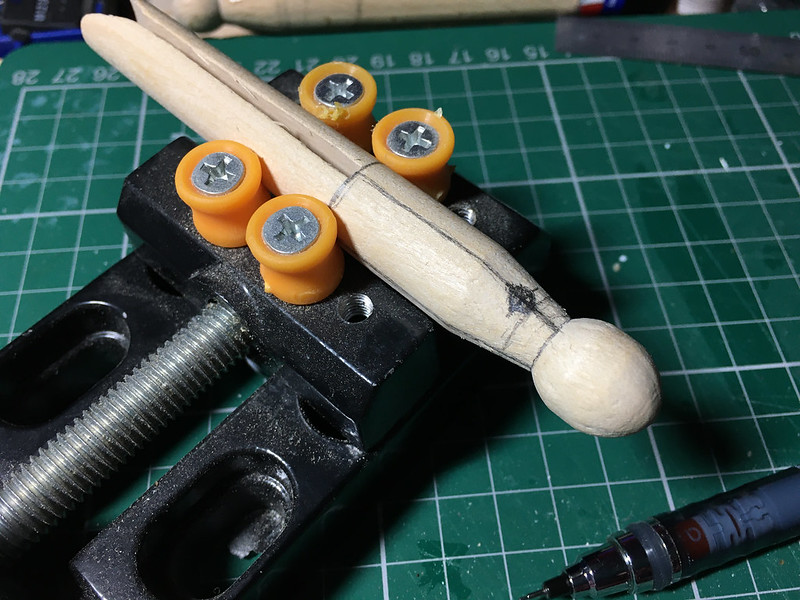
Moving on to the positive, the GOOD bits of this iteration of my peg soldiers must be the new way I am doing the arms and the new simplified feet. I know this all seems trivial but I'm trying to improve my peg models to the point they are easier to put together than my earliest versions and yet still remain - substantially - as attractive.

...And so, on to my next experiment!

Saturday 27 June 2020

Peg Figure Experiment - Part 4

Moving on with my peg soldier experiments, Figure 1 (ACW Union soldier) is progressing well and I should have a reveal of it up in the next few days - while Figure 2 is definitely starting to take shape.

Before I show you how Fig. 2 is looking I suppose I better introduce you to a bit of reference material that I collected for these experiments...


I've been 'reading' (listening to) Douglas C. McChristian's audiobook 'Regular Army O!: Soldiering on the Western Frontier, 1865 - 1891', an wonderfully evocative insight into the Western period US Army. This got me interested in the evolution of the US soldier and so I decided that when I am making peg prototypes I would take the opportunity to produce some of the uniforms showing the American soldier throughout history. And so...


This is my take on an American infantryman from the Mexican War (1846-48). It's an interesting uniform that I *think* I vaguely remember from the movie 'The Alamo' (possibly)? This was an exceedingly engaging period as - along with the 1812 War - it gives you a bit of an insight as to how the American Army was comparable to European ones during the Napoleonic influenced period of military history.

U.S. Army full dress and campaign uniforms, 1835-1851.
Anyway, nearly finished the construction, just some equipment to attach and then it's ready for priming and painting.

Sunday 21 June 2020

Peg Figure Experiment - Part 3

Quick Sunday night update on the peg figure experiments...

I'll be completing the two prototypes one at a time, so let's get on with the first - 'The Yankee'.

There were a few things I wanted to try out, in particular a quicker and easier way to do the feet. I also wanted to try adding more details like belts and other equipment, but also wanted to try different materials to make the extras, like styrene for any thin or flexible parts and small wood pieces for larger items. (The difference being that in my early peg soldiers I painted on these features.)


It will be interesting to see just how quicker this make the painting process now I have less fiddly outline painting. Even small things like doing the rank stripes as raised stripes means I don't have to painstakingly and carefully paint nice neat lines on, a big time saver (not to mention the reduced strain on my poor old eyes).

Just how far I go with adding the 'extras' in the future I'm unsure...Though I don't want to go too mad as - otherwise - I might as well just make 'normal' model soldiers! So, getting the balance between simplicity and attractive levels of detail will take some working out.

Next: Painting my Union Soldier.

Saturday 20 June 2020

Peg Figure Experiment - Part 2.5

Just a little Saturday morning tinkering... And today I'm making hats!

I'm using my little press-moulds and Milliput (my favourite modelling putty) to knock out a few little hats/helmets...


The moulds themselves are made using perhaps the simplest moulding technique, 'press-moulding' is exactly what it sounds like in that you press your original into the soft mould material ('Oyumaru Instant Mold') and when it hardens you stuff your putty material in to make your copy. Phew!

Obviously, the usefulness of this type of moulding is a little limited and is only suitable for less complex objects. But it does me fine, I may look into proper resin casting at some point in the future.

Once the moulded copy has hardened you just pop it out the casting material and you have a hat (or whatever)!


There is a bit of finishing off to do to get rid of any excess 'flash' but it's a handy little time saver. I know, this means part of my 'wooden figure' isn't wood, but I make this compromise considering the odd shapes of hats and how long it would take to carve out a little regiment of the bleeders! 😄

Incidentally, the hatted figure sort of gives you a clue to what period/uniform I have chosen for this little chap. But I'll be doing the 'reveal' of my choices in my next post.

Wednesday 17 June 2020

Peg Figure Experiment - Part 2

Starting to get into my modelling flow again. Carrying on my peg figure experiments - where I am playing with new ideas for adding additional features - I have made a pair of lolly-stick arms for my third prototype figure...


As you can see from the picture I have carved out a pair of little hands. This is something new I am trying out - the way I see it, the more features actually carved into the wood itself the less I have to carefully paint, thus saving time.

Next I attached the arms to the 'shoulder joints' with just Super Glue, as these are just tests I decided not to drill and pin these on...


I can't decide... Do these look a bit odd - maybe it's because the arms are flat. There again these are supposed to be toy soldiers. I'll leave judgement until the figure is fully painted.

To put the arms into context I made a couple of little wooden rifles out of more lolly-stick (actually, I think these were coffee stirrers). The whole idea of attaching the 'arms' with a gap between them and the body is so I could insert rifles in-between them in a 'port arms' pose...


I really enjoyed making the rifles (or muskets) and I did contemplate doing them with bayonets but I'm not sure how fragile this might make them (I will have to do some tests). Again, I will just glue these on but will drill and pin them on future finished models...


So, there we go. Things are starting to look good, and the separate arm version (figure No. 3) looks better for having the rifle added. It makes sense of the arms being separated from the body in the way they are now. And looking at it, the elongated shoulders will be great for adding epaulettes!

OK, I'll crack on with adding some smaller details and then onto the big decision - what uniforms to paint these figures with?

Sunday 14 June 2020

Ponderously Slow Restart!

Wow, it's taking some time to get myself going again! It's not so much nervousness or being a bit lost after such a long time away from the hobby, it's more simple technicalities - like not being able to find half my tools or some of my tools and materials still being under a pile of junk! 😁

Anyroads... I have made a start! The current experiment (I won't call it a project as I'm not sure if it will go through to the painted stage yet) is mucking about with new ways to put together my wooden peg figures... And incidentally, I should say that I haven't completely abandoned plastic or metal figures - every so often I will bang out some of them if the mood takes me... BUT...

I have clearly found, in peg figures, a style that I can really call my own and that suits my peculiar sense of humour and aesthetics. So, this blog will mainly be covering my journey in the wacky world of wooden toy soldiers.

Wassup! OK, this...
My first thought was to add accessories and limbs using styrene strips. This was because styrene is so easy to work with AND it's flexible enough to form over shaped profiles. I can wrap styrene strips around objects to make belts and collars and if I cut out an arm shape...


Styrene does work very well BUT I kinda feel a bit uncomfortable straying from my original idea that these figures would be 'all wood' (as far as I can). Therefore, I started playing about with other ideas using bits of lolly sticks - this was my Mk. II design...


Not so flexible, but that's OK as I guess it looks 'toy soldierish' just hanging off the side of the figure like that. Obviously, I can't make things like belts and collars BUT I had a thought and think that inscribing, carving and wood-turning on a small lathe may be the way to go to add some of the detail on the body of the figure.


Out on a Limb...
I was umming and ahhring about the odd angle of the arms because of the flared shape of the peg 'body' and wondered if there was anything I could do when my sister (or all people) gave me a good idea. 'What about drilling a hole through the body, running a rod through it and hanging the arms off that?' 👉


Luckily, my Dremmel drill press is one of the tools that I have unearthed from my man cave junk pile. So, let's do a little drilling shall we? 😃 First of all, let's try and make an accurate job of this...


Having drilled through a pilot hole - checking it had cone through level and come out on the other side at the right point - I then changed to a thicker drill bit to crate the hole through which I will thread my dowel...


This might be a bit on the thick side, but this is an experiment and I'll change the drill diameter for the final version of these figures IF the idea works out OK.

I pushed the dowel rod I had - some spare garden cane - and it was a fairly decent fit, though I might have to use some wood filler. I'll make sure to get the exact sized wood dowl to match the drill bit the next time...


I just need to cut down the dowl before I attach my lolly-stick arms. Do I use some pins to secure them in place or will glue be enough? We shall see.

OK, I'll end things there for now. Next time I will be fitting the arms. 

Sunday 7 June 2020

Sunday's Bits and Bobs

Well, as you can tell, I'm not quite fully active yet with my toy soldier hobby. Unfortunately, I am still sorting out my attic hobby room and so haven't found all my tools, cleared my desks or unboxed all my crafting materials, etc. It's a slow process, but I'm getting there (so, eventually, you will start seeing figures being produced again, honest, bear with me).

Today I am prepping some materials for the two 'refresher' projects I mentioned in a previous post; the figure test where I am experimenting with additional accessories and the little peg plane.

First thing I wanted to show you is a little thing I mentioned in my 'How to make peg soldiers' video and that is how dolly pegs can vary slightly in shape from one manufacturer to another...


The above example illustrates perfectly the minor variations in 'head' shapes, which is rather nice as it means you can give your figures a little character. I know this isn't a 'biggy' (literally) BUT it' something you should be aware of, particularly is you are the OCD type who likes his regiments perfectly uniform. If that is the case, ensure you source all your pegs from the same company before you start your project.


The plane is a slightly different kettle of fish as I decided I wanted a slightly larger diameter fuselage that the normal wooden peg would allow I am using some wooden dowel instead...


Here (above) you can see how I am sketching out the shape of my plane's fuselage - this will be a 1930s style monoplane fighter slightly similar to the American Boeing P-26 Peashooter - before sanding the final configuration using my orbital sander.


So I will be quite busy today with my little fret-saw and bits of lolly-sticks and what-not as I play with ideas on how to put these projects together. These will be kinda made-up as I go along sorta things as I want to experiment with several new ideas that I've had so they may take some time - with some re-dos - before they take shape. Hope you are patient! 😊

Finally, just a nice little find at a local store (one of the few that is open at the moment due to lock-down), I came across these little 'wooden dots'...


These are really great and I will be using these to add some decorative accessories to my figures and models. I guess I could make these myself - by cutting and sanding thin dowel - but for £1.50 the convenience out-weighs the cost saving (at least while I am experimenting).

Sorry this is such a hum-drum update that isn't very exciting, but I like to record my progress in case I loose track of what I was thinking... Believe me, this happens a lot! 😂

Monday 1 June 2020

So, What Next?

My main activity at the moment is unearthing my modelling equipment and old projects from under all the junk that has built up in my attic 'man cave' over the past two years!

Unfortunately, it seems like my toy soldier projects are right at the back of my mountain of crap! 😂

So, in the meantime, a lot of my Molatero work is just sorting and planning. That said, I do have a couple of actual crafting idea I would like to get on with as soon as possible...

The first is another little plane. Having done a couple of bi-planes I would love to do an early 1930s period 'racer' monoplane.I think that would look quite cool (excuse my dodgy doodles)...


Next, I want to experiment a bit with doing a peg figure that has arms. So far I have mainly painted on my peg soldier's arms, so I'd like to see what I can do with some pieces of lolly sticks just to make my figures a little more 3D...


I have done one pair of figures that had appendages, my two mini-peg figures and they had 'hands' of sorts...

My 'minis' compared to my usual 50mm peg soldier. I tried out making some
rudimentary hands out of craft foam with these so I could make different poses.
Actually, I forgot that I had also tried out using small beads to make some
simple hands with my D&D figures, but the arms are still just painted on.
So it would be interesting to follow this development of my technique and see what the bigger versions would look like and what pros and cons there are to adding arms.

And finally, still thinking along the lines of my little planes, I'd also like to explore a third peg scale. That is what I am calling my 'bead scale', as you will note that the little pilots of my bi-planes where simply small wooden beads.

What would a complete bead-soldier look like? 😆

Yeah, pretty tiny, but I'm curious - I'd also like to do more vehicles using the 'bead scale'. I have already done my little racing cars, but I'd like to use the same general technique to do some military vehicles as well.

What about a armoured car or tank in this 'bead scale'? Hmmmm?
So, there you go, actually several ideas there (not just two as I originally thought). HOWEVER, the one caveat is me being able to clear enough space on my work bench so I can use my power tool, particularly my fret saw and my circular sander.


Watch this space!