Saturday 29 August 2020

Let's talk about the 'C' word - Christmas!

 I can almost hear some of you groaning, but hear me out...


This year - due to tight finances - I am making several gifts for my family and friends. Now, those of you who follow my blog (all two of you LOL) will know that I am NOT the fastest maker of models AND I easily get distracted by other things! 😆

...SO, in fact, starting to think about Christmas now is not too early. It actually might be a bit late considering what I have planned.

Now, the reason I include this subject on this blog is that my gifts have a toy soldier related theme as I want to make some mini versions of German traditional nutcrackers!

Funnily enough, making mini peg versions of these popular festive ornaments is exactly how I got into the whole peg soldier making in the first place...


I followed an online tutorial for this prototype - you can find the instructions over at Kate's Creative Space - and although it turned out OK there were a couple of things I wasn't happy with.

First of all, the flock 'hair' was a pain in the ass. No matter how well you try to glue it down it molts and I reckon that eventually the poor old soldier will go bald! 😂 Also, I wasn't altogether enamoured with the hanging and/or standing methods (the standing 'ring' came from a special craft set specifically intended to allow you to make free-standing peg ornaments).

Back to the Drawing Board - My Mk. II Nutcrackers

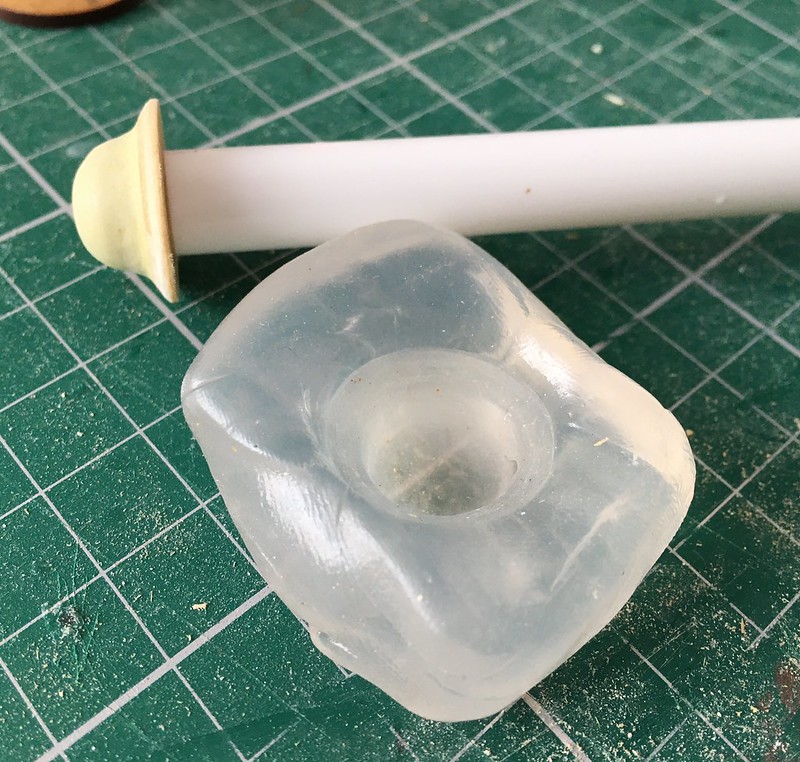
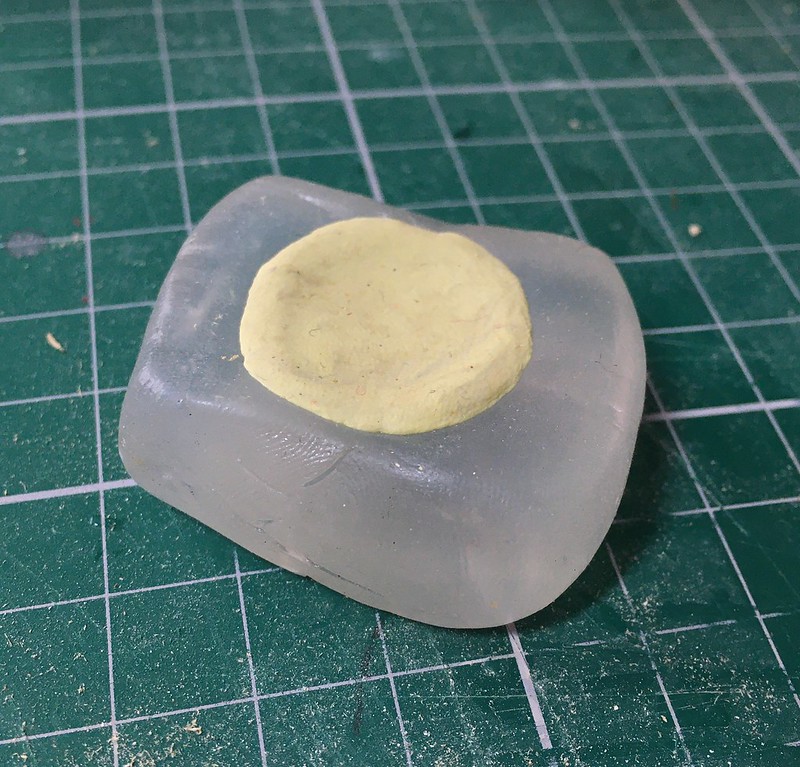
I've had plenty of time to mull over how to make a better mini nutcracker, especially as I have been learning a lot over the year making all my experimental peg soldiers.

The main change I made in my construction was to sculpt the 'hair' using Milliput putty, in this way I was able to create specific hair-dos to suit the kind of soldier I was making (or period of uniform). My nutcrackers are mainly 18th century inspired so there's a lot of powdered wigs with pony-tails! 😁

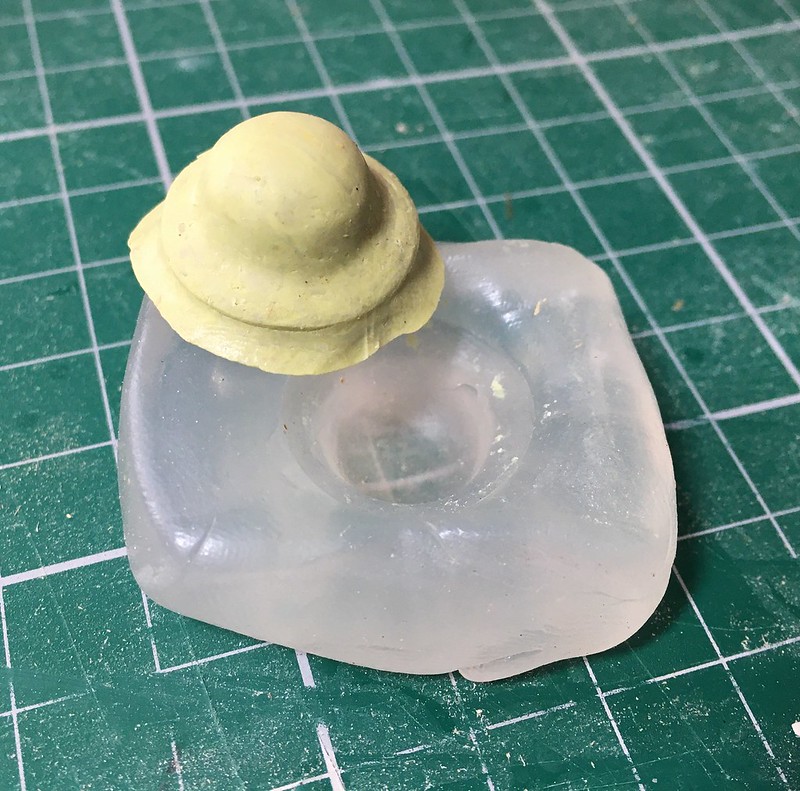
The next thing I changed was the simple hat design, one thing I have really enjoyed making for my experimental figures was ever increasingly complex hat designs. So, I've gone a wee bit mad and created some 'interesting' military headgear for my new nutcrackers...

Above: A Guardsman Officer and a Jaeger (huntsman)

Above: A King and a Pirate... Yarrrr!

Above: The French Old Guard? :)

As you can see, there quite a variety here ALTHOUGH the wife spoilt my fun a bit by saying 'well, they aren't very Chrismassy though are they?'. 😑 So I guess I'll be adding a couple of extras (a Santa and a snowman maybe), this way I can make two sets of four which I can box up as nice ornamental gift sets for both my daughters.

Anyway, aside from these big changes to the original prototype design I also decided to add a smaller modification which I hope makes them all the more charming and 'toy soldier'-like... A nose!

This is just a simple wooden rod made from a section of cocktail stick, but I think it makes a big difference and is a nice improvement. 😊

And that's it for now, except - on a non-soldier related note - that among the other gifts I am crafting are some other festive peg figures for Christmas tree ornaments. In this case I'm making a set of Christmas angels and (for some reason) fairies!

Monday 24 August 2020

July/August's Experiments Primed

The latest batch of experimental peg figures have been primed, ready to paint...


There's been some very interesting lessons learnt regarding construction techniques which I will be applying to future peg soldiers.

One of the things that this has got me wanting to try out is - finally back on topic - a unit of Molatero infantry! ...Now I've figured out a style of toy soldier that really suits my humour and style. 👍😅

Wednesday 19 August 2020

Dad's Army Characters WiP

 Finished work on the construction of my next batch of peg soldiers based on the classic British TV series 'Dad's Army'. This will be the first time I have made WW2 themed peg figures and although they are a wee bit out of my usual comfort zone of 19th century military based figures I found them quite enjoyable to make...

Left to right: Warden Hodges (booo!), Sgt. Wilson and Corp. Jones.

These are now ready to prime (grey acrylic spray) and then paint and although khaki battledress is somewhat bland compared to their 1800's equivalent they have their own antique charm I think!

Talking about 1800's uniforms, it struck me that I have already done a British army uniform that is similar to that work in some of the episodes of the series by Lance Corporal Jones - the character who was a veteran of the Sudan (1896–1899), the Boer War (1899–1901)...

It might be nice - if I have the time at some point - to do these peg characters again but dressed in the gear they wore in the very first episode of 'Dad's Army' (before they were issued with their khaki uniforms).

Sunday 16 August 2020

A Call to Arms! (Groan!)


A relaxing Sunday morning making little peg figure arms. Now I've started making separate arm pieces - rather than just painting them on as I did with my original peg soldiers - I am starting to experiment with slightly different poses. And this is probably why these figs are taking a while to put together.

I'm doing so many extra things with these characters, adding just the sculpted hats took a wee bit of time. This is a bit frustrating as part of the idea behind peg figures is that these are simple - I may be starting to add too many extras?

[I may need to get back to basics with my next gaggle of figures - whatever they will be. 😐]

Anyhoo, as you can see I have moved on a bit with the current selection of character. Again, the themes for these may not be exactly 'Funny Little Wars' or 'Molatero' but they are all goo practise, particularly or trying out new poses.

Friday 14 August 2020

Amazing Throw-Back Prussian Parade in Chile!

 This is quite wonderful - Chile has been long influenced by Germanic military traditions dating back to the late 19th century. The Chilean armed forces have retained these Prussian affectations and puts them on display in annual parades...

Mark Felton has put a nice little history of the Chilean 'Prussian connection' along with some information about the uniforms used...

Tuesday 11 August 2020

Mini Project - 'Brodie Helmet'

 I'm back from a week in hospital! That was unexpected... It was hugely annoying as I was bored out my mind and yet I have a load of little projects sitting on my work bench. 😠

Still, home now, so lets' start working through the backlog with a little -perhaps uninteresting looking - job which will actually be quite a useful bit of modelling to have under my belt. I am making a 'Brodie Helmet' - the tin hat that was worn by British and American soldiers from 1915 to the Second World War (when the Yanks replaced it with the M1 pot).

It'll be such a handy little sculpt to have available to me as it will open up a large range of possible models to me. I already have several ideas in mind.

This job will be to make a 'master sculpt' which I can then duplicate so I have a little collection of spares for when I need them. I'll probably just press cast these using Oyumaru Instant Mold, probably the simplest way to make small duplicates of objects.

Making the 'Master'...
I did some quick measurements of the heads of my peg soldiers and determined that I wanted a helmet diameter of 20mm and so cut a little disc of thin wooden sheet..

As I still do not have a mini-lathe - with which I could easily turn out simple shapes like this in wood - I have had to resort to sculpting the bowl shape of the helmet using Milliput putty...

It was then just a case of smoothing down the blob of putty into my desired shape. Generally a half-sphere, the Brodie gracefully curves out into the peak. Once I had sculpted the general shape of teh helmet with the putty I left it to cure overnight - Milliput dries stone hard and then can be easily filed and sanded to a smooth shape. [It's this hardness that I prefer about Milliput over other modelling putties. I have tried others - like Green Stuff - but they have a slightly softer texture and don't sand as well.]


Phase 2 - Casting Duplicates
Now that I have my 'master' model of the helmet it's time to begin the mould and casting phase of the project. As mentioned above I am using Oyumaru Instant Mold as this is a very simple object and so the press moulding technique is perfectly adequate.

Press moulding - as the name suggests - means that you simply press your original object into a moulding material to form an impression of the object you want to duplicate. Here's some photos of the process of casting the helmet model I want...

1. Drop the Oymaru gel block into boiling water for a few minutes to soften...


2. Once the gel is squishy (about as soft as Plasticine) you can set the block on a clean smooth surface and then you can press your original 'master' object into the soft gel...


3. Once the mould has hardened (I usually run the mould under very cold water to help it set with the master object still in it to help create an accurate impression) I leave it for five or ten minutes and then it should be hard enough to use as a mould.

Note: Before the next stage of putting putty into your mould check the impression to see if there are any air bubbles or damage caused by grains of dust or whatever. You want as good and clean an impression as you can get. If there is any damage you might need to start the mould-making process all over.

I then press small balls of my modelling putty into the mould, pressing the putty firmly into the impression using the rounded end of a stick I have made for the purpose (a pencil will do) to make sure that the putty gets right into the nooks and crannies of the mould. 

I fill the mould impression a little over the top to ensure I have everything so I will have to cut away a little bit of excess Milliput once the casting comes out the mould.

Now the annoying part - the wait for the Milliput to cure. I like my Milliput to be rock solid so leave it over night, but I believe you could pop out a fairly solid casting out the mould in a few hours if you are in a hurry to make several duplicates (you'd have to experiment to see if this would work without malforming the casting).

4. The moment of truth... Popping the hardened casting out of the mould.

While the gel mould is pretty solid it does have the consistency of hard rubber so you can bend it to help pop out your casting. Hopefully, you will end up with a nice duplicate of your original model object...

As you can see from the above photo there is a excess of Milliput around the bottom of the helmet. But this is OK as it has helped create a nice sharp edge to the peak of the tin hat. All I have to do is saw off - using my Dremmel and a cutting disc - this unwanted material and job's a good 'un! 😁

And there you go - simple press moulding. Great for small simple one-off objects.

I wouldn't use this material for anything complicated or if I needed to make a large number of duplicates. In these cases I would either source a 3D printer or go down the traditional resin casting route. In theory, you can do a a slightly more sophisticated two-part mould using Oyumaru gel - I have tried that - but the original still cannot have too much complex detail.

In the future I intend to invest in a resin casting starter kit as I will undoubtedly want to cast multiple objects and more complex objects. But for small jobs like this Oyumaru is quick and easy! 👍

Sunday 9 August 2020

Back from Hospital!

 Bah! Another short visit to hospital (nothing too serious - but it needed sorting) and so yet another knock to my schedule! 😕

Today, being Sunday, I had a bit of a relax and tinkered about with various projects on my little workbench (though the good news is that my main full-sized man-cave work area is nearly back in action). It's all a bit of a mish-mash of little jobs but I thought I'd post up some pics...

Above: Lots going on here, some soldiers and some RPG figures plus different
accessory mini-projects.

The military related figures are a series I am working on based on the classic 'Dad's Army' TV show. I am just putting together three pegs representing The Warden (boooo!), Sargent Wilson and Corporal 'They Don't Like It Up 'Em' Jones...

One other thing worth mentioning is a new tool I am using which compliments my little mobile workbench tray (which I use when I want to work in the lounge in front of the TV). My usual electric rotary tool is my trusty Dremmel Model 3000 (wired 130wt) tool BUT - while superb - this multi-tool is a little cumbersome and too powerful for small modelling and crafts really.

So, I ordered one of those very cheap rechargeable Chinese knock-off versions of a Dremmel. While these have a poor rating for their intended use (general light DIY) their low power is exactly right for working with light woods and plastics. Also, being wireless it's very easy to use and control one handed for small intricate jobs...

The tool is so light that you can easily use it like a pen to inscribe or engrave - something I just cannot do with my lump of a Dremmel (without attaching a separate accessory). It charges via USB - which is great - and it holds a charge for quite some time. A good purchase! (£24.99 from Amazon.)

It's nice to be back home! 👍