Sunday 25 February 2018

Mini-workshop Purchase - Sander

Bit of an oddity for a post, but in the end I thought talking about tools for making toy soldiers was a valid subject for the blog, so here's my first 'tool' entry...

I usually do all my modelling work with small hand tools as the materials I normally work with are soft ones (plastics and card). Rarely have I had to resort to power tools, though my Dremel Multi-tool has come in handy occasionally to cut small metal rods and to drill holes quickly.

However, now I am starting to get 'into' wooden toy soldier making - even in a modest way - it soon became apparent that access to basic power tools would be very convenient. Sanding and cutting by hand is quite tedious (particularly thinking ahead, when I may want to make small 'regiments') and my initial tests have demonstrated that my hand sawing is somewhat 'wobbly'!

😂

The problem is that I only have limited space and funds to invest in this hobby (as I have several other hobbies) and I don't want to buy expensive specialist tools that will just lie unused a lot of the time. So, I was very excited to find a mini bench-sander on sale at a local store that was exactly the sort of price I can afford and was also small enough to sit in the corner of my worktable...


At just £29.99 the Parkside Mini Bench Sander was exactly within my means and it is tiny. Obviously, it's intended for lightweight materials of a small size, but that's exactly what I will be working with. It will be great for smoothing off and rounding off my peg figures and also will allow me to sand at specific angles.

It also - rather importantly - comes with a a nozzle so that you can attach a vacuum cleaner to the machine so that you can such away sawdust while working. This is great as I don't want to make too much mess if I can help it. Here's a handy video review...


Aside from a circular sander, I'm will also be looking for a similarly small circular bench saw, a vertical drilling rig for my Dremel multi-tool and, finally, a mini- lathe (for turning my own 'peg soldiers). I already have a Dremel fret-saw.

I'll be getting a chance to try this sander out this week as I will be experimenting with some ideas for arms and feet for my peg soldier, which I will be sanding into shape from popsicle sticks!

Thursday 22 February 2018

Wooden Toy Soldier - Part 3

My painting test is near complete...


I hit a few snags and as a result some of the painting is a little raggy. One of the main things is that I need to buy a set of proper thin nibbed Sharpie markers. The drawing pens I have use non-permanent ink which - obviously - runs when you try to touch up with wet acrylic paint! (Du-oh on my part!)

Acrylics can also be a little hit and miss sometimes - some colour cover beautifully (that blue and red were great) but others are a real pain and require several thin coats to get the same effect. I've tried both the premium Vallejo modelling paints and cheaper craft acrylics and, to be honest, there ain't all that much difference. So, as I don't fancy the hassle of trying enamels instead, I shall just have to persevere and work out which are the 'good' colours and which are the troublesome ones.

Still, that's why we do painting tests.

Once again, I chose to varnish with the budget Wilko's spray lacquer. It seems to do the job (but only time will tell if it will crack or yellow)...


Debrief and Conclusions
This was a fun little project but it could be improved upon. For variety sake - should I wish to try these out as wargaming figures - I think I will look into a means to make proper separate arms (so I can pose the figure better). Also, I need to do something about his feet - as in, he needs some!

I'm OK with painting on the face and I do quite like the cartoony look and the same goes for uniform details. I don't want to start adding additional small parts as separate components, that would just start to get too fiddly.

Finally, the 25mm bases work fine, though this figure isn't really any specific scale. Is that a problem? Well, if I want to use other third party accessories - like terrain or artillery pieces - it might be, but at 47mm tall from head to foot I may be able to get away with some 54mm props.

These lovely wooden toy trees are just the sort of simple 'toy town' style that I
think would go with my peg soldier. Perhaps another good reason for me to look
into buying my own hobby lathe?

In any case, because of the unique look I would probably not want to mix these figures with other types and make my own similar looking props myself.

Well, onto my next test piece...This time I will be experimenting with a full sized peg doll soldier in the style of a traditional Christmas 'nutcracker' toy soldier.

Wednesday 21 February 2018

Featured Work - Dale's Wooden Warriors

Nice to find some other examples of small wooden toy soldiers for wargaming. I stumbled across an entry on the TMP [The Miniatures Page] forum showing some really nicely done wooden 'toy soldiers'...


These wonderful little fellows are made by a chap called Dale and many more examples can be viewed on his terrific blog, 'Wooden Warriors'

They are a slightly different style from my 'peg doll' soldier as they are made from prefabricated wooden components especially made for wooden toy projects...


This is really inspiring me as I love the stylised and simplified look of these. His soldiers are bigger than my peg soldier so there is more room to paint a more expressive face. He also makes little arms and feet which adds to the charm for the models.

Making arms is something I've been considering for my next test. while painting on features like arms  makes my modeller simpler to build it does have it's drawbacks. For example, you are a little restricted on the kind of poses you make because the painted on arms have to be depicted firmly at the side or against the body. Poses like 'at ease' is easy, but holding a gun in a firing position isn't really doable. So maybe simple little stick arms is the way to go (these also make painting easier).

Dale also has a real knack for doing great hats, as this Napoleonic Spanish infantryman illustrates...


The hat, arms and feet really give this little fellow a lot of character, but at the same time still keep things simple. However, they also show that you can do a passable historic uniform without including a lot of three dimensional ornamentation.

Do take a look at Dale's blog - there's lots of different types of gaming pieces on display (I especially liked his trees)!

Tuesday 20 February 2018

Wooden Toy Soldier - Part 2

(I guess the subtitle should be 'Project Peg Mk. 2'...)

Still concentrating on simplicity or a highly stylised toy soldier, I've made my model from just four parts; the peg body, the hat, a rifle and an MDF base. (All glued together with PVA wood glue for larger parts but superglue for the rifle as I needed 'instant tack'...Hope it will hold.)

The rifle is very simple and toylike and is just made from two matchsticks glued together and carved into shape with a craft knife, then sanded smooth...


It's crude, but as it's supposed to be a toy this kinda suits the purpose. My figure does not have arms or hands so I will just glue it to the side - in an 'at ease' pose - and paint a hand onto the rifle stock as if the soldier is holding the gun.

 As this is intended as a game marker I have glued the figure to a standard 25mm circular MDF gaming base...


The hat is on a little crooked, but lots quite 'jaunty' so I will leave that (this is just another test after all). Incidentally, this would be another good reason to consider turning these model in a lathe.

And now it's on with the primer and then the painting. Now is crunch time regarding the design - historic uniform of fantasy one?


I am unsure whether I might have been better to have primed with a brilliant white rather than grey. For one thing, as the primary colours I am using are very bright a white base will help to make the colours 'pop'. But, also, it means I have a good foundation for any of the white parts I intend to have, particularly as my Vallejo acrylic white seems to need a couple of coats get get a good opaque coverage.

Well, for now I'll make do with what I have and I have to say that the grey primer does make it easy to pencil in the design on the figure (and, yes, I went for a fantasy 'toy soldier' uniform design)...


The face isn't exactly 'traditional' but this is just a test. Though even though what detail there is is stylised and simplified I hope my shake brush work is up to painting the uniform by hand...

Is it me or does the grey primer coat dull down the bright top coats? Maybe
another reason to try a white primer next time.
Looking at my design I am thinking that if I do prime with white I could mask out certain regular design features - like stripes - so that they are not only straight but also provide an easy way to pick out fine painted details (guess I will save that for yet another test).

I will also have to expand my collection of craft acrylic paints. It's funny how some of my Vallejo paints cover beautifully - like the red and the blue I used - but other are a pain in the butt (like the flesh colour and white - and I happen to know that yellow is a nightmare to get a nice flat coat). Luckily, the craft paints are quite cheap. (I did wonder if I should try enamels, but they bring their own problems and are smelly!)

Next: The finished test model.

Monday 19 February 2018

Wooden Toy Soldier - Part 1

Now that I've tested the materials for my 'Peg Doll' toy soldier project I have to put some thought into the design. I actually have several projects based on the wooden soldier idea in mind, including; tabletop game markers of various sizes, traditional Christmas tree decorations and Christmas dinner table place-name holders.

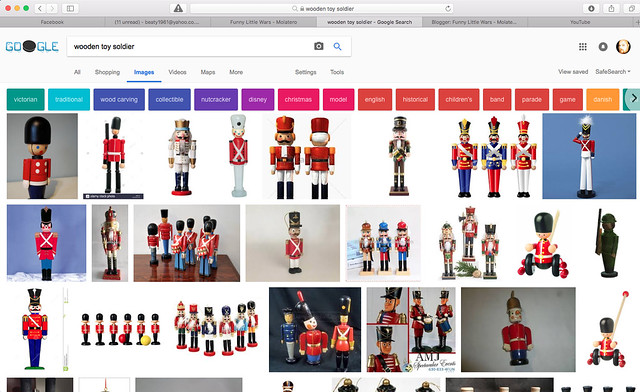
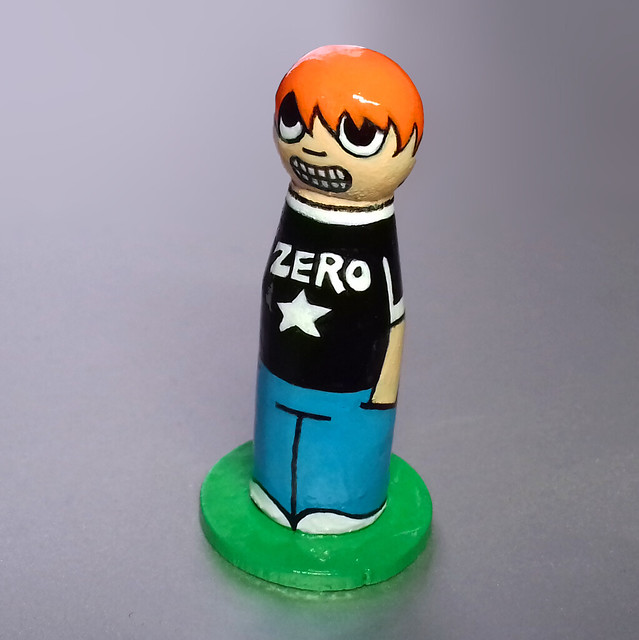
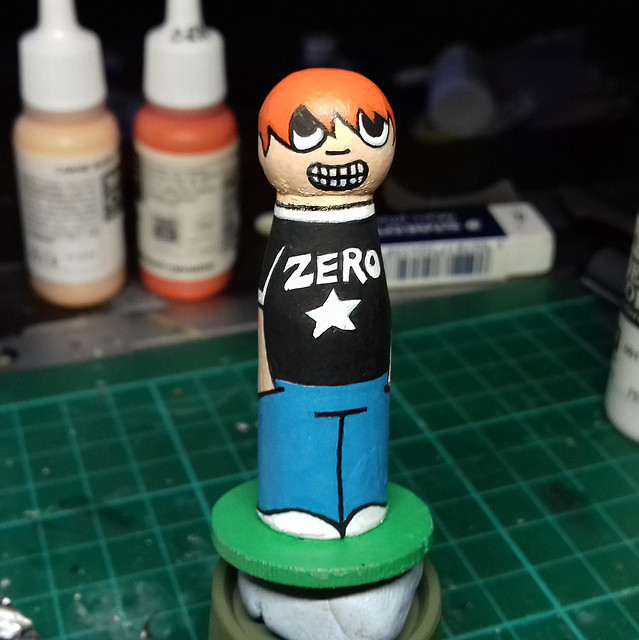
Googling 'wooden toy soldier' provided me with plenty of inspiration for
painting schemes and construction ideas for my peg dolls.
Wooden toy soldiers seem so synonymous with the festive season that it hard to avoid ideas that don't include Christmas themed projects!

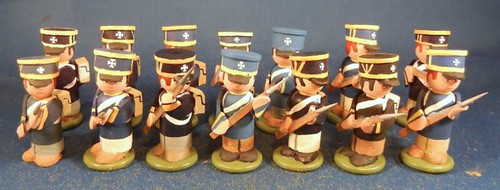
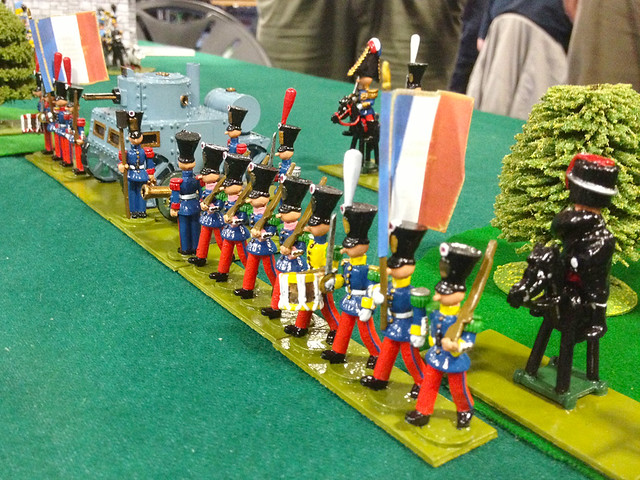
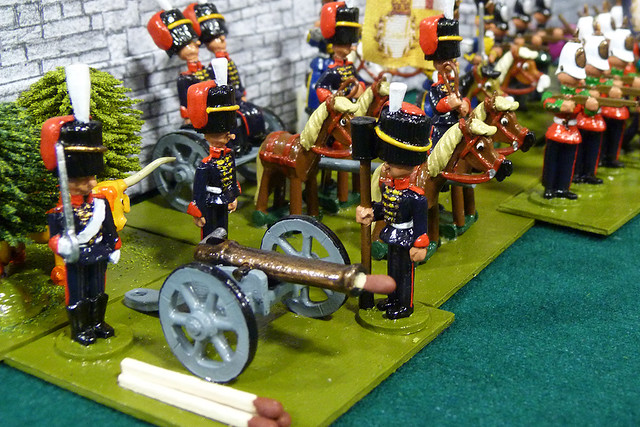
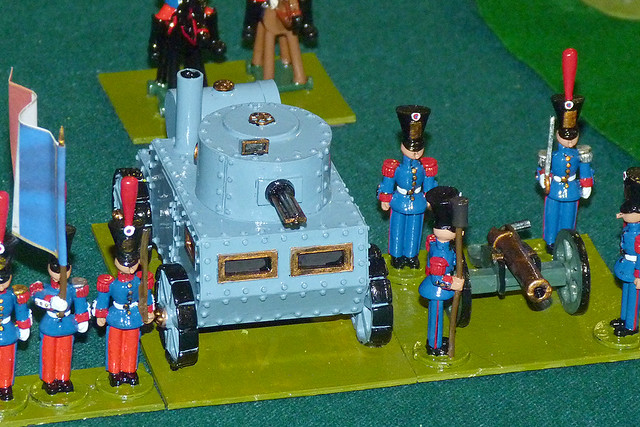
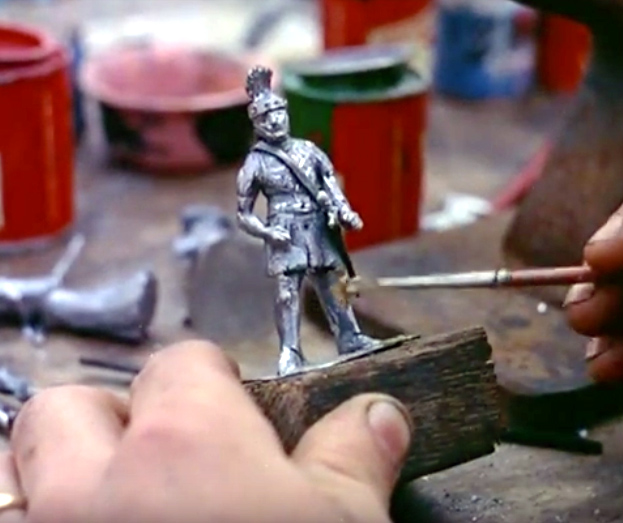
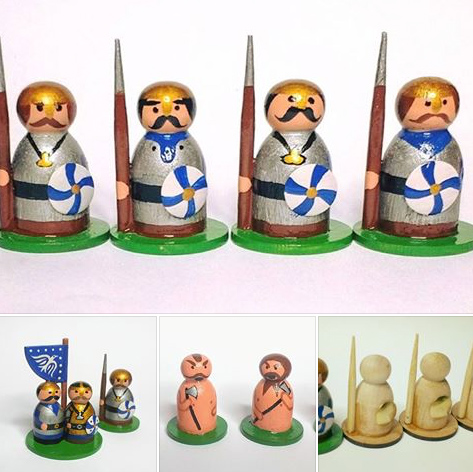
However, I am also interested to see if it is feasible to create useful game markers. This isn't an a new idea, I saw something similar when I visited the Triples War Game Show at Sheffield in 2013...


Obviously, my 'peg soldiers' will be even simpler in design than the wonderful toy solders I saw at Triples, but they provide a guide to the style that I'm looking for.

My main quandary is whether to do a 'short' peg figure (similar to my test model) or to try a 'long legged' version using all of the dolly peg? ...I may do both...

The other thing that's got me a bit puzzled is hats! The big hat is one of the defining features of the toy soldier and there are a few ways to create one, you could make one from some wood or perhaps go down the felt or fake fur route.

I prefer the idea of a wooden hat as that's more akin to the Nutcracker type toy soldiers I remember fro my childhood.

I found a tutorial that suggested that you try using wooden candle holders (see left), but while these seem ideal they are actually very hard to find in the UK so I will probably have to make my own alternative versions.

This actually won't be so bad as I'd like to do create different regimental uniforms based on historic ones and one of the most iconic pieces of uniform is the distinctive and often times unique headwear of the various regiments and nations.

So, my first idea is to create hats from a second peg. This seems a quick and cheap way to do this and I think I can create different shapes of hats depending on hot I cut the peg down.

And finally, how many parts do I make? My initial test figure was a single piece design with features painted on, but for the actual soldiers I may want to add extra pieces made of wood like rifles or swords. If I do this, how do I attach them - do I also need to make arms for the soldier?

A Funny Thing Happened on the Way to the Shops...
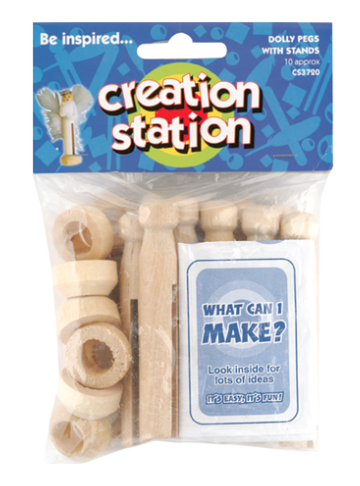
Being new to this 'peg doll' making business, I'm still working out some of the crafty 'props' and shortcuts. But, completely by chance, I happened across a bespoke 'peg doll making kit' at my local general store (of all places)!

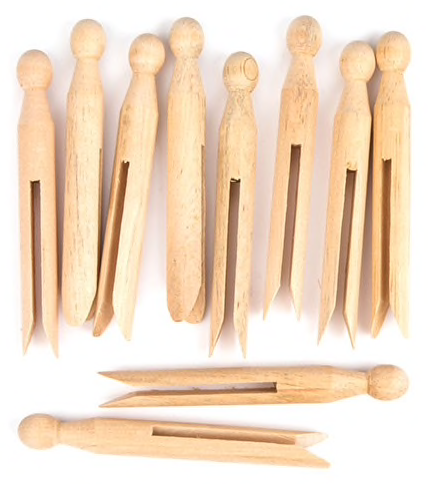
Now, these look like pegs, but they aren't really proper pegs, not like the ones I bought from Amazon. These are specifically made for creating peg dolls and they come with special base rings so you can make your doll free standing.

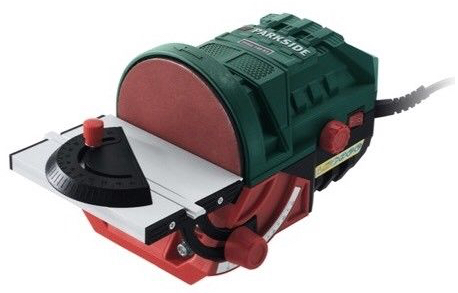
Having sawn through both these and the real beechwood pegs I can say that these faux-pegs are made of a softer wood (so wouldn't last on a clothesline in the rain for long). The pack is the same price as the real pegs I bought - about £2.50 - BUT you only get 10 'pegs' in this bag as opposed to 24 in the real peg pack.

Still, I do like the little stands, and this all got me thinking that IF I ever got into this peg doll making thing I would probably invest in a small wood-turning lathe and make my own pegs and accessories (this would solve the 'hat' problem). The softer pegs do make it easy for me to cut them up into accessories of the same diameter as the pegs themselves just using a simple hand saw though. SO they were a nice find.

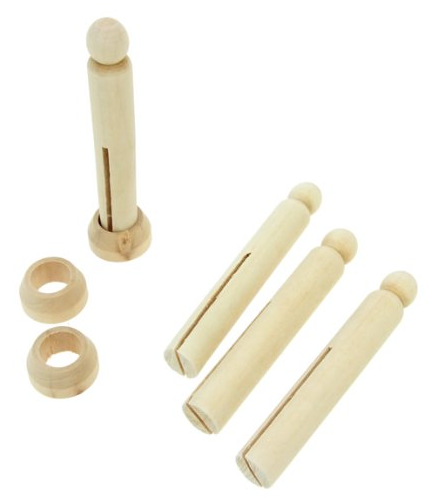
The Creation Station 'faux-pegs' - with ring stands.
One small detail I prefer about the fake pegs is that the 'shoulders' are less flared. The real pegs I have have a tapered 'shoulder' that narrows towards the 'head'. You will also note - from the accompanying photo - that the real pegs aren't exactly uniformly or symmetrically cut, whereas the fake pegs are. And finally, though you can't see in my photo, real pegs have tapered feet - to allow them to fasten to a clothes line - while the fake pegs are flatly cut as the bottom and the space between the 'legs' is narrower...

Real peg left, fake peg right.
Unfortunately, because the fake pegs are overall a shorter length than real dolly pegs you cannot mix and match if you want that uniform look. But I like the variation in detail between the two as it means  I can try out different effect when painting and it adds some character to the little figures I will make.

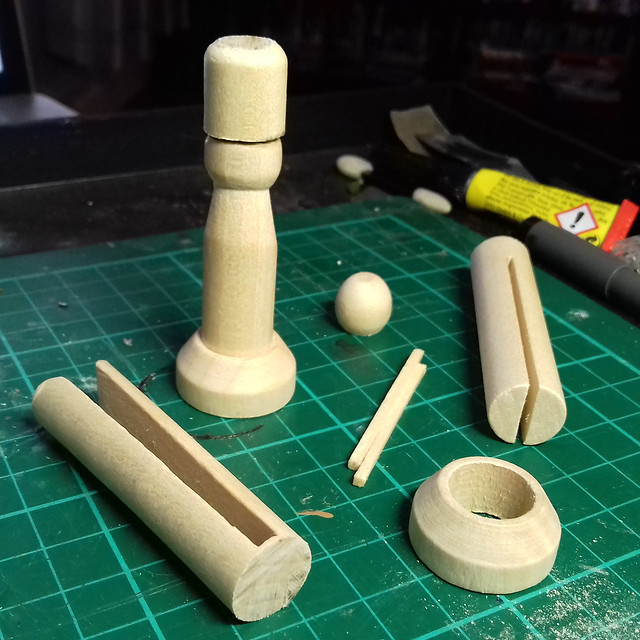
So, let's try one out...


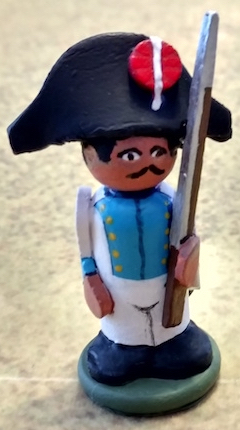
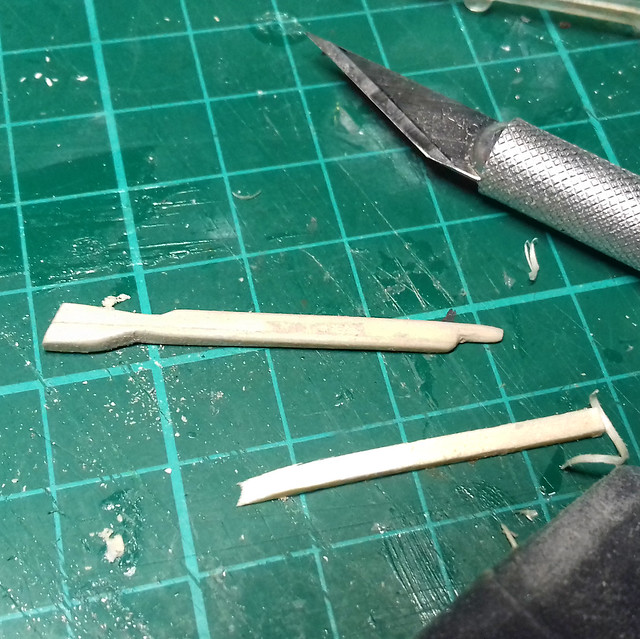
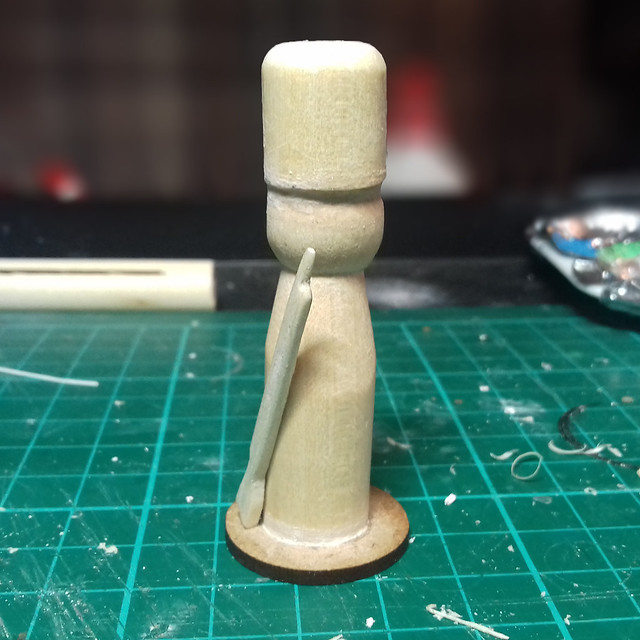
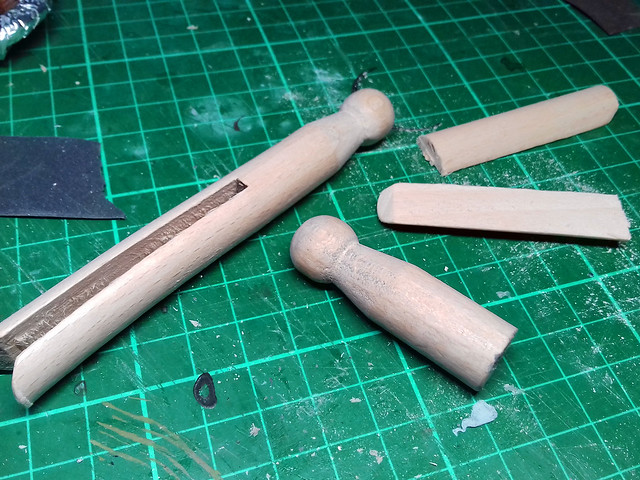
I used two pegs here, one of each type to create this soldier and his buzzby hat! The cut-offs will be worth keeping so I can carve other accessories. The above photo also shows a couple of matchsticks glued together, from which I hope to carve the soldiers rifle.

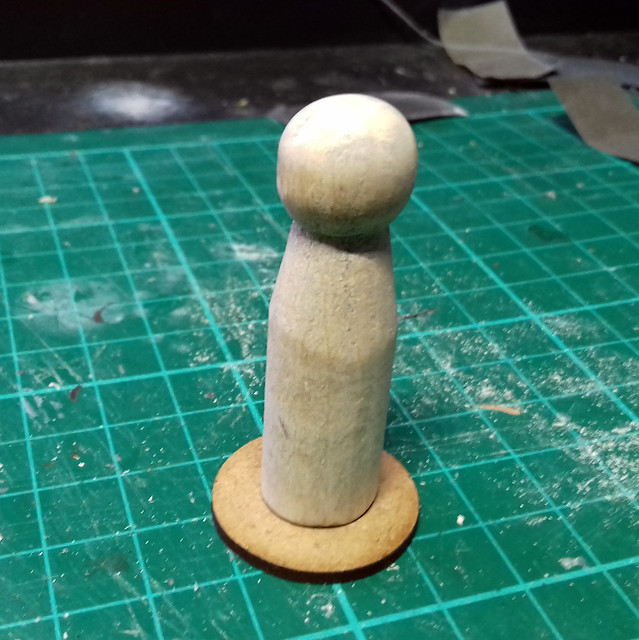
This, of course, is the shorter 'game marker' style peg that I will be trying out, as opposed to the full sized peg doll (but I will be making one of these later as well). They don't really conform to a standard scale, though I could cut him down to an even shorter size to make him roughly 28mm scale I suppose. But true scale isn't ugly important here, as long as he's being used in conjunction with other peg dolls of a similar size.

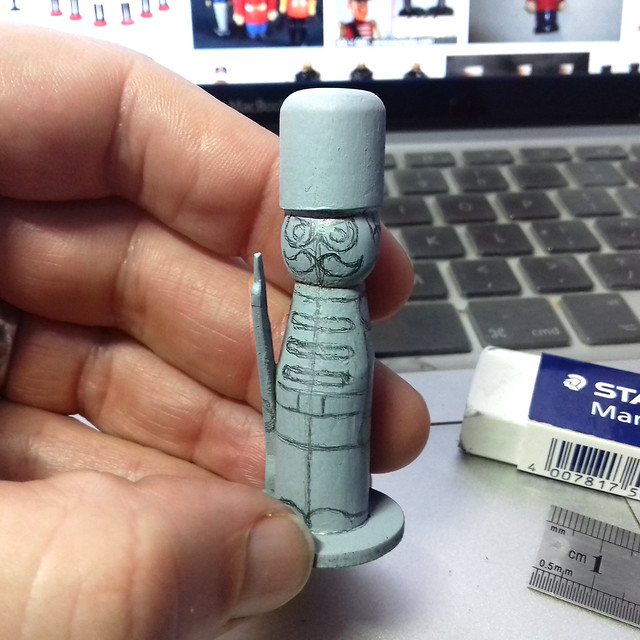
Well, on to the carving and sanding (there are some rough cuts which I want to smooth off) before I prime and start to paint my little soldier. The big question is; do I paint a simplified historic uniform (his busby suggests a British Guardsman) OR do I give him a fantasy 'toy' uniform? Hmmmm...

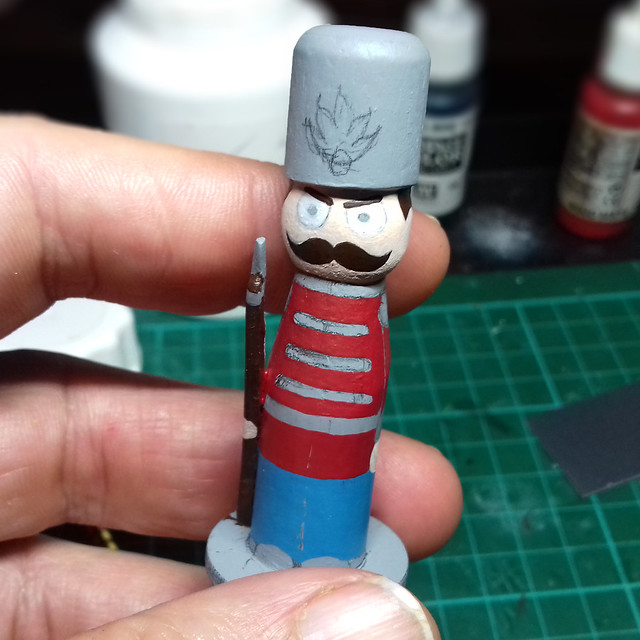
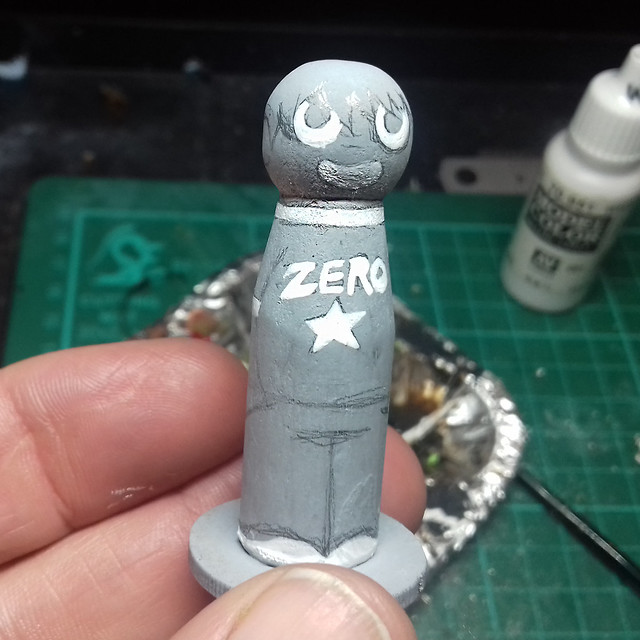
Next: Painting my soldier.

Sunday 18 February 2018

Featured Work - Lead Soldiers

Sorry, I couldn't quite catch the name of this modeller (James something), but this is superb. Though, Health & Safety might baulk at the idea of carving raw lumps of lead by hand!


British Pathé News (or some of it's producers at least) seems to have a bit of a love for toy soldiers as it seems to be a popular and recurrent them for their news segments. :)


Saturday 17 February 2018

Peg Doll Test - Part 3

Thought I'd post up the vanished test model...Actually, varnishing does make a difference and has improved (or literally 'glossed over') some of my dodgy line drawing!


I only used a cheap Wilko's spray lacquer, but it seems to have worked OK (not sure if it will yellow more quickly than more expensive artist's varnish).

Friday 16 February 2018

Peg Doll Test - Part 2

Nice to get painting larger scale figures again and because this is a simple cartoon design it's been very relaxing too. However, there was a serious purpose to this test and that was to work out whether acrylic paints were the best medium to use to get that wooden toy, high-gloss look.

I blocked out the main colour areas and that was enough to give me some worries about the acrylics I was using. These were my normal Vallejo modelling acrylics, but at times I found them too thin to cover well on the porous wood of the peg, some colours requires two or three coats to get the flat opaque colours I wanted...


So, I will try out another test with a more craft orientated acrylic paint (which seem to be a little thicker). The up side of this is that craft acrylics are a lot cheaper.

Anyway, I still have things I want to try out on this figure. chief among these is the outlining of the colour blocks - cartoon style - with a thick black Sharpie marker...


Actually...I didn't have a Sharpie thin enough so stupidly used a normal marker which proceeded to bleed and run when it hit the acrylic paint!!!

I had to go over several bit repeatedly to hit the runny felt-tip so this isn't quite as neatly drawn and painted as I had hoped. But, there again, this is why we do test models isn't it? (Now I know.)

All I need to test now is how the figure looks with a coat of gloss varnish and if all goes well I can start planning a proper peg doll project...I have several ideas! ;)

Thursday 15 February 2018

Huzzah! I have returned!

Life can be something of a pain in the posterior at times (to say the least). I am not going to go into the reasons that this blog has been dreadfully neglected for the past year, but it's suffice to say that 'life' is generally looking up and 'normal service will be resumed'...It is hoped.

Anyway, to get me back into the swing of things I've come up with an idea that should reignite my 'toy soldier' activities once more...

Project Peg
I happend to come across a couple of pictures of 'peg dolls' - painted as Vikings - on a wargaming group and I was at once taken with the simplicity of the design (it put me in mind of one of my favourite TV programs when I was young called 'Nogin the Nog')...


I wondered if I could do something similar in the vein of 19th century uniforms? Something like a miniature version of the traditional wooden Christmas nutcracker soldiers. In fact, I found a design on the internet of just such a peg soldier made up as Christmas tree decorations...


As you can see, in this case, the full 'dolly peg' has been used in the design. Whereas the original design I found was cut down dolly peg (though, I later discovered that you can buy larger sized wooden 'doll peg' blanks just for painting as peg dolls). In any case, I thought that trying out this ideas might be best attempted modestly (and cheaply) at first by using an original doll peg...


At just £2.50 for a pack of 24 beechwood pegs this would be a very budget-minded experiment where I could try out several different versions of my idea without worrying about wasting expensive materials. (If I do decide I like the results of this test I could always scale the idea up by buying some of the more expensive over-sized 'peg' blanks instead, we shall see).

Let's get to work...
I decided to start by making a version of the original cut-down peg 'doll'. It turns out that beechwood is a bit harder to saw though than I thought (should have used my Dremel)!


I trimmed the peg just above it's 'legs', which gives you a 'figure' that stands about 49mm tall (though, looking at the Viking models they look like they would be cut a lot shorter). And as I'm making this a small standing figure I mounted the peg on a 25mm diameter MDF wargaming base...


I considered adding arms and maybe a hat, but - for starters - I thought I would keep it simple and concentrate on working out how to paint this little fellow.

Let's start by priming the peg so that we can use acrylic paints. I'm just using acrylics because that's what I happen to have, but I could have gone with hard-wearing enamels or even watercolours which would show the woodgrain. All I happened to have was grey primer at the moment, sooo...

(Important note: IF you are getting into peg dolls as toys for children please take some care in choosing your materials - particularly the paints - to ensure that they are 'child safe'. I won't go into this here but some Googling will give you the information you need about non-toxic paints.)

Next, I use the grey primer as a canvas onto which I can sketch my design using pencil (N.B. I'm making this up as I go, I haven't checked other tutorials to see if this is the common way of making these peg dolls). This design will be super simple and I have chosen a cartoon character (Scott Pilgrim) for this test...


I didn't want to get into making things like arms and hats and weapons for a soldier model until I see how a painted figure would look. I want to make sure that acrylics work out the way I imagine they will before putting a lot of work into the modelling work.

So...On with the painting...


Next: I complete the painting of my first test.