Monday 30 July 2018

Peg WW1 Light Bomber - Part 5

Painting Check...
I've been a little unsure about my paint scheme for my little bomber aircraft so I've taken some test photos just to reassure myself that everything is going OK. Sometimes you need to see some photos, which seem to give you a little 'distance' from which you can assess your progress in a more detached way (that probably makes no sense to you whatsoever)!

Anyway, here's where I am so far...


I *think* this is going in the right direction..?

Sunday 22 July 2018

Peg WW1 Light Bomber - Part 4

And so, the painting begins...

I've decided to go with a pretty plain and widely used colour scheme for my bomber, a 'canvas' buff. While this was associate with earlier WW1 aircraft - from, say, 1914-17 - I'm imagining that my Molatarian Rebels of the 1918 uprising might be using older aircraft (I'm making this up as I go along - like everything else I do).

I thought the overall buff colour went nicely with the older 'pusher' design of aircraft. But will be adding a rather novel rebel slogan to the upper wing to add some interest to the scheme. The faction colour will be the blue, white and black scheme that I have designed for my rebels.

I designed my revolutionary slogan in Adobe Illustrator using a
vaguely Romanian/Cyrillic looking font. Then I printed it out
and traced the design onto the top wing...
My imaginary nation of Molatero is loosely based on Romania (ish)
and so I have used the modern political slogan of 'Rezist' as it
seemed so apt for a catchphrase of a civil uprising.

Otherwise, the rest of the painting is very straight forward and pretty easy. Being a simplified and stylised model detailing is pretty much non-existent and there will be few colours used. I'll start 'inside' and work 'out'...


To be honest, this paint job - being family plain - shouldn't take too long finish...Hopefully!

Wednesday 18 July 2018

Peg Racers - Molatero Grand Prix, 1936.

These are the sort of little models that would have given my late Father a lot of joy. They are intended as tests for some Christmas decorations I have in mind.


Great Britain
Germany
Italy
Molatero
:)

Monday 16 July 2018

Note on Regularity of Posts

Hello all. First of all, thank you to everyone who reads my blog and follows my hobby activities. My readership has been growing slowly and my stats have been very flattering. It's nice to know that people are coming back regularly to read my nonsense and even nicer that I'm starting to get more comments on my work.

Anyway, to the point. I've been posting a lot since I started my wooden peg projects, mainly because I've been trying out a lot of new techniques which I thought would be of interest. However, the whole reason I got into the 'peg figure' hobby was that I had an idea for some novelty Christmas gifts for my family...


Well, taking into consideration how long it takes me to make these peg figures - and that it's now mid-July AND that I have a lot of presents to make - I will have to start to get back on track and get on with those Christmas gifts.

This means I will be busier than even and producing even more peg models BUT - and here's the point - I won't be able to show you what I am doing!!! I don't want to ruin the surprise for my family.

So, while busily producing things I will not be posting as frequently as I have been. I'm going to try and alternate my work so that I am still making things for 'me' and for the blog. But, the posts will only be on a bi-weekly or sometimes on a weekly basis from now until Christmas. Sorry.


I hope you still find what I am doing interesting enough to visit every week. I'll still be working on my peg 'Franco-Prussian War' project and alternating this with my 'What Else Can I make With Pegs' projects (making planes, vehicles, artillery and ships).

Again, thank you so much for reading my little blog,

Steve

Saturday 14 July 2018

Peg WW1 Light Bomber - Part 2

Well, I'm still making this up as I go along,  so I've only a vague idea which way this one is going!

I began the session by doing some more work on my 'bead' rotary engine...


The cocktail stick arrangement at the rear is just a device I made for reference so I can determine how I might start to make a tail section.


Next I move onto making the main wing struts. Cocktail sticks at the ready, this is going to take quite a few...


My careful measurements of the layout of the wing struts worked out as the top wing fitted easily in place. While loosely based on the design of the Airco DH. 2 the layout isn't exactly identical, especially where the fuselage struts connect to the top wing...


Well, that worked out OK, but the tail section is my next challenge. I have plenty of reference to base the flimsy tail - the Airco DH. 2, Royal Aircraft Factory F. E. 2, Vickers F. B. 6 and French Breguet V all used this 'pusher' arrangement and the delicate tail section it required. Though, I'll probably modify the designs to suit my idea of this imaginary aircraft.


I went for a slightly unfeasible 'twin boom' arrangement, just for fun and to make it suitably distinct from any actual historical aircraft type. I'm not even sure that such an arrangement would work! (I may add to it, just to give it some more period flair!)

Well, that's it for this session. She's a big beasty (would still like to have a go at a twin engined bomber though). In the next part I will begin the paint job, I'll just have to decide on a suitable colour scheme.

Thursday 12 July 2018

Handy Gadget

Just a quickie about a new useful piece of kit I've just bought - the Citadel Painting Handle.


Now, I know a lot of people think that Citadel products are rather over-priced for what they are, but this item is fairly niche and so 'value for money' is harder to gauge in this case. At £5 for a plastic grip that clamps figures and so holds them steady it's usefulness kinda seems worth the cost.

I've been using a home-brew grip - a cotton reel with a piece of Blu Tack on top - but, while a cheap solution, it has let me down on a couple of occasions. Blu Tack seems to loose it's stickiness just at the most inopportune moment sometimes.


So, I bit the bullet and forked out a fiver, but I'm pretty glad I did.

I have big hands and I appreciate the chunkiness of this grip and the weight of it compared to my featherweight cotton reel. Also, the clamp is sprung which means the jaws are always under tension and they grip the figures base nice and tight (but not so tight that you can't easily remove the figure when you want).

I much prefer this sprung grip to something like a screw grip where you have to laboriously screw and unscrew the jaws every time you want to pop a model in or out.


Yes, everything is plastic (except the spring gear I guess), but it's good quality none the less.

And finally, and most importantly, it's very comfortable in use. It's reasonably big and fits snug in the palm of my hand enclosed by all my fingers.


Fiver well spent.

PS...Final factoid - the jaws are designed to open up to 40mm diameter bases. Mine are smaller, being pretty standard 25mm round bases. The shaped jaws seem to be designed to accommodate bases of other shapes too (square and hexagonal, for example).

Wednesday 11 July 2018

Peg WW1 Light Bomber - Part 1

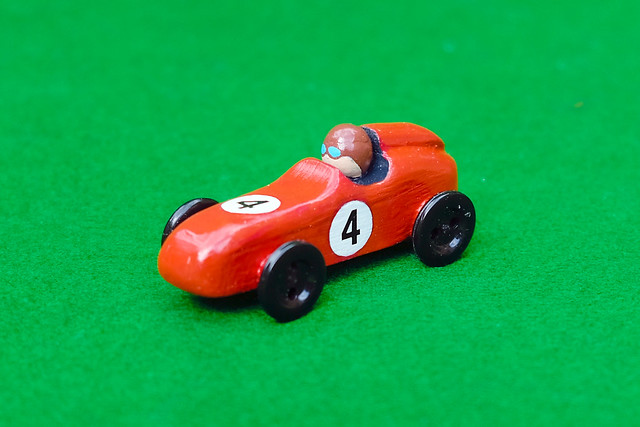
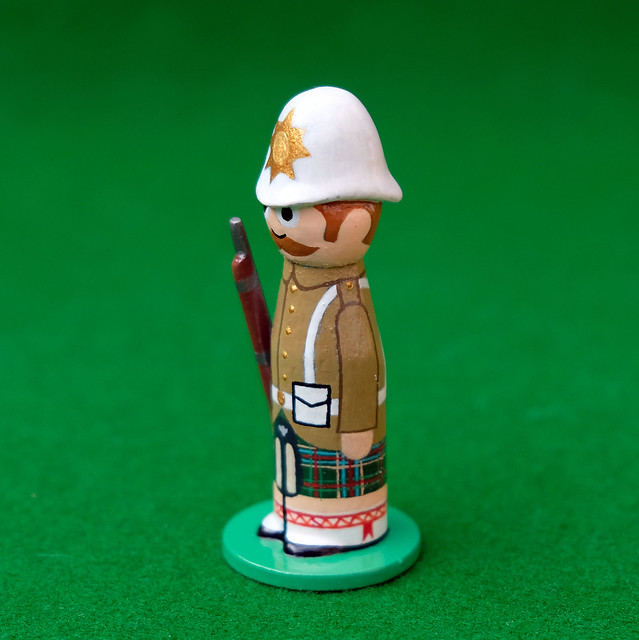
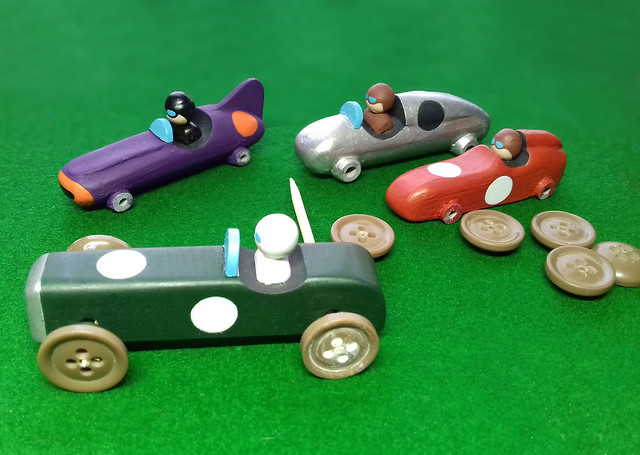
I really enjoyed making my first peg plane - see 'The Purple Baron' - and I had always intended this to become a small series of 'historic Molatarian military aircraft'. In fact, I had already an idea for my next aeroplane model...

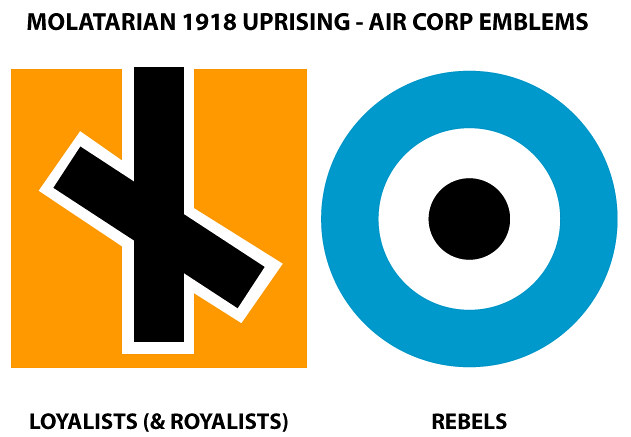
The backstory for my first plane was that it represented a fighter aircraft of the Loyalist (or Royalist) faction during the 1918 Molatarian Civil War. Naturally, I imagined that there would be a 'Rebel' faction and they would have also fielded some aircraft and I wanted to make a model of one of these.


The wonderful thing about WW1 aircraft is that there was such a diversity of designs - flight still being in it's infancy - and this would allow me to indulge my imagination with some quite exotic models. Having done a pretty conventional biplane design I now wanted to explore something a little more unusual.
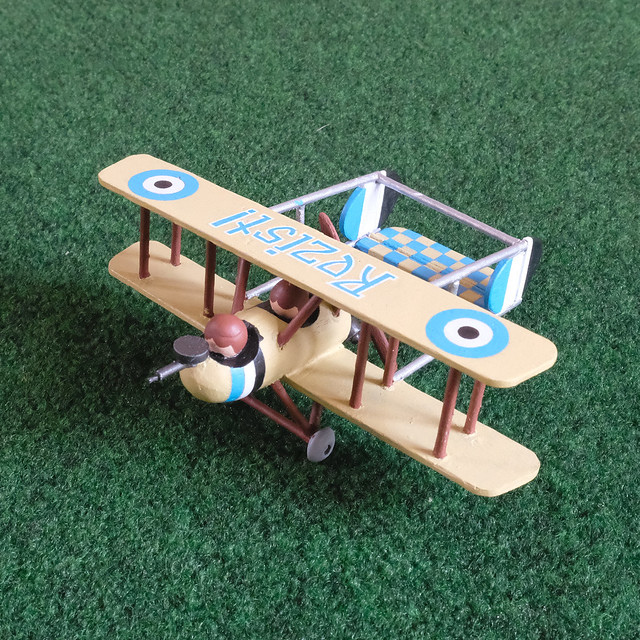
The 1917 Zmeu RoÅŸu ('Red Kite') Pusher Light Bomber
I have always liked the 'pusher' aircraft design - the British Airco D.H. 2 is a favourite plane of mine -  but I thought it might be nice to have a two-seater light bomber model to compliment my first single-seat fighter model. Examples of this type would be the British Vickers FB-6 or Royal Aircraft Factory F.E.2 (both 'pusher' fighters) and the French Breguet Bre.5 (a 'pusher' bomber)...

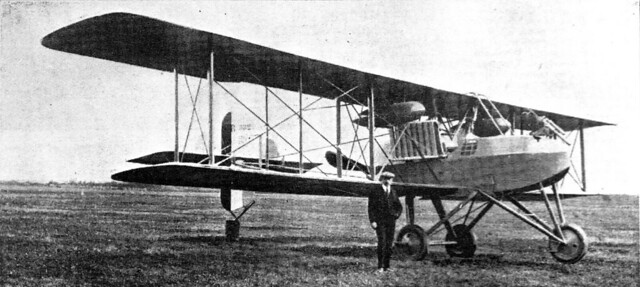
The French Breguet Bre.5 bomber of 1916. Source: Wikipedia.
Of course, as usual, my peg model will be of a simplified, toy, design and will also be intended to represent a fictitious Molatarian type!

Peg Pusher Construction
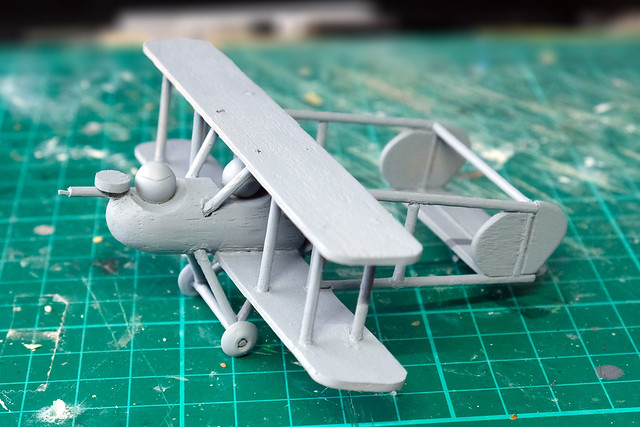
I'll be largely following the process of construction I established with my 'Purple Baron' plane. The fuselage will be a shaped wooden dowel or peg...


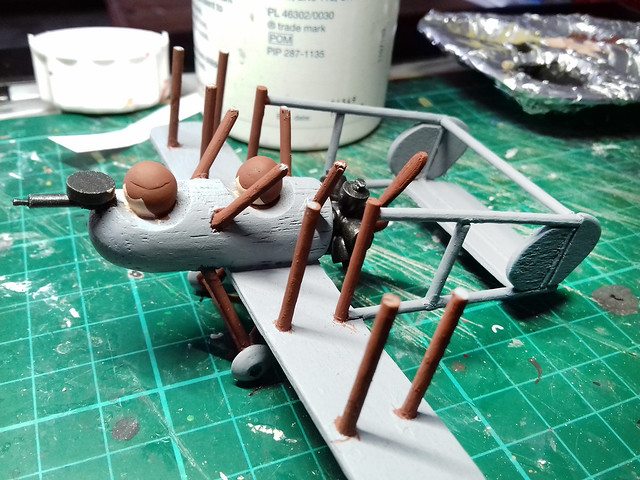
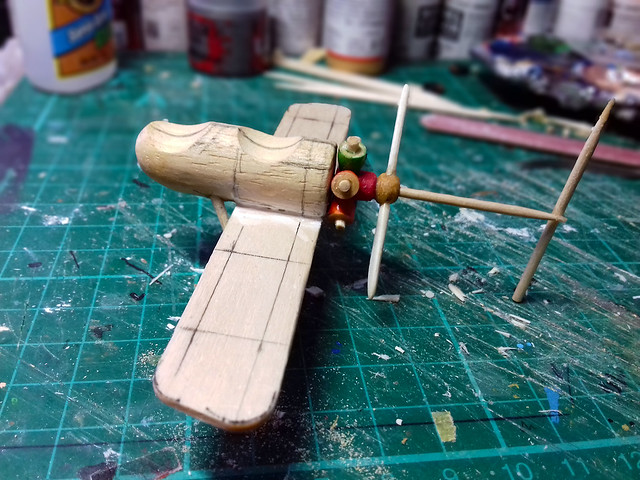
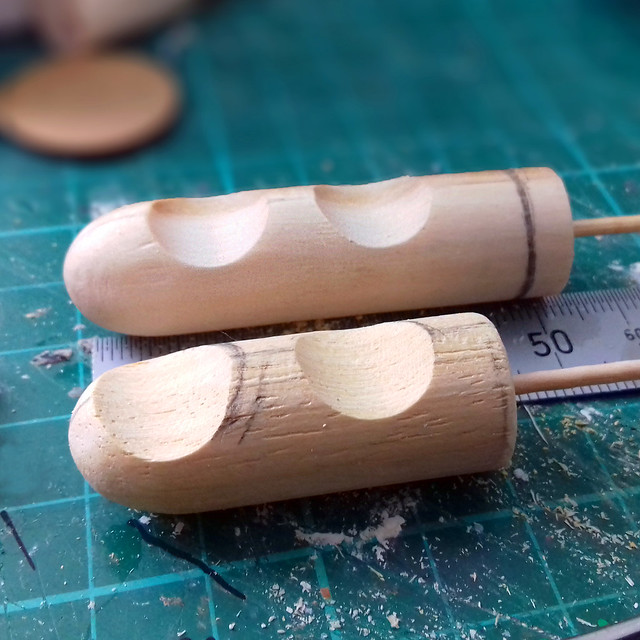
Obviously, I have shaped the 'cockpits' by sanding out scalloped shapes using my Dremel with a small drum sander. Pilot at the rear, gunner/bombardier in the front cockpit.

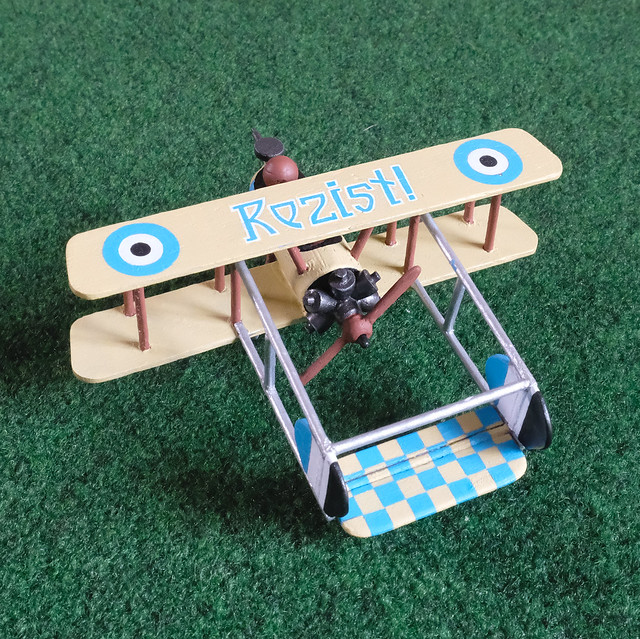
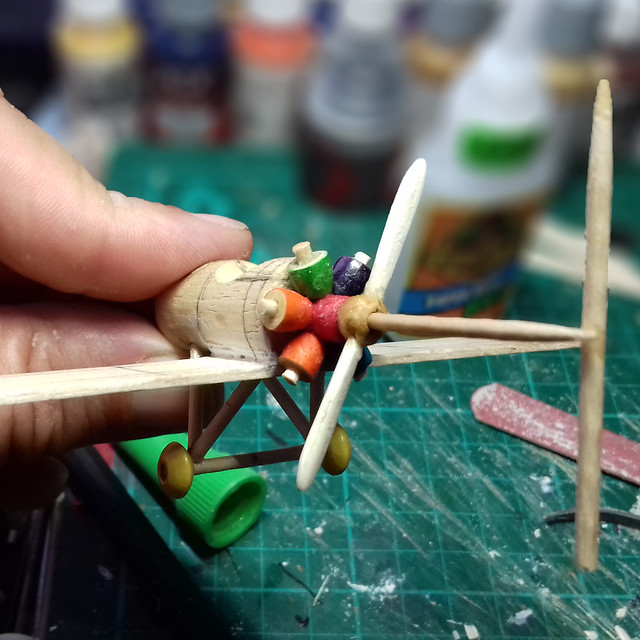
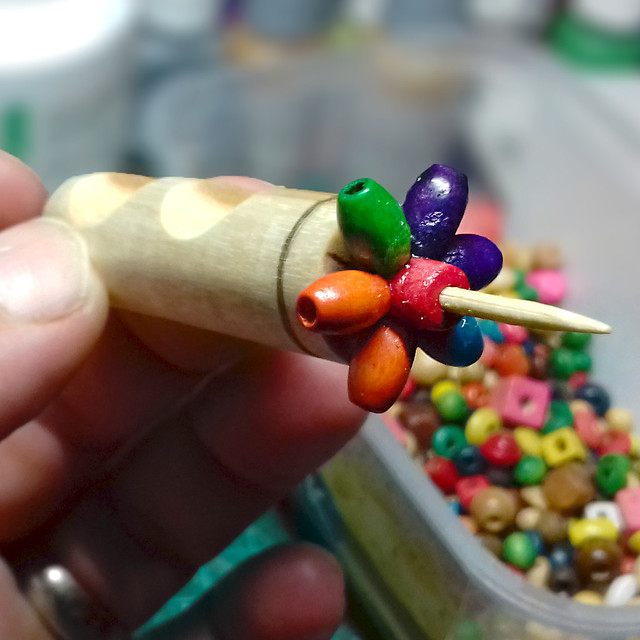
The main feature of the 'pusher' type is the rear mounted and facing engine and principally these early engines were the ubiquitous rotary engine. My little plane will have a simplified rotary engine which I will make out of six wooden beads, representing the engines cylinders... :)


Second Thoughts...
The one downside of this 'make it up as you go along' approach to modelling is you don't have a plan (obviously) so you don't exactly have a true sense of the final scale. While my fuselage looked right, it clearly wasn't once I started estimating the wing span required and how ling the tail section would be!

In short, my 'light' bomber would have eventually turned out to be something more akin to a 'heavy' bomber...Way bigger than I wanted it and too big for a single engined aeroplane. So I quickly made up a second slightly shorter fuselage...


I'll keep the longer fuselage as it would be nice to have a crack at a heavy, two engined plane at some point. The shorter fuselage should produce a plane only a little larger than my original bi-plane fighter...Hopefully.

A Wing and a Prayer
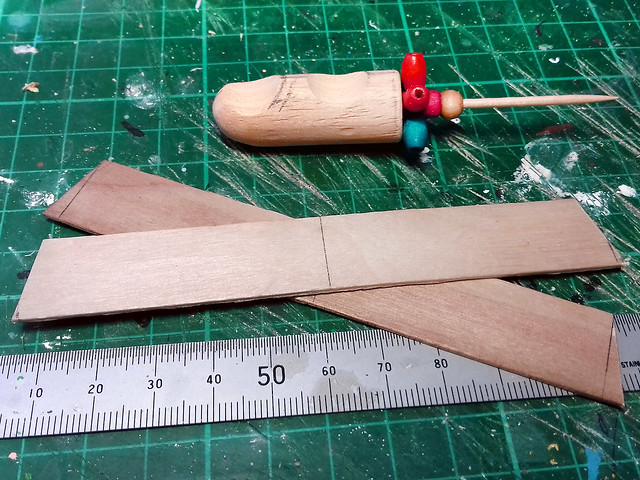
Time to cut out the wings, I'm using the same large wooden tongue depressor sticks that I used for the wings on my bi-plane. This time, though, the wing span will be slightly wider and the edges will be more square cut...


And now my second gaff...I failed to work out a way to attach the wings where I could easily check that they were on square! In other words, like so much of my stuff, I attached the wings by eye (they sorta looked straight and square-ish).

(I maybe should've made some sort of template or something.)

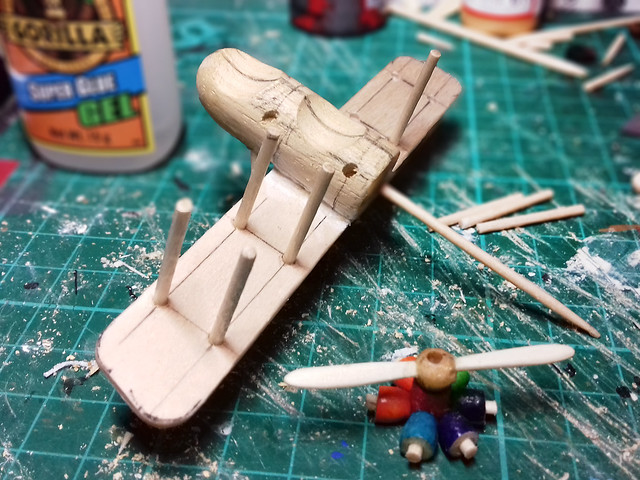
Anyway, I thought 'what the hell' and glued the lower wing on...

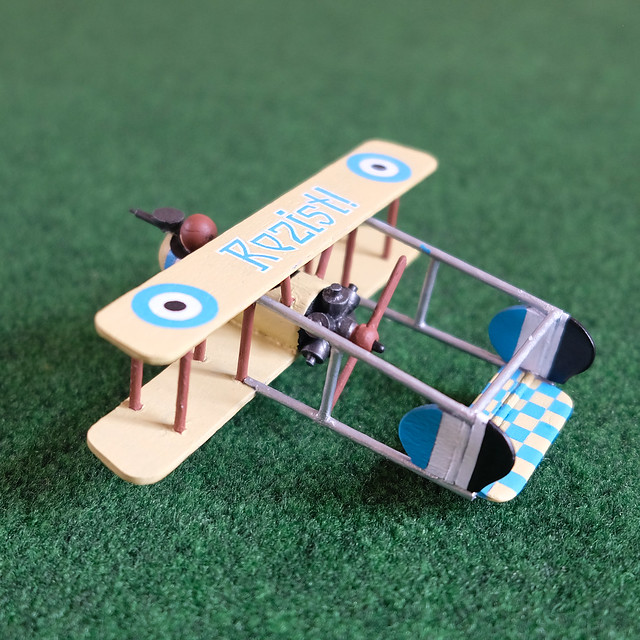
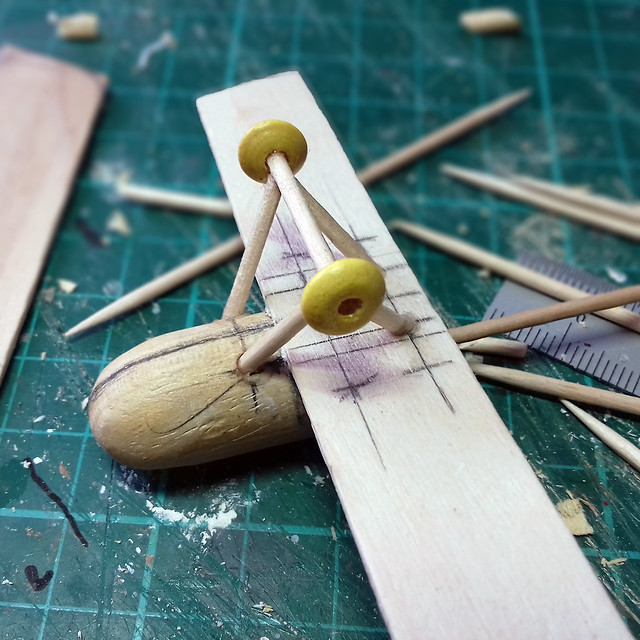
...I also put together the undercarriage.

I Have  a Cunning Plan!
Having just told you that I don't have a plan and that I'm making this up as I go along, I will contradict myself by saying that I do have a bit of a plan.

One problem I came across with my original peg bi-plane was when it came to painting it. I found is very difficult to paint the pilot and the upper fuselage with the top wing installed. So, this time I intend to paint all the parts before I install the upper wing.

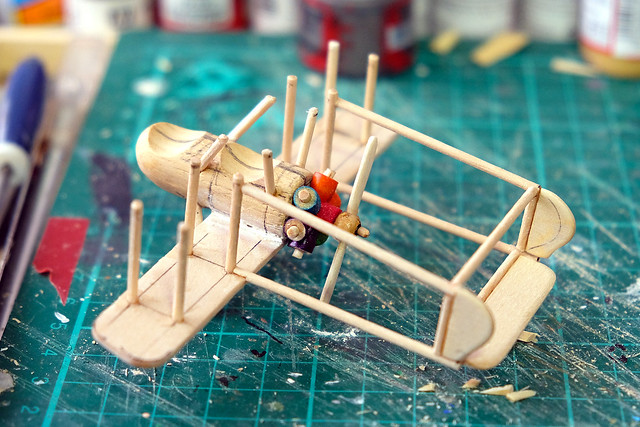
This means I will have to do some careful preparation which will allow me to paint as much of the plane as I can before gluing the upper win on, perhaps by making some pilot holes in the wing so I can just drop the top wing and tail on accurately...

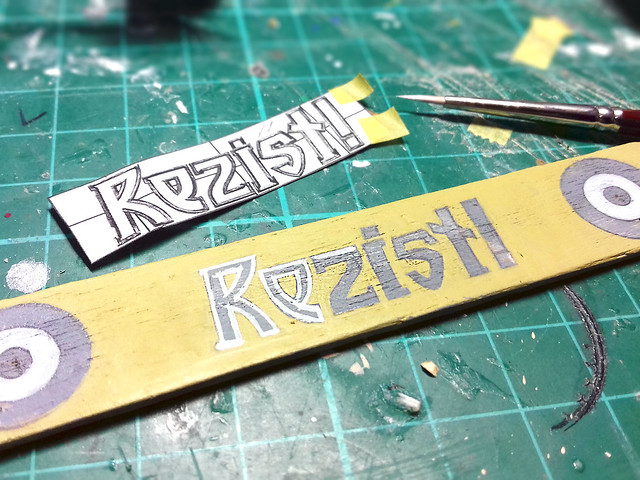
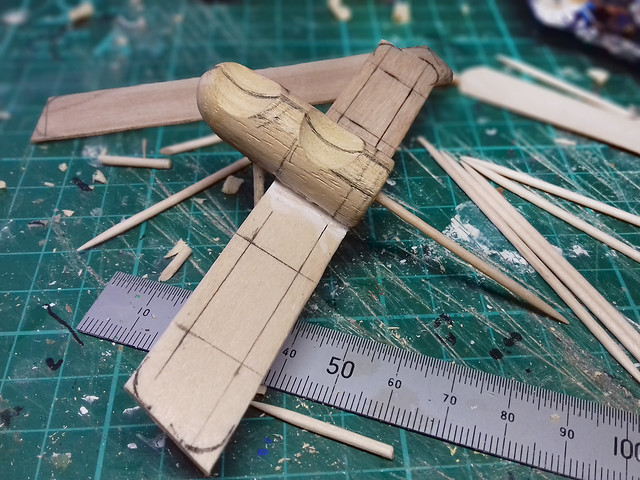
Careful planning and measuring for the next step as I want to install the
top wing and tail unit after painting the top of the fuselage.
Figures crossed that I can get all the separate assemblies to match up correctly. We shall see in Part 2.

Sunday 8 July 2018

Highlander of the 3rd Foot & Mouth, 1895

Well, I'm getting faster at doing this if nothing else! Just as I estimated, I got my little Highlander completed this afternoon...


This is about the last of my prototype tests and I feel confident enough to actually get back on with my 'Franco-Prussian War' Portable War Game project. After that I would like to build up my Molatarian forces in this format!

Hope you all had a good weekend! :)

Friday 6 July 2018

Something for the Weekend, Sir?

I had a spare prototype figure lurking on a shelf, it was one of the tests I did of the pith helmet casting. So, I thought, let's give it a go...


I'd already painted up one of the prototypes in 'Zulu' (the movie) style, so I thought it'd be nice to have a bit of fun with this one and based it on 'Carry On Up the Khyber' - a soldier of the '3rd Foot & Mouth'. :)

Got quite a lot done this afternoon and imagine I will have it finished by the end of the weekend.

UPDATE: Saturday.

Just thought I'd pop this in as it's a tiny bit progress, but - boy - did it challenge me. This is the very first time that I've ever tried to paint a tartan pattern...


Er, not exactly top notch line painting, but I'm hoping it might pass for this 'cartoon' style project.

Thursday 5 July 2018

Peg D&D Adventurers - Part One

This was fun and a bit of a departure from 19th/20th century soldiers, but it's been an interesting experiment and I've learned a few things.


This is the first half of a peg figure set depicting my D&D adventuring group, including; a Warrior, a Druid, a Blue Wizard and a Barbarian.

They are just novelty ornaments really, as at 42mm scale (approx) they wouldn't look right as game miniatures...Unless I made a huge collection of other D&D beasts to go with them! (That's a no, btw!) :D


The Blue Wizard and Barbarian are my newest completions and like all experiments there are things I like and were somewhat successful and things I don't like and were not so successful. My 3D accessories are starting to get a bit more elaborate, as is my painting of textures - but I've tried to keep everything within my desired 'cartoon' look for these figures.


I still have two more player characters to do and I plan to do a DM figure too as I don't want him to fell left out (particularly as he's the one who has been doing the most work in creating our current adventure which I shall entitle 'Massacre at Sleepy Bay'). :)

Monday 2 July 2018

Quick Racer

Just a quickie...

I finally solved my peg racer wheel problem, though perhaps not to my complete satisfaction. I had hoped I could turn some nice complete - one-piece - wheels for my racers out of wood, but I could not afford the modelling lathe I wanted this month (and probably not for a few months either).

So...I've been thrashing about trying lots of alternatives, but nothings been to my liking. I resorted to using buttons, but then, I had to think of a way to cover up the tell-tale holes in them - maybe by the addition of a wheel-hub or hub-cap of some sort.

Well, I just happened to be in good old Wilko's the other day and I came across a pack of thier 'Foam Pieces' for arts and crafts projects. Now I have seen foam bits and mixed medium being used before - over on  Wooden Warriors - but I had it in mind that I would have liked my peg figures to have been all wood.


BUT...(There's always a 'but')...

I've come to the end of my tether trying to knock together a wooden solution (without the proper tools) out of down and from flat sheets. All my attempts were...Rubbish!

So, foam...


Actually, I like the yellow wheels! :)

I suppose the one positive about this is that it has gotten me to explore mixed media. But, I'd still prefer to stick just to wood components if I can.

Sunday 1 July 2018

Peg D&D Druid Completed

Well, another figure off the production line. I'm really pleased with the new Posca Paint Pens, they did - indeed - work fine with my normal spray lacquer without any bleeding whatsoever. Win!


This was an interesting little project to do as - because these were bespoke custom characters for individual D&D players - each figure in this series will have very specific features and accessories and aren't quite as simplistic as the other peg figures that I have done so far.

In this case, the addition of a fur effect paint job, a magik tome, and - which turned out to be the trickiest bit - a Native American skin tone. The skin tone took me three attempts before  I was happy with it.

I have four more characters in this series to do for the rest of our adventuring group; a barbarian warrior (me), a wizard, and (female) thief and a novice (female) druid. I only highlight 'female' as I have to figure out what stylistic shorthand I might use to denote a specific gender (another first for me).

Again, all this seems a little 'off topic' for this - supposedly - FLW Molatero themed blog BUT this is all much needed practise before I embark on a set of Molatarian peg figures. I want to have nailed this peg figure format before I start on these.

Saturday 30 June 2018

Relaxing Saturday!

France 4 - Argentina 3....What a game!

Anyway, that's what I was watching while doing some relaxing painting. But, I was equally excited about the new set of Posca Ultra-Fine Paint Pens I recieved this afternoon...


Quite a nice set of colours (including some metalics), though at £28 it should be. My only complaint - and I didn't notice this until they arrived - is that there isn't a nice brown. This is a pity as a chestnut or mud brown would have been really useful for the figure I'm working on...


The pens will be great for outlining and drawing in small detail on my figures. I seem to find it easier to draw on straight lines and dots with a pen rather than a brush.

My figure is one of the set of D&D adventurers that I making for my role playing group. It's a druid of Native American or Inuit influence and stylistically is - again - modelled on those on the Wooden Warriors blog.

It's a bit of a departure and a little more detailed than my usual peg figures. The player I am making this figure for wanted me to highlight that the character was wearing furs, so that was a something a bit different...


Well, it not perhaps the most convincing fur, but overall I was faily please with how the figure turned out. The big question now is, will the Posca details stand up to glossing?  Yeah, I know I have already done a test, but as this is a actual live model you do tend to worry!

We shall see.

Anyway, the other small job I got done today - between cheering on France - was making the wheels for my little peg racers...