Showing posts with label Burkish. Show all posts

Wednesday, 14 October 2015

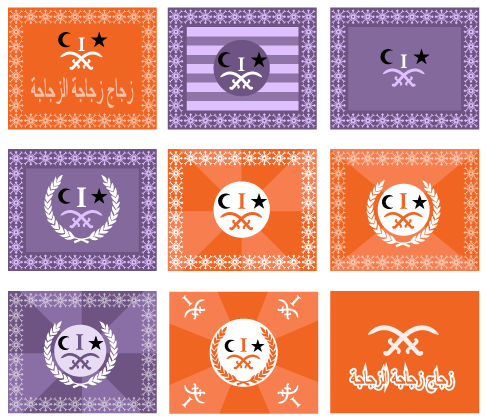
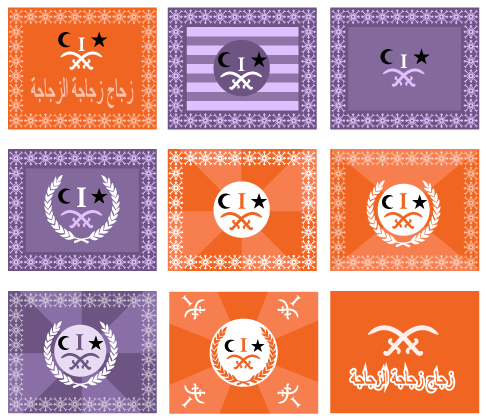
Burkish flag ready!

I had a bit of a panic, a while ago I had a rather nasty work data disaster - despite being careful to back-up my work files when a faulty drive corrupted my files those files were then backed-up over my copies! (I used a piece of software which automatically managed my back-ups.)

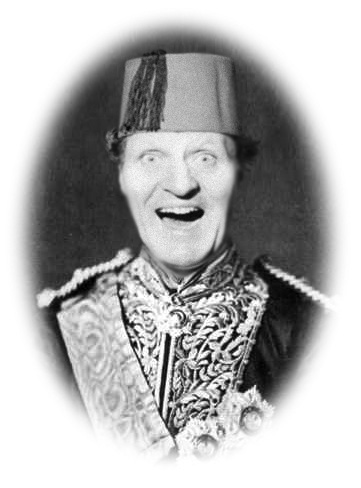
The Burkish Sultan, who's favourite moto was that famous
old Burkish saying: "Glass, bottle. Bottle, glass." Sage indeed.

Why am I telling you this? Because I just happened to have saved my Burkish infantry regimental flag designs onto this hard drive!

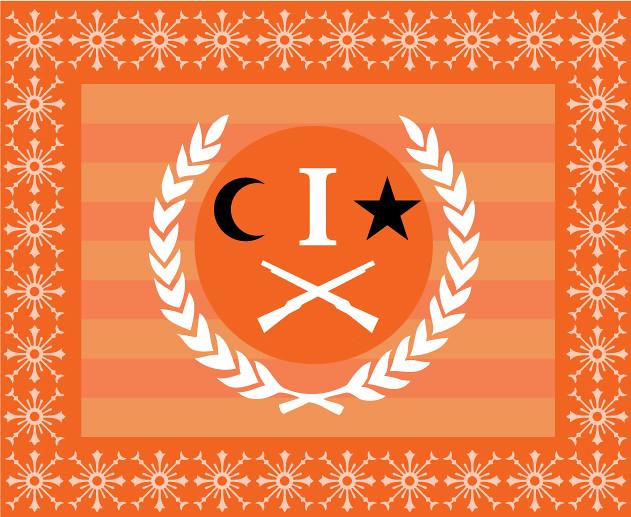
Anyway, the good news is that I have now modified my back-up strategy AND while clearing out my Cloud-based storage I discovered another copy of my Burkish flag design (I often make multiple copies of files precisely abecause I am paranoid about losing work). So here's my Burkish flag design in all it's glory...


I've tried to give the flag an 'Ottoman' feel to reflect the Middle-Eastern influence of my imaginary Burkish Sultanate. It's actually a little over-ornate compared to historical Ottaman battle-flags but I've borrowed and modified various different motif to create my Burkish one.

Some of my draft designs for a Burkish flag.

What I have to work out next is how to turn my digital design into a mini-flag to mount on my toy soldier's flag pole. Not difficult but I will double check some of the TVAG flag designs I got with the Funny Little Wars rules for sizing.

Practically speaking, I got some good tips for making flags from that prolific FLW enthusiast, Mr. Tim Gow. So I'm off into town to buy some double sided sticky tape! I'm looking forward to putting my printed design together as this will be the icing on the cake, so to speak...

Which reminds me, I must buy some tea-cakes today. My daughter is popping by for a visit!

Tuesday, 13 October 2015

Burkish 'command' element progress

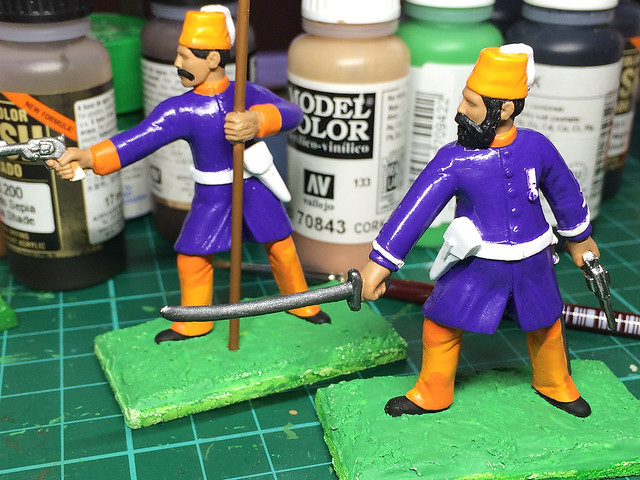
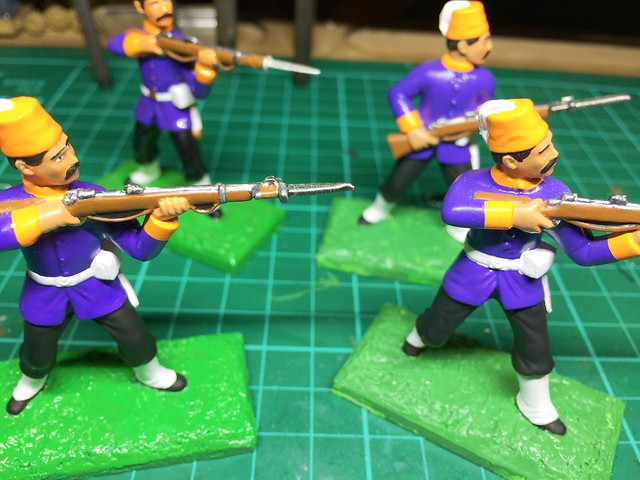
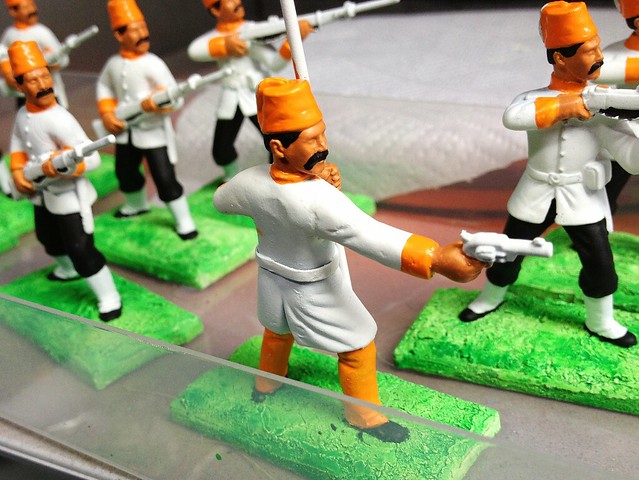
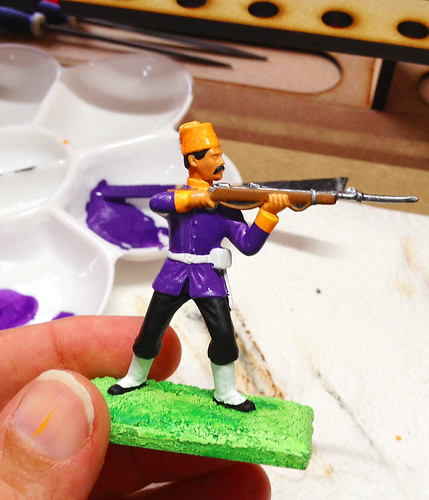
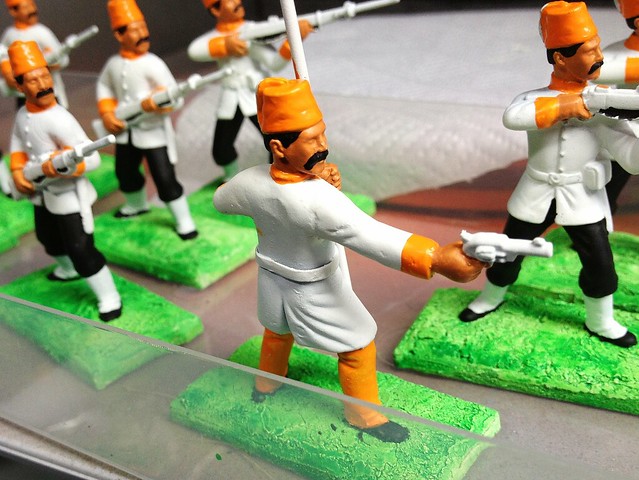
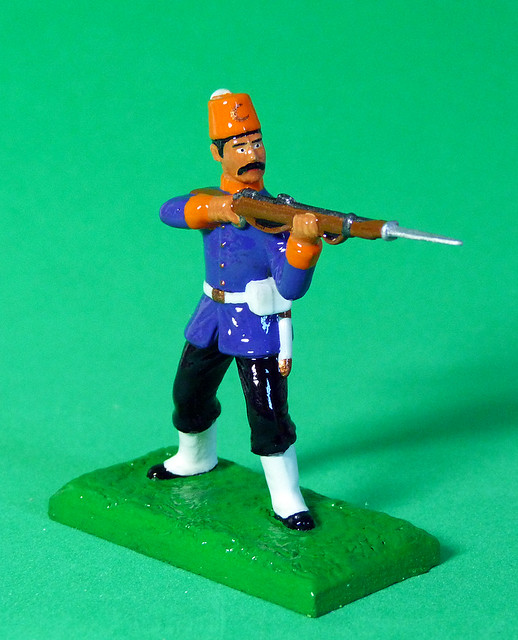
Just a small update on my Burkish light infantry regiment, I'm on the last leg - painting the 'command' group (if that's the correct term for the senior NCO and officer). They have a slightly different uniform than the 'other ranks'...


I'm about halfway through painting the figures, so as you can see some of the coats are a bit patchy. But I'm getting through the job pretty quickly (for me).

I'm toying with giving the officer a grey beard, and the flag-carrier needs a flag! This is in the works as well.

Wednesday, 7 October 2015

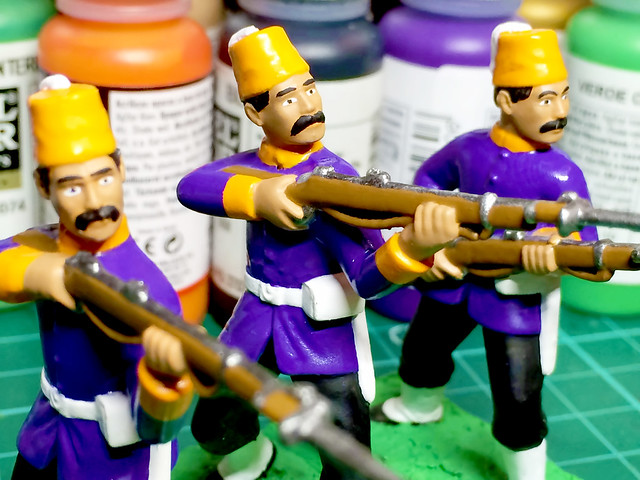
17 of 20 Burkish!

Getting there (apologies for the count down)! But just finishing off the infantry element of my Burkish regiment, which will leave just the NCO/officer element to complete.

But I can announce the winner of the Groucho Marx look-alike contest...

"I never forget a face, but in your case I'll be glad to make an exception."

(I was so tempted to paint little spectacles on him and give him a cigar!)

Wednesday, 30 September 2015

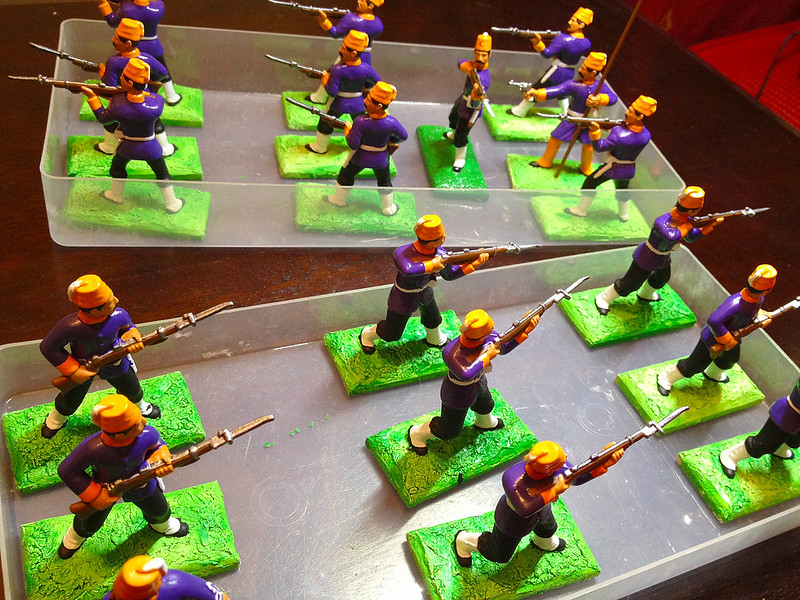
9 of 20 Burkish!

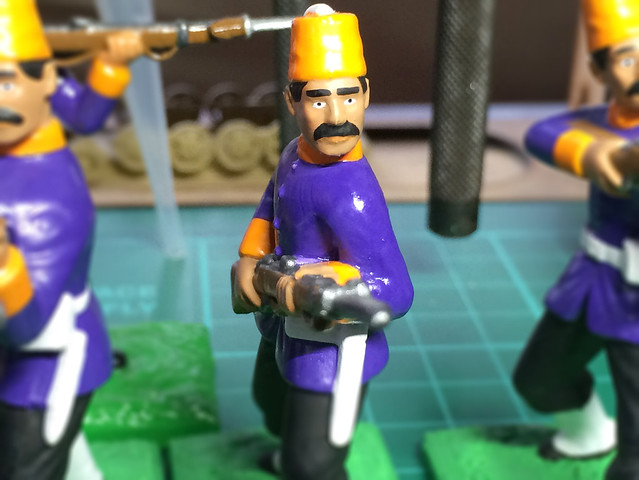
About halfway with my Burkish regiment...Phew!


Edit: I have been asked why all my Burkish troops look somewhat surprised! - I think I need to start painting on 'angry eyebrows'! :D 

Sunday, 20 September 2015

Burkish Infantry resumed - note to myself

Now I've done a refresher project and feel I have my FLW mojo back it's time to get back on track with some of my earlier work. First in line is my Burkish infantry.

These should have been an easy start for my new FLW hobby as they were a straight forward painting job based on Armies in Plastic's 1882 Egyptians. Though I have to admit I didn't think that this sort of 'simple' painting was as easy as I imagined it might be.

Getting nice solid flat colours was the big challenge for me. I'm a graphic designer by trade so I'm a might pernickety about staying inside the lines and flat colours!

Still, I found it very relaxing - once I had found the right paint for the job. For FLW glossy figures I found that the gloopy (it's a word, look it up) Tamiya acrylic range was right for me. While a little tricky to work with as it is quite thick it does produce a nice opaque coat.

Not easy to work with, in my opinion, but do give a superb flat opaque coat.

Anyway, this brings me to the matter in hand - restarting mu Burkish infantry project. First things first, just what colours did I use for my original test figure? That's right, I - Mr. Meticulous - forgot to make a note of exactly which colours I used for my Burkish colour scheme. Du-oh!

So today I have been going through all my paints to see if I can match up the correct colours. This is where I discovered just how many shades of brown I had!


Note to myself - remember these colours!
It took me a while of dabbing on different paints to recreate my original test piece but eventually I have several identical Burkish troops. Phew. So here is the recipe just so I can refer back to it in the future (I'll make a point of writing posts like this for each of my figure painting projects).

[Note: Although I prefer Tamiya paints for this I do use Vallejo for certain undercoats and when Tamiya doesn't have exactly the colour I want.]

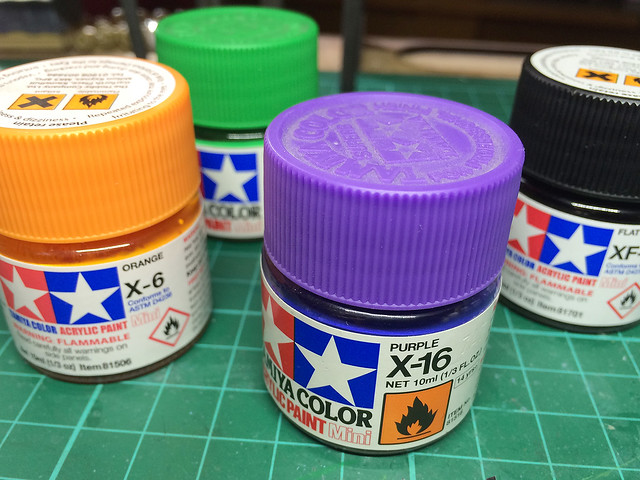
• Orange: Tamiya Acrylic X-6 Orange (a git to work with!)

• Purple: Tamiya Acrilic X-16 Purple

• Flesh tone: Vallejo Model Color 70843 Cork Brown

• Black: Tamiya Acrylic XF-1 Flat Black 

• White: Tamiya Acrylic XF-2 Flat White

• Rifle wood: Vallejo Game Color 72043 Beasty Brown

• Rifle metal: Vallejo Model Color 70863 Gunmetal Grey

• Grass (undercoat): Vallejo Model Color 70891 Intermediate Green

• Grass (upper-coat): Tamiya Acrylic X-28 Park Green

Process - the production line
Just a little note about the production. Yes it's pretty straight forward and there's not a lot I can say about painting a unit of FLW soldiers. Again, it is a very relaxing activity - no brain required and it's something you can definitely do while watching TV (though I prefer listening to music).

As you might imagine I undertake a colour at a time across the 'regiment', all the trousers followed by all the tunics, etc, etc. And I work 'inside out' - by that I mean I start with the lowest layer and work outwards - beginning with the flesh tones and working up through the uniform ending with the webbing kit and weapons (ending with the base).


However I also have a procedure of three stages of coats; base coat, top coat and finally 'touching up'. It's a circle of painting where I run through all the soldiers in the unit and by the time I have done that the first ones should be dry and it's OK to start running though the next process.

And that's it.

Everyone will have their own technique and preferred style and I guess my little foible is that I do do eyes and eyebrows. But I don't shade - of course - and I don't do the 'red cheeks' that some traditional toy soldier painters like to do.

Monday, 8 July 2013

Burkish Infantry near readiness

There is slow progress in the readiness of my first regiment of my Grand Army of Molatero. The colonial contingent of Burkish Naval Infantry nears deployment...


All the basic painting is done, but now I have to go back over each figure to do the touching up - where I have gone over lines or been shaky in my painting - and add the finer details.

The last job will be the final coat of grass green on the bases before glossing. Still, things are moving forward.

Wednesday, 26 June 2013

A coat of paint (get it?)

Burkish infantry part 16...
Well, it's the final large area of paint, the tunics. I painted the rifles first though so this is looking like a completed toy soldier. But not quite!


Aside from the fact I still have 18 more to get to this stage this, in fact, only marks the laying down of the base coat. In places it is still a little on the thin side with the white primer showing through - check out the grass green on the base for example - and so there will be a session of touching up to do.

The last phase will be the detailing - faces and buttons and buckles, etc - before I gloss.

I have to say that the Tamiya X-16 Purple is a lot nicer to work with, although in photos it tend to look more on the blue end of violet than the red end of the spectrum. For the rest of my Molatero regiments I may switch to Vallejo's 70811 Blue Violet which is a shade lighter and more obviously purple.

...Phew, 18 to go...18 to go...

Monday, 24 June 2013

Many moustaches, Burkish infantry fashion

Looking like a meeting of the militant section of the Chuckle Brothers league, my Burkish soldiers are taking shape...


The Tamiya orange - as I mentioned in my last post - was a nightmare, it's like painting with PVA. It dries super quick which is a real pain when you are painting a unit like this. So I am thinking of trying out Vallejo paints on my next regiment.

I am on the last large block of paint now, the purple tunics, and after that it's smaller items and then detailing.

Next regiment:
I am already putting thought to my next regiment (or is it battalion, I forget the FLW rules) and will be moving on to the Molatero main force itself. I intend two regiments of line infantry, a Guards and a Jäger. Both of these will be based on the research I have been doing on Balkans Wars uniforms with my Jägers based on Romanians of the period.

From there I will move on to my cavalry support and then finally my artillery (then start to populate my general staff and auxiliary). But that's a long time off yet, in the meantime I await pay day and then will make my order for three boxes of Armies in Plastic's Boxer Rebellion Russians which will be acting as the basis of my Jäger unit.

Sunday, 23 June 2013

Painting by numbers...

Burkish Naval Infantry Part 14...Or something...
We are into the production line process now, and I'm finding it really relaxing!


You have to start by doing a little planning about your painting strategy, which layers you are going to put down in which order. The simple solution is to start on the 'bottom layer' and work up, so...

1. Flesh tones
2. Green (base)
3. Black (trousers and boots)
4. Orange (collar and cuffs and hat)
5. Purple (tunic)
6. Brown (rifle)

...Etc, etc...

Though what I am finding is that having painted the soldiers with a white primer I might have to give each layer ta couple of light coats (as the white tends to show through). But hopefully the white primer will make the brighter colours more vivid. We shall see.

Edit: (Later in the day) I'd just like to say that Tamiya's X-6 Orange acrylic is HORRIBLE to work with! :)

Friday, 21 June 2013

Burkish 1st Inf. flag finalists


Narrowing things down, my main choice now is what colour combination to go with now. The orange looks quite nice...Maybe!

Thursday, 20 June 2013

Primed and ready! Burkish underclothes...

Right, *before* I get to priming the soldiers I do have to iron out any kinks in the rifles. This is the main draw back of plastic soldiers I think, all the rifles are slightly bent because of the way the soldiers were shoved in boxes.

This is easily remedied, I dunk the bent rifles in a bowl of boiling water and straighten them out and then quickly dunk them in a second bowl of cold water to reset them. Job done.


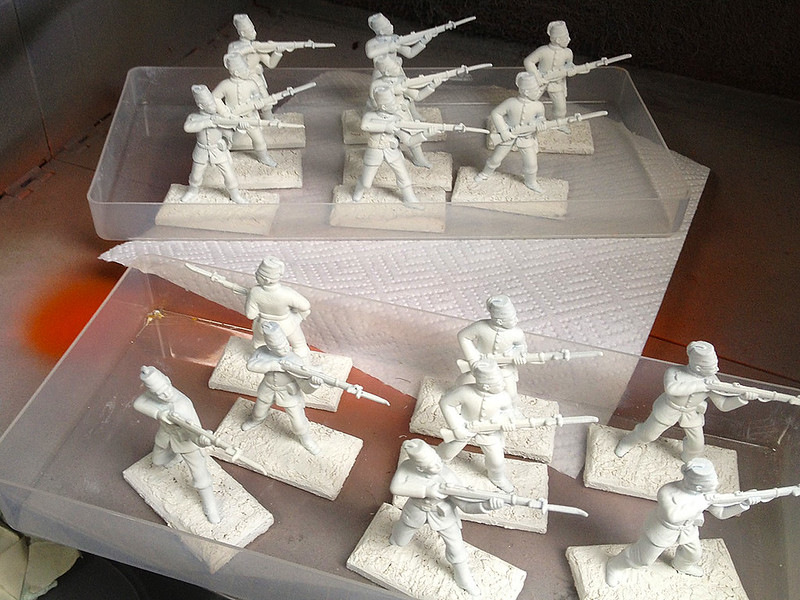
That done I gave each soldier a quick wipe down in case there was any dust or plastic bits on them and then started the first coat of primer. This was AutoTek plastic laquer for car bumpers, Tim Gow recommended this as it helps stiffen fragile parts like the rifles and keep them a bit more stiff.

Once dry I started the second primer which was a few light coats of white spray...


Well, now the intense bit - the actual painting production line!

Wednesday, 19 June 2013

Burkish 1st Infantry flag

As my first regiment comes along I have been putting some thought to the design of the regimental banner. The general feel is Arab-esque...


The regimental moto is an old Burkish proverb, which translates (roughly) as follows: Glass bottle bottle glass.

Edit: Played around with some additional ideas.

Cleaning up plastic soldiers

Burkish Naval Infantry Part 12 - Tidying up
This is a relatively small but quite important part of preparing plastic toy soldiers for painting - cleaning up seams and moulding marks.

Being moulded plastic figures there are signs of the process that created them, mainly in the form of  seams and little round marks which are to do with the way the moulds work (don't ask me). Were this a hard plastic kit I would be reaching for the files and sand paper, but soft plastic is a different kettle of fish...

The only paper abrasive material I find that works without chewing up
the surface too much is a very fine glass paper, but used sparingly.

Soft plastic doesn't so much sand as fray. So the better course of action is to shave the worst of the blemishes off using a very sharp hobby knife and then finish off with a very fine glass paper. I also use the oblique side of the scalpel blade which I draw over the left over marks to smooth off.

It's still not perfect by any means - but these are toy soldiers and I think having the occasional seams might actually be in keeping. I'll probably experiment with this when I move from plastic to cast metal figures.

...Anyway, 18 to do. But while I work through these I am starting to think about my next regiment and am looking for ideas based on Romanian and Balkan uniforms from the 1890-1900s.

Tuesday, 18 June 2013

Burkish bases, messy fun!

Part 11 (whatever!) of my Burkish naval infantry saga...
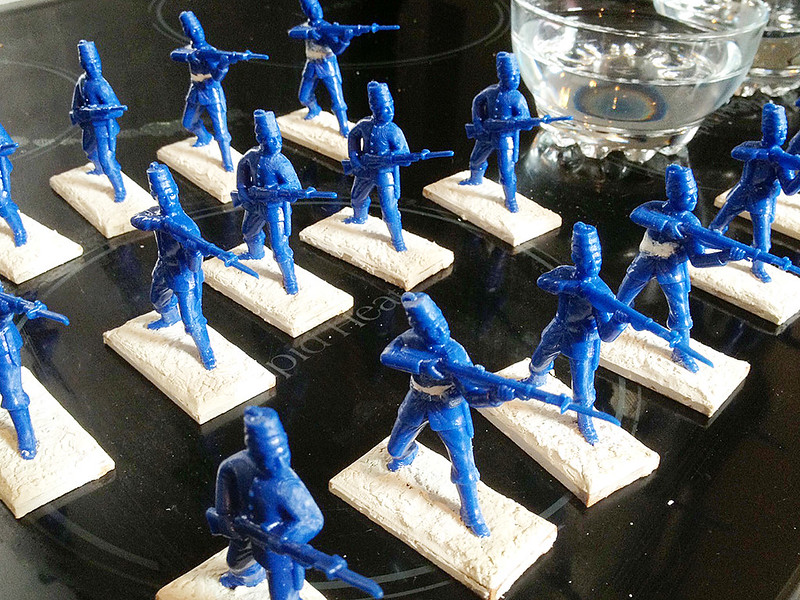
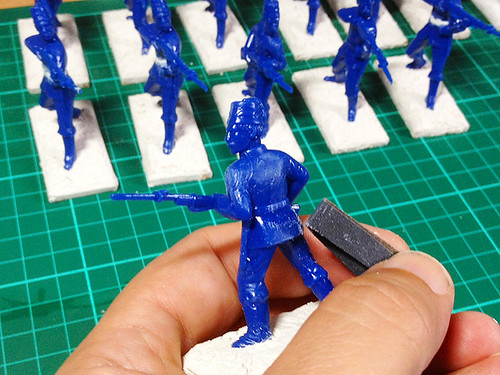
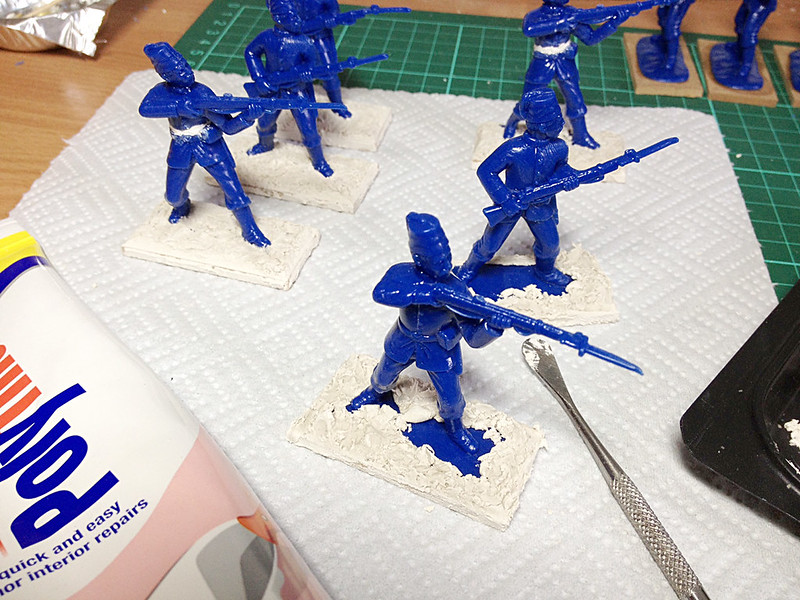
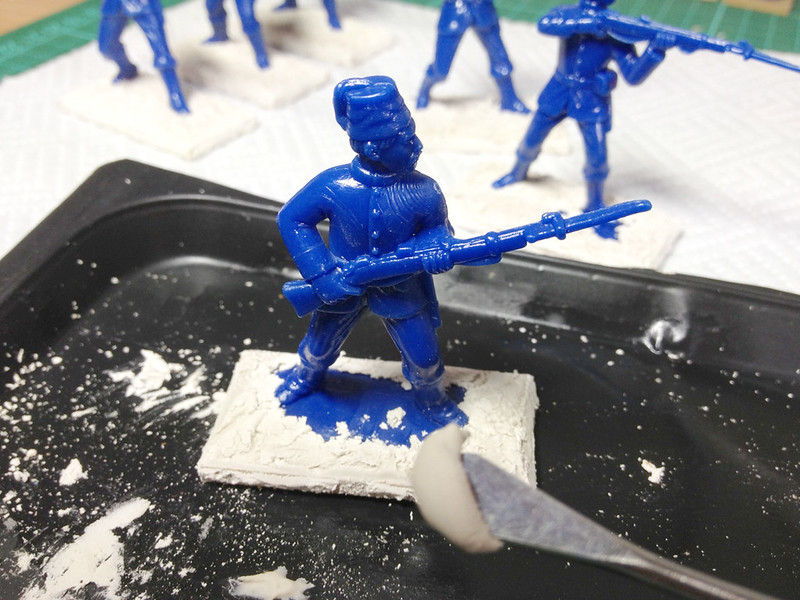
Well, with all the remaining soldiers lined up it time to add the bases. This is a nice messy bit and very relaxing - I simply glue the plastic soldiers to the little MDF bases and then add PolyFilla.


Now I found that working in threes is just enough time to lay down a rough layer of Polyfilla before it starts drying a little. By the time I have done the first layer on the second three it's dry enough to go back and start smearing out the first three. Too wet and the Polyfilla is horrible to work with - it sticks to anything - and you end up pulling off more than you put on!

So, do thing in stages and you soon get into a rhythm where the Polyfilla is just at the right consistency to work with as you complete one operation in the process. Soon you have a little production line going.


I tend to work from the outside of the base in, the last stage being the bit up to the feet which demands a little more care. Polyfilla produces a wonderfully random cracked earth effect...And it's cheap!

Music while Polyfilling? The Marriage of Figaro ("Le Nozze de Figaro"), K. 492: Act II - "Voi Che Sapete"...(Just right for slapping on stuff to!)

Boy this is relaxing. I stopped for a big mug of tea and a piece of apple strudel, ahhhhhh!


Saturday, 15 June 2013

Glossing over toy soldiers!

Put the final touch to my long suffering test model and gave him a few layers of clear lacquer...


I don't know if it's just me but all of a sudden this shouts 'toy soldier'! Before I was - well, not disappointed, but I thought something was missing, but now it has all come together. Glossing your soldiers really does put the cherry on the cake!

And one more thing I changed. I have repainted the base a vivid grass green, again this seems to say toy soldier more than the dull mid-green I had before. I think that it reminds me of Britains toy soldiers?

...Oh cake! Tea and cake...

Thursday, 13 June 2013

Burkish command figures...Base coat

...Um, Part 9? Well anyway, thought I would show the converted figures in their primer coat as they look nicer that way...

Click to enlarge

The first part of this painting procedure was to spray the figures with a couple of thin coats of AutoTek Clear Laquer spray, then a couple of light coats of AutoTek White Primer.

Hopefully the white will really make the final colours pop.


...Only 18 more to go and I'll have my first FLW regiment ready to paint!

Wednesday, 12 June 2013

Burkish figure conversions finished

Burkish Naval Infantry project...Er, Part 8?
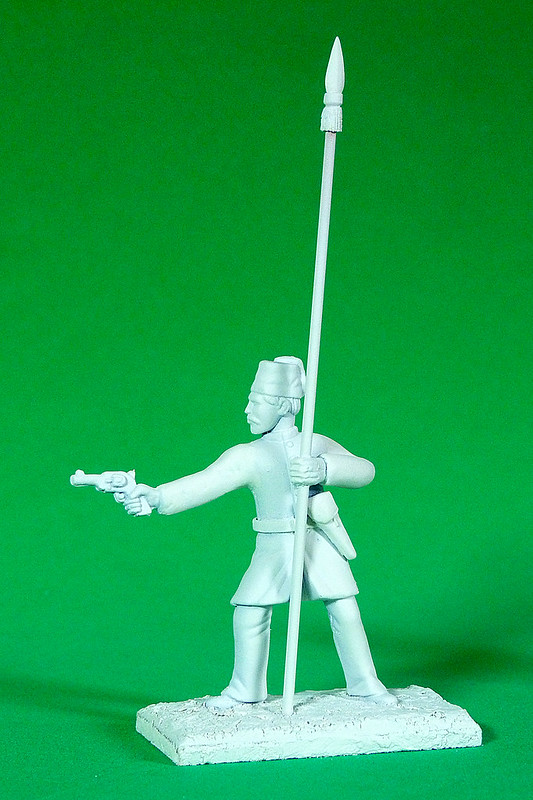
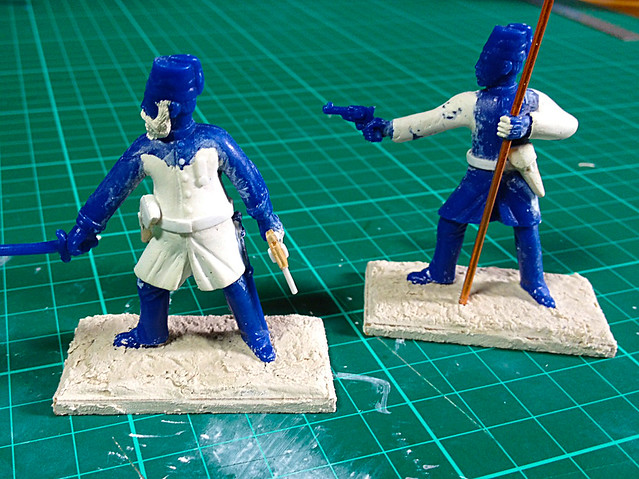
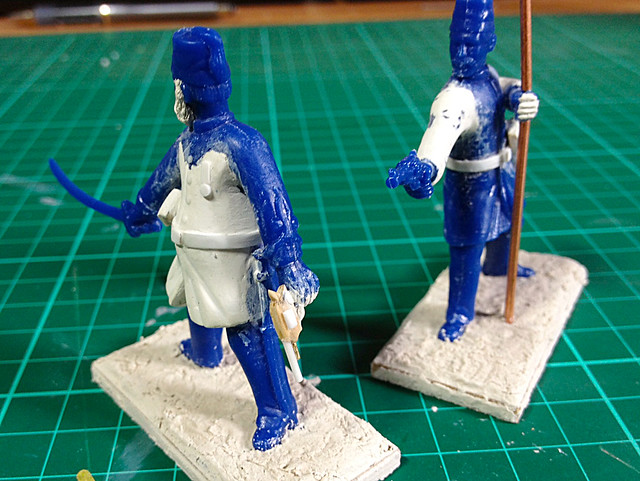
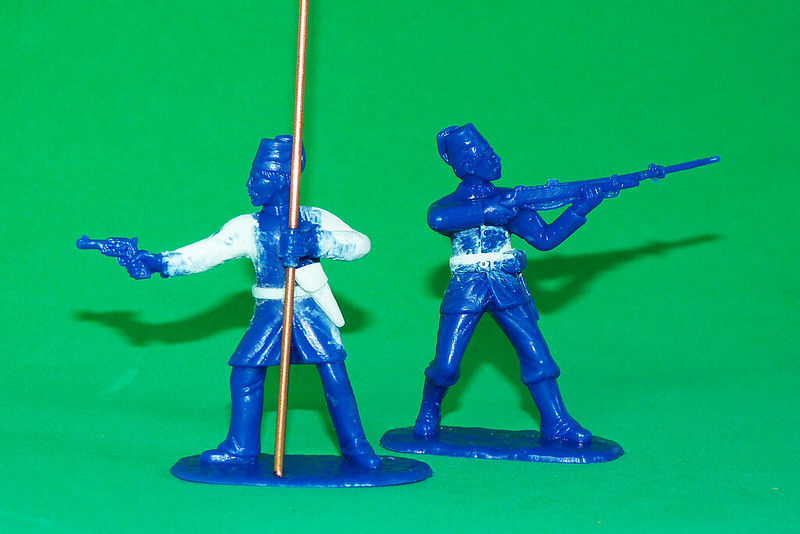
Well, finished the conversion of the two command figures for my infantry unit, the flag bearer and the commanding officer...

Excuse the dodgy iPhone snaps!

Obviously they will look their best when they get a coat of paint, but it's interesting to note at this stage how much work - denoted by the white Milliput - has gone into each figure. Generally I am pleased with this first attempt and it will spur me on to do more and maybe even something built from scratch.


I still have to adjust the flag pole - which is why it's a bit bent - but otherwise that's that. Now I have to base all my infantry in this unit and start the process of painting them.

Thursday, 6 June 2013

(Too much...) Burkish Delight!

Burkish Infantry project - Part 3
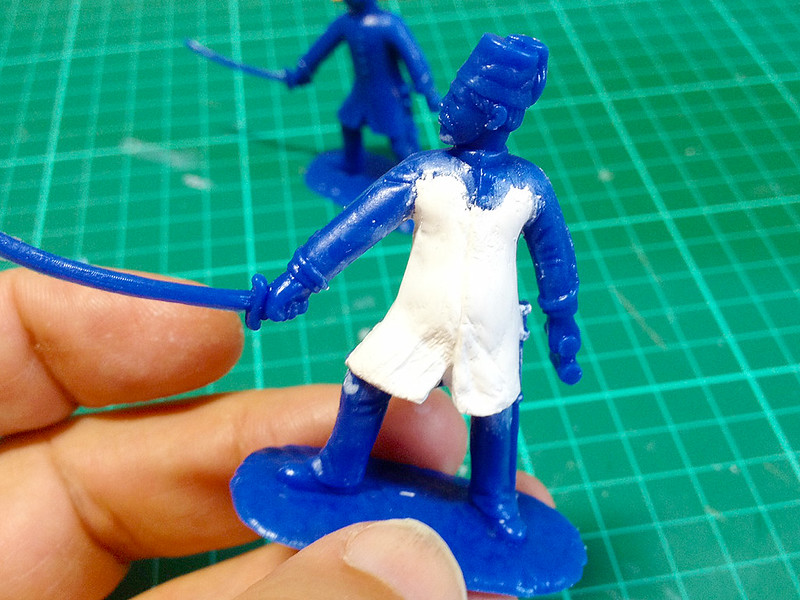
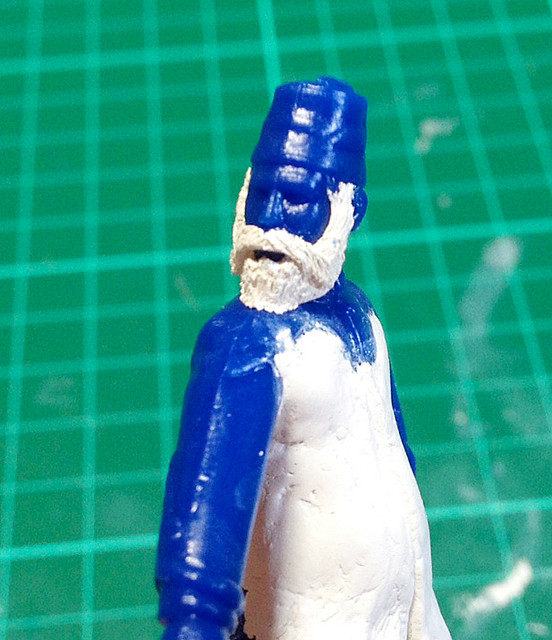
Had a bit of a lark this afternoon playing about with putty! I wanted a distinctive and unique character for C.O. of my Burkish infantry so decided to pad out one of the officer figures I have (having used another one for the flag bearer)...

Anyhoo, short story I have the makings of a portly pasha!

Unfortunately white Milliput is a pratt to photograph, so you might not
be able to make out the folds in his new jacket or his new pot belly!

I have to say I love working with Milliput and adding a couple of stone to my officer was very easy, but then - typically - I got a bit excited (and had some Milliput left over) so I decided to have a go at a big beard too.

Any resemblance to a certain Mr. Claus is purely accidental!

I want to dress him up with some choice accoutrements, like an officers sash, belt and some medals. We'll see how that goes, but I will have to wait for his belly to dry now! Hee hee!

Tuesday, 4 June 2013

Burkish Naval Infantry unit - Part 2

I covered the conversion of the first of my two 'special figures' for my Burkish Naval Infantry unit in Part 1 of this series of posts. Today I will be documenting the creation of the second (and third) custom characters for my little colonial brigade.

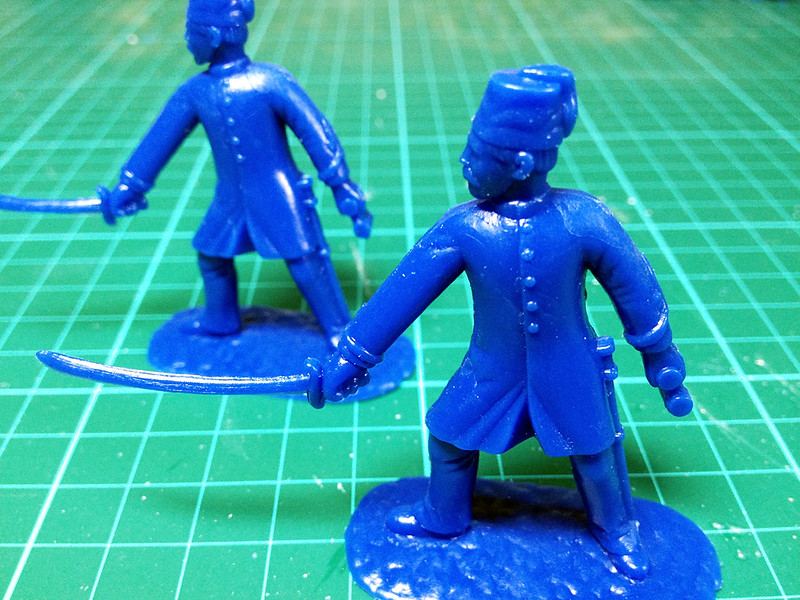
These next conversions are based on the AiP Egyptian 1882 Soldiers in Winter Dress set, they are the officer figures and will be converted to represent my flag bearer and C.O.


Although - technically - the flag bearer would be an NCO this particular pose lends itself very well to conversion. His dynamic pose strikes the right sort of posture for the flag bearer. The one down side is that I will now have to slightly modify my officer so that the two figures are suitably distinct from each other (especially as they will appear next to each other in the ranks).

The easiest way to differentiate the poses are a change in the arms and also the gear they will be holding. Naturally I would like the officer to be brandishing a sword but the binoculars is a bit out of place (he will make a nice artillery officer though).

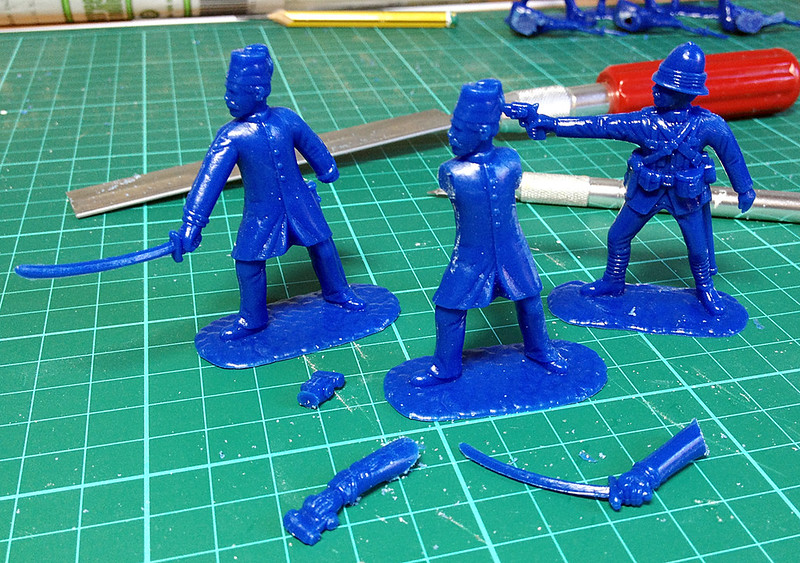
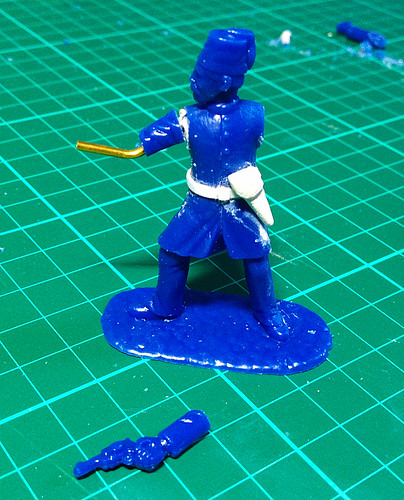
The flag bearer will have to undergo surgery to bring his right arm forward in order to hold the flag, while his left hand could be holding a revolver. I say revolver because it just so happens that AiP made a bit of a boo-boo and included a nice British Officer by mistake in the last pack of Egyptians I bought, so some simple transplant surgery will give me the pose I am after!


Er, the British officer threatening to shoot the Burkish soldier in the head was an unfortunate result of my not paying attention when I took the photo! But the various surgical operations necessary to convert my figures are evident...

First of all, though, I decided that my 'NCO' needed a belt and holster. Easy enough, I made the belt out of a strip of thin plasticard strip and the holster was carved from a wooden coffee stirrer and detailed with Milliput!

The left arm will be the recipient of the transplanted gun-arm from the unlucky British officer, but I wanted to change the straight arm pose. I made an armature (pun for Tim) out of a piece of brass rod and bent it into position, I then slotted onto it pieces from the original gun-arm.

The idea is that I join up the pieces with Milliput.

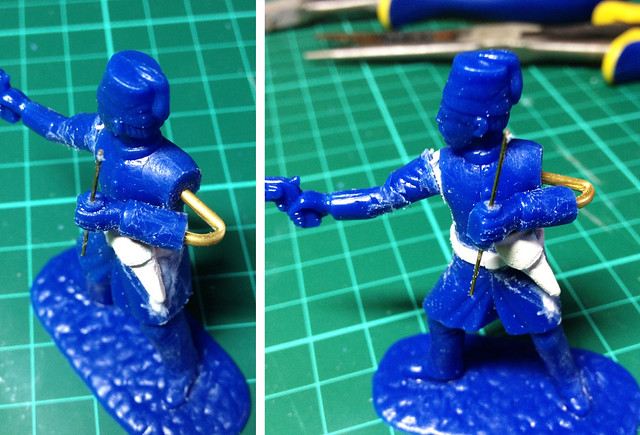
The right arm is the more complex, it will have to have a bend in it as he will be grasping the flag pole across his body. How realistic this will be is a matter of debate as I imagine a battle flag is a rather heavy - and in all probability a two handed - affair. But this is the wonderful world of toy soldiers after all!

Once again I started with a brass armature and used the original arm to supply the pieces required to re-construct the new pose. His original hand held the binoculars so it was already in the right grip for a cylindrical object (sort of). I would drill through the hand to facilitate the flag pole.


Sorry about the photo, but I hope this shows how I intend to create the right arm. The small wire going through the hand is not the flag pole itself, I will be slotting a larger rod onto this.

...And after some playing with Milliput...


(Click on photo to enlarge.)

Quite pleased. I'm still modifying my C.O. - just to make him more of an individual character - but these two fellows should make fine additions to my colonial infantry.

The Milliput bits are a bit messy I admit, but I am banking on these smoothing out a bit - and being camouflaged - by the primer coats and then the final painting of the figures. Fingers crossed.
Friday, 24 May 2013

Burkish Naval Infantry unit - Part 1


Today is rather exciting, I start my first FLW regiment. I am using two boxes of Armies in Plastic's Egyptians in Winter Dress (1882) to create my imaginary Burkish Naval Infantry. Having worked out my painting regime for these sorts of figures it should now be a pretty straight forward production line type of job. Well, except for two special figures I want to include in my unit that is.


One figure that isn't 'out the box' is the flag bearer, this character will have to be created by converting one of the other toy soldiers from the set. Additionally, there weren't quite enough standing riflemen to make up the unit I wanted - I have a preference for an all standing firing-line.

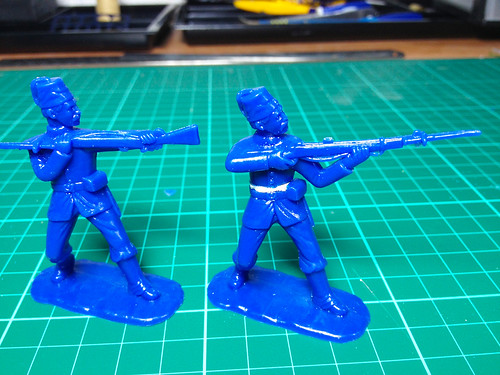
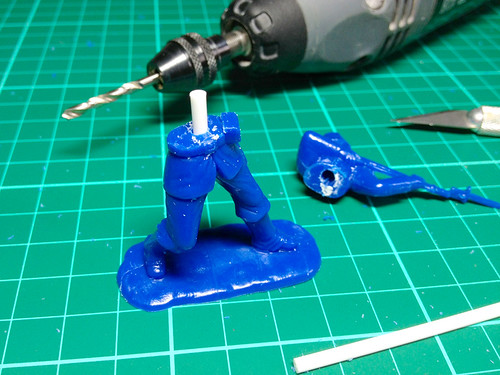
Luckily there are three figures in a particular pose that I am not keen on, the fending-off pose with rifle butt forward. I reckoned that these might be converted using the firing poses from the kneeling riflemen to create a couple of additional shooting infantry for my ranks. I would simply take the bottom half of the standing figure and mate it to the top half of the kneeling figure!

Proof of concept, the two halves of my chopped up soldiers stuck
together with some BluTac. But I like the pose!
Pretty simple as I say, but a good introduction to converting these soft plastic toy soldiers.

To be honest I was surprised how easy it was to cut through these figures, my sharp hobby knife slid through the plastic like the proverbial knife through butter! But joining the two haves together again did pose a bit of a problem, I mean what kind of glue is best and will the join hold?

I decided to use a internal brace, a piece of plastic inserted into a hole drilled in either half.


The resultant pose is quite dynamic, rather as if the soldier has just fired. Hiding the seam will be left to my old friend Milliput, the painting will do the rest!

In part 2 of this project I will be doing a little more complex conversion as I make the regiment's flag bearer.