Showing posts with label construction. Show all posts

Sunday, 2 May 2021

Invasion Mars - 2nd British Infantry (Pt. 1)

As mentioned in the previous post, I am well on the way to making my first British unit for my 'Invasion Mars, 1899' project. This unit is a 'heavy' infantry Grenadier unit - an elite with special weapons - so I next wanted to start on my more basic 'light' infantry.

I had in mind something along the lines of the idea of 'Zulu on Mars' when it came to designing the light infantry figures, using the 1879 pattern of uniform worn by the British at the Battle of Rorke's Drift. Taking this as a basis I would then modify the original design to give it a more Steampunk look!

Luckily for me this is already a pretty popular theme and there is a reasonable amount of reference and ideas knocking about on the internet and in print and even in popular media...

British infantry on Mars! Doctor Who, series 36, episode nine – Empress of Mars

For me the most iconic bit of the uniform has to be the British Army's 'Foreign Service pith helmet, so I wanted this to be at the heart of my design. But unlike some early science fiction I did not want to endow Mars with a earth-like atmosphere, so this helmet would have to be modified into some sort of environmental protection.

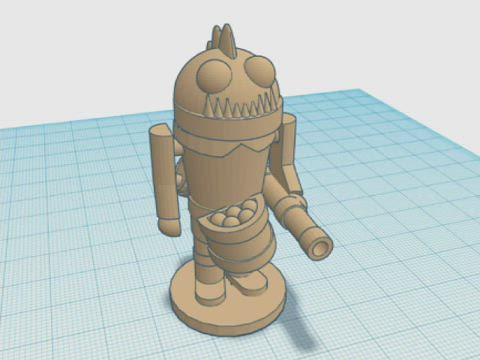
Using TINKERCAD as my 3D modelling software of choice (at the moment, until I can get to grips with something more sophisticated) I quickly mucked about with some shapes until I got something approximating my idea. I won't lie, the helmet was a bit of a bitch to do and it took me a while to get something that I was happy with...

Steampunk Soldier - 'Invasion Mars, 1899'

There was then a lot of tinkering around with sizes. I always tend to over-size things when I free-hand my designs and the first attempt at the helmet was way too big in proportion to the body and when compared to the Grenadiers I did...

Back to the drawing board and I rescaled the helmet a couple of times until I think I hit the 'Goldilocks' zone. Yes, it still is a little over-sized but that's part of my cartoon style and also so that it works as a 'space helmet'...

The next issue was the design of the 'space gun', again I didn't want to do what some game miniature designers have done and simply make a Martini-Henry rifle (as used in 'Zulu') for a science-fiction figure. I don't know about the effects of ballistics in space or what effects a different gravity has on projectiles but I'm sure a 'one gun suits all' (space and differing gravities) would mean some special considerations...

So, I went for a fanciful Steampunk design with an unspecified firing mechanism - could be a rail gun, could be a ray gun sorta thingy that would suit all situations! 😂 

Sorry this is upside-down, but the above picture show how I orientate my
objects for 3D printing for the best quality.

Design Done - The Printing Begins!
Now the nerve wracking bit, although I am starting t gain a little confidence with my 3D printing workflow. The primary concern is print quality and how to orientate designs on the print bed to get the best print I can. 

There is actually two concerns, orientation and whether to add supports. In the above picture of my space gun I orientate the arm and gun component in such a wat that I get the smoothest print quality on the main straight line (the upper arm). There were several options but I decided this offered the most advantages. Others might disagree.

Supports are the second - but related - consideration. I might orientate my model so that I can minimise the use of supports (supports being scaffolding that supports over-hanging elements of the model). So it turns into a bit of a puzzle working out which way to place the component to get the best quality with the least support! 😵

Here I have orientated the body & legs in the vertical BUT I have, then, had
to add a lot of tree-like supports to aid in the printing of the helmet over-hang.

Yes, it's all a bit crazy, but after a time it becomes second nature and you eventually just 'know' instinctively what's going to cause problems in a particular model. Er, mostly!


Print done I then carefully compare it to the other model I have made in the series, my Grenadier. As mentioned above, my first attempt at my new helmet resulted in it being obviously over-large when compared to my Grenadier's 'diving helmet'. But this latest print turned out to be proportionally correct (I think)...

Above: Checking mutual proportions, but also notice that I have added
my 'magnetisation' system to the bases, steel washers! LOL

Well, this is all going swimmingly! Er, except.......!

On fitting the arms to the body I noticed that the arm holding the gun didn't fit properly due to the splayed feet I had done. It's not noticeable in this photo due to the angle I took it, but believe me that the arms are not fitting the way that they should be...


...Back to the drawing board again! This is what prototypes figures are for though, working out all the kinks before running off a whole unit of figures. In this case I had to go back into TinkerCad and alter the angle of the feet so there was more space for the gun to sit on the base properly...


And that's it for now. A very good start I think (?), I'm quite pleased with my design for a Steampunk soldier and I'm really enjoying this series. AND it's actually taking me back to the original idea for this blog which was to do wargame armies (rather than the single figures I have been doing for a long time).

I may even get round - eventually - to doing the FLW Molatero army I intended to do in the first place! 😁

NEXT: Painting my Infantryman.
Thursday, 29 April 2021

Steampunk Grenadiers - Magnetised Bases

 Having completed printing the remainder of the first unit for my 'Invasion Mars, 1899' project I realised I had made a bit of a boo-boo! But, first of all let's have at the progress so far...

So far so good - although I am still working on the arms and weapons - and this is when I had a bit of a 'duh-oh' moment. I like to magnetise war game figures so I can easily move units in unit trays, this entails fitting a small magnet into the base of the figure - guess what I HADN'T done! 😖

I didn't really want to start drilling or carving out holes in the figures' bases so I could insert magnets, this would be quite messy.  SO... Plan B, I decided it would be easier just to glue steel washers to the bottom - then I'll magnetise the unit trays with magnetic sheets.


This is a bit of a fudge but it does have one positive effect - it gives my PLA printed figures a little bit of weight - which I prefer. Every cloud has a silver lining!

NEXT: I finish the construction and painting of my Grenadiers.

Saturday, 10 April 2021

Innsmouth Bad Boys - Part 1

 Moving on from the 'good guys' I made for my 'Assault on Innsmouth' scenario (a H.P Lovecraft inspired pulp-horror skirmish game I have in mind), I have designed two of the townsfolk mutants. These are intended to be two of Innsmouth's heavies and will provide artillery support for the town faction.

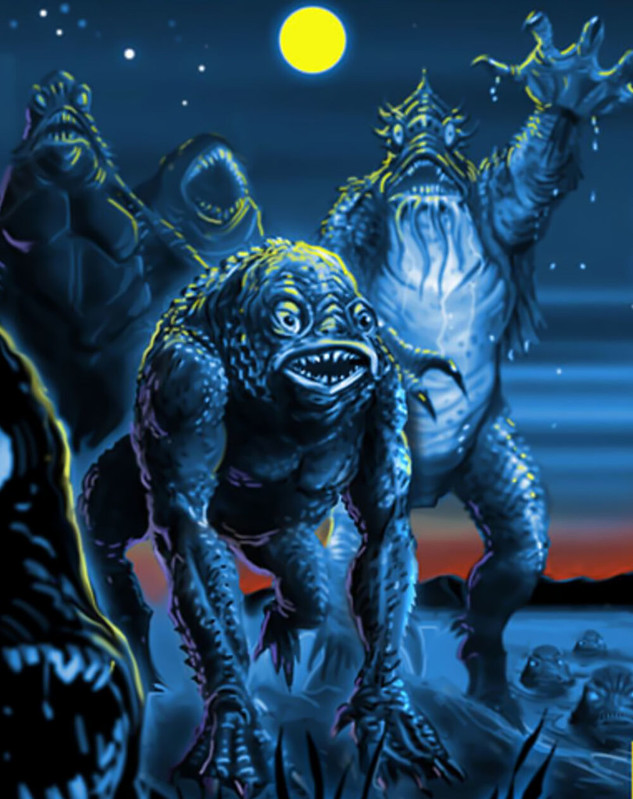
Above: 'The Deep Ones', undersea demons that the the followers of
Dagon aspired to interbreed with. Source: The H.P. Lovecraft Wiki.

For those that haven't read Lovecraft's story, the inhabitants of Innsmouth displayed a spectrum of mutations culminating in their final change into immortal fish-like humanoids called 'Deep Ones'. In their abdominal worship of the demi-god Dagon, the townsfolk interbreed with the Deep Ones which culminated in a range of aquatic hybrids.  

Designing a Mutant Peg Figure!
So far I haven't really taken my peg figures into the realms of the horror genre, so what I am doing now is a bit of a jump into the unknown for me. In other words, I am - as I have done in the past - making this all up as I go along, I don't have any templates for these new designs.

My first attempt to create a mutant creature was simply to modify my usual peg body by adding a hybrid head...

But this first attempt at a 'shark-man' was not satisfactory at all, I needed to create something a little more monstrous - in both look and mass. So, I decided to create a new, slightly larger body and by doing so I would be able to mount a larger head on it.

Above: By simply upturning the normal body and enlarging the normal
component that I use I was able to create a base for more massive heads!

The massive heads do lend themselves to a cartoonish horror quite nicely, especially as I am trying not to let my monsters look too out of play against my other peg figures. Hopefully, I have maintained a balance here - I can't goo too wild or 'realistic' (relatively speaking).

First to be designed in TINKERCAD was my 'frog man' cannoneer. It's a bit tongue-in-cheek and a sort of cross between Lovecraft and 'The Pirates of the Caribbean' but it makes me smile...

Innsmouth Townsfolk Pegs - Frogman Parts

Happy with my 3D design I printed out all the various parts in the form of a kit. Every time I make one of these 3D figures they do seem to get a tiny bit more detailed or have more components to them...

I was particularly please with the cannon and I think I will try to scale this component up to make a proper canon for my normal peg soldiers. That done I moved on to the second of my Innsmouth heavies - my new and improved shark-man (the cocktail sticks are just place-holders until I could fashion better harpoon spears)...

I'm quite pleased with how these little monsters turned out. I think I'm starting to get to grips with this 3D figure making malarkey (even for saying that my cartoon style is fairly simple). 

They are quite intimidating and should give the townsfolk a bit of a chance in their defence against the Federals and their puny human weapons! 😉

NEXT: Scratching my head over the colour schemes and painting.

Sunday, 7 March 2021

1920s Peg Detective - Part 1

Another in my 'Assault on Innsmouth' series, this character is a Federal agent. It's been a while since I read 'Shadow Over Innsmouth' but as far as I remember Lovecraft relates that Innsmouth was eventually assaulted by Federal forces to clear out the degenerate elements which was mis-reported by the press as a 'prohibition liquor raid'. While this is - as far as I remember - fairly unspecific later narratives in the 'Call of Cthulhu' RPG mythology intimate US Marines, US Navy and government agencies like the FBI being involved.

Now the 'Federal' agencies may have been one of any number, like The Bureau of Internal Revenue, The Federal Bureau of Investigation or even - as pictured above - The US Postal Inspection Service, all of which - despite the mundane titles of some of these services - had a hand at dealing with the gangsters and miscreants of the time.

So, as I cannot be exact as to which department might have had a hand in the raid, my agent is a generic government agent (though I had in mind the 1987 movie 'Untouchables' when I made him).

“Arm your agents, and not just with revolvers. If these gangsters want to use machine guns, then give your special agents machine guns, shot guns, tear gas, everything else! This is war!” Bruce J. Gregory (Addison Richards), 'G'Man', 1935. 

The Makings of a 'G' Man...
As is usual with my peg figures I start by planning the hat - a hat is one  of the most identifiable characteristics of my cartoon figures. The hat most associated  with a detective from the 1920s and 30s was the fedora so that's where I started...

Obviously, to match the look of my cartoon figures I simplified the design of the hat by using basic geometric shapes to create something which looked roughly like the real thing (very roughly)! 😄

I also extended the 'body' of my peg figure to give it the look of having a long coat, another characteristic of the hardboiled detective - where would the gumshoe be without his trench coat?

And finally, as an active member of a armed raid I decided to give my man a pump shotgun - again very much influenced by the movie 'Untouchables'...

Above: My completed 3D 'kit' for my peg detective.

Quite a lot of the final detail will be affected during the painting process - such as the shirt, tie and the coat lapels. But, in the meantime, here's the assembled 'kit'...


As usual I did have a bit of a quandary over how to create a acceptable pose with a weapon. My way of making the peg figures does have certain limitations when it comes to modelling 'realistic' poses, particularly when it comes to the arms. So, I have to take a bit of 'artistic licence'... 😉

In this case, as you can see, I have my G Man holding his pump shotgun one handed, it's a bit iffy BUT is in keeping with some Hollywood movies!

NEXT: What colour is a dirty Macintosh? 😂

Thursday, 4 March 2021

US Navy Shore Party Seaman - Part 1

 Onward and upwards with my 'Assault on Innsmouth' characters! Today I've been working on the second of my six 'good guys', this time a sailor with a honking great BAR (Browning Automatic Rifle)!

Above: My reference source for this figure, illustrations of 1920s era
USN Shore Party members from the China campaign.

I've kinda split my investigative team into two types of members - three are the traditional action hero types there to deal with the physical adversaries and traditional dangers, while the other three are paranormal specialists who are adepts in arcane knowledge. (Though in common with D&D conventions each individual will have their own specialist attributes.)

My seaman will be my 'tank', a very physically strong character who possesses heavy firepower and can soak up punishment. His BAR light machine gun will provide the investigative team with protection from waves of aggressors.

Hello Sailor!
I started with my stardard 3D peg figure, though I have now tried to incorporate a belt so as to make painting a little easier (gluing on a belt - plasticard strip - to the printed body proved a little fiddly and messy in previous figures).

Above: My 3D model file was created using TINKERCAD and I am slowly
creating a collection of interchangeable standard parts.


I was thinking about what other items I could add, but in keeping with my simplified cartoon style of my peg characters I decided 'less was more' and that other details were better just painted on.

So, the main new feature of this particular character would be the sailor's Browning Automatic Rifle (BAR) which the US military used as a light machine gun. I wanted a roughly identifiable silhouette though it would still be designed to compliment my simplified 'toy' style. I began by laying down some simple blocky shapes in TINKERCAD (using my standard rifle model as a template for size)...

Above: You can see how TINKERCAD uses simple 'primitive' shapes to
build up your model designs. I wanted to create a rough overall shape that
was analogous to the real BAR but which fitted my 'cartoon' characters.

It actually took a couple of attempts before I came up with a design I was happy with, and I noticed that for these figures that I have sorta over-scaled the guns, I suppose in keeping with the chunky cartoon aesthetic. 

The gun done I printed out all the individual parts to make my peg figure 'kit'...

The only thing that was missing rom this set of components is the connecting rod which acts as the arm attachment 'shoulders'. This I would make out of 4mm wooden dowel (I tried out 3D printing this part but - in my opinion - it was a bit of a waste of time and material when a bit of dowel was perfectly adequate).

NEXT: In part two of this project I'll come up with my paint palette for this little seaman (and I am quite pleased with myself for getting right through this post without making any puns about seaman).

Friday, 29 January 2021

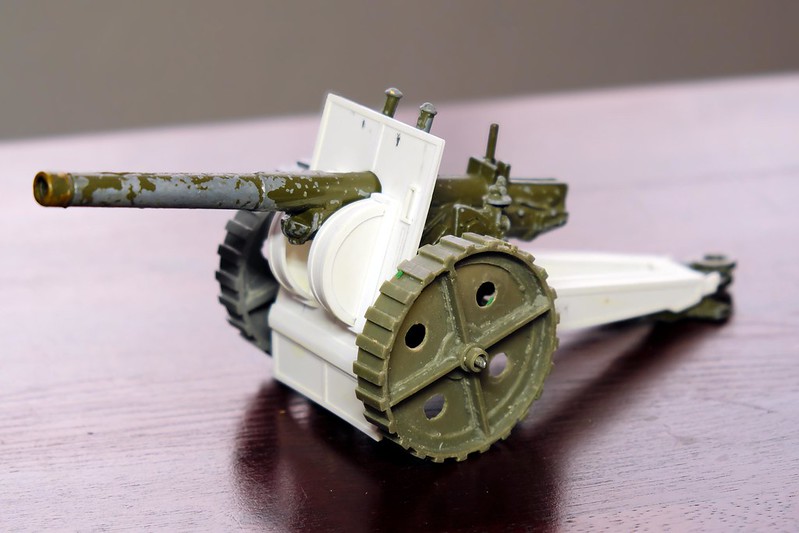
Poor man's 4.7 Naval Gun Part 6

 Now here's a blast from the past! The continuation of a long 'dead' project, reanimated due to my new 3D printer acquisition...

It all began way back in 2013, when I was first beginning to dip my toe in the murky waters of scratch-building model conversions. My intension was simple - I could not initially afford to buy the classic Britain's 4.7inch Naval Gun model as the prices were stupidly high on eBay, so I decided to see if I could make a cheaper 'look-a-likely' artillery piece for my Funny Little Wars collection.

Above: Britains' 4.7 Naval Gun model the classic FLW artillery
piece. Now out of production and limited in supply, this die-cast
model much sought-after and prices can be astronomical!

You can read all about the project and how it initially progressed by following this link (opens in new window): Poor man's 4.7 Naval Gun Project Series

Anyway, to cut to the chase, a couple of things happened that put this project into moth balls, so to speak. First of all, my reach out exceeded my grasp as back then my scratch building skills were pretty basic and I got stuck when it came to the - for me - trickier building. And secondly, a change in my personal finances meant that affording the real Britains 4.2 gun model became less of an issue (in fact, I ended up buying two and so my need for a fake copy became somewhat redundant)...

Fast Forward Eight Years! >>
First of all, I can't believe I started this project eight yeas ago! But having dusted off this old job (literally) I now feel a lot more confident that I can actually complete the thing - thanks mainly to my new 3D printer!

What makes the difference is being able to model design ideas in virtually before committing to a build. Whereas before my scratch constructions were very much 'suck it and see' affairs I can now - thanks to the TINKERCAD software - experiment with objects and components to see if they are viable...

Above: The result of a short session in TinkerCad, playing about with
shapes and ways to connect shapes together... No cut fingers here!

As the name suggests, I can tinker away to my hearts content - never worrying about spoiling a laboriously crafted wooden or plastic component and then having to start all over again! I soon had a collection of small parts which solved the quandary I originally had with my faux-Naval gun - how to attach the modified plating to the die-cast model.

Yes, I could have probably - eventually after lots of trial and error - have produced exactly the same components the traditional way with pieces of styrene cut to shape, but being able to model these shapes and alter them on the fly in the software meant I ended up with a more accurate end product in a fraction of the time.

Everything fitted together exactly how I wanted them and if something was slightly wrong it was ridiculously easy to tweak the dimensions and run off another component. This also solved another of traditional modelling's great bug-bears - 3D printing kinda kills the 'carpet monster'! I no longer have to worry about losing some small component as I can simply print off another. 😁

NEXT: Parts now assembled it's time to strip off the old paint!

Thursday, 10 December 2020

The Grinch Peg Doll Part 1

 Part of my Christmas Nutcracker series of figures are some that aren't so traditional as I thought it would be nice to make some of my nutcrackers a bit more relatable to my kids (I still call them kids despite the fact they are in their late 20s)! 😁

One of my figures is based on the wonderful Jim Carey movie 'The Grinch', based on the book by Dr. Seuss. It's a terrific 'kids movie' and Christmas favourite and I thought it would make a smashing wee peg character.

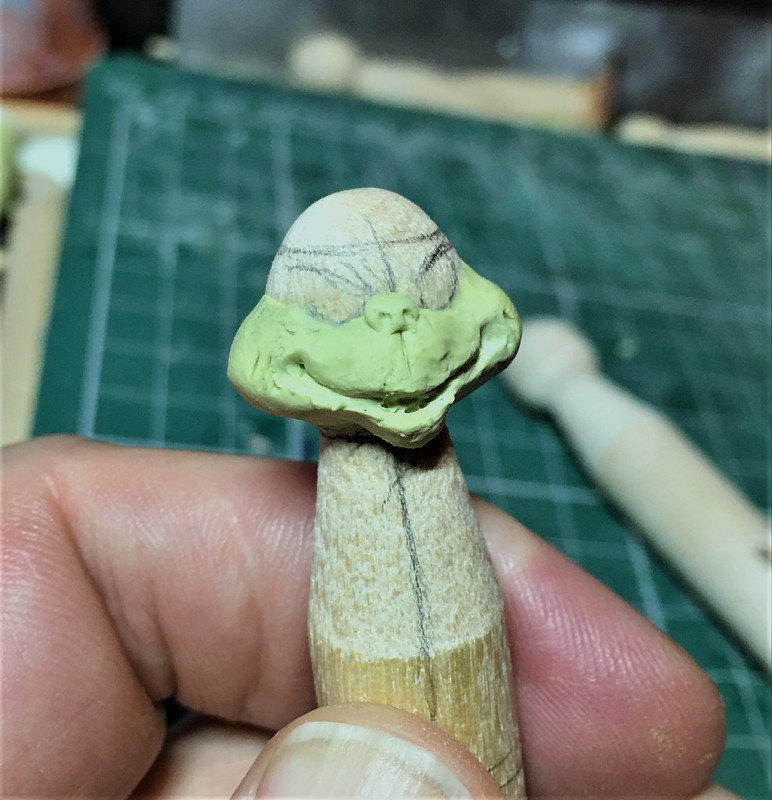
I decided that this particular peg doll would be a little more of a caricature than some of my other simplified models and I began by sculpting a little more detailed face for it than I would normally do...


As usual, I am using MILLIPUT modelling putty to do my sculpting, it's my favourite medium for jobs like this. I like how - once you have mixed the two part elements - you can decide just how firm you want your putty by how long you leave it before you start to work with it - use it straight away for a very soft PlayDoh consistency or leave it to cure for a while for a harder 'cold plasticine' firmness (if that makes sense). 


As you can see I've gone a bit crazy with the level of features for the face, but once I started I found I couldn't stop! 😂 I just got a bit carried away. I did calm down a bit after I finished the head, however, and dialled down the level of detail for the rest of the model...


And the legs are basically the same as my normal full-sized peg dolls. The one quandary I have now is how to model the arms, do I go for my normal 'nutcracker' style of arm - 2D flat style hanging off a rod - or do I try and model something a little more 3D? Hmmmm...

Well, we shall see in part 2 of this project.

Saturday, 24 October 2020

Peg Nutcracker - Old Guard Construction


Christmas is firmly in the forefront of my mind now. As I am on a very restricted income these days I am trying to make a lot of my gifts, hopefully my family will enjoy the fact that I have made an effort (or they might think that I am just a big cheapskate)! 😂

Anyway, I am making a couple of sets of mini-nutcrackers which are loosely based on those traditional German fireside ornaments (see pic left) - here's a link to the real things, but prepare yourself for a bit of a shock as some of the prices are eye-watering: Erzgebirge Palace.com - Nutcrackers [Opens in new window.]

I've already completed my 'Pantomime Private' model and that went fairly well, so I'm moving on to something a little more traditional now with a Nutcracker Soldier. To recap (as I did some basic prep with a half-dozen dolly pegs for this series) I began by dressing the basic peg with some period hairstyles...

In a earlier experiment I did where I tried to work out how I would make a mini-nutcracker I followed the real example and did the hair using some synthetic flock to represent the faux fur hair. But this did not work out well and actually started moulting with little tufts of flock coming off. So I decided to sculpt the hair-pieces using good old Milliput putty.

Once the hair was on I then moved on to making various hats for my different nutcracker types. Here you can see the basic shape of my guardsman's hat (right), although they were not attached permanently at this point...

I then moved on to creating the shoulders and arms for my soldier. I drilled a hole though the upper body of the peg so I could pass a piece of dowel (a barbecue skewer) through...


And then I added the feet and a base to the peg (having sawn off the tips of the peg's prongs so they were flat). The boots were made of a couple of blocks of decorative moulding wood and I decided not to shape them as he is a regular soldier and leave him with big army clod-hopper boots! 😄

[I'm using Evo-Stik Impact Instant Contact Adhesive for these jobs. It's really strong and I don't end up sticking my fingers together like I used to do when I used super glue! It's also more economical.]

Finally, I made the arms and rifle. The arms were my usual flat designs cut out of some 2mm sheets of plywood. At this point there was a lot of head scratching as I was unsure exactly how I should go about how to design and attach the gun. 

With my short (50mm tall) peg soldiers I usually just make a proportionally sided rifle and stick it to the side of the peg in a grounded arms pose BUT because my nutcrackers have those long lanky legs a rifle to do a similar pose would be ridiculously long (I know, I tried it) and out of proportion to the soldiers body.

So, I decided to go for a 'sloped arms' pose instead, with the size of the rifle in proportion to the body of the nutcracker...

I also changed the design of how I usually do my rifles. Instead of carving out a stylised rifle shape from a single piece of lolly stick I made a two-piece stylised toy 'popgun' out of a elongated triangle of lolly stick and a length of barbecue skewer! I really wanted to emphasise the toy nature of this soldier.

And here is the completed nutcracker...

Generally I quite happy with the design ALTHOUGH something is still niggling me about the very crude way that I attached the rifle to the left arm. I may have to go back to the drawing board with that and come up with a more elegant solution.

But - in essence - this is the construction process for the soldier. Once I have solved the rifle problem I will them move on to priming the nutcracker ready for painting.

Friday, 23 October 2020

Operation Pickelhaube Part 4

 ...And we get to the last part of the construction of my peg Prussians! 

Funnily enough, I've left one of the most distinctive parts of the Prussian's uniform to last- the Spitze....Er, that's the spike on the helmet! 😊

After a quick think I decided on a good old cocktail stick for the spike,cocktail sticks are great! So, I began by drilling a pilot hole in the top of the helmet to attach my fake spike...


The hole prepared - the exact diameter of a cocktail stick - I began to whittle my little spike. I cut a length of the stick (about 7mm) and glued it into the hole with about 4mm protruding.

Once the glue was dry and the top of the stick was firmly held in place I *carefully* sanded a rounded point to the spike.Then I *gently* filed this into a sort of acorn shape. Remember, these figures are caricatures so it doesn't have to be exact nor does everyone have to be identical - just a rough approximation.

I'm quite pleased with the helmets, though still a little confused about whether this shape of Picklehaulbe is accurate to 1870 - reference illustrations varied, some suggesting that an older taller version was in use and some suggesting that this latter flatter one was. Still, as I say, this is just a caricature and not a 'display model'.

The final job was the addition of the boots. I reverted to my older technique of using Milliput putty to create the toes of the boots. All of this series of models for my Franco-Prussian War set are of what I call my 'Mk. 1 peg soldier' style, as I later changed the way I modelled shoes to a quicker and easier method.

That done and dried it's time to prime the models ready for painting!