Showing posts with label Project 1. Show all posts

Friday, 29 January 2021

Poor man's 4.7 Naval Gun Part 6

 Now here's a blast from the past! The continuation of a long 'dead' project, reanimated due to my new 3D printer acquisition...

It all began way back in 2013, when I was first beginning to dip my toe in the murky waters of scratch-building model conversions. My intension was simple - I could not initially afford to buy the classic Britain's 4.7inch Naval Gun model as the prices were stupidly high on eBay, so I decided to see if I could make a cheaper 'look-a-likely' artillery piece for my Funny Little Wars collection.

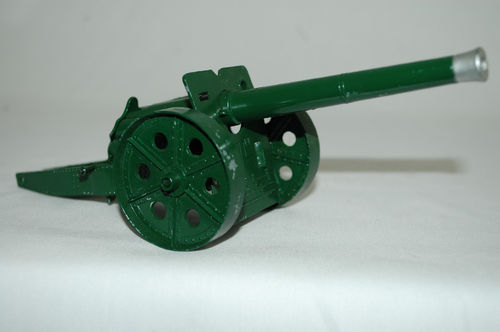
Above: Britains' 4.7 Naval Gun model the classic FLW artillery
piece. Now out of production and limited in supply, this die-cast
model much sought-after and prices can be astronomical!

You can read all about the project and how it initially progressed by following this link (opens in new window): Poor man's 4.7 Naval Gun Project Series

Anyway, to cut to the chase, a couple of things happened that put this project into moth balls, so to speak. First of all, my reach out exceeded my grasp as back then my scratch building skills were pretty basic and I got stuck when it came to the - for me - trickier building. And secondly, a change in my personal finances meant that affording the real Britains 4.2 gun model became less of an issue (in fact, I ended up buying two and so my need for a fake copy became somewhat redundant)...

Fast Forward Eight Years! >>
First of all, I can't believe I started this project eight yeas ago! But having dusted off this old job (literally) I now feel a lot more confident that I can actually complete the thing - thanks mainly to my new 3D printer!

What makes the difference is being able to model design ideas in virtually before committing to a build. Whereas before my scratch constructions were very much 'suck it and see' affairs I can now - thanks to the TINKERCAD software - experiment with objects and components to see if they are viable...

Above: The result of a short session in TinkerCad, playing about with
shapes and ways to connect shapes together... No cut fingers here!

As the name suggests, I can tinker away to my hearts content - never worrying about spoiling a laboriously crafted wooden or plastic component and then having to start all over again! I soon had a collection of small parts which solved the quandary I originally had with my faux-Naval gun - how to attach the modified plating to the die-cast model.

Yes, I could have probably - eventually after lots of trial and error - have produced exactly the same components the traditional way with pieces of styrene cut to shape, but being able to model these shapes and alter them on the fly in the software meant I ended up with a more accurate end product in a fraction of the time.

Everything fitted together exactly how I wanted them and if something was slightly wrong it was ridiculously easy to tweak the dimensions and run off another component. This also solved another of traditional modelling's great bug-bears - 3D printing kinda kills the 'carpet monster'! I no longer have to worry about losing some small component as I can simply print off another. 😁

NEXT: Parts now assembled it's time to strip off the old paint!
Friday, 12 July 2013

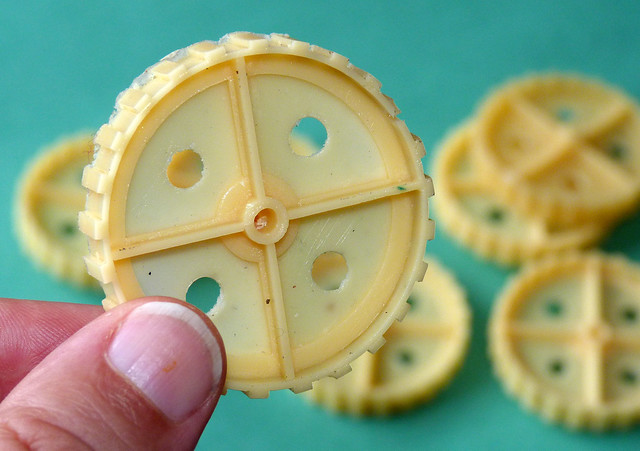
Wheely useful resin wheels

Poor man's 4.7 Naval Gun Part 6
I've put this project on the back-burner while I wait for my brother's resin casting experiments to bear fruit. Well, I received a intriguing little parcel from my bruv this morning full of little resin goodies...


To recap, I'm converting a diecast Cresant gun into a mock 4.7 Naval Gun and part of this was my scratch build of the early 1900s era solid wheels. However, I wanted to duplicate the originals as I knew I would need them again in other projects I have in mind.

My brother is experimenting with resin casting and very kindly duplicated my scratch built wheels - as well as some other items - and I think he's done a terrific job (easily comparable to some commercial resin models I have bought).


What else will I use them for? Well, aside from the gun itself, I am thinking about scratch building a steam gun tractor.

In the mean time this access to resin duplication opens up all sorts of possibilities - for example, I have just sent up a couple of heads with custom hats I have just made for my Molaterian infantry project.

This post is part of my 'Poor Man's 4.7 Naval Gun' project - the complete series of posts can be seen here.

Photo from my brother of the casting process.

Tuesday, 16 April 2013

FLW - Poor man's 4.7 Naval Gun Part 5

Dispatch from the Burkish Ministry of War: Today representatives of the Burkish General Staff visited the armament works of Ware-Armatage in England to oversee the progress of the very latest heavy artillery to be procured for the Pasha's Grand Expeditionary Force. This weapon will undoubtedly consolidate the already enviable reputation of the Burkish Marine Infantry and constitute a fearsome force, one that will bolster the Army of Molatero in it's quest for peace and security.
The Pasha - treasured  friend and
strong ally of Molatero

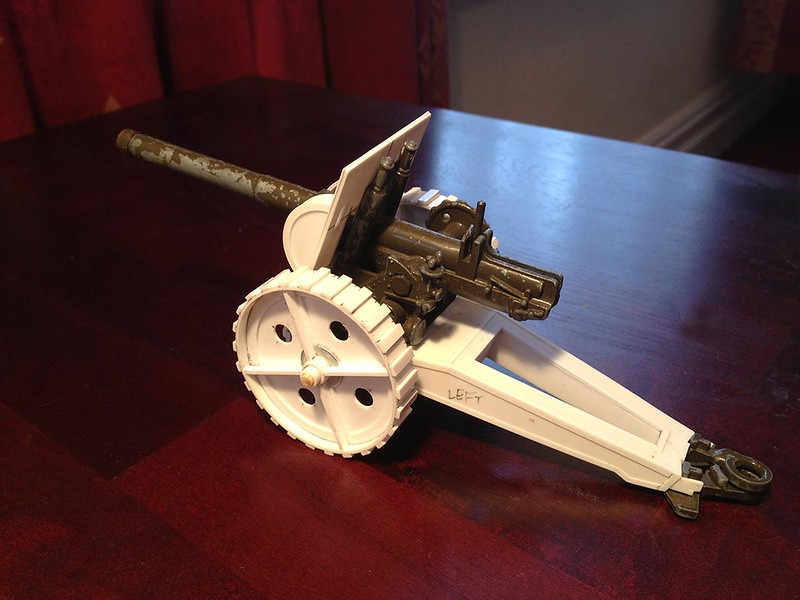
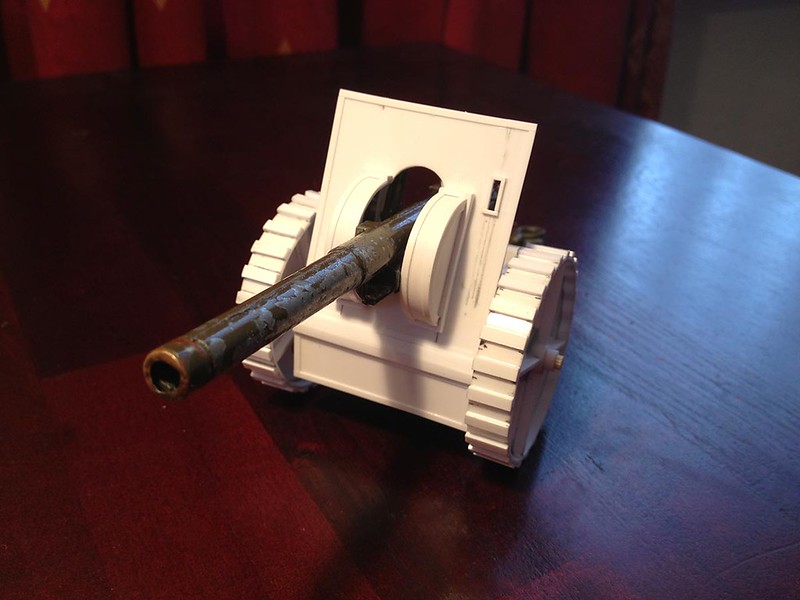
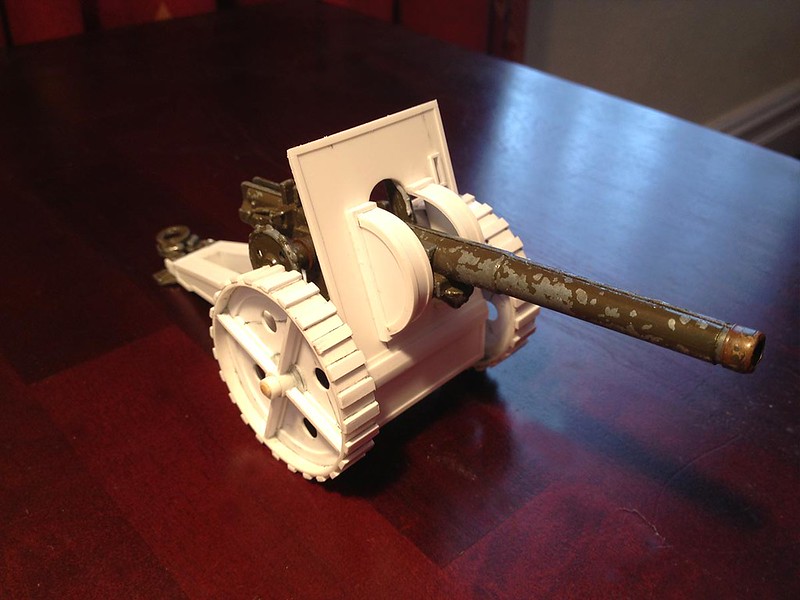
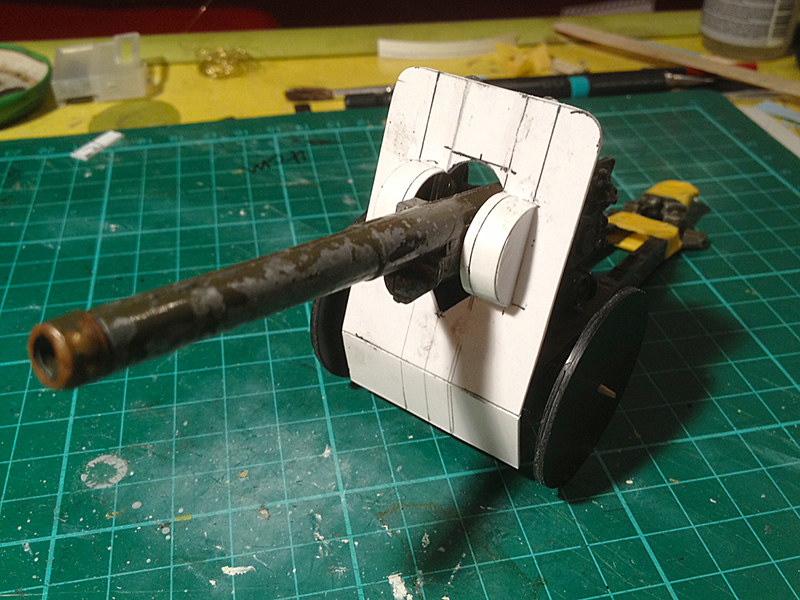
I've finished the plasticard 'disguise' for my conversion project. I decided not to go over the top with detail - it would be all to easy to start banging on rivets and what-not.


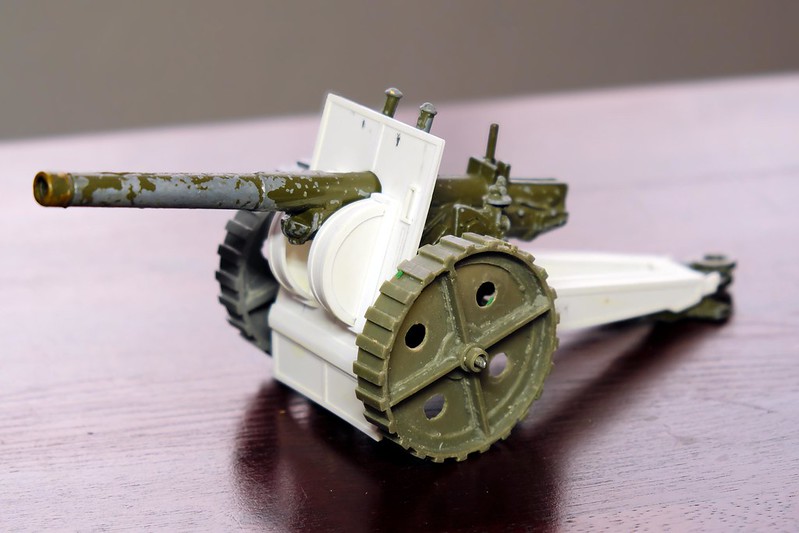
I'm really pleased with the boxing-in job I did with the original split carriage. It changes the character of the gun all-together and makes it more early 1900s looking (I think). The wheels obviously help a lot too in this respect.


One thing I did notice - now I do have an actual Britains' 4.7 gun model - is the discrepancy in scales between Britains and Crescent  Both are suppose to be 1/32 - I believe - but the Crescent's 5.5 inch gun is a lot more slender than the Britains' 4.7 inch gun. So I may have to dub my poor man's 4.7 as a poor man's 4 inch gun instead!

Anyway, job done and now it's onto the renovation of the Crescent toy itself. I want to strip off the old paint and give it a new coat of Humbrol N0. 50 Brunswick Green and then paint my plastic parts to match. Then it's a case of putting the two together.


Wednesday, 3 April 2013

FLW - Poor man's 4.7 Naval Gun Part 4

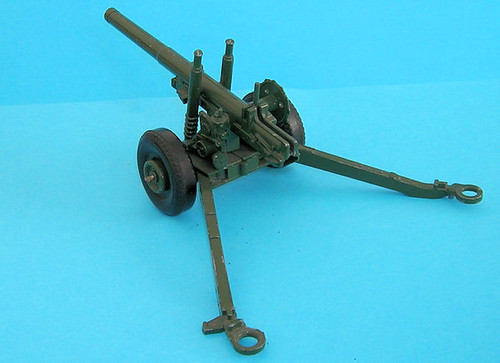
The Crescent 5.5 gun with it's split carriage
opened and ready to fire
I'm on to the last major component of my poor man's 4.7, the gun carriage. The original Crescent 5.5 gun was a modern (WW2) design with a split carriage designed to unfold into a stabilising 'V',  while the 1900 artillery piece was still influenced by Napoleonic gun design.

At this point the single piece carriage was the norm and the Britains' 4.7 gun reflects this, so my faux 4.7 should have this feature.

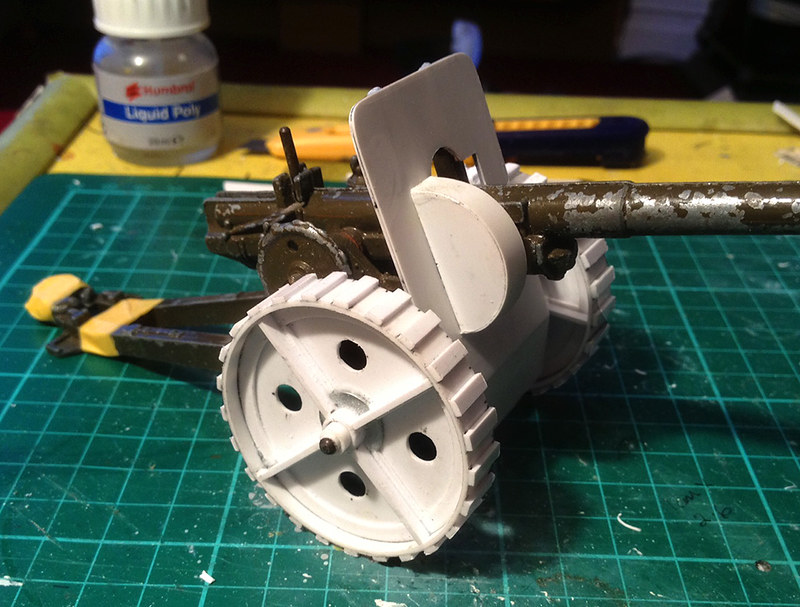
Basically I will be hiding the 5.5's split carriage by covering it in a plasticard shell, boxing it in to give the impression of an Edwardian heavy gun carriage. I'll let the photos tell the story...


Of course I will tart this basic box up a bit with some additional detail, but I will show this at the final put together. You'll notice I have already started to disassemble the Crescent toy ready for the next stage where I repaint it, I'll use the Nitromors to strip the old paint first.


Sunday, 24 March 2013

Poor man's 4.7 Naval Gun - Part 3

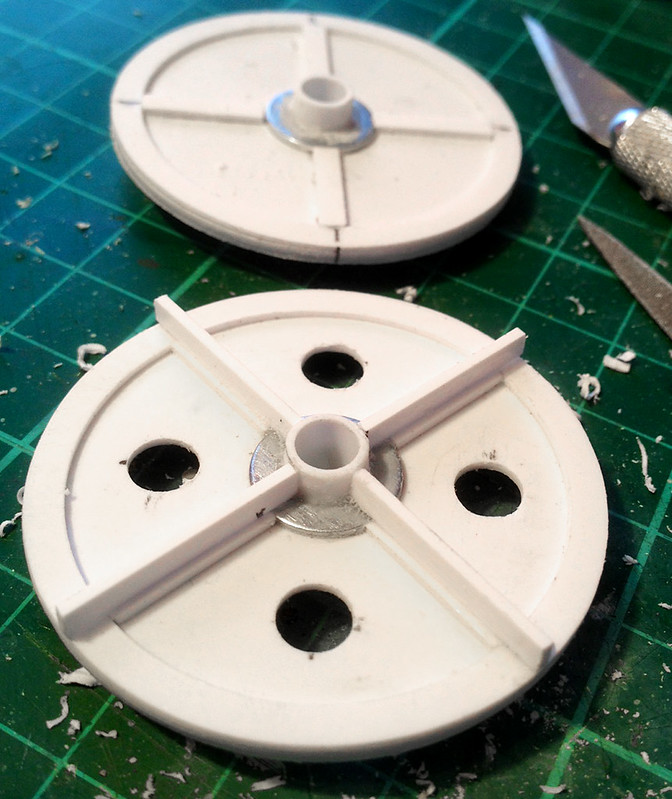
Last Sunday I prototyped my new shield design for my Crescent 5.5 gun conversion, today I have been finishing off my new wheel design. I wanted a 1900s style solid wheel design - a 'Percy Scott' style - similar to that on the classic Britains' 4.7 Naval Gun which I am modelling my conversion on.

I started off by making some plasticard discs and then added the additional bracing and hubs. I used a few spare metal washers to add some strength, and also because they happened to be the exact size I was after.

Then I cut out a couple of strips of plastic to form the rims of the wheels and glued them to the outside of the discs. I suppose this was one of the trickier bits as curling the plastic around the discs was a bit fiddly.

I am rubbish at maths - I am more the visual type of guy - so I worked out the diameters and spacing of everything by trial and error. Making a paper template which I could wrap around the wheel as a make-shift ruller for marking my wheel tred measurements...


The Britains' 4.7 didn't have any treds on it's solid wheels, but I liked this idea, I think it's evocative of the period. Besides, I don't want my '4.7' to be exactly the same as the Britain's one, just similar.


In the end I didn't bother faffing around with complicated methods of dropping the axle height (to match the Britain's gun) I just decided that this height was acceptable.

Next I will box in the tail supports and then figure out how to disassemble the Crescent gun ready to strip of the original paint prior to repainting the complete conversion.

Sunday, 17 March 2013

Poor man's 4.7 Naval Gun - Part 2

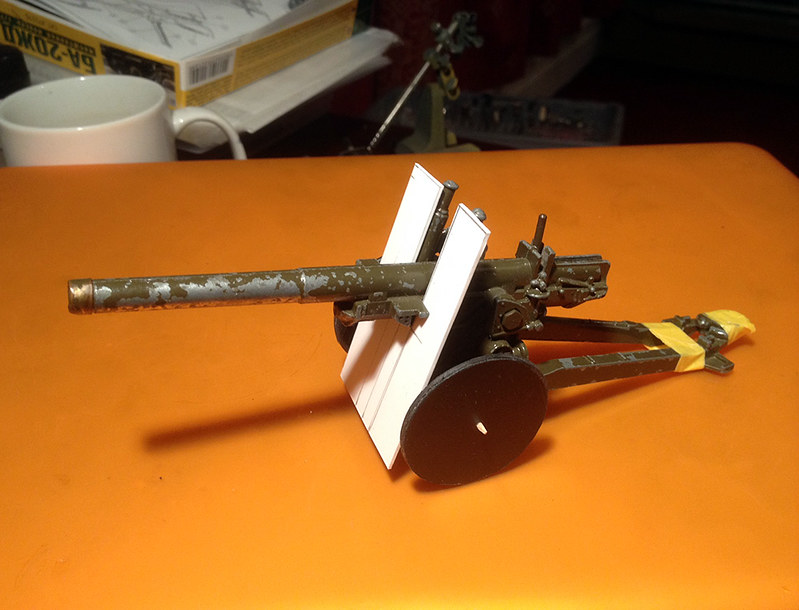
Well, I started the weekend with Friday's post about my intended 'Poor man's 4.7' project and today I end the weekend with a little update on my progress. I've finished off the gun shield prototype - it's a little lacking in detail (rivets and what-not) but I will save that for the final version.

One problem I had to solve was the Crescent 5.5 model's elevation mechanism as bits of it jut out at the front, interfering with my shield. So I cut out a section of my shield to allow the gun to elevate freely...


Trouble is that this means that I have rather a large hole in my shield now. So I designed a set of cowls to cover the holes but still allow the gun to rise and descend...


I think this gives the shield the Edwardian period look I was after, but I will be happier when I have the rest of the detail done. One of the things I want to do is to make a telescope like the Britains' 4.7 - I think it will finish this off nicely...


Next I'll make my wheels - I think I have come up with a way to make bigger wheels without raising the gun any higher.

Friday, 15 March 2013

Poor man's 4.7 Naval Gun - Part 1

I decided to designate Friday's as my Funny Little Wars day (blog wise), just so I end the week with something a little more frivolous. I really enjoy the tongue in cheek aspect to this war gaming format as it encourages an imaginative approach within a loose framework of Edwardian military history.

Today I am starting to consider how I might add a battery of heavy artillery on the field. Usually the avid FLW exponent would by default turn to the famous Britains' 4.7 inch Naval Gun toy. It was H.G. Wells' favoured 'weapon' on the playroom battlefield and it holds a rather hollowed place among  those that use his rule set. But today a authentic 4.7 model will set you back a tidy sum as they are being snapped up by collectors.

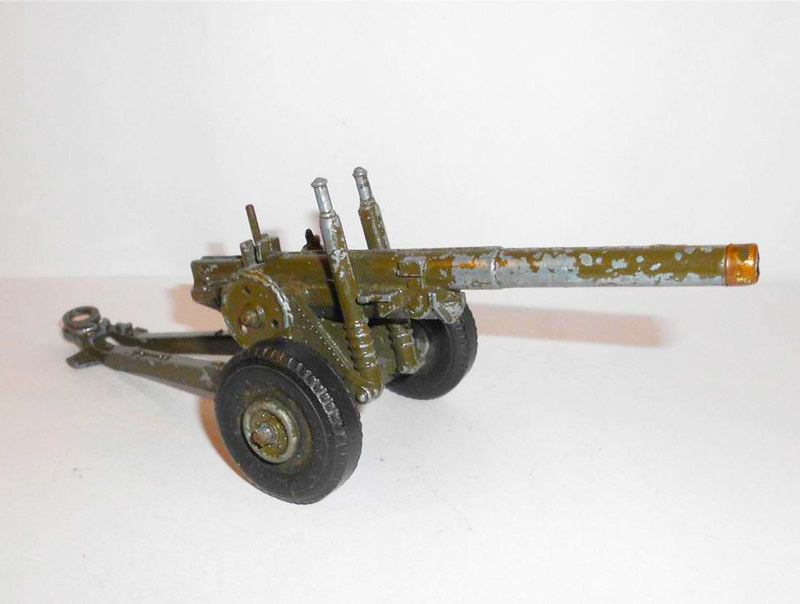
So I decided to try and come up with a cheap and cheerful alternative to the venerable 4.7. I soon discovered the Cresent Models 5.5 inch British artillery piece, another die cast toy but one that does not have the charm and charisma of Britains' masterpiece.

The 5.5 gun can be picked up for a pitance - compared to the 4.7 - on eBay and there are plenty on offer in a variety of conditions. My only stipulation was that the firing mechanism was in a working condition and I soon won one at a very reasonable price.

Now the 5.5 is a relatively modern gun compared to the 4.7 (which historically dates back to the late 1880s) so I realized that if I were to pass my model off as an Edwardian artillery piece I would have to disguise it somewhat.

First thing to go were the very modern looking rubber tyres and thier wheels. An easy job that only entailed my pinching the end of the axel so that the steel pin that formed the axel slid through the retaining holes. Job done (nice easy start)!

To replace the 5.5's wheels I wanted to create something more fitting to the period (pre-WW1) and have something that was a little larger. I also wanted to add a gun shield, to hide the huge spring posts and add to the 'antiqued' look.

None of what I am doing is irreversible so that - if I wish to - I can turn my faux-4.7 back into it's original 5.5 self. The upshot of my rough and ready prototyping is this...


Now this is, of course just a very elementary 'proof of concept'. I wanted to check what size of wheels I could get away with and also to see how I might affix a shield without obstructing the ability to elevate the gun. I also taped the gun's tail supports together and intend to box them up with plasticard to give a more '4.7' looking carriage to my model.

Naturally, once I am satisfied that I have the proportions that I am looking for in my add-on components I will craft some new parts which have a bit more detail and realism to them. But even at this point I think my additions have change the character of the gun slightly.

I think I can get away with slightly larger wheels and my final versions of these will either have a spoked arrangement or a 'solid' design like the Britains' 4.7 gun has...

Above: The real thing -Photograph showing British QF 4.7 inch gun on the improvised
wooden field carriage designed by Captain Percy Scott. In action at the Battle of Colenso, South Africa, 15 December 1899. Source: Wikipedia


Above: The famous Britains' model number 1264. 4.7 Naval Gun. This die cast toy
was in production for some 60+ years, from 1905. It went through several versions, the
mechanism being improved and honed.