Showing posts with label 3D Printing. Show all posts

Saturday, 29 May 2021

What's Going On - May 2021

 Yep, doing a unit of figures (even a small one) is taking time, so I reckon it will still take something like another week of spare time to finish my first 'Invasion Mars, 1899' unit. Sorry, I'm a slow painter.

I have made some progress on the fiddly steampunk gun models that I had designs - I think I overstretched my design ability here - and I got them to print out OK. I just have to remove the supporting sprues and clean them up...

So, what am I also working on that might be mildly interesting to talk about in the mean time?

Well, my youngest daughter and I have been making a start on our DIY Christmas gifts and one of the ideas we had was based on some little wooden mantlepiece ornaments that we found... (Bear with me)...

What we wanted to do was build our own slightly more detailed versions of these Christmassy ornaments and put some lights in them to decorate out front rooms. So I came up with a prototype of my own...


NOW... What has this to do with toy soldiers? Well, at some point I did want to war game with my soldiers and this would entail making some battlefield terrain and furnishings - like buildings and what-not.

So, this festive novelty is actually an interesting experiment in what I can archive if I want to build some scale buildings. And it's been an interesting exercise.

Scale-wise I reckon that this prototype is around either 20mm or 28mm or somewhere in between. While I might struggle to make something in 50/54mm - my printer having a smaller print area - I think I could do something for my peg figures if I print the models out in parts.

I was very pleased by the level of detail and textures I could get out of my printer and I can imagine some of the possibilities for various types of battlefield accessories...

Anyway, it's a intriguing idea.

Sunday, 18 April 2021

A Sunday Stroll into 28mm Territory

 Really, while planning and designing my next figures and trying to use up the last of a PLA filament spool, I decided to experiment with scaling down my normal 50mm designs. I was intrigued to know how scaling would effect the detail that I had on my peg sized soldiers - would it disappear or deform beyond recognition? ...One way to find out (I thought)...

So, I reduced my 3D Steampunk figure using TINKERCAD to what I considered an equivalent of 28mm scale (according to a web search that is 30mm form foot to eye level of the figure)...


As I said, I made no concession to the effects on detail by shrinking the existing model so I had no idea whether some of the finer detail would simply disappear during printing. Also, I have never printed out a 28mm scale miniature using my Flashforge Adventurer 3 so that was a bit of an unknown too (although I know a lot of gamers regularly print out 28mm miniature using such a 3D printer and are happy with the results).

In any event, I was sort of pleasantly surprised by the what was spat out! Bear in mind - because I like to tinker - that I decided to print this small figure out in one-piece (the body anyway) instead of three pieces like I did with his big brother. The arms and the sword I printed the usual way and separately...

28mm Version of Normal Peg Model

Not too shoddy eh? (But it did need a clean up.) 😁

Here's a comparison photo of the 28mm fig with the original 50mm soldier. I haven't worked out the percentage reduction of this but it looks like it's about a 50% down-scale-ish...

As you can see, it's a little rough round the edges of some of the smaller detail I created for the 50mm fig. But it's not too bad and would probably look better once painted. If I'm honest, I've actually had worse plastic soldier figures from commercial companies and not complained! (I'm looking at you Airfix!) 😉

So, what have I learned here? Well, I do have to make some concessions to the smaller scale, perhaps by making some of the finer detail a bit chunkier so that it holds itself in the reduction. There has to be a balance in robustness of the design when I think I might be doing both a 50mm and 28mm version of the same figure.

Useful experiment.

Saturday, 10 April 2021

Innsmouth Bad Boys - Part 1

 Moving on from the 'good guys' I made for my 'Assault on Innsmouth' scenario (a H.P Lovecraft inspired pulp-horror skirmish game I have in mind), I have designed two of the townsfolk mutants. These are intended to be two of Innsmouth's heavies and will provide artillery support for the town faction.

Above: 'The Deep Ones', undersea demons that the the followers of
Dagon aspired to interbreed with. Source: The H.P. Lovecraft Wiki.

For those that haven't read Lovecraft's story, the inhabitants of Innsmouth displayed a spectrum of mutations culminating in their final change into immortal fish-like humanoids called 'Deep Ones'. In their abdominal worship of the demi-god Dagon, the townsfolk interbreed with the Deep Ones which culminated in a range of aquatic hybrids.  

Designing a Mutant Peg Figure!
So far I haven't really taken my peg figures into the realms of the horror genre, so what I am doing now is a bit of a jump into the unknown for me. In other words, I am - as I have done in the past - making this all up as I go along, I don't have any templates for these new designs.

My first attempt to create a mutant creature was simply to modify my usual peg body by adding a hybrid head...

But this first attempt at a 'shark-man' was not satisfactory at all, I needed to create something a little more monstrous - in both look and mass. So, I decided to create a new, slightly larger body and by doing so I would be able to mount a larger head on it.

Above: By simply upturning the normal body and enlarging the normal
component that I use I was able to create a base for more massive heads!

The massive heads do lend themselves to a cartoonish horror quite nicely, especially as I am trying not to let my monsters look too out of play against my other peg figures. Hopefully, I have maintained a balance here - I can't goo too wild or 'realistic' (relatively speaking).

First to be designed in TINKERCAD was my 'frog man' cannoneer. It's a bit tongue-in-cheek and a sort of cross between Lovecraft and 'The Pirates of the Caribbean' but it makes me smile...

Innsmouth Townsfolk Pegs - Frogman Parts

Happy with my 3D design I printed out all the various parts in the form of a kit. Every time I make one of these 3D figures they do seem to get a tiny bit more detailed or have more components to them...

I was particularly please with the cannon and I think I will try to scale this component up to make a proper canon for my normal peg soldiers. That done I moved on to the second of my Innsmouth heavies - my new and improved shark-man (the cocktail sticks are just place-holders until I could fashion better harpoon spears)...

I'm quite pleased with how these little monsters turned out. I think I'm starting to get to grips with this 3D figure making malarkey (even for saying that my cartoon style is fairly simple). 

They are quite intimidating and should give the townsfolk a bit of a chance in their defence against the Federals and their puny human weapons! 😉

NEXT: Scratching my head over the colour schemes and painting.

Sunday, 7 March 2021

1920s Peg Detective - Part 1

Another in my 'Assault on Innsmouth' series, this character is a Federal agent. It's been a while since I read 'Shadow Over Innsmouth' but as far as I remember Lovecraft relates that Innsmouth was eventually assaulted by Federal forces to clear out the degenerate elements which was mis-reported by the press as a 'prohibition liquor raid'. While this is - as far as I remember - fairly unspecific later narratives in the 'Call of Cthulhu' RPG mythology intimate US Marines, US Navy and government agencies like the FBI being involved.

Now the 'Federal' agencies may have been one of any number, like The Bureau of Internal Revenue, The Federal Bureau of Investigation or even - as pictured above - The US Postal Inspection Service, all of which - despite the mundane titles of some of these services - had a hand at dealing with the gangsters and miscreants of the time.

So, as I cannot be exact as to which department might have had a hand in the raid, my agent is a generic government agent (though I had in mind the 1987 movie 'Untouchables' when I made him).

“Arm your agents, and not just with revolvers. If these gangsters want to use machine guns, then give your special agents machine guns, shot guns, tear gas, everything else! This is war!” Bruce J. Gregory (Addison Richards), 'G'Man', 1935. 

The Makings of a 'G' Man...
As is usual with my peg figures I start by planning the hat - a hat is one  of the most identifiable characteristics of my cartoon figures. The hat most associated  with a detective from the 1920s and 30s was the fedora so that's where I started...

Obviously, to match the look of my cartoon figures I simplified the design of the hat by using basic geometric shapes to create something which looked roughly like the real thing (very roughly)! 😄

I also extended the 'body' of my peg figure to give it the look of having a long coat, another characteristic of the hardboiled detective - where would the gumshoe be without his trench coat?

And finally, as an active member of a armed raid I decided to give my man a pump shotgun - again very much influenced by the movie 'Untouchables'...

Above: My completed 3D 'kit' for my peg detective.

Quite a lot of the final detail will be affected during the painting process - such as the shirt, tie and the coat lapels. But, in the meantime, here's the assembled 'kit'...


As usual I did have a bit of a quandary over how to create a acceptable pose with a weapon. My way of making the peg figures does have certain limitations when it comes to modelling 'realistic' poses, particularly when it comes to the arms. So, I have to take a bit of 'artistic licence'... 😉

In this case, as you can see, I have my G Man holding his pump shotgun one handed, it's a bit iffy BUT is in keeping with some Hollywood movies!

NEXT: What colour is a dirty Macintosh? 😂

Thursday, 4 March 2021

US Navy Shore Party Seaman - Part 1

 Onward and upwards with my 'Assault on Innsmouth' characters! Today I've been working on the second of my six 'good guys', this time a sailor with a honking great BAR (Browning Automatic Rifle)!

Above: My reference source for this figure, illustrations of 1920s era
USN Shore Party members from the China campaign.

I've kinda split my investigative team into two types of members - three are the traditional action hero types there to deal with the physical adversaries and traditional dangers, while the other three are paranormal specialists who are adepts in arcane knowledge. (Though in common with D&D conventions each individual will have their own specialist attributes.)

My seaman will be my 'tank', a very physically strong character who possesses heavy firepower and can soak up punishment. His BAR light machine gun will provide the investigative team with protection from waves of aggressors.

Hello Sailor!
I started with my stardard 3D peg figure, though I have now tried to incorporate a belt so as to make painting a little easier (gluing on a belt - plasticard strip - to the printed body proved a little fiddly and messy in previous figures).

Above: My 3D model file was created using TINKERCAD and I am slowly
creating a collection of interchangeable standard parts.


I was thinking about what other items I could add, but in keeping with my simplified cartoon style of my peg characters I decided 'less was more' and that other details were better just painted on.

So, the main new feature of this particular character would be the sailor's Browning Automatic Rifle (BAR) which the US military used as a light machine gun. I wanted a roughly identifiable silhouette though it would still be designed to compliment my simplified 'toy' style. I began by laying down some simple blocky shapes in TINKERCAD (using my standard rifle model as a template for size)...

Above: You can see how TINKERCAD uses simple 'primitive' shapes to
build up your model designs. I wanted to create a rough overall shape that
was analogous to the real BAR but which fitted my 'cartoon' characters.

It actually took a couple of attempts before I came up with a design I was happy with, and I noticed that for these figures that I have sorta over-scaled the guns, I suppose in keeping with the chunky cartoon aesthetic. 

The gun done I printed out all the individual parts to make my peg figure 'kit'...

The only thing that was missing rom this set of components is the connecting rod which acts as the arm attachment 'shoulders'. This I would make out of 4mm wooden dowel (I tried out 3D printing this part but - in my opinion - it was a bit of a waste of time and material when a bit of dowel was perfectly adequate).

NEXT: In part two of this project I'll come up with my paint palette for this little seaman (and I am quite pleased with myself for getting right through this post without making any puns about seaman).

Monday, 22 February 2021

Back in the Saddle with Peg Figures

Although I've not posted much since Christmas I've not been idle. I've actually been quite busy figuring out (excuse the pun) how best to utilise my new 3D printer for helping me with my peg figure building.

Well, I've actually managed to complete some 3D printed peg characters who I am quite happy with and think I've come up with a design that works with the printer and works for me too! (I've had to modify the way I build my figures a little.)

The above screenshot shows the sort of 3D design work I've been working on, exploring new ways of making parts for my figures and ways of including accessories that are easy to print. One of my frustration with my 'traditional' wooden peg figures was how limited I felt I was with poses and also how fiddly hats were to make (particularly if I wanted multiple copies of the same design). 😄

I had originally considered resin casting to make copies of components that I'd want to use again and again, but my new 3D printer is a terrific way of prototyping and is a lot less messy that dealing with resin and moulds.

I can now experiment unhindered and quickly in a way that wasn't so easy to do with wood. Being able to plan and design components virtually in software took a lot of the guesswork out of making new ideas. Working in wood was a little more convoluted as most times I would never really know if a design would work until I actually carved it, and that could be a lot of wasted time if it wasn't right (as well as a waste of material).

Working with software designs I can be pretty certain something is 'in the ball park' before committing it to print. This saves time and money and materials.

Above: Experimenting with arm poses and ways to attach accessories
to them in software means I can try out endless ideas and combinations.

That's not to say I am abandoning wood, just that I now have the best of both worlds as I can mix mediums to get the figure design that I want (often with wood I made some compromises and had to settle for less dynamic looking or overly simplistic components or poses).

Anyway, after a lot of tinkering about and prototype parts I ended up making a few wholly 3D printed peg figures which I intend to paint. I am please with some of my new ways of doing things - like the rod attachment for arms - and the improved designs - like the semi-rounded arms instead of the old flat ones.


Some of the new features of my 3D peg figures were totally unexpected but fortuitous discoveries. Like the ability to incorporate facial features into a one-piece head and that my PLA prints are a lot lighter than my wooden characters, which will be great come next Christmas as they will be great for hanging on the tree!

Are there any downsides? Well, it has been remarked that being plastic instead of wood kinda detracts from this home-crafted charms a bit (according to some people). But that's a point of view, personally I always thought the 'charm' came from the design and finished painted figure as much as what it was made from. (Though I repeat, I won't be ditching wooden pegs, it will all depend on what I am making the figures for.)

Friday, 29 January 2021

Poor man's 4.7 Naval Gun Part 6

 Now here's a blast from the past! The continuation of a long 'dead' project, reanimated due to my new 3D printer acquisition...

It all began way back in 2013, when I was first beginning to dip my toe in the murky waters of scratch-building model conversions. My intension was simple - I could not initially afford to buy the classic Britain's 4.7inch Naval Gun model as the prices were stupidly high on eBay, so I decided to see if I could make a cheaper 'look-a-likely' artillery piece for my Funny Little Wars collection.

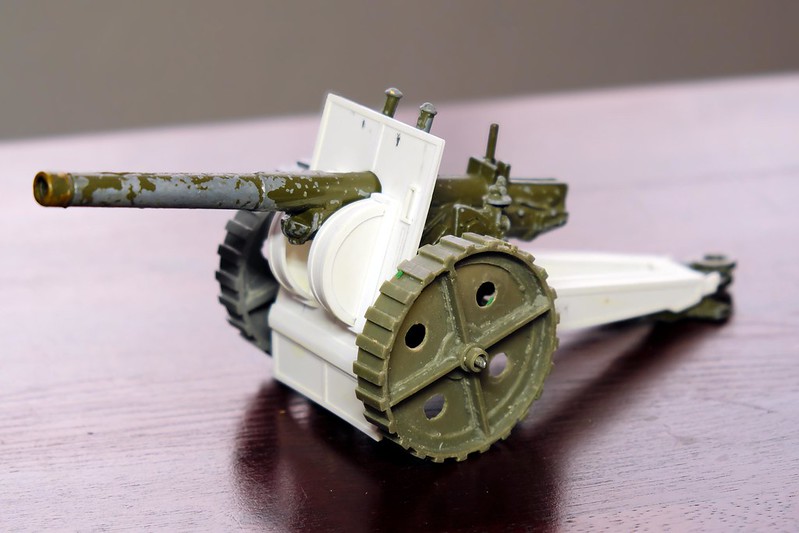
Above: Britains' 4.7 Naval Gun model the classic FLW artillery
piece. Now out of production and limited in supply, this die-cast
model much sought-after and prices can be astronomical!

You can read all about the project and how it initially progressed by following this link (opens in new window): Poor man's 4.7 Naval Gun Project Series

Anyway, to cut to the chase, a couple of things happened that put this project into moth balls, so to speak. First of all, my reach out exceeded my grasp as back then my scratch building skills were pretty basic and I got stuck when it came to the - for me - trickier building. And secondly, a change in my personal finances meant that affording the real Britains 4.2 gun model became less of an issue (in fact, I ended up buying two and so my need for a fake copy became somewhat redundant)...

Fast Forward Eight Years! >>
First of all, I can't believe I started this project eight yeas ago! But having dusted off this old job (literally) I now feel a lot more confident that I can actually complete the thing - thanks mainly to my new 3D printer!

What makes the difference is being able to model design ideas in virtually before committing to a build. Whereas before my scratch constructions were very much 'suck it and see' affairs I can now - thanks to the TINKERCAD software - experiment with objects and components to see if they are viable...

Above: The result of a short session in TinkerCad, playing about with
shapes and ways to connect shapes together... No cut fingers here!

As the name suggests, I can tinker away to my hearts content - never worrying about spoiling a laboriously crafted wooden or plastic component and then having to start all over again! I soon had a collection of small parts which solved the quandary I originally had with my faux-Naval gun - how to attach the modified plating to the die-cast model.

Yes, I could have probably - eventually after lots of trial and error - have produced exactly the same components the traditional way with pieces of styrene cut to shape, but being able to model these shapes and alter them on the fly in the software meant I ended up with a more accurate end product in a fraction of the time.

Everything fitted together exactly how I wanted them and if something was slightly wrong it was ridiculously easy to tweak the dimensions and run off another component. This also solved another of traditional modelling's great bug-bears - 3D printing kinda kills the 'carpet monster'! I no longer have to worry about losing some small component as I can simply print off another. 😁

NEXT: Parts now assembled it's time to strip off the old paint!

Sunday, 24 January 2021

Wood versus Plastic! Crafting Versus Printing.

 Ok, so a bit of a talking point came up after I posted up my intension to 3D print some of my toy soldiers rather than my 'usual' technique of crafting the peg soldiers out of wooden dolly pegs. Some people were clearly not entirely happy about the idea! 😕

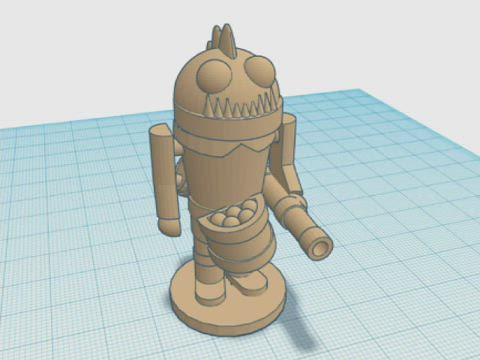
A couple of my early 3D printed prototypes, one of
my 'nutcracker' full-sized peg bodies and one of my
'50mm' half-sized bodies.

Typical of the comments was something along the lines of "...but if you 3D print them instead of crafting them out of real wood they will lose their charm!"

I was a bit taken aback, I didn't realise my toy soldiers were a thing that had 'charm'. I thought they were just daft little fun toys! But apparently, to some people, I'm somewhat spoiling part of the attraction of my peg soldiers. 😦

...My first though was along the lines of 'I didn't realise I had an obligation to others to maintain some sort of standards'! I thought I was just making these things to amuse myself. But, that's a bit ingenuous as I do get a kick from other peoples appreciation of what I do - that's why I post pictures on social media after all.

[Edit: Just read this back and it sounds like a bit of a moan! LOL But it's not, really. I like to hear other peoples' point of view.]

So, after pondering the issue I realised that some of these people had missed the point - I had never said I was replacing my original wood crafting technique of making peg soldiers with plastic 3D versions. I simply said that I would be investigating the possibilities that 3D might afford me for making prototyping easier PLUS I am thinking of making a range of easily duplicated plastic soldiers for war gaming where laborious wood crafting would be a bit of a hinderance.

I will still be making my wood crafted soldiers - but mainly for gifts, display and commissions! DON'T PANIC!

Phew! Anyway, I have begun my experimentation which involves learning how to 3D design the models, prepare them for printing and then learning how best to print them. This is not at all straight for ward as just pushing a 'PRINT' button and out would pop a finished model! 😁

I've certainly had a few minor print disasters! Luckily my printer allows me to monitor the printing remotely - via it's built-in camera - so I am able to hit the brakes if the print goes pear-shaped...

So, there's a learning curve which has to be overcome with 3D printing - it isn't such a hands-on 'build it and it will work out' experience that crafting with wood can be. But once this initial technical mechanics of building models in 3D and then printing them is understood - at least the basics - I should be able to do what I like to do best, tinker! 😁

In fact, this uneducated messing about started in earnest from day one of getting the printer, but now I am trying to get myself on a rather more methodical and formalised track, starting with the software.

I am starting with an easily accessible piece of software called (suitably enough) TINKERCAD, which is perfectly suited to my simple geometrically shaped figures...

 
At this stage I am just trying to understand how to combine primitive shapes - spheres, cubes, cones, tubes, etc - to recreate my 50mm wooden peg figure design.

Additionally, and perhaps a little more tricky, is my experiments in making multipart accessories and components that I can then add to the basic body to create different types of characters. I am finding the making of arms a bit of a challenge...


The main problem that I am encountering is that some of the shapes I used in my wooden figures simple do not translate well into a 3D printed model version. Due to the way my 3d printer works - which is to build up a model layer by layer - I have to reassess the way I construct components. In effect, I have to change my whole way of thinking.

Because of the changes I am having to make in the shape of my original component designs I am actually ending up with a slightly new style. Some small or thin parts - like the flat arm designs pictured above - have had to be made a little chunkier in order to work the way I want them to. Frustrating at times but also very interesting.


This has all given me an insight into why other small toy figure - like those made by Lego and Playmobile - look the way they look. It isn't all stylistic choices, some of the 'look' is led by the actual manufacturing process itself!

My arm designs changes from the old flat design into - first of all - tubes and then, eventually, half-tube shaped components...


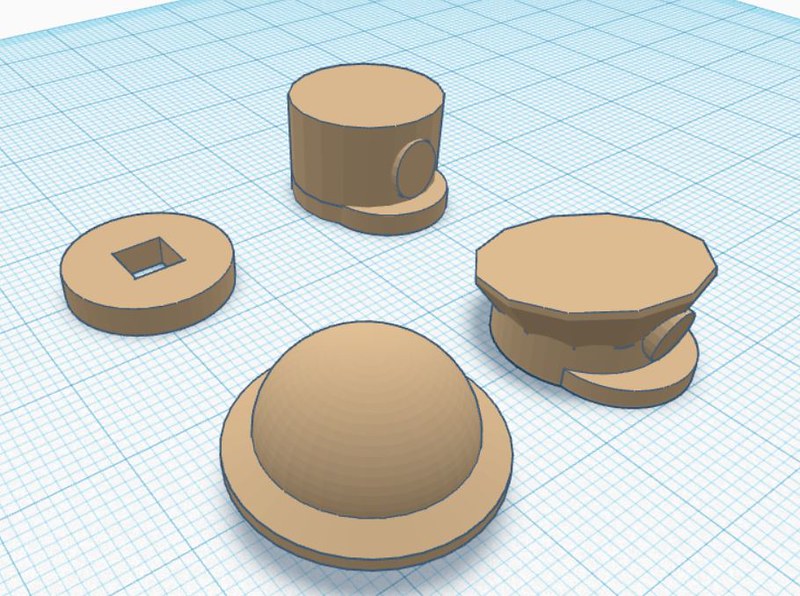
Similarly, hats had to become a little chunkier and like my arms I had to come up with a way of easily attaching the component to the body...


However, little design quandaries aside, 3D modelling has - as I had hoped - made it easier for my to work out my design ideas and quickly prototype my doodles on paper into fully formed 3D models.

It's been an evolutionary process with minor adjustments here, amending dimensions there and tweaking things I wasn't quite happy with, but I feel I got there eventually and have produced a little character shape that I am happy with. though, this has left me with a little army of test pieces...

NEXT: It's time to see what my 3D figures paint up like and how they compare to my wooden versions!

Thursday, 31 December 2020

New for 2021, 3D Printing!

 I better write this today as I can't see me doing much on Hogmanay... Not that I intend to drink that much booze tonight, it's just that I hope to spend a nice relaxing day with the wife watching old movies!

Anyway, I've already hinted at the new addition to my modelling tools, but I thought I'd add a bit more detail as this will be playing quite a big role in my model making in 2021...

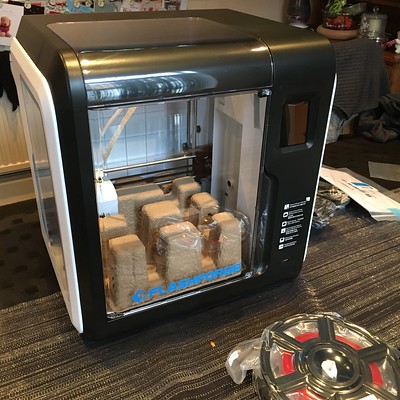
Santa was very kind to me (a big 'thank you' to all my lovely family who contributed to this present) and a BIG package arrived on my doorstep just after Christmas Day. It was a FLASHFORGE ADVENTURER 3 3D printer...

The above photo shows the newly unboxed printer with some of the protective packing still in place. Believe me when I say that I soon had all that peeled off, unstuck and dispensed with in very short shrift! 😁

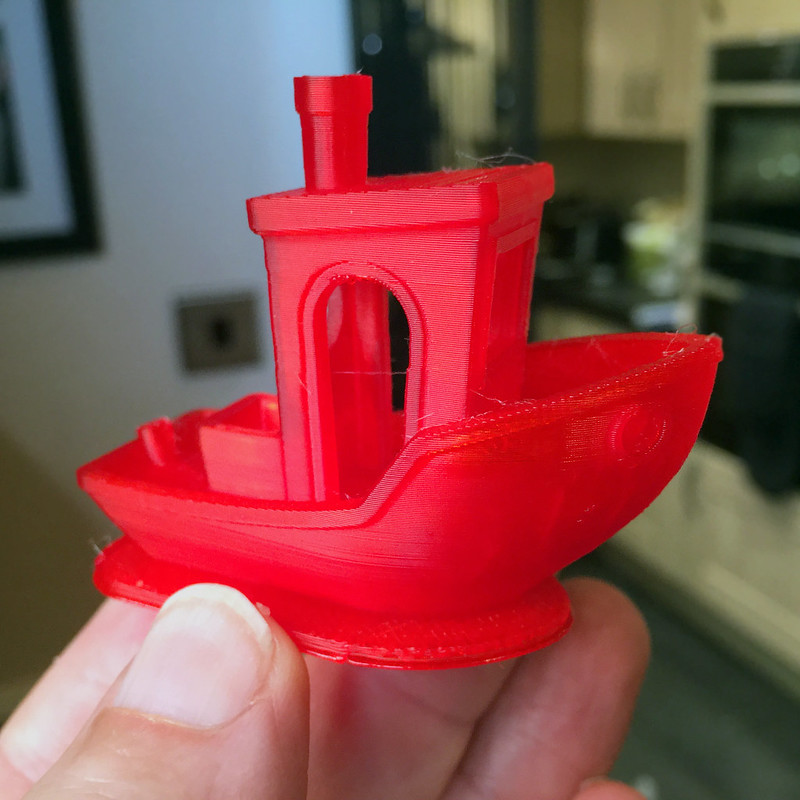
I won't go into the details of this printer, it's specs and why I chose it (just yet) but suffice to say that it's aimed at complete 3D printing 'noobs' like myself and, indeed, it was not very long before it knocked out my very first test print...

The end result of this was a cute little 'Bench' boat model - a standard model designed to test your printers set-up (every new 3D printer-er starts by printing this torture-test model)...

Despite it just being a generic test print 'Benchy' is kinda cute in it's own right and I even imagined that - scaled up and modified slightly - it might make a nice little boat for my 50mm peg figures! 😆

Anyway, so begins my adventure into 3D printing with my Adventurer 3 printer!

But before I leave things there you might be asking 'but why 3D printing'? Good question!

There are a lot of ideas I have for new (to me) modelling techniques that I want to try out this year. Different ways of putting my peg soldiers together and how to add different accessories and different kinds of models (like vehicles). The quickest and most convinient way of doing this for me - coming as I do from a plastic model-making background - is for my to prototype these new idea using a plastic printing method like 3D printing.

Using 3D software and this printer I can quickly try out new things and see how they might work without laboriously carving out little pieces of wood (which is quite messy)!

In fact, I can try out a lot of my initial idea in 3D software alone and only once satisfied - in principal - with the design do I need to go to print. So another new 'thing' for me this year will be to design my models using a 3D drawing application like TINKERCAD or BLENDER...


The above picture shows my early attempts to create a 3D version of a peg! Once I have a template for my pegs I can then start to work on 3D versions of the ideas that I have for accessories (This is the drawing of a full-sized dolly peg, but I'll also make a version of my 50mm 'half-sized' pegs as well).

And there we have it, bringing my peg making into the 21st century!

HOWEVER, I should say that I am not abandoning my more traditional wooden peg creations. I still very much enjoy the good old fashioned creative pleasure of making things by hand. The 3D printing - which is in a plastic material - is for very specific projects where traditional crafting is less suitable...

Imagine, for example, having to create a whole army of various but similar figures for a large scale war-game. A more streamlined production line process would be far more practical in this instance. Also, more complex models - like vehicles - would be far quicker to prototype virtually in 3D first in order to create a template for how exactly I would create them in wood.

So, quite aptly for New Year my new 'toy' nicely connects the old and the new!

HAPPY NEW YEAR!

Tuesday, 29 December 2020

And Goodbye 2020 - Huzzah!

 A bit early I know, but today I completed what will be the final peg figures for the year as I completed the two remaining nutcrackers I had left to do from Christmas...

I am now having a little break from making figure over the holiday and intend to think about what I will be doing in 2021. Santa was very generous and my main present will be playing a part in how I will be progressing with my little hobby. Here's a quick hint...

Flashforge Adventurer 3 - First Calibration Print