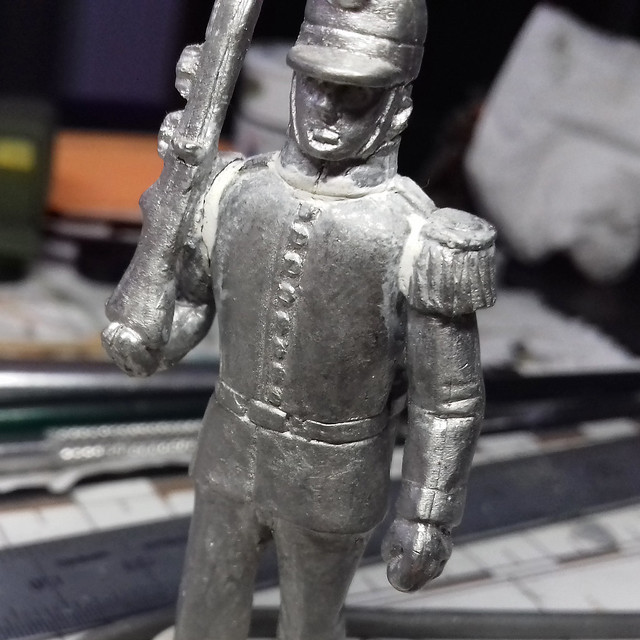
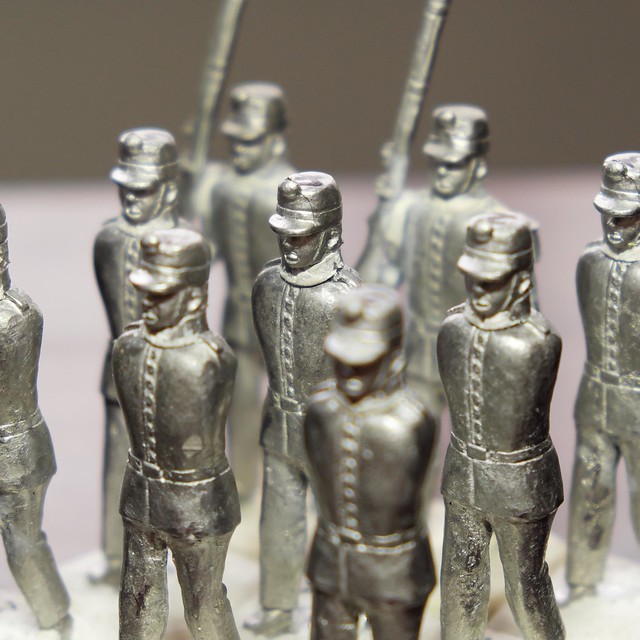
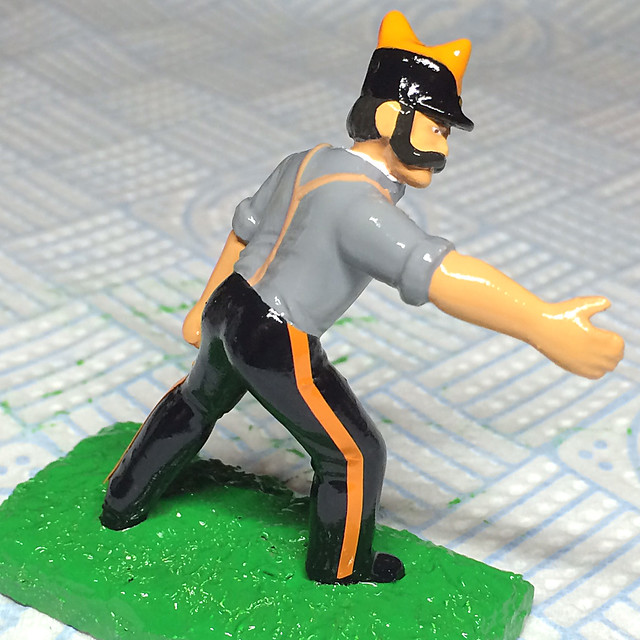
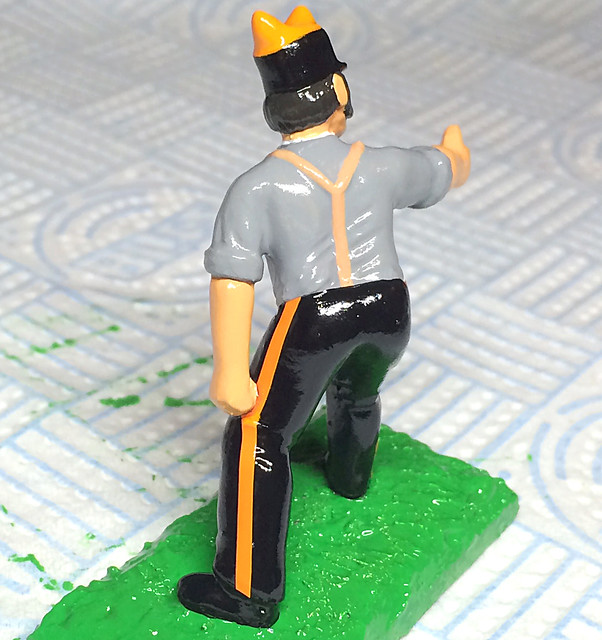
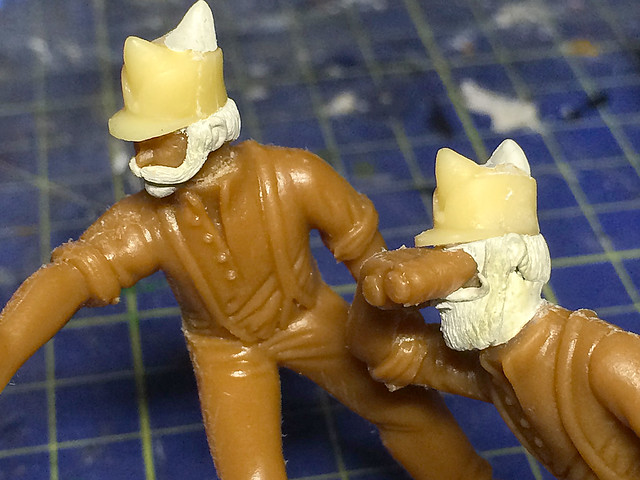
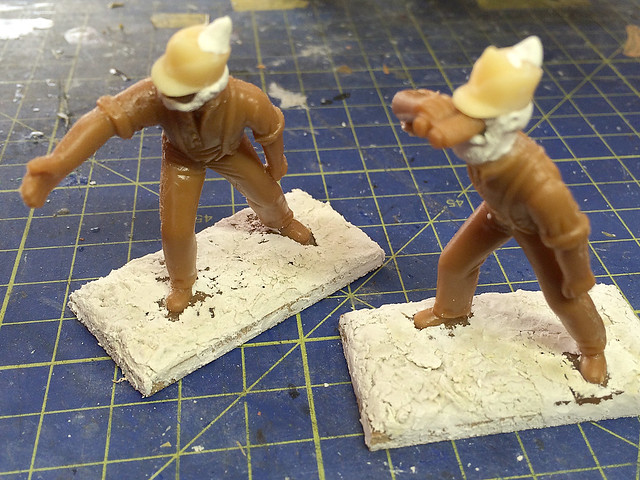
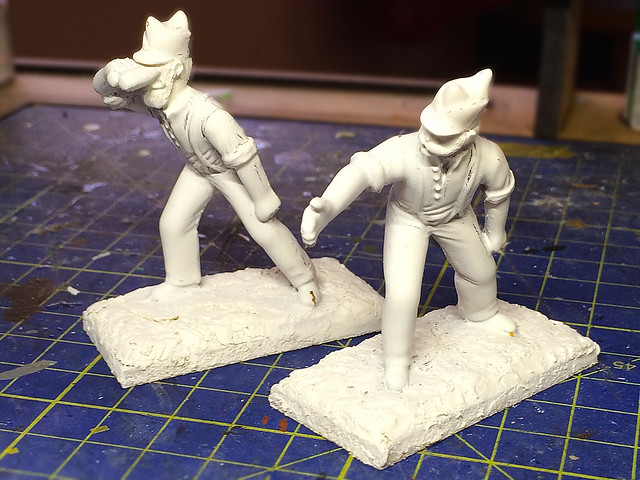
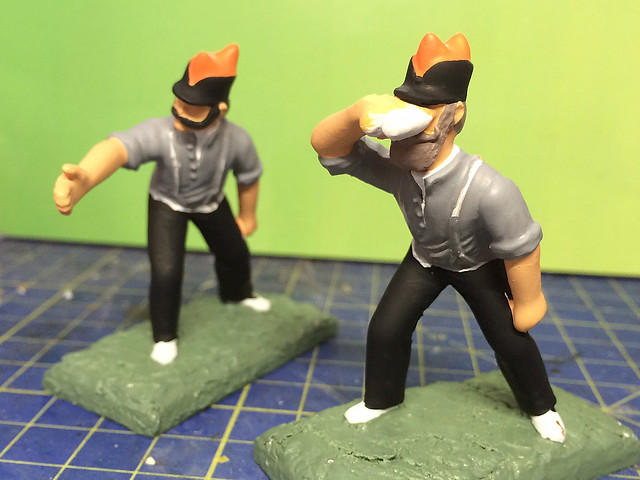
A lot of the work on my Black Hat French soldiers is cleaning up. Tedious filing and trimming of excess white metal seam lines and flash. But the fitting of parts also needs a fair amount of attention as getting the heads or limbs to sit right on the torso is a wee bit tricky (or it is with me, as I keep changing my mind about whether an arm looks straight, etc).
Ironically, Black Hat does give the arms a little nub or 'peg' of sorts (it's tiny) which would be helpful in locating the correct place to mount the arm IF they had also added a hole in the torso's shoulder for it to fit into. They didn't...So, it's down to you to decide where the arm should fit exactly...
Even when you do eventually decide that you have the arm attached just right there is still the little matter of gaps between the top of the arm and the shoulder. This has to be filled with more white Milliput putty...
After filing and sanding away at seven right arms and the seven left arms you feel like a bit of a rest (it's one of those dull repetitive jobs). I'd already been through this process with the seven heads, plus had to fill the gaps between the collar and the top of the torso so the head blended into the body correctly. More putty was needed to complete the process.
Still, once all the arms are on I just have to attach the bayonet frogs (and sword scabbard for the officer) and the jobs a good 'un! On to the priming after that!
Being the Ethereal Embassy for the Kingdom of Molatero and it's participation in the Funny Little Wars
Showing posts with label 1/32. Show all posts
Showing posts with label 1/32. Show all posts
Thursday, 16 March 2017
Wednesday, 15 March 2017
Workbench Update - March 2017
Getting back into FLW Toy Soldiers has been a little more convoluted and slow going than I expected. Even before I picked up a little soldier I had to begin to reorganise the complete mess that is my 'man cave' (stroke home junk yard). But, the good news is I can actually see some carpet now, though the mountain of boxes of 'crap' I've moved to one side of the room is threatening to avalanche on top of me every time I venture upstairs!
However, I did manage to dig out a couple of hibernating projects and I have managed to make some progress with them. So, here's what's on my workbench (come TV Dinner tray) at the moment...
1890 French Infantry of the Line
I do love my little Belle Époque French soldiers - Black Hat mouldings - and I'm really pleased to get this little half-regiment back on the march again.
They are a tiny bit taxing as there is a reasonable amount of preparation work to be done on these white metal figures. The fit is a wee bit of an issue, and pitting is the other. I've had to resort to the liberal use of white Milliput putty to fill in and smooth out some of the gaps and holes. But hey, that's white metal models for you!
Faux 1900 Heavy Artillery
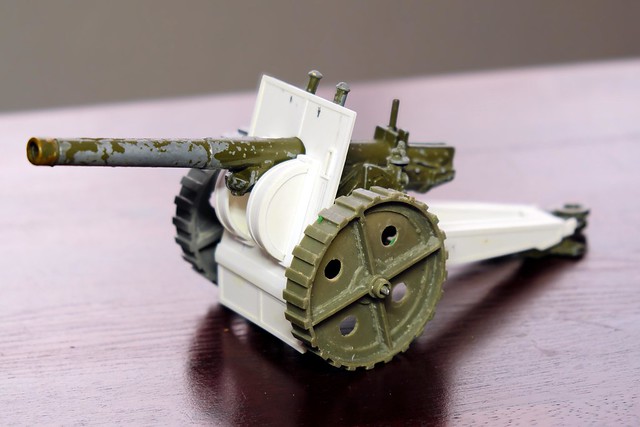
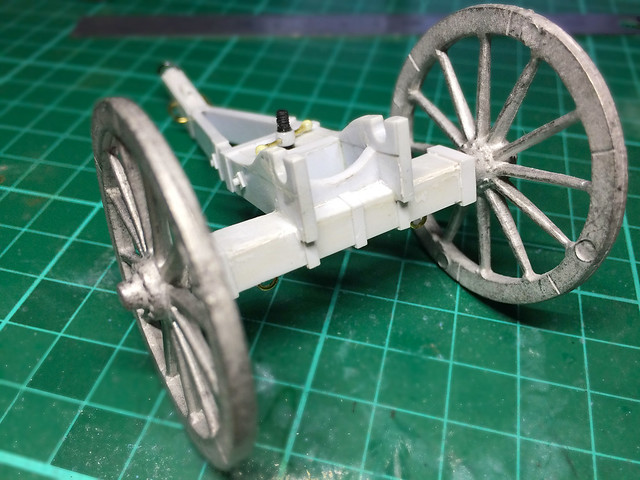
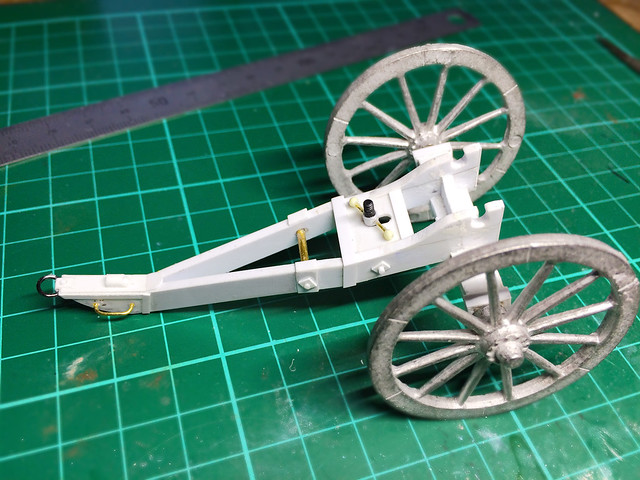
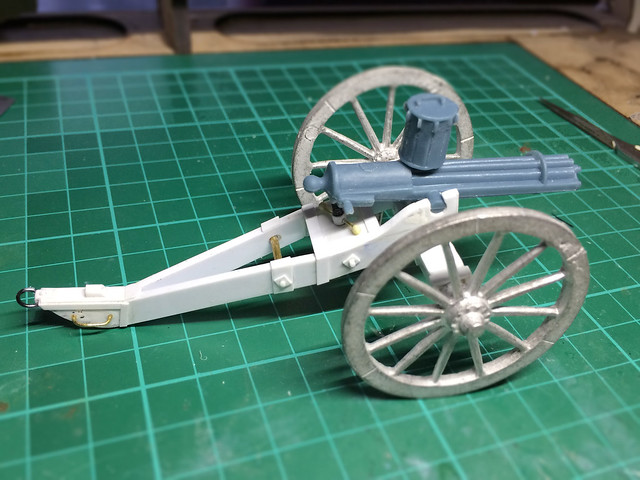
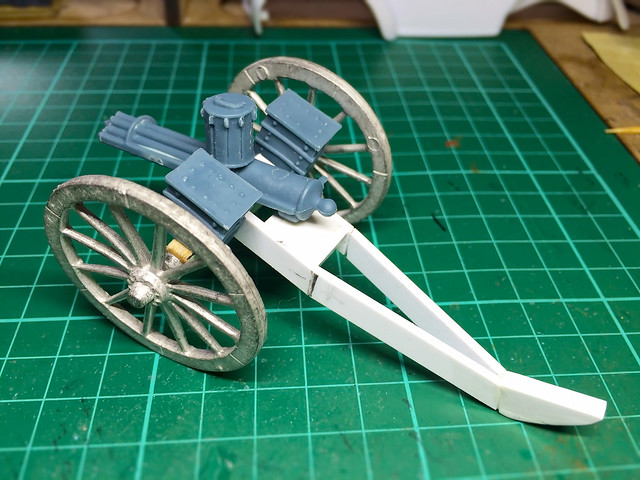
I also dusted off my 'poor man's Britain's Gun'. This die cast model - by Crescent - is actually a WW2 era 4.5 inch gun, but I'm modifying it to make it look more like a turn of the century piece.
The whole reason for doing this is so I can paint this gun in 1890 Molatero artillery colours (black and white). And while I already have two examples of the lovely Britain's 3.5 Naval Gun model, I do not want to desecrate either of these by painting them. (Crescent die casts are cheap and widely available on eBay.)
I'm just working on fixing the scratch built gun shield onto the model's chassis. And then - once I know all my plastic parts fit correctly - I will remove them again and begin to strip the green paint off the metal model.
Wednesday, 15 February 2017
I remember...
In fact, this is not an abandoned blog. It's just that the past year has been a bit of a funny one filled with a multitude of life events in one rather uncomfortable package! (I won't bore you, but suffice to say I've had a lot on my plate!)
Anyway, as it happens I've just been doing some work that has reminded me how much I enjoyed painting 1/32 scale figures, so I thought I'd post it up as it seems vaguely relevant...
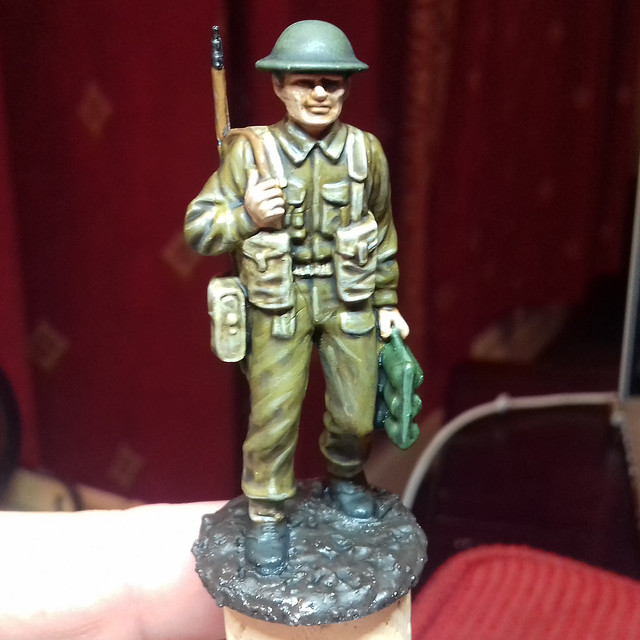
This 1/32 scale British WW2 Tommy is, of course, a good old Airfix figure. I was using it to test out some painting techniques and colours for a 28mm figure project that I am planning.
After doing this happy little chap, I did consider maybe carrying on and doing a few more from the 'British Support Weapons' set that I have (I recall buying it so I had some 1/32 Vickers .303 machine guns to tinker with). But, I can ill afford yet another diversion.
However, it has caused me to get out some of my 1/32 Molatarian figures and stick them back in the project cue, so that I have some variation from the WW2 themed models that I am starting to amass.
I still prefer my flat 'toy soldier' painting style for my Molatarians over the shaded technique shown above. But, it's interesting to compare the two styles....
>Dust blown off blog! <
Wednesday, 7 October 2015
17 of 20 Burkish!
Getting there (apologies for the count down)! But just finishing off the infantry element of my Burkish regiment, which will leave just the NCO/officer element to complete.
But I can announce the winner of the Groucho Marx look-alike contest...
But I can announce the winner of the Groucho Marx look-alike contest...
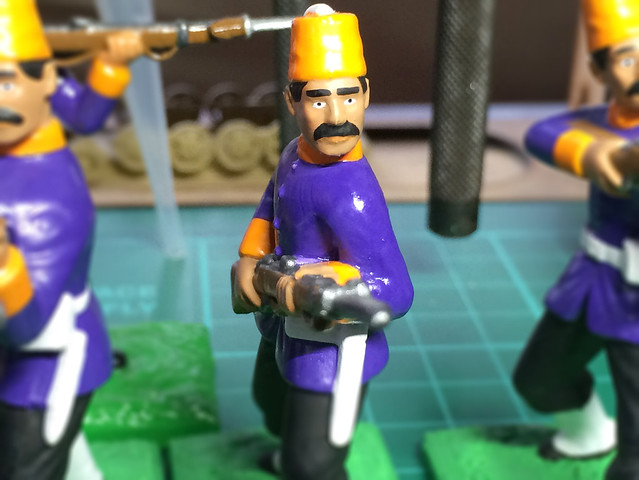 |
| "I never forget a face, but in your case I'll be glad to make an exception." |
(I was so tempted to paint little spectacles on him and give him a cigar!)
Wednesday, 23 September 2015
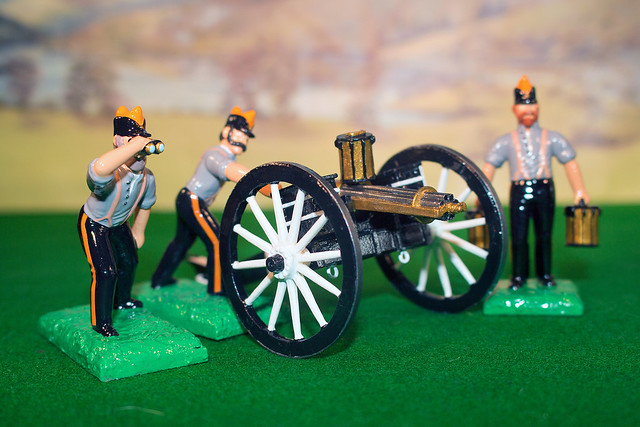
AiP 1/32 Gatling Gun set complete
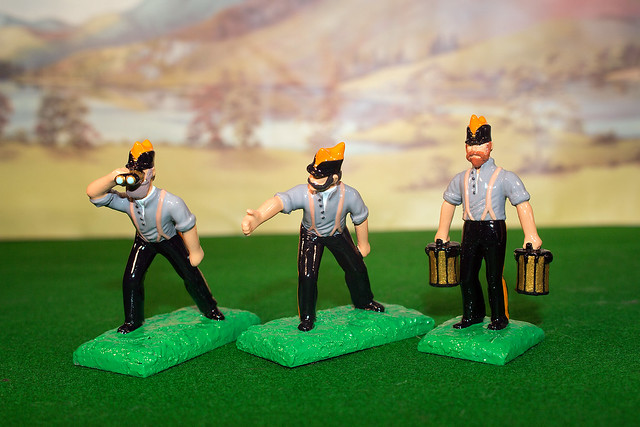
Well, although this was intended as just a way of getting me back into my FLW hobby my AiP Gatling Gun set has turned out to be my very first complete FLW unit! Huzzah!
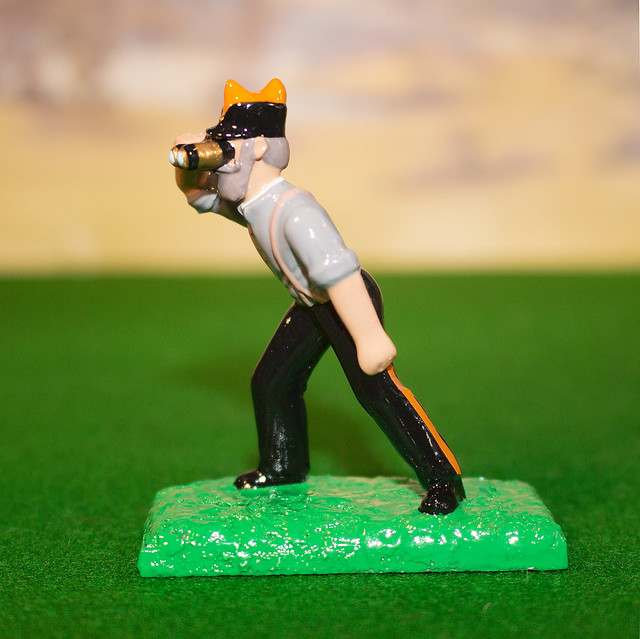
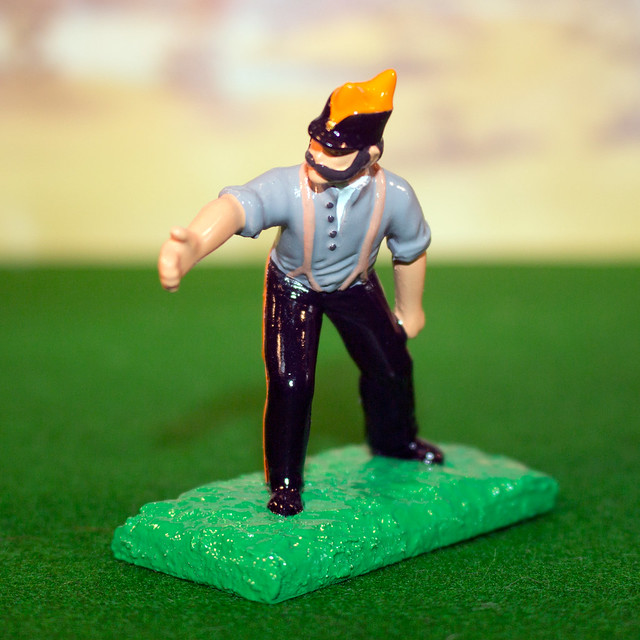
It's a wee bit rough around the edges (my Gatling carriage is a bit shoddy), but I'm very pleased with the gun crew. The colour scheme for my artillery regiment was a good choice I think (this is the 1870-1907 Molatero scheme, I was thinking of a subdued uniform scheme for the period just prior to and including The Great War).
Anyway, task completed and I feel like I have my FLW mojo back again. In fact I've already started getting my brushes into my first infantry regiment. But, back to the here and now, these little chaps are a fairly good start on my way to a modest Molatarian army - if I do say so myself!
Labels:
1/32,
AiP,
artillery,
conversion,
Molatero,
plastic,
Project 11
Wednesday, 16 September 2015
AiP 1/32 Gatling Gun carriage re-made - Part 4
Gun complete...
I've given it a coat of gloss varnish to match my glossy soldiers. I didn't use anything expensive, just Wilkos Hobby Lacquer. I have to say, I've tried to do some research on what's best to use as a overcoat but - as usual with these things - there isn't a consensus. In fact one of the FLW bloggers that I admire - Mr. Tim Gow - swears by Ronseal Outdoor Gloss Varnish!
(With my figures I am just experimenting with a light protective coat of varnish followed by a generous painted on layer or two of Pledge Klear Multi-surface wax!)
In the end I was pleased with the black and white colour scheme. It does suit my period (late 19th century) aesthetic very well. And I also think that my scratch-built gun carriage compares quite favourably with the original AiP one.
Well, it's nice to have made some progress in this particular hobby again. I have to say I find painting FLW figures and models far more relaxing than 'modern' plastic scale military models. None of this fretting over authentic colour schemes or weathering or shading or what-not!
NEXT: I finish off the gun's crew and then put the two together for the final completion photography.
Labels:
1/32,
AiP,
artillery,
conversion,
Molatero,
painting,
plastic,
Project 11,
scratch build
Sunday, 13 September 2015
AiP 1/32 Gatling Gun carriage re-made - Part 3
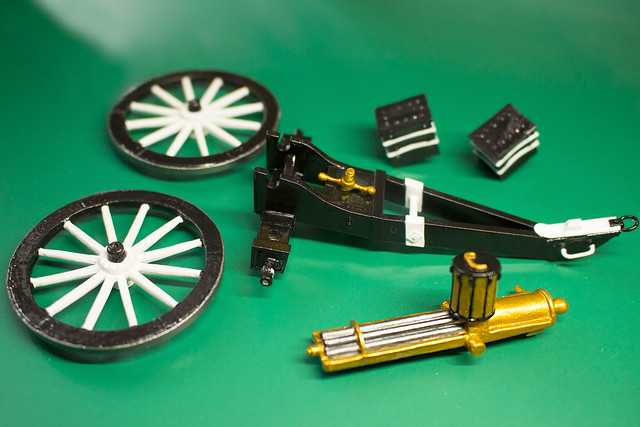
Having got the basic modelling of the Gatling done it was onto the painting. The carriage is going to be predominantly black - with some small details picked out in white - and the wheels are going to be white with black hubs and wheel trim.
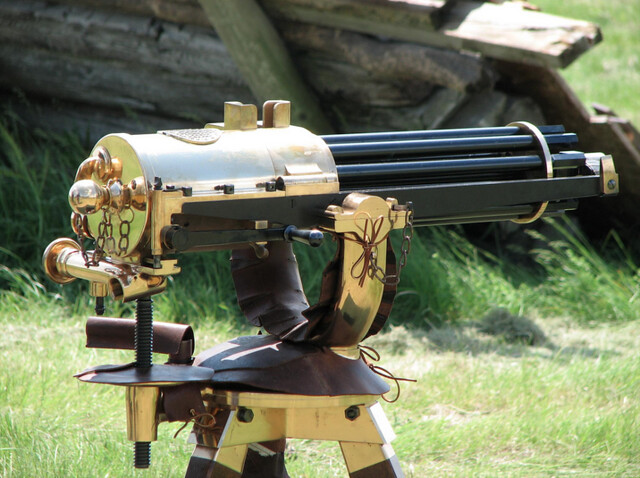
The gun itself will be one of the older style brass Gatlings with steel barrels. Here's an example (although this one has black barrels, which I think would be too much)...
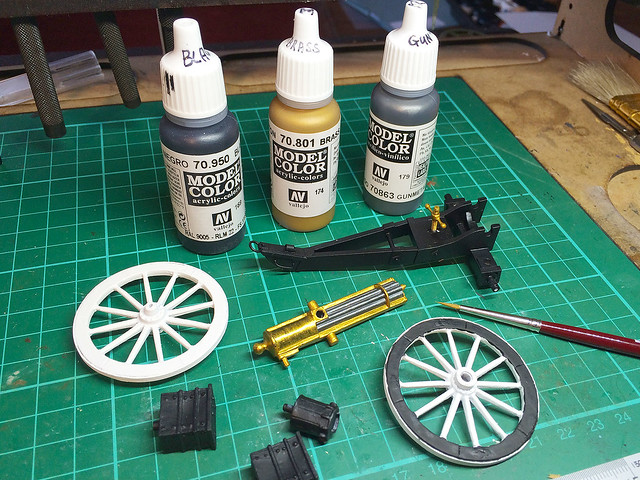
And so, it's on to the painting. I'm using Vallejo acrylics (to be honest I rarely use anything else these days, I seem to have settled on Vallejo) with special prominence to their metallics - 801 Brass and 863 Gunmetal Grey.
I've just started applying coats in the above photo, I mention this because the Brass colour, in particular, needs several thin coats I have found (you'll notice it's a bit streaky after just one coat). But I was very pleased with the Gunmetal Grey, it has given me exactly the dull steel look I was after.
It's a bold colour scheme and as it came together I wavered a bit. But I wanted something that would stand out and be immediately identifiable as 'Molatarian' on a table-top or carpet battlefield. Hopefully it doesn't look to much like a zebra!
I'm really pleased with the brass Gatling, in fact if I had known it would turn out so striking I might have even toned down the carriage scheme and gone plain black. I'll have to get everything finished off and assembled before I am convinced.
Next: Hopefully a finished gun!
Labels:
1/32,
AiP,
artillery,
conversion,
Molatero,
plastic,
Project 11,
scratch build
Tuesday, 8 September 2015
AiP 1/32 Gatling Gun carriage re-made - Part 2
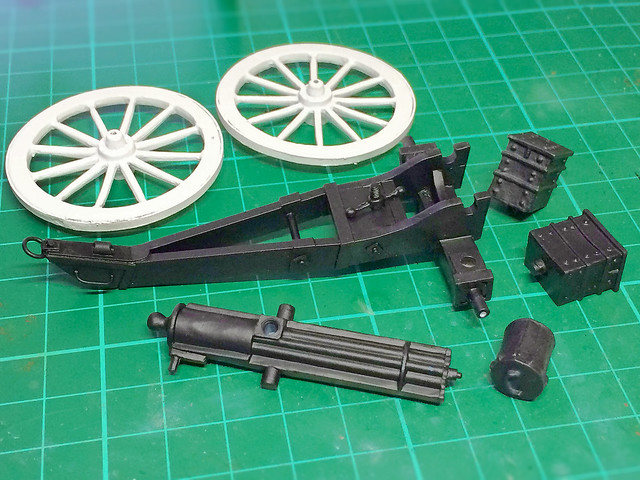
I pretty much played it by ear when I made the new gun carriage for this project, it was all a bit slap dash and therefore there was quite a bit of tidying up to do before I moved on to the detailing...
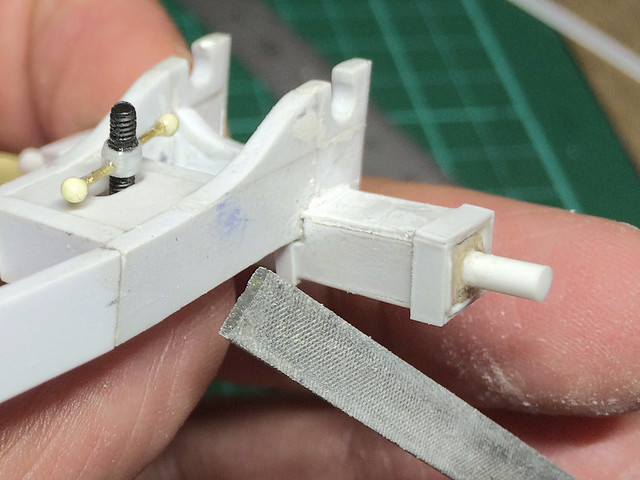 |
| There were a lot of sloppy joins to fix...At least I have a template for any further gun carriages I make. |
Having gotten the house keeping out the way I started adding some extra detail to the front end of the carriage. It's all very cosmetic, I'm not basing my additions on any particular historic reference...
Just enough extras to make the carriage look as if it might be based on something real! (Which it isn't. Any resemblance to something real is purely coincidental.)
It's all going to be painted black anyway (more about the colour scheme in a minute) so I didn't go wild with the amount of detail that I added. But I think it looks OK?
Quick check to get a feel for how it'll look like when done...
The carriage paint scheme
I had a good think and I decided I wanted something that stood out a little and would be uniquely 'Moletarian'. I didn't want something bland like field grey or natural bare wood and metal so I picked a colour scheme for my Molatarian artillery pieces that would look smart and unique.
I toyed around with colour combinations based on the national colours of Molatero - black, purple, orange and white - and out of these I decided black was a good choice for the main base colour. It's a practical choice, quite 'tactical' and seems a feasible in the context of late 19th Century military artillery. But what colour to choice for the contracting colour? (Plain black would be a bit boring.)
Purple was a immediate 'no' for me (yuck), and orange didn't seem right either. Which left white. Hmmm, black with white detailing - that sounded pretty attractive and sort of believable for a circa 1870 military artillery scheme.
So, I'll start with a base coat of Humbrol black matt acrylic...
Next: Carriage painting completed and onto the painting of the Gatling Gun itself.
Labels:
1/32,
AiP,
artillery,
Molatero,
plastic,
Project 11,
scratch build
Friday, 28 August 2015
AiP 1/32 Gatling Gun carriage re-made - Part 1.5
...I wasn't happy. The job I made of the new Gatling carriage just wasn't quite right (a reminder)...
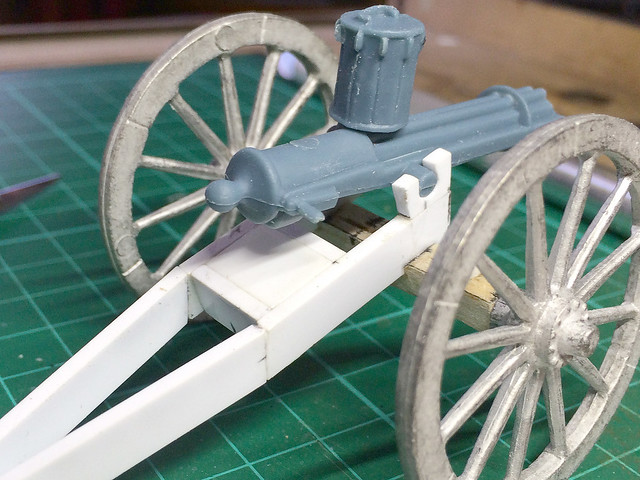
The problem is that the gun's breech mechanism is laying right on top of the 'box' where the elevation mechanism should go (a wheel and screw arrangement which lifts and lowers the gun). At the moment there is no room for the screw to go between the box and the breech. Here's an idea of how it should look...
I hated to acknowledge what obviously had to be done...I was going to have to raise the trunnion holes in order to make space between the carriage and gun breech. Bugger!
Well, after a lot of cursing and sawing away with my craft knife (must buy a micro-saw) I detached the end of the carriage with the trunnion holes and added a new 'end' piece and then re-attached the trunnion pieces on top on the new end pieces...Phew!
It's all getting a bit slap-dash now and a little messy but if I can get this first attempt to work and look right I'll know how to tackle any further carriages I make.
Messy maybe, but it did the trick...
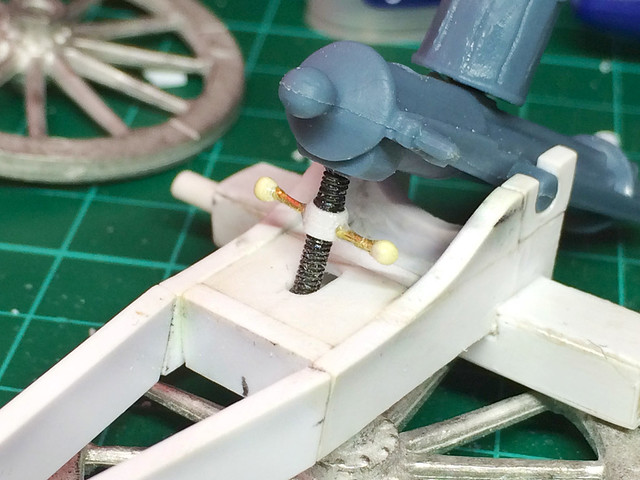
I now have adequate space between the breech and 'elevation box' on the carriage (don't know if that's the correct term for it) to insert the screw mechanism. Obviously, now I'm satisfied, I will have to tidy the job up, but I'll add the elevation screw first.
Well, it's not the best piece of scale modelling but it's better than the original AiP attempt (sort of). I really wanted to do a little wheel but just couldn't find a suitable part in my scraps box.
I'm back on course now - this model has turned out to be a bit of a prototype really, as I work out the best way to make a 1/32 gun carriage with my chosen materials. Though I hope that once I have added the extra detail and painted this attempt it will look OK.
The good thing about modifying the way the gun attached to the carriage - and raising it - is that it solves one of the main issues with the original AiP model. It get's rid of the annoying 'droopy gun'!
Next: Adding the detail and painting.
Historical note: I mentioned that this form of Gatling - mounted on a conventional artillery gun carriage - was an earlier form of the gun. But there seems to have been another reason this 'heavy' carriaged version of the gun was in use - apparently it was useful for engaging fixed (or fortified) positions. In this case the ability to transverse - sweep left and right quickly - was not such a big issue (perhaps). I'm still reading but what amazed me was how very large calibre automatic guns were in use quite early on, guns like the Hotchkiss and Maxim 'Pom-Poms' were mounted on gun carriages (Wikipedia: "...37 mm Nordenfelt-Maxim or "QF 1-pounder" introduced during the Second Boer War, the smallest artillery piece of that war. It fired a shell one pound in weight accurately over a distance of 3,000 yd (2,700 m)".
The problem is that the gun's breech mechanism is laying right on top of the 'box' where the elevation mechanism should go (a wheel and screw arrangement which lifts and lowers the gun). At the moment there is no room for the screw to go between the box and the breech. Here's an idea of how it should look...
 |
| The elevation screw (inside red circle) lifts and lowers the gun barrels. |
I hated to acknowledge what obviously had to be done...I was going to have to raise the trunnion holes in order to make space between the carriage and gun breech. Bugger!
 |
| Damn! No space between the breech and the elevation 'box'. |
Well, after a lot of cursing and sawing away with my craft knife (must buy a micro-saw) I detached the end of the carriage with the trunnion holes and added a new 'end' piece and then re-attached the trunnion pieces on top on the new end pieces...Phew!
 |
| A bit rough and ready, but whatever works! |
It's all getting a bit slap-dash now and a little messy but if I can get this first attempt to work and look right I'll know how to tackle any further carriages I make.
Messy maybe, but it did the trick...
I now have adequate space between the breech and 'elevation box' on the carriage (don't know if that's the correct term for it) to insert the screw mechanism. Obviously, now I'm satisfied, I will have to tidy the job up, but I'll add the elevation screw first.
Well, it's not the best piece of scale modelling but it's better than the original AiP attempt (sort of). I really wanted to do a little wheel but just couldn't find a suitable part in my scraps box.
I'm back on course now - this model has turned out to be a bit of a prototype really, as I work out the best way to make a 1/32 gun carriage with my chosen materials. Though I hope that once I have added the extra detail and painted this attempt it will look OK.
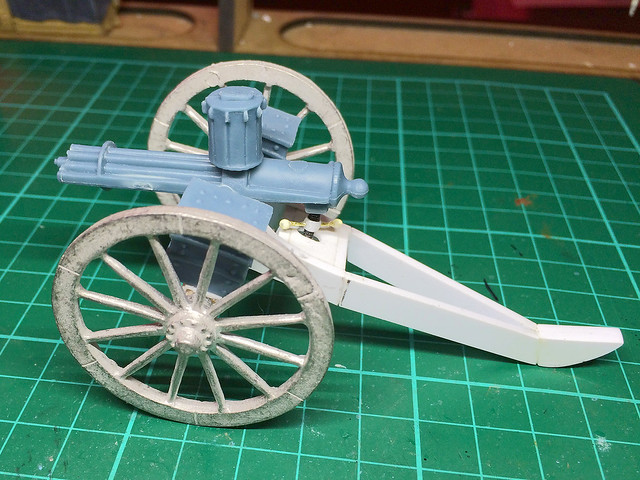 |
| Back to square one, but I'm a bit happier now! |
The good thing about modifying the way the gun attached to the carriage - and raising it - is that it solves one of the main issues with the original AiP model. It get's rid of the annoying 'droopy gun'!
Next: Adding the detail and painting.
Historical note: I mentioned that this form of Gatling - mounted on a conventional artillery gun carriage - was an earlier form of the gun. But there seems to have been another reason this 'heavy' carriaged version of the gun was in use - apparently it was useful for engaging fixed (or fortified) positions. In this case the ability to transverse - sweep left and right quickly - was not such a big issue (perhaps). I'm still reading but what amazed me was how very large calibre automatic guns were in use quite early on, guns like the Hotchkiss and Maxim 'Pom-Poms' were mounted on gun carriages (Wikipedia: "...37 mm Nordenfelt-Maxim or "QF 1-pounder" introduced during the Second Boer War, the smallest artillery piece of that war. It fired a shell one pound in weight accurately over a distance of 3,000 yd (2,700 m)".
Labels:
1/32,
AiP,
artillery,
conversion,
Molatero,
plastic,
Project 11
Tuesday, 25 August 2015
AiP 1/32 Gatling Gun carriage re-made - Part 1
OK, while the crew figures should progress quite easily now let's turn our attention to the Gatling Gun itself. I have two issues with the gun as it is provided by AiP, it has been given a simplified and somewhat generic gun carriage (to expedite it's use for the other three gun barrels supplied ) and it's rather droopy gun elevation.
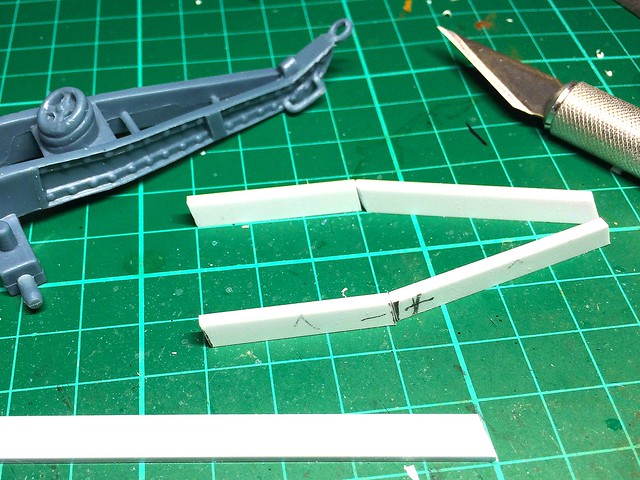
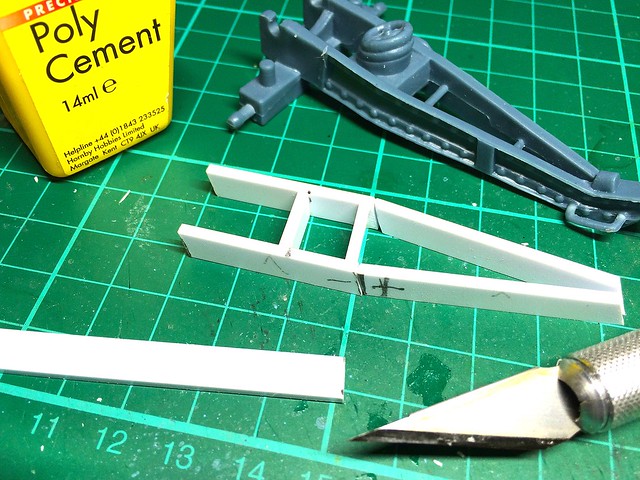
In the end I decided that the best way to deal with both these issues (and ensure I can make use of the optional artillery barrels) is to build my own custom gun carriage from scratch - using the AiP carriage as a guide. Not a hard job as the carriage is a pretty simple in design...
I was a bit dubious about how AiP had chosen to mount the Gatling Gun, as the way they have done it is to 'pin' it into place using conventional cannon-style trunnions. This means there is no lateral movement of the gun unless you move the whole carriage left and right. I had thought that the Gatling was mounted on some sort of simple swivel mounting?
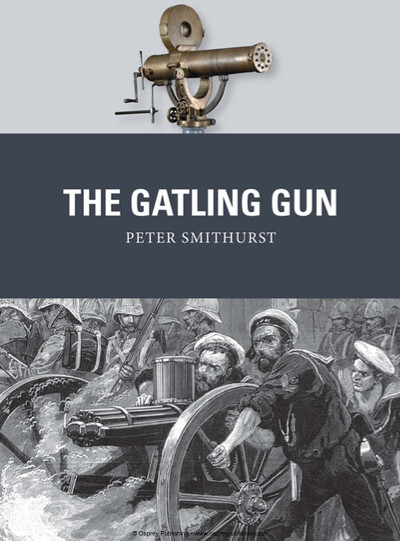
Osprey's book on the Gatling Gun (By Peter Smithhurst) was just recently released and it provided me with some information which leads me to believe that AiP's British Gatling is meant to be one of the earlier guns made by W. Armstrong, first used in action during Third Anglo-Ashanti War of 1873–74:
"The Gatling guns which accompany the expedition are those known as the 0.45 inch. They will be mounted on carriages somewhat similar to the guns [i.e. artillery], and, we presume, are mainly intended for the defence of stockade positions."
~ The Times of 6 October 1873
[Osprey 'The Gatling Gun', Page 50.]
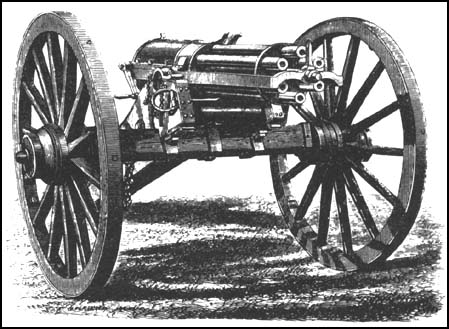
My reading leads me to believe that these Gatlings were probably similar to Model 1865 guns in 1in calibre (as in the illustration above). The fact that this type of mount existed is good enough for me as it happens to be easier to recreate.
Just bear in mind that if you do want to model later Gatling Guns that their carriages did evolve to include better transverse rail or swivel mounts which provided easier lateral movement. These include British Army Gatlings that were deployed in the later Boer War...
Anyhoo...Onto construction...
Making a feasible circa. 1870 Gatling Gun carriage
All the barrels included in the set (see earlier post) are so delightfully appropriate for my Molatarian artillery company that it would be a great shame to simply consign three of them to my scraps box and just make up the Gatling Gun using the one carriage that AiP includes in the set.
The solution to this problem was simple...Make three more gun carriages, starting with one for my Gatling!
One must remind oneself that this is a 'toy gun' carriage and so the liberties taken are excusable, certainly from the point of view of the Funny Little Wars enthusiast. But even so I wanted to modify the Gatling version of the carriage to something I felt was more appropriate.
It's a simple 'box' frame design so poses no tricky modelling issues. My main concern was getting some form of reference material on which to base my model, this opened up a whole 'research' can of worms. The AiP carriage, as I said, is a generic artillery carriage rather than one of the more specialised Gatling carriages that were developed - which provided movement in the horizontal as well as vertical firing plane - which is more appropriate to the earlier models of Gatling Guns.
Anyway, historical worries aside, I simply wanted some ideas about how I would furnish and ornament my carriage frame. I particularly wanted to replace the 'lump' which is supposed to be the elevation wheel on the AiP original. The AiP carriage also looks like it is a metal riveted affair and I wanted to see if there were indeed such metal carriages in use with the Gatling (as it turned out there were).
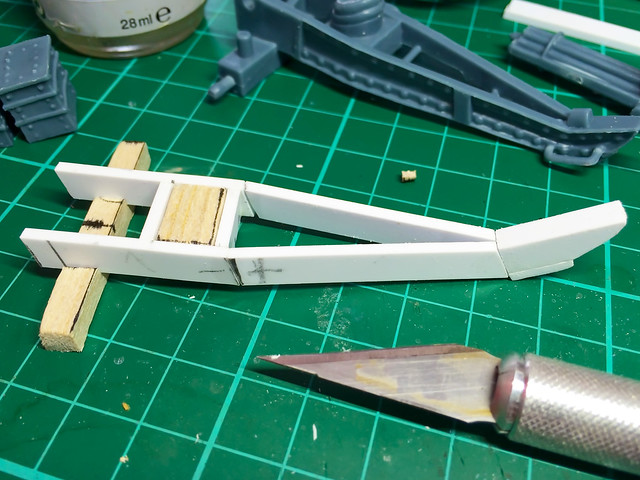
As is obvious from the pictures I have taken of the construction process I am working in light-weight materials - styrene and balsa wood. While these will not make the sturdiest of models they are nearly as good as the original AiP plastic and are, naturally, very easy to work with. Actually I haven't worked much with Balsa before and I am finding it a very nice medium (if you aren't too concerned about the hardiness of the model.)
I suppose the ideal way to ensure a fairly strong toy - for playing with - would be to cast my model in resin when I have finished making it. This would make it more resilient and durable. I'll think about that (it depends how good a job I make of it and whether I feel this carriage may be just a 'one off' or not).
So, onto fitting the AiP Gatling Gun model to my carriage. The trunnion arrangement - the metal pivots which are used to attach the gun to the carriage - are those parts which mark this gun out as being an earlier version of the gun. What this means is that, while the gun could be elevated freely, moving the gun from side to side - an basic requirement of a machine-gun - was only achievable by rotating the whole gun carriage (like a cannon).
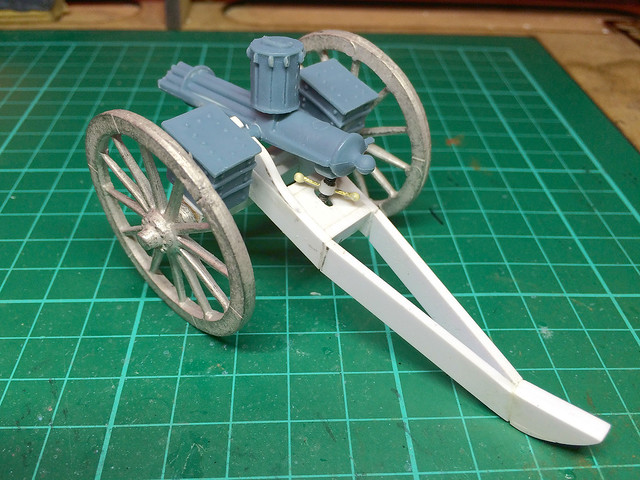
Well, I completed the basic carriage frame construction, but there is a lot of detailing work left to do. Still, it looks OK and I found a spare set of white-metal wheels that finish off the compliment of parts, the AiP original items being those moulded in the blue-grey plastic.
Now I have to plan how to add all the carriage furniture and detailed accessories - like the elevation screw - and clean up the AiP gun itself (which has a little flash and some seam lines). But, not a bad start.
Next: Adding all the fancy details to finish off the model.
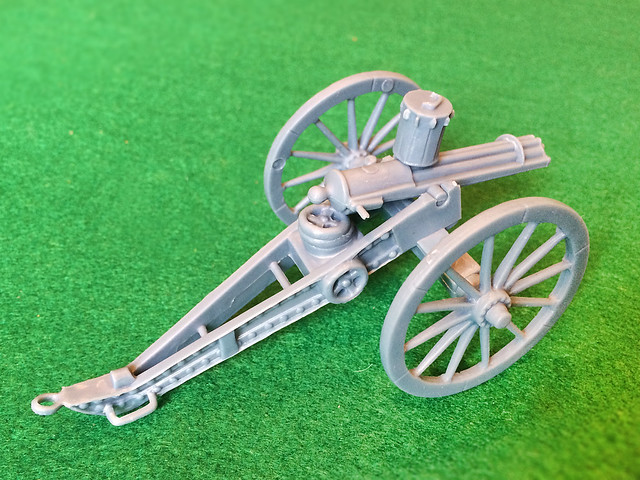 |
| AiP's Gatling Gun. Unfortunately I can't identify exactly which version of the historic Gatling Gun this is supposed to be. |
In the end I decided that the best way to deal with both these issues (and ensure I can make use of the optional artillery barrels) is to build my own custom gun carriage from scratch - using the AiP carriage as a guide. Not a hard job as the carriage is a pretty simple in design...
I was a bit dubious about how AiP had chosen to mount the Gatling Gun, as the way they have done it is to 'pin' it into place using conventional cannon-style trunnions. This means there is no lateral movement of the gun unless you move the whole carriage left and right. I had thought that the Gatling was mounted on some sort of simple swivel mounting?
Osprey's book on the Gatling Gun (By Peter Smithhurst) was just recently released and it provided me with some information which leads me to believe that AiP's British Gatling is meant to be one of the earlier guns made by W. Armstrong, first used in action during Third Anglo-Ashanti War of 1873–74:
"The Gatling guns which accompany the expedition are those known as the 0.45 inch. They will be mounted on carriages somewhat similar to the guns [i.e. artillery], and, we presume, are mainly intended for the defence of stockade positions."
~ The Times of 6 October 1873
[Osprey 'The Gatling Gun', Page 50.]
My reading leads me to believe that these Gatlings were probably similar to Model 1865 guns in 1in calibre (as in the illustration above). The fact that this type of mount existed is good enough for me as it happens to be easier to recreate.
Just bear in mind that if you do want to model later Gatling Guns that their carriages did evolve to include better transverse rail or swivel mounts which provided easier lateral movement. These include British Army Gatlings that were deployed in the later Boer War...
Anyhoo...Onto construction...
Making a feasible circa. 1870 Gatling Gun carriage
All the barrels included in the set (see earlier post) are so delightfully appropriate for my Molatarian artillery company that it would be a great shame to simply consign three of them to my scraps box and just make up the Gatling Gun using the one carriage that AiP includes in the set.
The solution to this problem was simple...Make three more gun carriages, starting with one for my Gatling!
One must remind oneself that this is a 'toy gun' carriage and so the liberties taken are excusable, certainly from the point of view of the Funny Little Wars enthusiast. But even so I wanted to modify the Gatling version of the carriage to something I felt was more appropriate.
It's a simple 'box' frame design so poses no tricky modelling issues. My main concern was getting some form of reference material on which to base my model, this opened up a whole 'research' can of worms. The AiP carriage, as I said, is a generic artillery carriage rather than one of the more specialised Gatling carriages that were developed - which provided movement in the horizontal as well as vertical firing plane - which is more appropriate to the earlier models of Gatling Guns.
Anyway, historical worries aside, I simply wanted some ideas about how I would furnish and ornament my carriage frame. I particularly wanted to replace the 'lump' which is supposed to be the elevation wheel on the AiP original. The AiP carriage also looks like it is a metal riveted affair and I wanted to see if there were indeed such metal carriages in use with the Gatling (as it turned out there were).
As is obvious from the pictures I have taken of the construction process I am working in light-weight materials - styrene and balsa wood. While these will not make the sturdiest of models they are nearly as good as the original AiP plastic and are, naturally, very easy to work with. Actually I haven't worked much with Balsa before and I am finding it a very nice medium (if you aren't too concerned about the hardiness of the model.)
I suppose the ideal way to ensure a fairly strong toy - for playing with - would be to cast my model in resin when I have finished making it. This would make it more resilient and durable. I'll think about that (it depends how good a job I make of it and whether I feel this carriage may be just a 'one off' or not).
So, onto fitting the AiP Gatling Gun model to my carriage. The trunnion arrangement - the metal pivots which are used to attach the gun to the carriage - are those parts which mark this gun out as being an earlier version of the gun. What this means is that, while the gun could be elevated freely, moving the gun from side to side - an basic requirement of a machine-gun - was only achievable by rotating the whole gun carriage (like a cannon).
Well, I completed the basic carriage frame construction, but there is a lot of detailing work left to do. Still, it looks OK and I found a spare set of white-metal wheels that finish off the compliment of parts, the AiP original items being those moulded in the blue-grey plastic.
Now I have to plan how to add all the carriage furniture and detailed accessories - like the elevation screw - and clean up the AiP gun itself (which has a little flash and some seam lines). But, not a bad start.
Next: Adding all the fancy details to finish off the model.
Labels:
1/32,
artillery,
conversion,
Molatero,
plastic,
Project 11
Friday, 29 May 2015
Give the man a stripe!
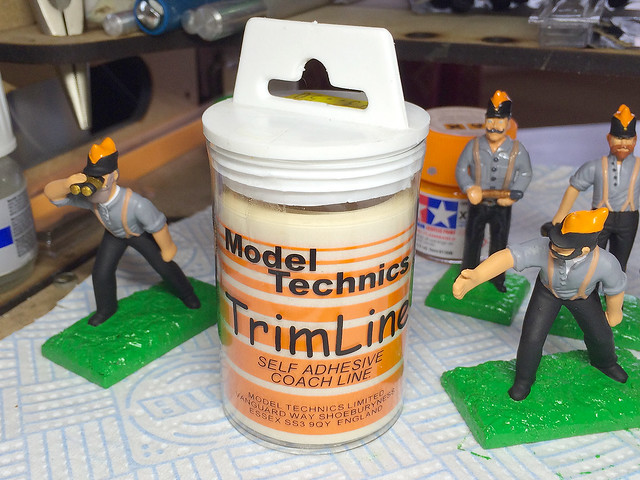
A little aside with my Gatling crew regarding how I apply the trouser stripes. Now up until now I have hand painted the strips and being a graphic designer by trade I am a little persnickety about how straight a straight line is!
While perusing through my local model store I came across a decal product that I thought might help speed up and make more accurate trouser stripes. It's called Model Technics TrimLine...
What immediately caught my eye was that it was available in the very bright orange that I have been painting my Molatarian soldiers' stripes. Basically it's a long roll of self-adhesive vinyl strips of varying widths - three of which are ideal for the use I have in mind. (There is a range of colours and the roll is about three quid.)
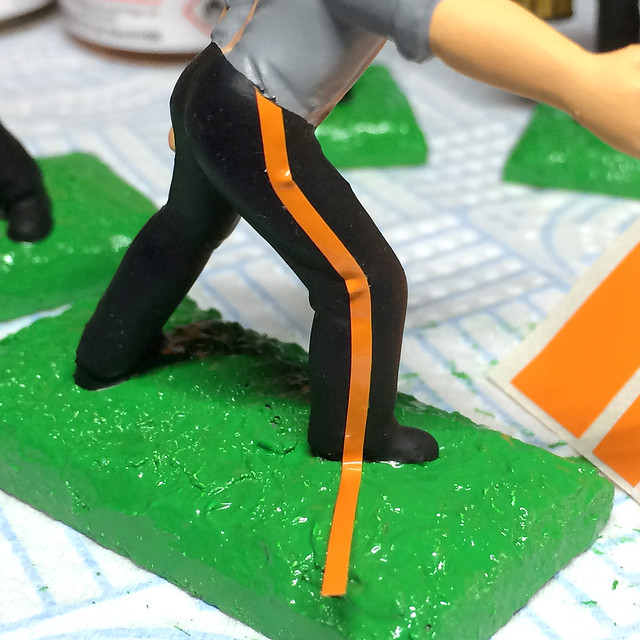
I had two concerns about this product - how flexable is it (can it conform to bent legs) and how thick are the stripes (would it stand out as being obviously a stuck on decal). Only one way to find out...
Well, while the stripes are not too thick they aren't all that flexible - they are really designed for coach-lining models and being applied in straight lines. So getting then to curve to the natural pose of a toy soldiers leg was a bit of a challenge and I had to do a wee bit of cutting with a scalpel to get them to 'bend' the way I wanted.
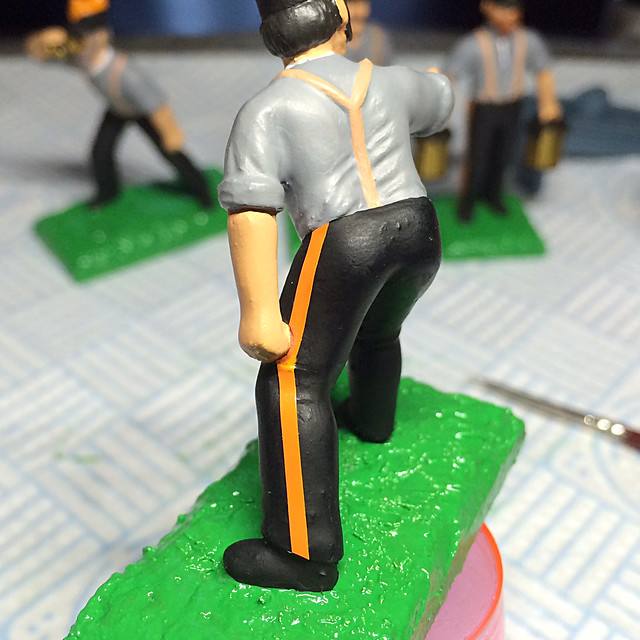
However, with perseverance I eventually managed to get them to applied in an acceptably realistic manner...
OK, so they don't bend very smoothly but I reckon it's good enough - to be honest I don't think I could have tried the TrimLine out on more difficult poses (except perhaps kneeling). As the majority of toy soldier models are in straight legged poses most will be a lot easier work than these little fellows.
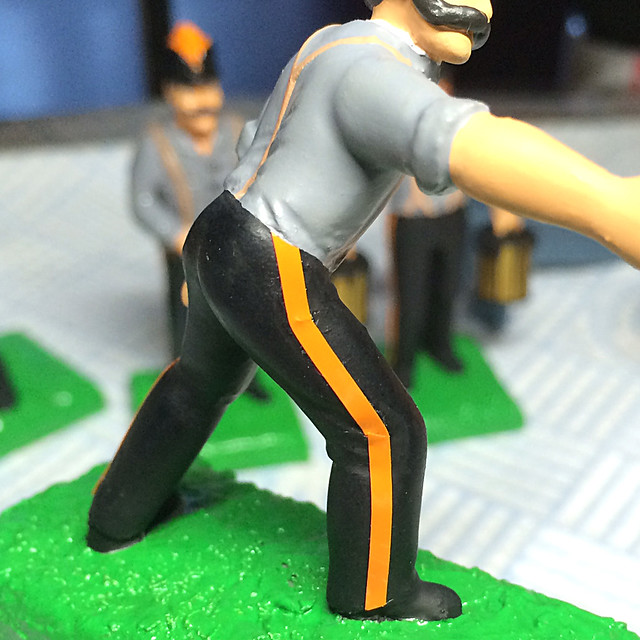
The next issue was just how noticeable these stripes would be as transfers as I was a little worried they would look stuck on. But they actually did look too bad (they are quite thin) and there was no noticeable 'white edge' to them to give the game away. So I carried on and went to the glossing stage...
As I had hoped the application of a coat of gloss seemed to smooth out any obvious 'step' between model and stripe, and the effect was to blend the transfer 'in'. At a distance the stripe looks as if it is just very carefully painted on! (Lovely straight edges!)
Experiment a success I should say - though I am probably open to accusations of 'cheating'. Still, when you think of the work involved in painting a whole regiment of these chaps (20 figures say) - that's 40 stripes in all and that's a lot of time and concentration. TrimLine would really speed up the creation of my figures and is an improvement over my less than perfect line painting methods.
(I am sure there are some modellers out there that would make short work of painting stripes freehand - but I'm afraid I am just not one of them.)
Labels:
1/32,
accessories,
AiP,
artillery,
effects,
painting,
plastic,
Project 11
Sunday, 24 May 2015
Molatarian Gatling Gun crew - progress
OK, I mentioned that I had a bit of an issue with the heads of the AiP gunners because I had removed the original pith helmets. To recap taking off the 'big hat' revealed that AiP had only done the most cursory sculpting of the head - particularly of the gunnery officer - as the hat largely obscured his features (as did the NCO/Officer's binoculars)...
This left me with a little rebuilding to do as my Molatarian hats were more 'off the face'. So off I went with the Milliput and did some very amateurish 'plastic surgery' (having seen my efforts I can guarantee that I will not be having any visits from crime bosses who need a change of identity)!
Not great! But I feel a little better - plus it's given them 'the personal touch' so they are a little unique (even if it's not in a good way). :)
Just a minor point, I'm using (Quick Drying) Pollyfilla for the bases now. It's quick and easy to apply, dries quickly (naturally) and creates an interesting texture. Obviously this does make my bases quite thick (or is it deep?) as I already mount my figures on 3mm MDF bases, but I prefer the extra weight and stability this gives. It does mean my figures might be slightly taller on the game table than other peoples' though.
Link to UK MDF figure bases: Warbases
Well, that's the 'hard' work done, and so it's on to the paint preparation process. As before I used some spray on lacquer (Wilko's cheapest) just to smooth out the surface of the figures and help give them some rigidity. Then it was a quick spray of some white automotive primer...
The primer actually serves to highlights any overly rough areas that might need some additional attention. So it's out with the scalpel again to do some remedial work and then another quick squirt of white!
Satisfied with this, I move on to the base painting. As on my test I tend to do the first coat with my Vallajo Model Color paints before moving on to the more expensive and tricky Tamiya paints for the final coat...
The Vallejo colours are a bit flatter but help provide a good base for the bright Tamiya colours, which need help to create a good opaque coverage. I admit this is - by the end - a lot of coats of different types of paint, but you are looking for that 'traditional toy soldier' look which is epitomised by flawless and flat colour coverage. So it's worth going the extra yard to achieve this.
Well, that's these chaps well on their way to being finished so we will turn our attention to the Gattling Gun itself now.
NEXT: Head scratching about the AiP 'Gatling' and how to approach this model.
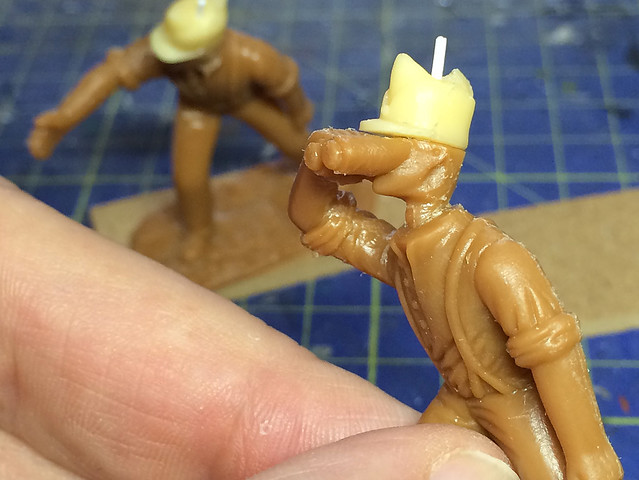 |
| "Oh gov! Me neck's so skinny and me ears have shrunk!" |
Not great! But I feel a little better - plus it's given them 'the personal touch' so they are a little unique (even if it's not in a good way). :)
Just a minor point, I'm using (Quick Drying) Pollyfilla for the bases now. It's quick and easy to apply, dries quickly (naturally) and creates an interesting texture. Obviously this does make my bases quite thick (or is it deep?) as I already mount my figures on 3mm MDF bases, but I prefer the extra weight and stability this gives. It does mean my figures might be slightly taller on the game table than other peoples' though.
Link to UK MDF figure bases: Warbases
Well, that's the 'hard' work done, and so it's on to the paint preparation process. As before I used some spray on lacquer (Wilko's cheapest) just to smooth out the surface of the figures and help give them some rigidity. Then it was a quick spray of some white automotive primer...
The primer actually serves to highlights any overly rough areas that might need some additional attention. So it's out with the scalpel again to do some remedial work and then another quick squirt of white!
Satisfied with this, I move on to the base painting. As on my test I tend to do the first coat with my Vallajo Model Color paints before moving on to the more expensive and tricky Tamiya paints for the final coat...
The Vallejo colours are a bit flatter but help provide a good base for the bright Tamiya colours, which need help to create a good opaque coverage. I admit this is - by the end - a lot of coats of different types of paint, but you are looking for that 'traditional toy soldier' look which is epitomised by flawless and flat colour coverage. So it's worth going the extra yard to achieve this.
Well, that's these chaps well on their way to being finished so we will turn our attention to the Gattling Gun itself now.
NEXT: Head scratching about the AiP 'Gatling' and how to approach this model.
Subscribe to:
Posts (Atom)

