Showing posts with label plastic. Show all posts

Sunday, 11 October 2015

IMEX 1/32 Confederate Complete Casson Set review.


As I am interested in my Molaterian field artillery at the moment I thought I should investigate how my field guns might be drawn and what limber they might use. So, I had a look around at what plastic horse artillery caisson or limbers sets there were in 1/32...The short answer is not that many.

What is a 'casson' (or caisson)?
'A caisson is a two-wheeled cart designed to carry artillery ammunition. Caissons are used to bear the casket of the deceased in some state and military funerals in certain Western cultures, including the United States and United Kingdom.' Source: Wikipeadia
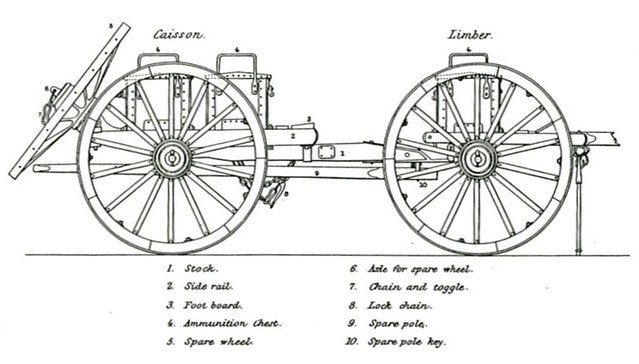
Diagram of a Caisson (left) and Limber (right) combination. IMEX technically
supply you with a limber, yet they call their set a 'casson' set. To a degree the
two words can be interchangeable, but were you to be pedantic a caisson is a
larger 'cart' which provides extra ammunition and other spare parts.

While limbers and caissons are two different things, they are often confused. But, generally, the limber is a wheeled support for the 'tail' of a field gun, while a caisson is a wheeled ammunition carrier. The confusion derives from the fact that a caisson can also act as a limber. [Note that IMEX calls it's ACW horse artillery set a 'casson' set. I presume this is due to an American interpretation of the spelling.]
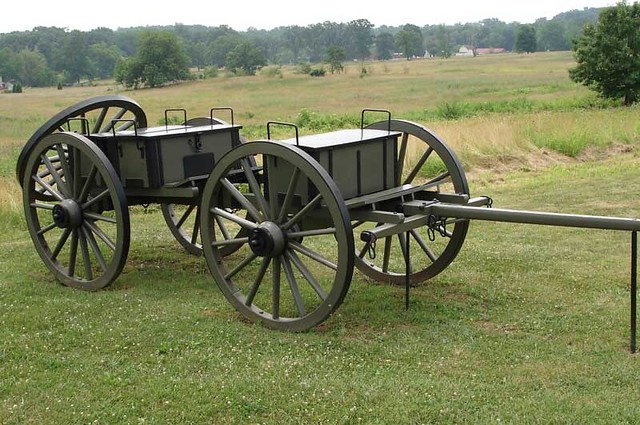
Limber (right) and Caisson. Source: Wikipedia

Anyhoo...Rather annoyingly, the only 1/32 horse drawn gun set I could find was made by IMEX - an American Civil War horse artillery set. I say annoyingly because - here in the UK - it is rather expensive at £20. Though, to be fair, it is rather a large set which includes horses, caisson, cannon and 18 figures.

As I was unable to find any review of this set, or indeed any photo reference of the contents of the box I bit the bullet, bought it and so I thought I'd produce a review of my own...

The IMEX American Civil War Confederate Complete Casson Set
The first thing you notice with the IMAX 'casson' set is the size of the box (xxx x xxx) - it's a big set!
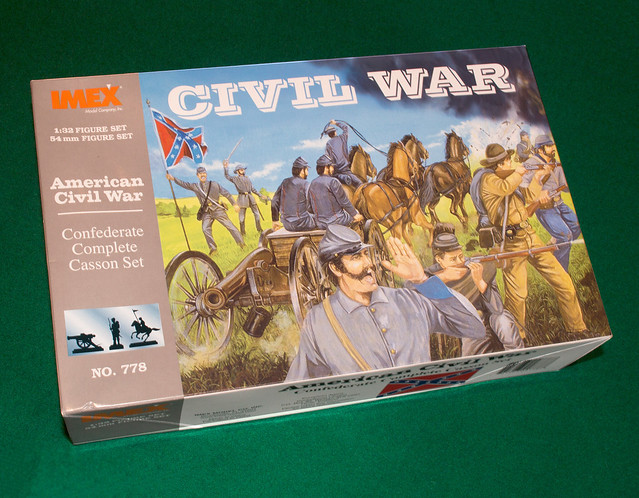

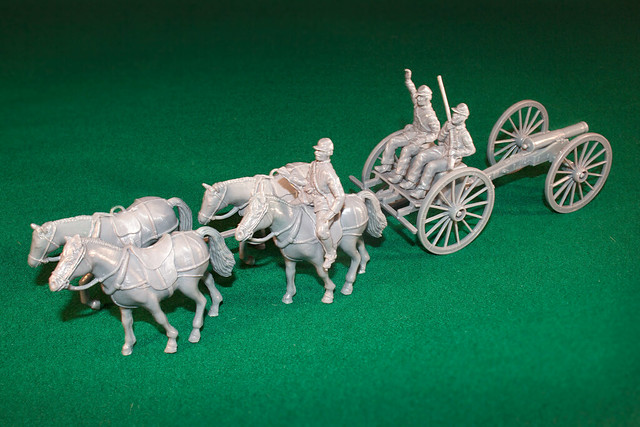
There is a lot in the big box, with  no less than 18 confederate soldiers, 4 horses plus cannon and limber (sorry, 'caisseon'). Eighteen soldiers seems a lot for a single field gun crew, and it is - x of these figures are Confederate infantry armed with Springfield/Enfield rifle-muskets and their officer.

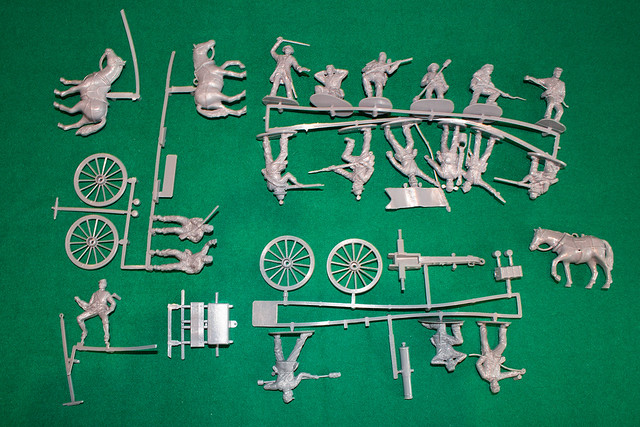
One of the horses went AWOL here...But I found it later!

The components of this set are plastic, but it is a slightly harder plastic than one normally find with plastic toy soldiers (but not plastic kit hard). This is quite nice with regards to the crispness and rigidity of the soldiers' rifles, a component that so often suffers from bending because of the soft plastics normally used.

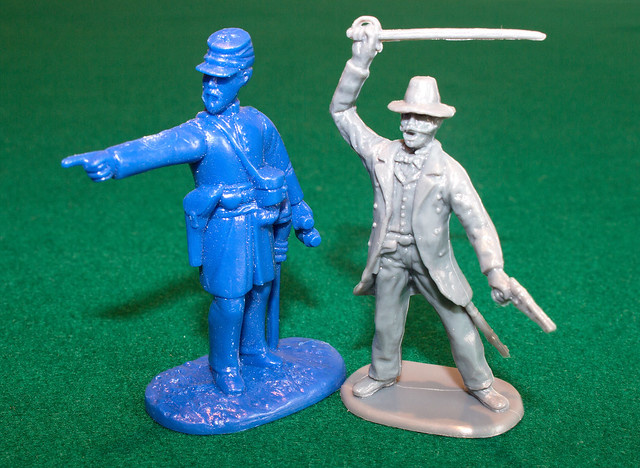
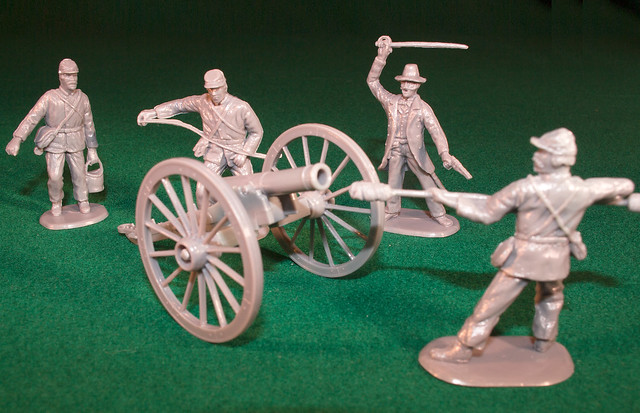
Scale-wise the IMEX figures are close to those of - for example - Armies in Plastic, though maybe a little shorter and skinnier. Here's some comparison shots, Armies in Plastic Union artillerymen in blue IMEX Confederates in grey...
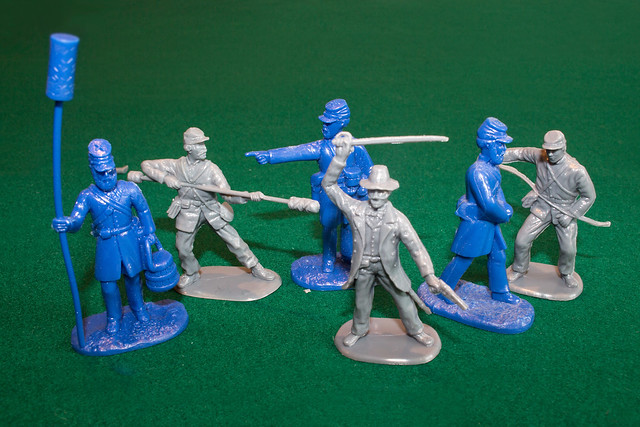
I suppose there isn't that much in it, depends how picky you are! The IMEX chaps
have a little more character to them I think though, in their looks and poses.

Additionally, as you can see from my photos, the sculpting of the figures is a little more detailed or should I say 'gritty' that those of AiP's. By 'gritty' I mean the actual texture of the sculpting, which isn't as smooth as an AiP sculpt. It's a little more 'realistic' in it's attempt to recreate the folds in clothing, whereas AiP are definitely in the toy soldier camp as far as how they portray their subjects (they include less detail and material textures are simplified).

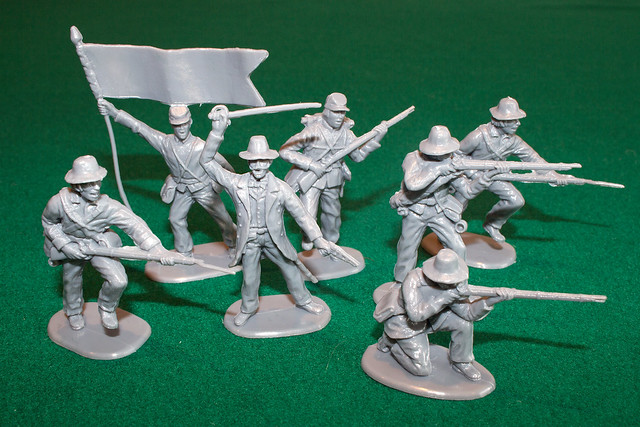
My first impression was that the IMEX Confederates were a little 'raggedy'. But, historically, I guess this was probably fair comment and this is further emphasised by the ad-hoc nature of the 'Rebs' uniforms (indeed the box art illustrates the inclusion of civilian garb as part of the Confederate dress).

The IMEX gun team figures (probably enough for two guns really).
The Confederate infantry platoon that accompanies the IMEX set.

So these aren't parade ground - beginning of the war - Confederates. But I am sure ACW enthusiats will put me right on this matter!

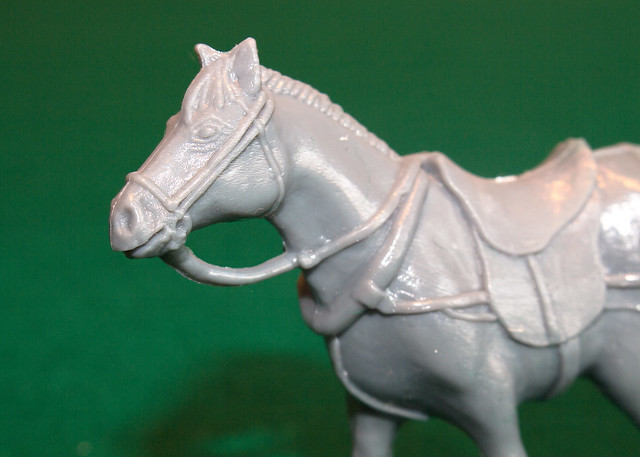
The horses are a little disappointing. They are rather 'chubby' beasts and there is something a little comical about the expressions on their faces!
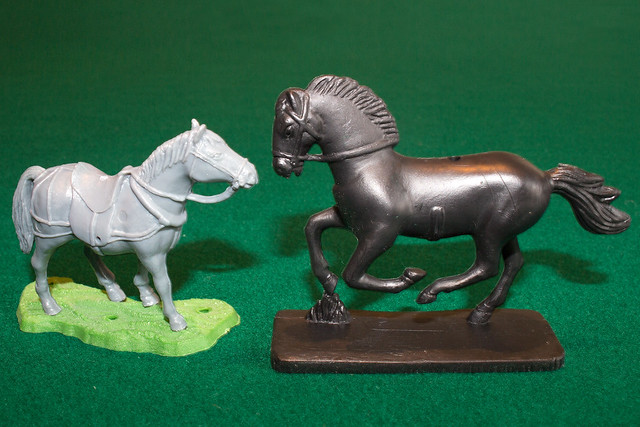
Left: IMEX horse. Right: Armies in Plastic cavalry horse. The stand under the
IMEX horse is from another set, it's just there to equal out the height.
Is he laughing at me?
Scale wise the IMEX horse do look a little squat. As endearing these little fellas are they don't really say horse artillery to me - I imagined something a little bigger, leaner and muscular. The IMEX horses seem to say 'trust me with your 11 year old daughter on her point-to-point'!

The cannon is a nice piece, it's a light gun and I'd even go as far as to guess it's one of the early bronze 1841 Confederate 6 Pounders. This places it as an early ACW piece of field equipment, as by mid-war the 12 Pounder was more prevalent I believe. But I'm no expert, I'm just going by comparing the model to images on the Internet...
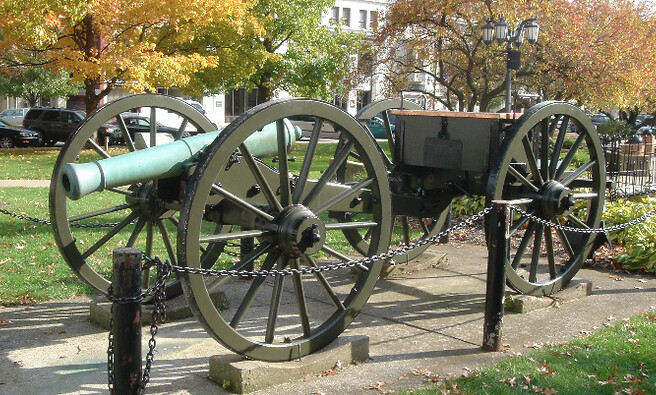
Model 1841 6-pounder attached to its limber. Source: Steencannons.com

So overall you do get value for money (if you compare the IMEX set's price to box sets made by AiP or Italeri), principally because of the addition of all the extra infantry.

Were I pernickety (and I am) I would be concerned how these figures fit in with my other plastic soldiers. If you have gone down the IMEX route for all of your ACW plastic soldiers then fine, but looking at the IMEX figures next to the AiP ones I'd have to hope that once I'd painted them in a similar style that the variations in scale and sculpting style might no be so noticeable (we shall see when I paint a test figure).
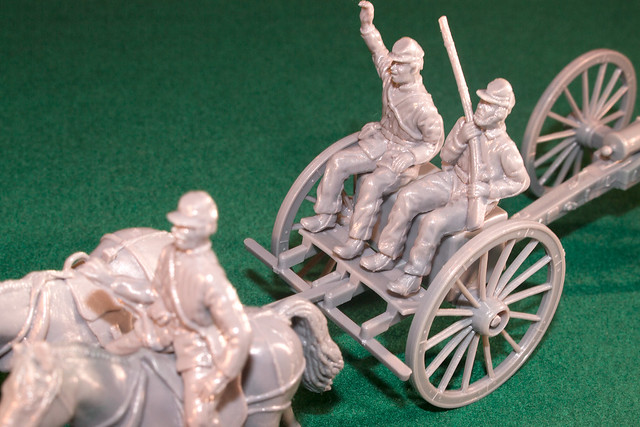

Obviously, one must remember that these toy soldiers - when 'played with' as part of a war game - will be seen from tabletop or even floor distance and so any variations in scale might not be noticeable at all.

In the end though, as this is the only relatively cheap source of a 1/32 plastic full horse artillery team available in the UK you may find yourself with Hobson's Choice.

(I note, with some envy, that our American cousins have access to a wider variety of choice. For example, Classic Toy Soldiers USA make a nice ACW limber in 54mm for just $1.95! And if you want something a little special then Marx make a wonderful Commemorative Reissue of their classic Confederate Limber Play Set which comes with both a limber and a caisson for $22.95!)

--------------------

The IMEX set in the context of my FLW hobby
Having talked about the IMEX set generally I'd just like to add a brief note about the set in context of Funny Little Wars and also from the point of view of my possible use of the set.

Obviously the relevancy of this set is limited as this sort of cannon is more suitable to the mid rather than late 19th century (which is the period which interests me the most). That said there were - historically - situations where this sort of smoothbore cannon was still in use quite late, particularly in colonial campaigns and in the hands of 'native' armies and armies which were less 'modernised' than their European counterparts.

As I mentioned, I really wanted the horse team and limber components of this set for my late 19th century artillery team - particularly for an AiP Krupp 75mm gun project I have in mind - so the 6 Pounder is probably going to the spares box.

As to the figures, the artillery team will convert nicely for the role of Molatarian gunners (and auxiliary troops) but I have a cunning plan in mind for the rest of the Confederate infantry. I would really like to make a regiment of Molatero civilian irregulars, a militia unit in non-military Victorian clothing (would love to convert a few figures into full evening dress, top hats and all)!

Wednesday, 7 October 2015

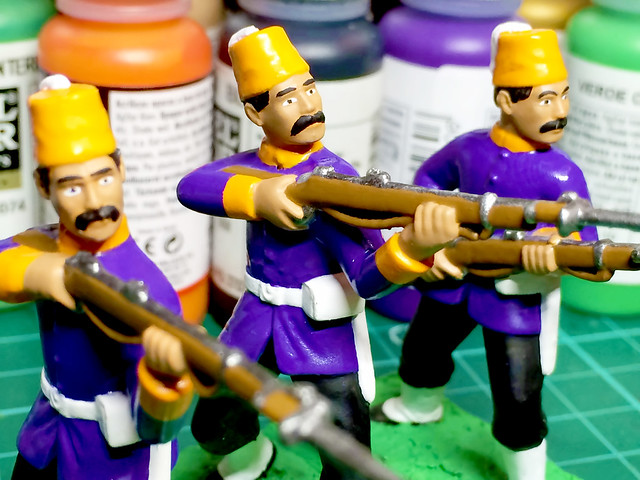
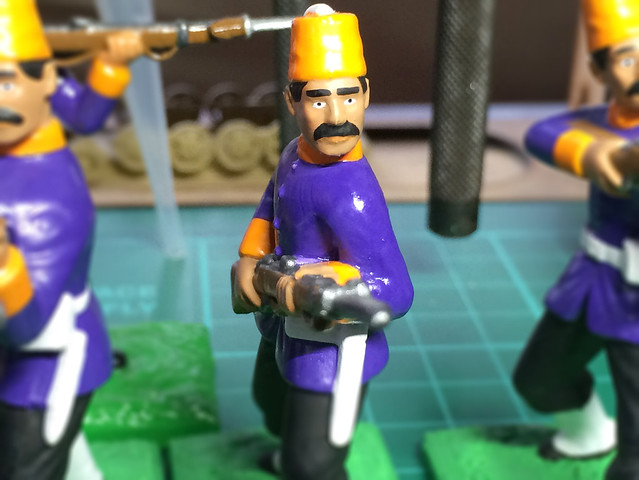
17 of 20 Burkish!

Getting there (apologies for the count down)! But just finishing off the infantry element of my Burkish regiment, which will leave just the NCO/officer element to complete.

But I can announce the winner of the Groucho Marx look-alike contest...

"I never forget a face, but in your case I'll be glad to make an exception."

(I was so tempted to paint little spectacles on him and give him a cigar!)

Wednesday, 30 September 2015

9 of 20 Burkish!

About halfway with my Burkish regiment...Phew!


Edit: I have been asked why all my Burkish troops look somewhat surprised! - I think I need to start painting on 'angry eyebrows'! :D 

Wednesday, 23 September 2015

AiP 1/32 Gatling Gun set complete

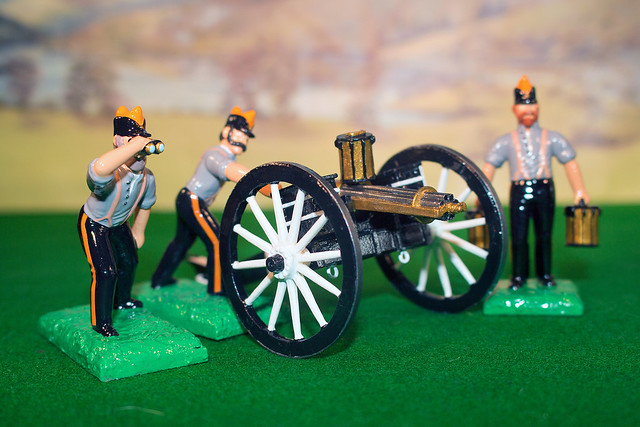
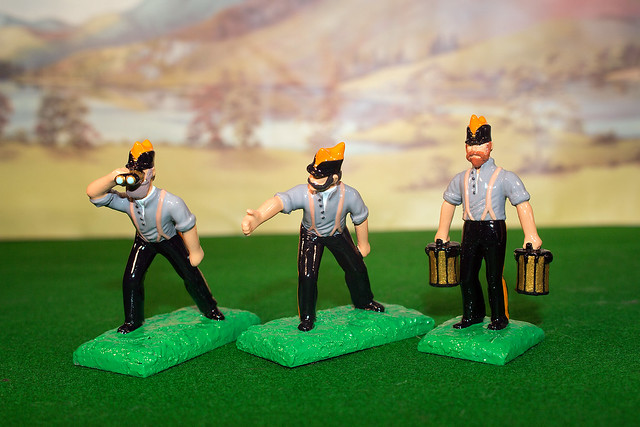
Well, although this was intended as just a way of getting me back into my FLW hobby my AiP Gatling Gun set has turned out to be my very first complete FLW unit! Huzzah!


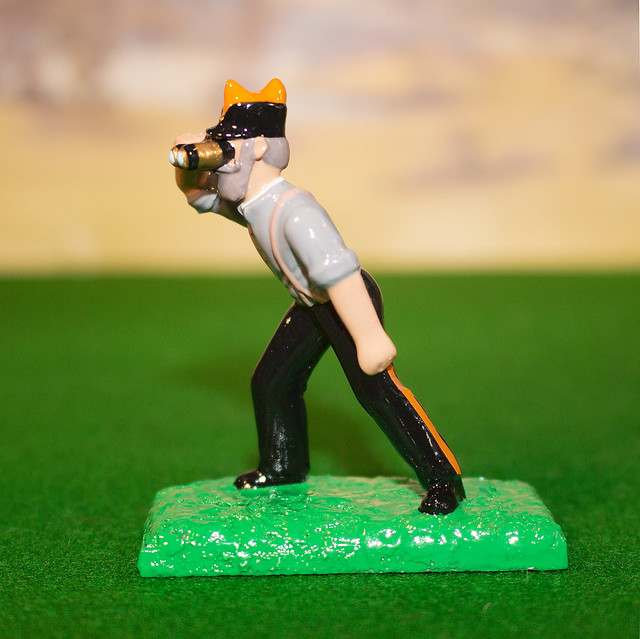
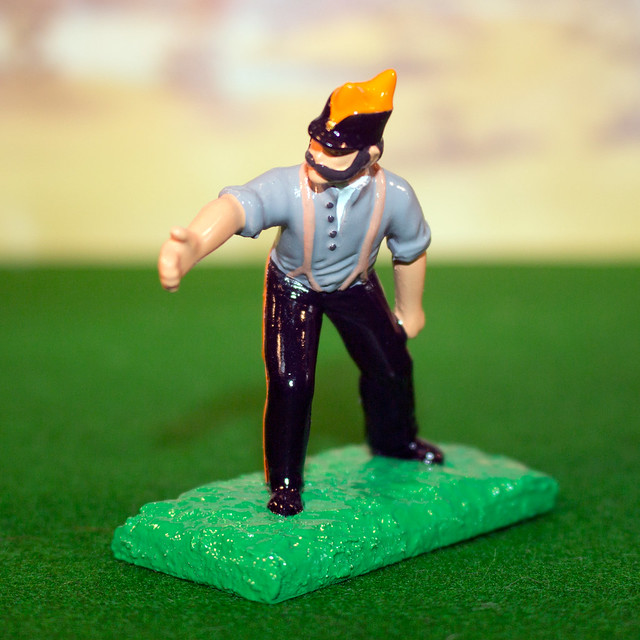
It's a wee bit rough around the edges (my Gatling carriage is a bit shoddy), but I'm very pleased with the gun crew. The colour scheme for my artillery regiment was a good choice I think (this is the 1870-1907 Molatero scheme, I was thinking of a subdued uniform scheme for the period just prior to and including The Great War).


Anyway, task completed and I feel like I have my FLW mojo back again. In fact I've already started getting my brushes into my first infantry regiment. But, back to the here and now, these little chaps are a fairly good start on my way to a modest Molatarian army - if I do say so myself!


Wednesday, 16 September 2015

AiP 1/32 Gatling Gun carriage re-made - Part 4

Gun complete...


I've given it a coat of gloss varnish to match my glossy soldiers. I didn't use anything expensive, just Wilkos Hobby Lacquer. I have to say, I've tried to do some research on what's best to use as a overcoat but - as usual with these things - there isn't a consensus. In fact one of the FLW bloggers that I admire - Mr. Tim Gow - swears by Ronseal Outdoor Gloss Varnish!

(With my figures I am just experimenting with a light protective coat of varnish followed by a generous painted on layer or two of Pledge Klear Multi-surface wax!)


In the end I was pleased with the black and white colour scheme. It does suit my period (late 19th century) aesthetic very well. And I also think that my scratch-built gun carriage compares quite favourably with the original AiP one.


Well, it's nice to have made some progress in this particular hobby again. I have to say I find painting FLW figures and models far more relaxing than 'modern' plastic scale military models. None of this fretting over authentic colour schemes or weathering or shading or what-not!

NEXT: I finish off the gun's crew and then put the two together for the final completion photography.

Sunday, 13 September 2015

AiP 1/32 Gatling Gun carriage re-made - Part 3

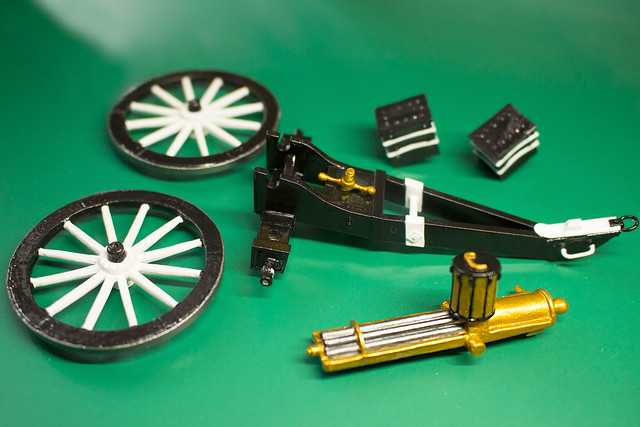
Having got the basic modelling of the Gatling done it was onto the painting. The carriage is going to be predominantly black - with some small details picked out in white - and the wheels are going to be white with black hubs and wheel trim.


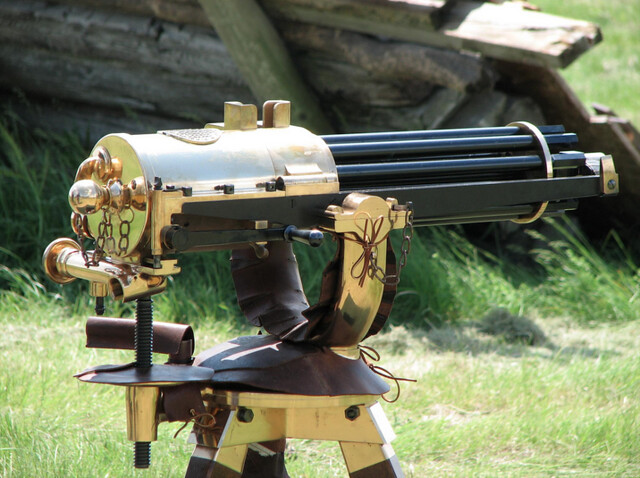
The gun itself will be one of the older style brass Gatlings with steel barrels. Here's an example (although this one has black barrels, which I think would be too much)...


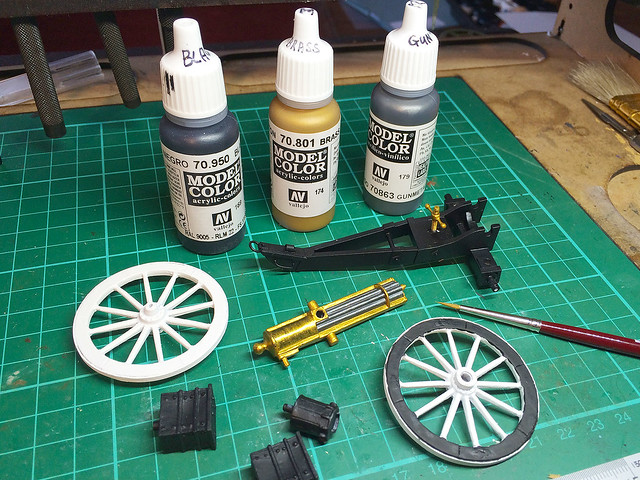
And so, it's on to the painting. I'm using Vallejo acrylics (to be honest I rarely use anything else these days, I seem to have settled on Vallejo) with special prominence to their metallics - 801 Brass and 863 Gunmetal Grey.


I've just started applying coats in the above photo, I mention this because the Brass colour, in particular, needs several thin coats I have found (you'll notice it's a bit streaky after just one coat). But I was very pleased with the Gunmetal Grey, it has given me exactly the dull steel look I was after.


It's a bold colour scheme and as it came together I wavered a bit. But I wanted something that would stand out and be immediately identifiable as 'Molatarian' on a table-top or carpet battlefield. Hopefully it doesn't look to much like a zebra!

I'm really pleased with the brass Gatling, in fact if I had known it would turn out so striking I might have even toned down the carriage scheme and gone plain black. I'll have to get everything finished off and assembled before I am convinced.

Next: Hopefully a finished gun!

Tuesday, 8 September 2015

AiP 1/32 Gatling Gun carriage re-made - Part 2

I pretty much played it by ear when I made the new gun carriage for this project, it was all a bit slap dash and therefore there was quite a bit of tidying up to do before I moved on to the detailing...

There were a lot of sloppy joins to fix...At least I have a template for any further
gun carriages I make.
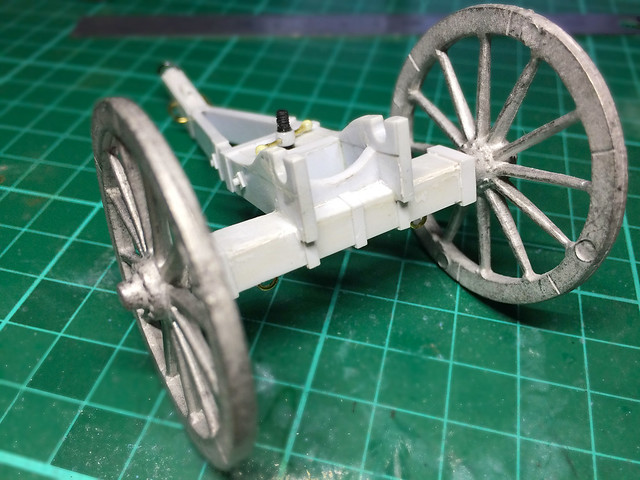
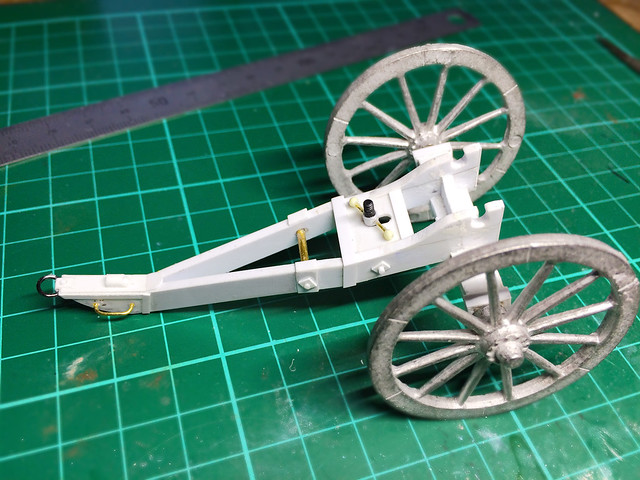
Having gotten the house keeping out the way I started adding some extra detail to the front end of the carriage. It's all very cosmetic, I'm not basing my additions on any particular historic reference...


Just enough extras to make the carriage look as if it might be based on something real! (Which it isn't. Any resemblance to something real is purely coincidental.)


It's all going to be painted black anyway (more about the colour scheme in a minute) so I didn't go wild with the amount of detail that I added. But I think it looks OK?

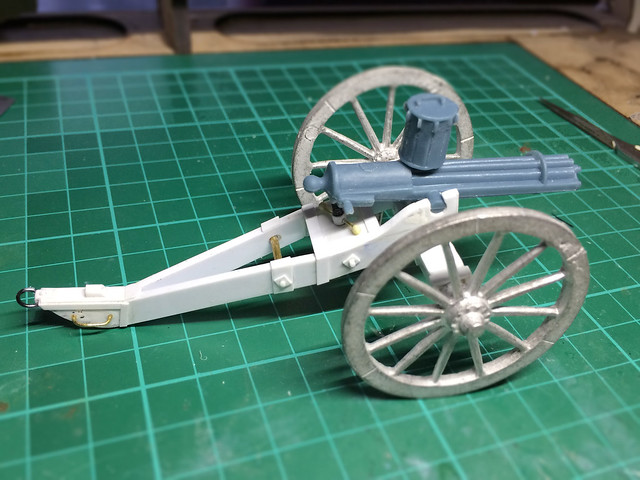
Quick check to get a feel for how it'll look like when done...


The carriage paint scheme
I had a good think and I decided I wanted something that stood out a little and would be uniquely 'Moletarian'. I didn't want something bland like field grey or natural bare wood and metal so I picked a colour scheme for my Molatarian artillery pieces that would look smart and unique.

I toyed around with colour combinations based on the national colours of Molatero - black, purple, orange and white - and out of these I decided black was a good choice for the main base colour. It's a practical choice, quite 'tactical' and seems a feasible in the context of late 19th Century military artillery. But what colour to choice for the contracting colour? (Plain black would be a bit boring.)

Purple was a immediate 'no' for me (yuck), and orange didn't seem right either. Which left white. Hmmm, black with white detailing - that sounded pretty attractive and sort of believable for a circa 1870 military artillery scheme.

So, I'll start with a base coat of Humbrol black matt acrylic...

Next: Carriage painting completed and onto the painting of the Gatling Gun itself.

Friday, 28 August 2015

AiP 1/32 Gatling Gun carriage re-made - Part 1.5

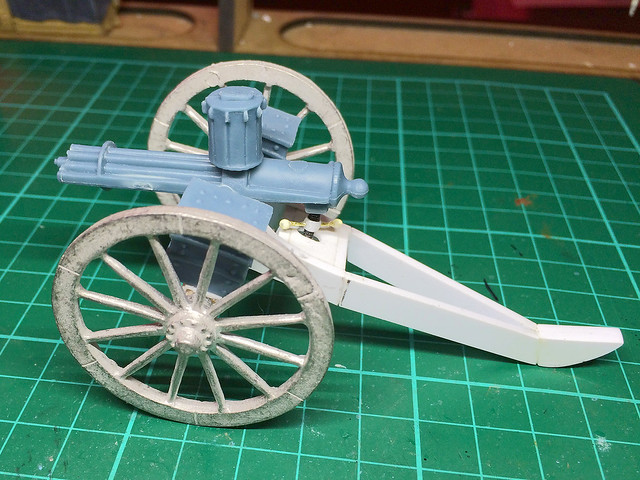
...I wasn't happy. The job I made of the new Gatling carriage just wasn't quite right (a reminder)...


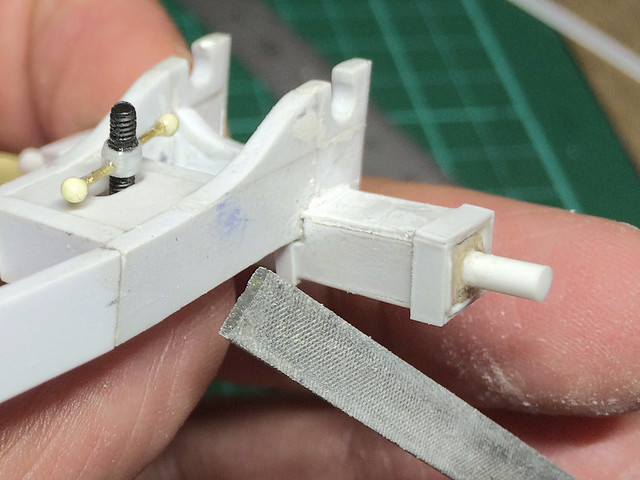
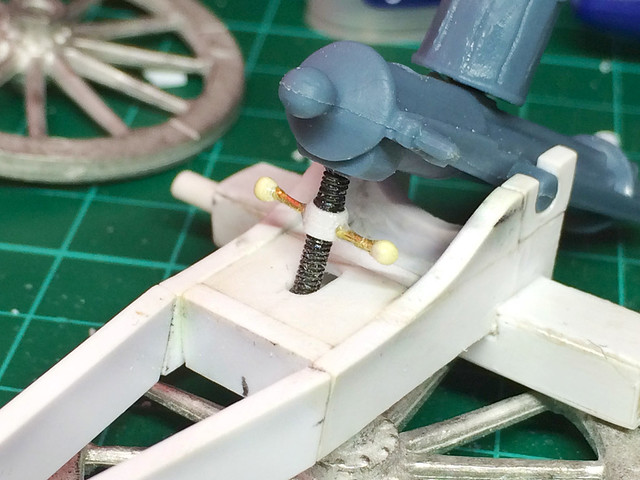
The problem is that the gun's breech mechanism is laying right on top of the 'box' where the elevation mechanism should go (a wheel and screw arrangement which lifts and lowers the gun). At the moment there is no room for the screw to go between the box and the breech. Here's an idea of how it should look...

The elevation screw (inside red circle) lifts and lowers the gun barrels.

I hated to acknowledge what obviously had to be done...I was going to have to raise the trunnion holes in order to make space between the carriage and gun breech. Bugger!

Damn! No space between the breech and the elevation 'box'.

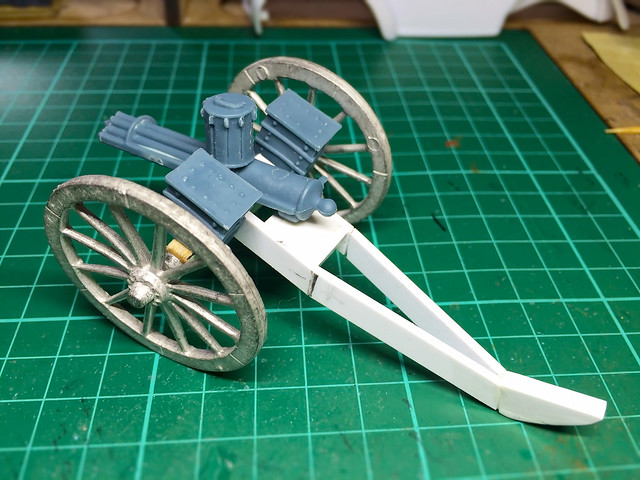
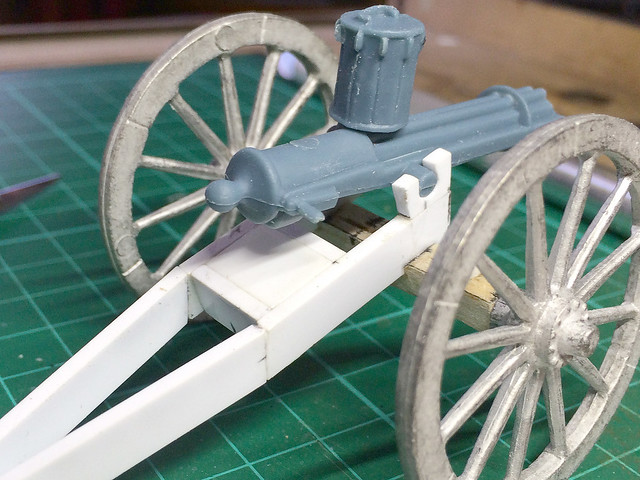
Well, after a lot of cursing and sawing away with my craft knife (must buy a micro-saw) I detached the end of the carriage with the trunnion holes and added a new 'end' piece and then re-attached the trunnion pieces on top on the new end pieces...Phew!

A bit rough and ready, but whatever works!

It's all getting a bit slap-dash now and a little messy but if I can get this first attempt to work and look right I'll know how to tackle any further carriages I make.

Messy maybe, but it did the trick...


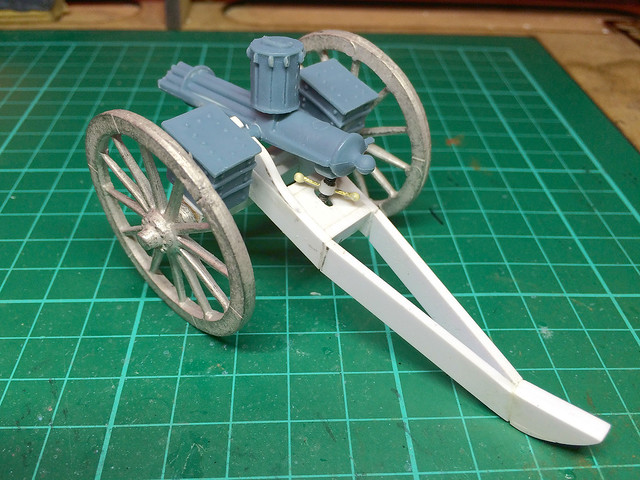
I now have adequate space between the breech and 'elevation box' on the carriage (don't know if that's the correct term for it) to insert the screw mechanism. Obviously, now I'm satisfied, I will have to tidy the job up, but I'll add the elevation screw first.


Well, it's not the best piece of scale modelling but it's better than the original AiP attempt (sort of). I really wanted to do a little wheel but just couldn't find a suitable part in my scraps box.

I'm back on course now - this model has turned out to be a bit of a prototype really, as I work out the best way to make a 1/32 gun carriage with my chosen materials. Though I hope that once I have added the extra detail and painted this attempt it will look OK.


Back to square one, but I'm a bit happier now!

The good thing about modifying the way the gun attached to the carriage - and raising it - is that it solves one of the main issues with the original AiP model. It get's rid of the annoying 'droopy gun'!

Next: Adding the detail and painting.

Historical note: I mentioned that this form of Gatling - mounted on a conventional artillery gun carriage - was an earlier form of the gun. But there seems to have been another reason this 'heavy' carriaged version of the gun was in use - apparently it was useful for engaging fixed (or fortified) positions. In this case the ability to transverse - sweep left and right quickly - was not such a big issue (perhaps). I'm still reading but what amazed me was how very large calibre automatic guns were in use quite early on, guns like the Hotchkiss and Maxim 'Pom-Poms' were mounted on gun carriages (Wikipedia: "...37 mm Nordenfelt-Maxim or "QF 1-pounder" introduced during the Second Boer War, the smallest artillery piece of that war. It fired a shell one pound in weight accurately over a distance of 3,000 yd (2,700 m)".

Tuesday, 25 August 2015

AiP 1/32 Gatling Gun carriage re-made - Part 1

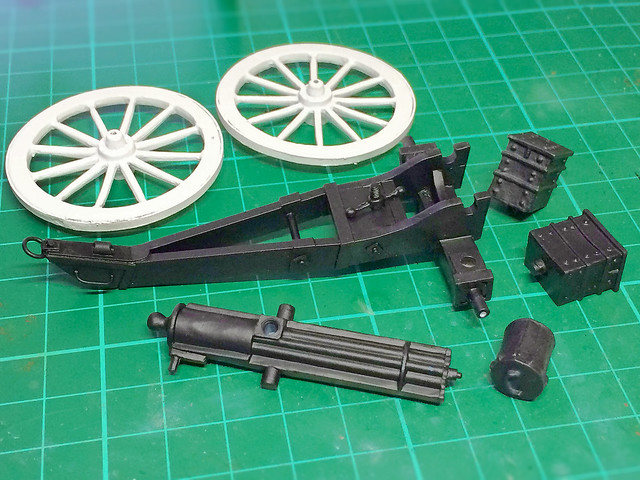
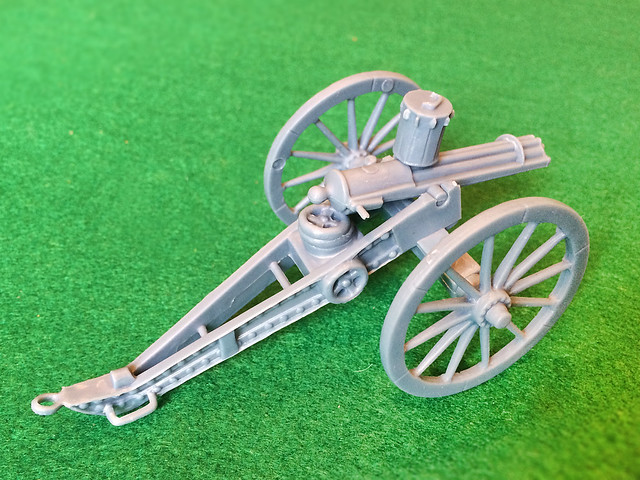
OK, while the crew figures should progress quite easily now let's turn our attention to the Gatling Gun itself. I have two issues with the gun as it is provided by AiP, it has been given a simplified and somewhat generic gun carriage (to expedite it's use for the other three gun barrels supplied ) and it's rather droopy gun elevation.

AiP's Gatling Gun. Unfortunately I can't identify exactly which version of
the historic Gatling Gun this is supposed to be.

In the end I decided that the best way to deal with both these issues (and ensure I can make use of the optional artillery barrels) is to build my own custom gun carriage from scratch - using the AiP carriage as a guide. Not a hard job as the carriage is a pretty simple in design...


I was a bit dubious about how AiP had chosen to mount the Gatling Gun, as the way they have done it is to 'pin' it into place using conventional cannon-style trunnions. This means there is no lateral movement of the gun unless you move the whole carriage left and right. I had thought that the Gatling was mounted on some sort of simple swivel mounting?

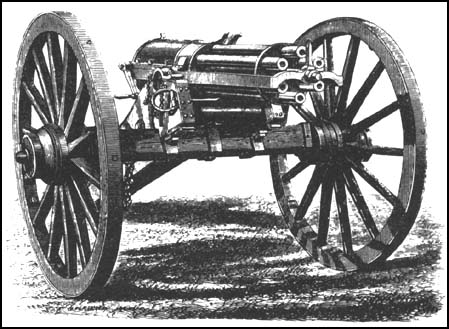
A 1 inch 1865 Gatling mounted using trunnions on a field carriage. This form of
mounting seems to have been an early type of mount, with fully articulated swivel
mounts 
coming later perhaps. This is the format of AiP's model.

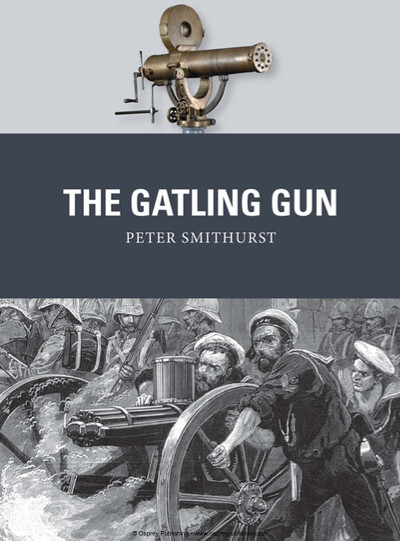
Osprey's book on the Gatling Gun (By Peter Smithhurst) was just recently released and it provided me with some information which leads me to believe that AiP's British Gatling is meant to be one of the earlier guns made by W. Armstrong, first used in action during Third Anglo-Ashanti War of 1873–74:

"The Gatling guns which accompany the expedition are those known as the 0.45 inch. They will be mounted on carriages somewhat similar to the guns [i.e. artillery], and, we presume, are mainly intended for the defence of stockade positions."
~ The Times of 6 October 1873
[Osprey 'The Gatling Gun', Page 50.]


My reading leads me to believe that these Gatlings were probably similar to Model 1865 guns in 1in calibre (as in the illustration above). The fact that this type of mount existed is good enough for me as it happens to be easier to recreate.

Just bear in mind that if you do want to model later Gatling Guns that their carriages did evolve to include better transverse rail or swivel mounts which provided easier lateral movement. These include British Army Gatlings that were deployed in the later Boer War...

Anyhoo...Onto construction...

Making a feasible circa. 1870 Gatling Gun carriage
All the barrels included in the set (see earlier post) are so delightfully appropriate for my Molatarian artillery company that it would be a great shame to simply consign three of them to my scraps box and just make up the Gatling Gun using the one carriage that AiP includes in the set.

The solution to this problem was simple...Make three more gun carriages, starting with one for my Gatling!

One must remind oneself that this is a 'toy gun' carriage and so the liberties taken are excusable, certainly from the point of view of the Funny Little Wars enthusiast. But even so I wanted to modify the Gatling version of the carriage to something I felt was more appropriate.

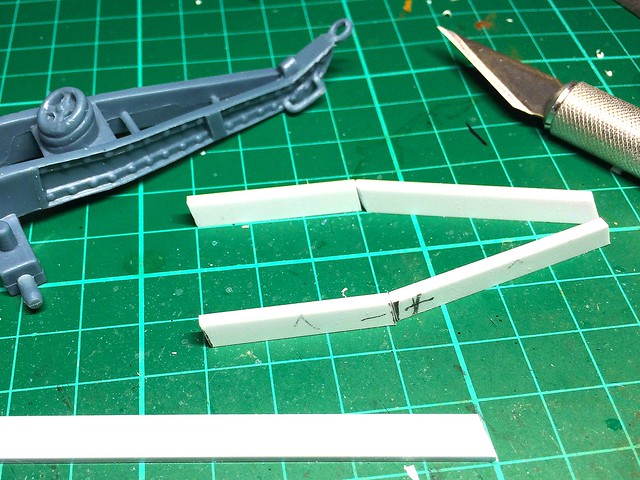
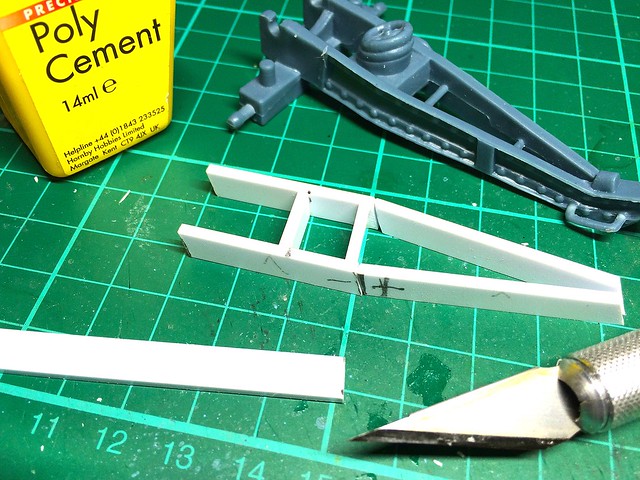
And so it begins. I didn't buy any special materials but used just what
happened to be on hand in my styrene collection and of the nearest
dimensions. Though it'll be a slightly lighter carriage, which is good.

It's a simple 'box' frame design so poses no tricky modelling issues. My main concern was getting some form of reference material on which to base my model, this opened up a whole 'research' can of worms. The AiP carriage, as I said, is a generic artillery carriage rather than one of the more specialised Gatling carriages that were developed - which provided movement in the horizontal as well as vertical firing plane - which is more appropriate to the earlier models of Gatling Guns.


Anyway, historical worries aside, I simply wanted some ideas about how I would furnish and ornament my carriage frame. I particularly wanted to replace the 'lump' which is supposed to be the elevation wheel on the AiP original. The AiP carriage also looks like it is a metal riveted affair and I wanted to see if there were indeed such metal carriages in use with the Gatling (as it turned out there were).


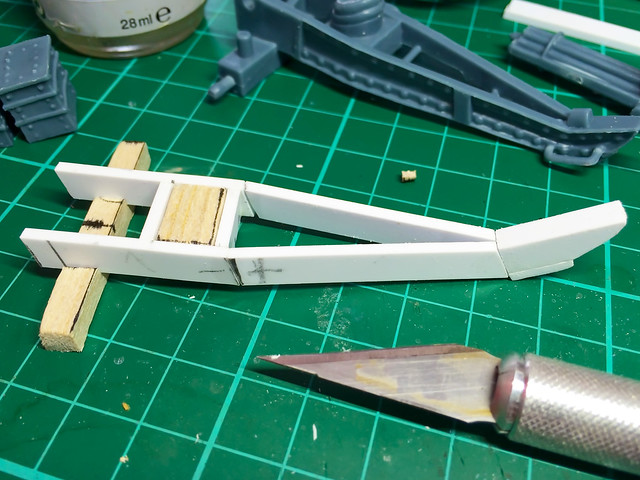
As is obvious from the pictures I have taken of the construction process I am working in light-weight materials - styrene and balsa wood. While these will not make the sturdiest of models they are nearly as good as the original AiP plastic and are, naturally, very easy to work with. Actually I haven't worked much with Balsa before and I am finding it a very nice medium (if you aren't too concerned about the hardiness of the model.)

I suppose the ideal way to ensure a fairly strong toy - for playing with - would be to cast my model in resin when I have finished making it. This would make it more resilient and durable. I'll think about that (it depends how good a job I make of it and whether I feel this carriage may be just a 'one off' or not).


So, onto fitting the AiP Gatling Gun model to my carriage. The trunnion arrangement - the metal pivots which are used to attach the gun to the carriage - are those parts which mark this gun out as being an earlier version of the gun. What this means is that, while the gun could be elevated freely, moving the gun from side to side - an basic requirement of a machine-gun - was only achievable by rotating the whole gun carriage (like a cannon).


Well, I completed the basic carriage frame construction, but there is a lot of detailing work left to do. Still, it looks OK and I found a spare set of white-metal wheels that finish off the compliment of parts, the AiP original items being those moulded in the blue-grey plastic.

Now I have to plan how to add all the carriage furniture and detailed accessories - like the elevation screw - and clean up the AiP gun itself (which has a little flash and some seam lines). But, not a bad start.

Next: Adding all the fancy details to finish off the model.