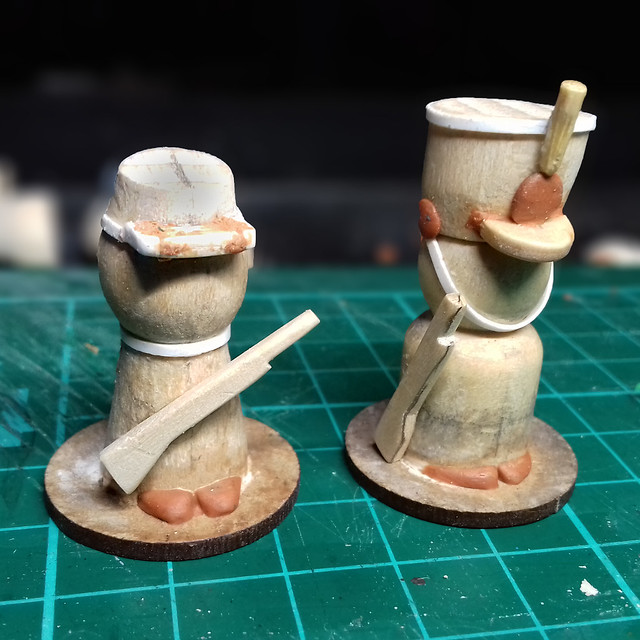
Two details that I definitely want to add are guns and 'feet'. After my last peg soldier I felt a bit unhappy with the way I had done (or rather not done) the feet, as I just painted them on. So I wanted to see if there was a very simple way I could give the impression of feet without spending too much time. I considered small rectangles of matchsticks or bits of cocktail sticks, but in the end had a play with some small pieces of Milliput modelling putty...
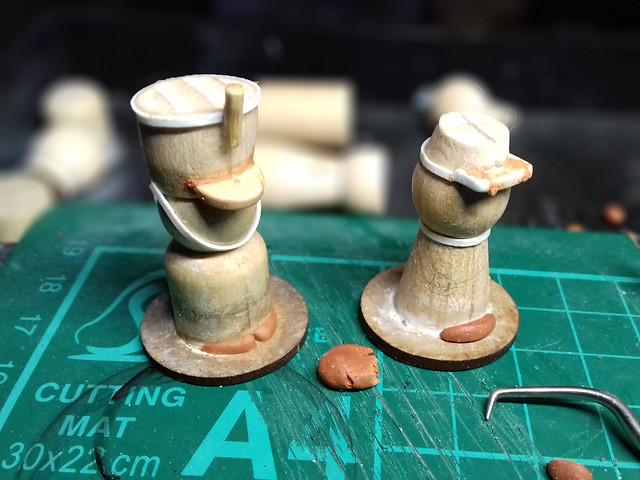
This sounds a bit more labour intensive than it really is. I like Milliput, and moulding a couple of tiny balls of putty into little 'toecaps' didn't take me very long at all. Obviously, if I can find a simple pre-fabricated alternative to this then I will go for that in the future, but for these prototypes this will do.
Next, guns. though I was pretty happy with the simple wooden musket shape I made for my last peg soldier. But I wanted to see if I could simplify that design even further, so I tried cutting the gun shape out of a lolly stick, in one piece...

This is just a few cuts with a craft knife, then a quick rub over with some fine sand paper to round off the edges. The lolly stick wood is quite hard really so the end product is quite sturdy and shouldn't break. I'm pleased with the look, but - as was pointed out to me - I might not be so pleased having to make the guns for a full regiment!
Call to Arms!
What to do about arms...Not weapons, but the dangly things that hang from your shoulders! Do I try to make some simplified limbs or just paint them on like I did with my first peg soldier?
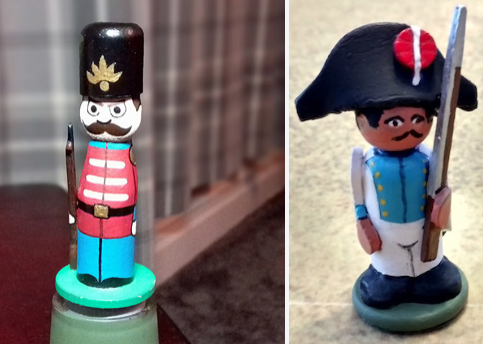 |
| On the left is my peg soldier with minimalist painted on arms, and on the right is a lovely peg soldier by Dale at Wooden Warriors with some simplified arms. |
This, then, left me wondering about how I should attach the musket. I fixed the gun in an 'at ease' position at the side of my first peg soldier (a simple solution) but I wanted to try something different. So, for my Confederate infantryman I thought I might have a go at 'port arms', with the musket held across the chest...
This will make it very interesting when it comes to my painting his arms in! (Fingers crossed I can pull this off.)
Finally, prior to the actual painting, you'll notice that I have experimented with adding extra bits of detail using Milliput and styrene strips. Nothing drastic, just some extra decoration.
Next: Painting.
I am still searching for three dimensional arms for the larger figures. For smaller figures, I use tile spacers like Matt does, but it is harder with the larger figures.
ReplyDelete