Moving on with my little Prussians, it's time to add their rifles. I should say, I haven't gone for realism with these at all - in keeping with the rest of my simplified cartoon peg soldiers' look - and they are just recognisably rifles. They aren't modelled on the real Prussian rifles of the Franco-Prussian war - Dreyse "needle-gun" rifle - and are a bit over-sized, again because my soldiers are sort of cartoon figures.
Anyway, fixing the guns in place. Surprise - it ain't rocket science! 😂
However, I do take the additional precaution of pinning my guns as well as gluing them as these are just the sort of additional objects that have a knack of getting snapped off, especially if your toy soldiers are for use in the rough and tumble of war-gaming.
I begin by applying a light dot of glue to the parts and then I attach the rifle in place. As these are what I call my 'Mk. 1' peg soldiers - and so things like arms and hands are simply painted on - I tend do go for the 'Order Arms' pose where the rifle sits on the ground and is held with the right hand.
Once the glue sets and the rifle is fairly secure I then drill a small hole through the 'action' of the rifle right into the peg figure's body. This is where I will insert the pin so your drill needs to compliment the size of pin you are using...
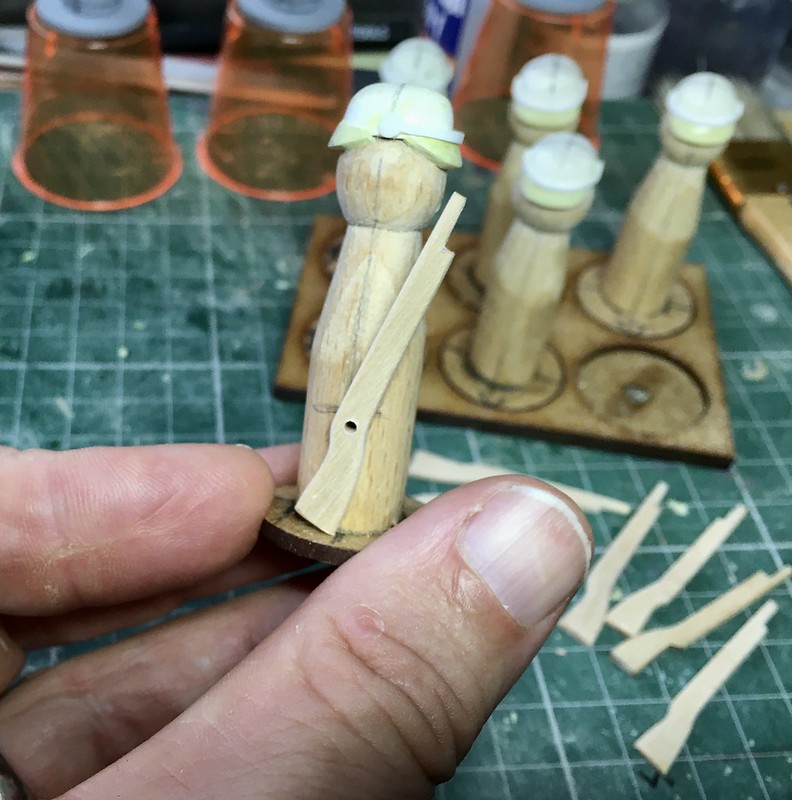
The pins I use are 'Panel Pins' and are usually about 15-20mm long with a slightly enlarged 'head'. To accommodate the head - so that the pin doesn't show - you need to enlarge the hole top a wee bit, then I drip a little drop of glue into the hole and insert the pin...

Depending how deep I have drilled the pilot hole you might need to trim you panel pin to fit. You want to make it so that the head of the pin lays inside the counter-sunk hole you have made. If you make a good job of it you may not have to cover the pin head with filler to hide it...

And there you go, this should be nice and secure. I just have to add some detail to the Prussians' helmets and add some boots (just the toes) and that's the model complete. 😊
Incidentally, I came across a wonderful video of a reenactment of Prussian soldiers using their Dreyse "needle-gun" rifles in action against some unfortunate Austrian infantry armed with less advanced mussel loaders (during the Austro-Prussian War of 1866)...
When the Prussians met the French in battle four years later then did not have such a technological advantage as was shown in the above video. The French were armed with the Fusil modèle 1866 'Chasspot' rifle, which had several advantaged over the Prussian rifle. Sadly, as with so many of the French arms innovations of the 1870s this advantage was not enough to save the French and the German Confederation were the ultimate victors!
The only comment I have is about the part where the Prussian takes aim along the barrel before he fires. Apparently, from what I have read, the breech was not 100% gas tight and there was a considerable flare through it, especially after a number of rounds had been fired. The Prussian found it impossible to get soldiers to aim the needle gun. Shooting from the hip was the troops own method.
ReplyDelete