I've been asked a lot - well, a few times...emmm, actually twice 😏 - what basic tool you would need to make peg soldiers (or other figures too)! So, I thought I'd put together a few photos of the *basic* tools that I started out with, as well as a few additional conveniences that I added to my hobby tool box. [I'll follow this post up with another about the more advanced tools later.]
SO, let's begin...
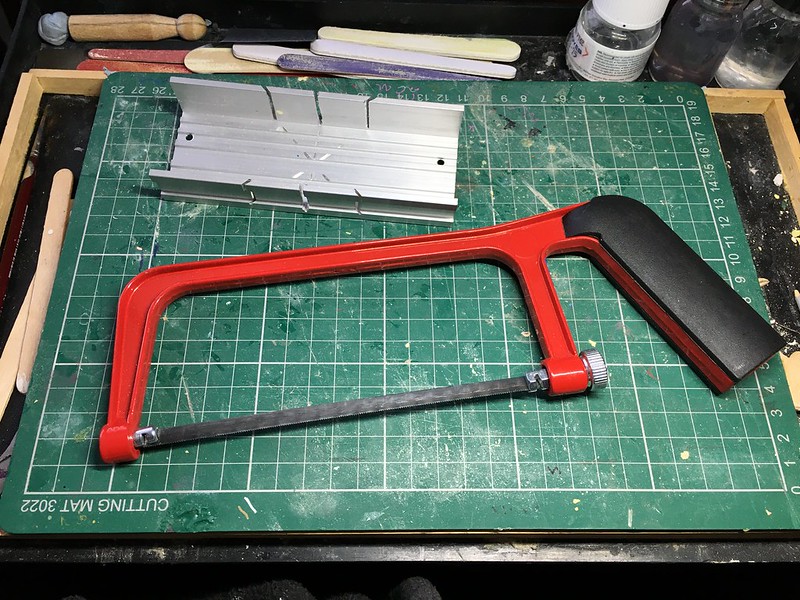
As you have probably noticed I like half size peg figures (about 50mm), which means I end up having to cut down the full sized dolly peg by half! Obviously, then, one of the important basic tools for me was a small saw and I bought a cheap hacksaw set at the local budget hardware store...
The above saw came with a aluminium mitre block for cutting angles, which is kinda handy to have. This cost about a fiver so it won't break the bank. (Even if you prefer to make your figures using teh whole height of the dolly peg this saw will come in handy. I regularly saw the top of the 'head' off my pegs so that I can put little hats on them!)
Next up are the shaping, trimming and sanding tools I use. When I started out I just used a craft knife and some emery boards, but as time went on I added tome other useful items like files and various types of sand paper (fine and course)...
Again, most of these are budget items, the emery board come in large packs which I purchase from 'PoundLand'! 😁
However, before I ever put saw, file or craft knife to peg I always mark out my design ideas on the peg itself so I know how I am going to create my little figure. So I have various pens and pencils to draft out details and I also have a few different types of rulers - mostly metal - for measuring and for using as cutting guides...
Something I eventually added to my tool kit was a selection of hand drills and various small drill bits. I use these to drill pilot holes for when I am pinning components to my peg figures. These aren't crucial for starting out, but you will find them useful as your figures develop and become more complex.
And Finally, and this is a bit of a biggy... Glues.
Ya need to stick those little fellas together! And while, in the beginning, I settled for a simple super glue (any brand would do) I eventually graduate to a proper impact adhesive (Evo-Stick), That said, super glue is still part of my tool kit as sometimes I need a fast acting spot weld just to hold something in place temporarily OR I find superglue can act as a liquid filler which can smooth out gaps...
Once again, as I progressed in my hobby, I found that I had need for some specialist fillers and modelling putties. Filling gaps developed into sculpting small objects, which - in turn - eveloved into my sculpting larger objects! My go-to medium for sculpting (and filling) is Milliput).
So, there you go - these are my basic tools and - really - your don't need all of these to dip your toe in the water. But, if like me, you eventually get hooked by the hobby you will undoubtedly add many more specialist tools (but, again, you don't need to).
I'll talk about more advanced tools in a separate post and I will also do another post about painting the figures.


Thank you for sharing this! Honestly, I always figured you had some kind of wood workshop to make these figures (you can tell my woodworking experience is limited to middle school shop class). It never occurred to me that some simple hand tools (and a lot of creativity) could do the job.
ReplyDeleteMost interesting and inspiring.
ReplyDelete