Showing posts with label tools. Show all posts

Tuesday, 13 October 2020

Basic Tools for Making Peg Soldiers (And Other Figures Too)

 I've been asked a lot - well, a few times...emmm, actually twice 😏 - what basic tool you would need to make peg soldiers (or other figures too)! So, I thought I'd put together a few photos of the *basic* tools that I started out with, as well as a few additional conveniences that I added to my hobby tool box. [I'll follow this post up with another about the more advanced tools later.]

SO, let's begin...

As you have probably noticed I like half size peg figures (about 50mm), which means I end up having to cut down the full sized dolly peg by half! Obviously, then, one of the important basic tools for me was a small saw and I bought a cheap hacksaw set at the local budget hardware store...
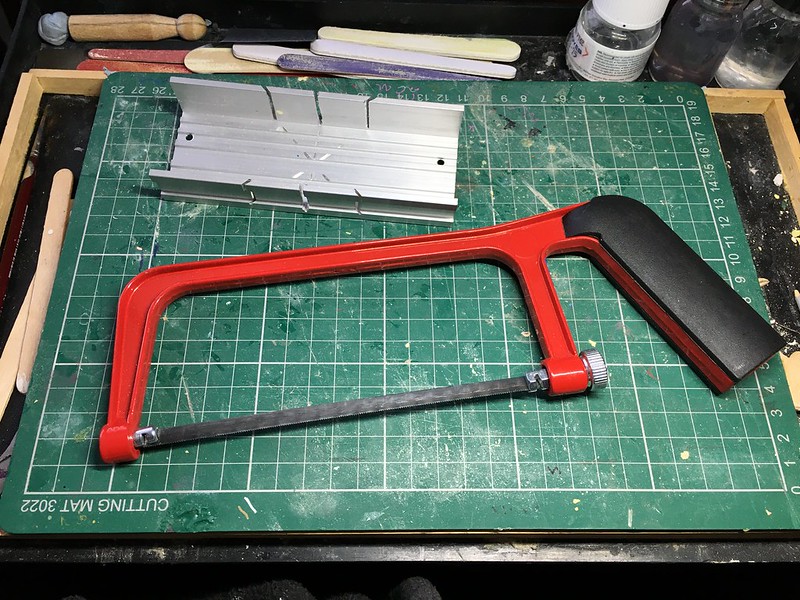
The above saw came with a aluminium mitre block for cutting angles, which is kinda handy to have. This cost about a fiver so it won't break the bank. (Even if you prefer to make your figures using teh whole height of the dolly peg this saw will come in handy. I regularly saw the top of the 'head' off my pegs so that I can put little hats on them!)

Next up are the shaping, trimming and sanding tools I use. When I started out I just used a craft knife and some emery boards, but as time went on I added tome other useful items like files and various types of sand paper (fine and course)...

Again, most of these are budget items, the emery board come in large packs which I purchase from 'PoundLand'! 😁

However, before I ever put saw, file or craft knife to peg I always mark out my design ideas on the peg itself so I know how I am going to create my little figure. So I have various pens and pencils to draft out details and I also have a few different types of rulers - mostly metal - for measuring and for using as cutting guides...

Something I eventually added to my tool kit was a selection of hand drills and various small drill bits. I use these to drill pilot holes for when I am pinning components to my peg figures. These aren't crucial for starting out, but you will find them useful as your figures develop and become more complex.

And Finally, and this is a bit of a biggy... Glues.

Ya need to stick those little fellas together! And while, in the beginning, I settled for a simple super glue (any brand would do) I eventually graduate to a proper impact adhesive (Evo-Stick), That said, super glue is still part of my tool kit as sometimes I need a fast acting spot weld just to hold something in place temporarily OR I find superglue can act as a liquid filler which can smooth out gaps...

Once again, as I progressed in my hobby, I found that I had need for some specialist fillers and modelling putties. Filling gaps developed into sculpting small objects, which - in turn - eveloved into my sculpting larger objects! My go-to medium for sculpting (and filling) is Milliput).

So, there you go - these are my basic tools and - really - your don't need all of these to dip your toe in the water. But, if like me, you eventually get hooked by the hobby you will undoubtedly add many more specialist tools (but, again, you don't need to).

I'll talk about more advanced tools in a separate post and I will also do another post about painting the figures.

Sunday, 9 August 2020

Back from Hospital!

 Bah! Another short visit to hospital (nothing too serious - but it needed sorting) and so yet another knock to my schedule! 😕

Today, being Sunday, I had a bit of a relax and tinkered about with various projects on my little workbench (though the good news is that my main full-sized man-cave work area is nearly back in action). It's all a bit of a mish-mash of little jobs but I thought I'd post up some pics...

Above: Lots going on here, some soldiers and some RPG figures plus different
accessory mini-projects.

The military related figures are a series I am working on based on the classic 'Dad's Army' TV show. I am just putting together three pegs representing The Warden (boooo!), Sargent Wilson and Corporal 'They Don't Like It Up 'Em' Jones...

One other thing worth mentioning is a new tool I am using which compliments my little mobile workbench tray (which I use when I want to work in the lounge in front of the TV). My usual electric rotary tool is my trusty Dremmel Model 3000 (wired 130wt) tool BUT - while superb - this multi-tool is a little cumbersome and too powerful for small modelling and crafts really.

So, I ordered one of those very cheap rechargeable Chinese knock-off versions of a Dremmel. While these have a poor rating for their intended use (general light DIY) their low power is exactly right for working with light woods and plastics. Also, being wireless it's very easy to use and control one handed for small intricate jobs...

The tool is so light that you can easily use it like a pen to inscribe or engrave - something I just cannot do with my lump of a Dremmel (without attaching a separate accessory). It charges via USB - which is great - and it holds a charge for quite some time. A good purchase! (£24.99 from Amazon.)

It's nice to be back home! 👍

Thursday, 12 July 2018

Handy Gadget

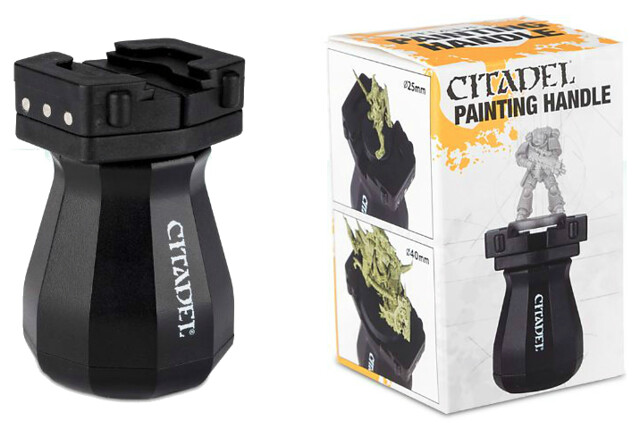
Just a quickie about a new useful piece of kit I've just bought - the Citadel Painting Handle.


Now, I know a lot of people think that Citadel products are rather over-priced for what they are, but this item is fairly niche and so 'value for money' is harder to gauge in this case. At £5 for a plastic grip that clamps figures and so holds them steady it's usefulness kinda seems worth the cost.

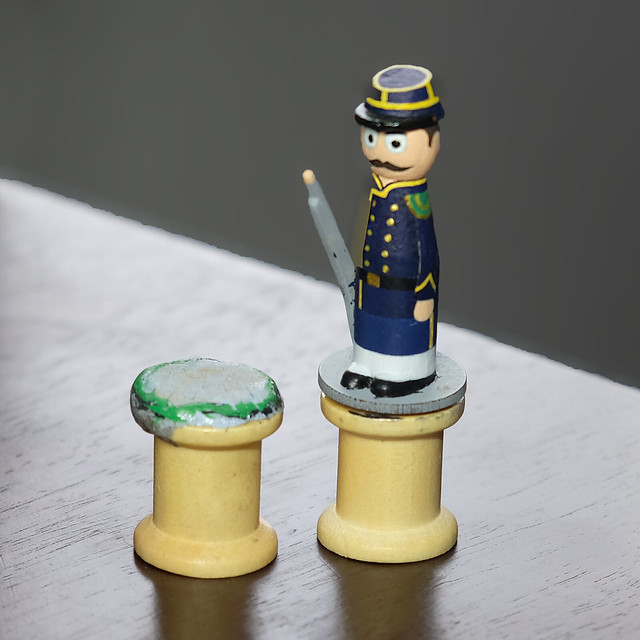
I've been using a home-brew grip - a cotton reel with a piece of Blu Tack on top - but, while a cheap solution, it has let me down on a couple of occasions. Blu Tack seems to loose it's stickiness just at the most inopportune moment sometimes.


So, I bit the bullet and forked out a fiver, but I'm pretty glad I did.

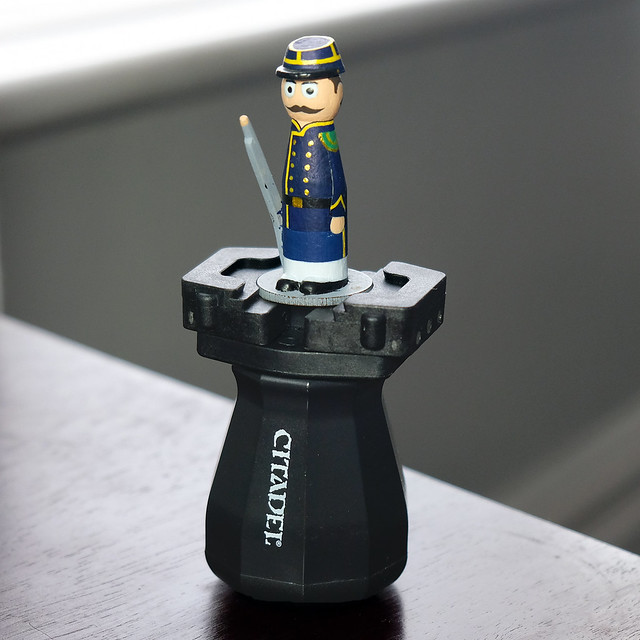
I have big hands and I appreciate the chunkiness of this grip and the weight of it compared to my featherweight cotton reel. Also, the clamp is sprung which means the jaws are always under tension and they grip the figures base nice and tight (but not so tight that you can't easily remove the figure when you want).

I much prefer this sprung grip to something like a screw grip where you have to laboriously screw and unscrew the jaws every time you want to pop a model in or out.


Yes, everything is plastic (except the spring gear I guess), but it's good quality none the less.

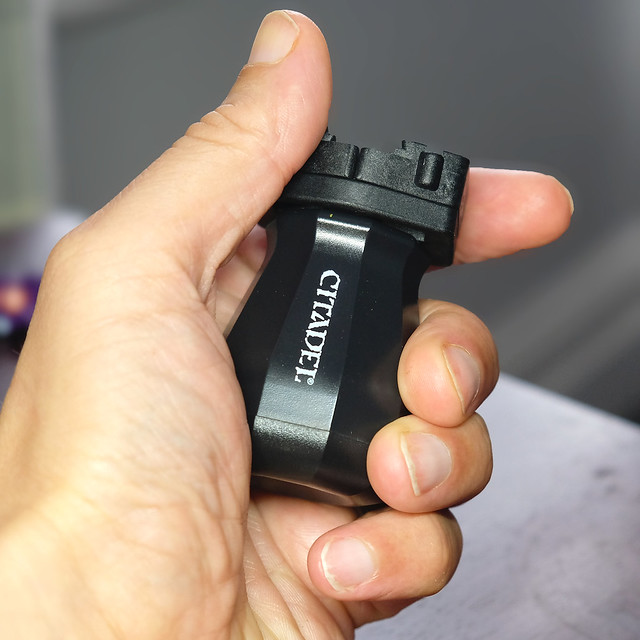
And finally, and most importantly, it's very comfortable in use. It's reasonably big and fits snug in the palm of my hand enclosed by all my fingers.


Fiver well spent.

PS...Final factoid - the jaws are designed to open up to 40mm diameter bases. Mine are smaller, being pretty standard 25mm round bases. The shaped jaws seem to be designed to accommodate bases of other shapes too (square and hexagonal, for example).

Sunday, 25 February 2018

Mini-workshop Purchase - Sander

Bit of an oddity for a post, but in the end I thought talking about tools for making toy soldiers was a valid subject for the blog, so here's my first 'tool' entry...

I usually do all my modelling work with small hand tools as the materials I normally work with are soft ones (plastics and card). Rarely have I had to resort to power tools, though my Dremel Multi-tool has come in handy occasionally to cut small metal rods and to drill holes quickly.

However, now I am starting to get 'into' wooden toy soldier making - even in a modest way - it soon became apparent that access to basic power tools would be very convenient. Sanding and cutting by hand is quite tedious (particularly thinking ahead, when I may want to make small 'regiments') and my initial tests have demonstrated that my hand sawing is somewhat 'wobbly'!

😂

The problem is that I only have limited space and funds to invest in this hobby (as I have several other hobbies) and I don't want to buy expensive specialist tools that will just lie unused a lot of the time. So, I was very excited to find a mini bench-sander on sale at a local store that was exactly the sort of price I can afford and was also small enough to sit in the corner of my worktable...


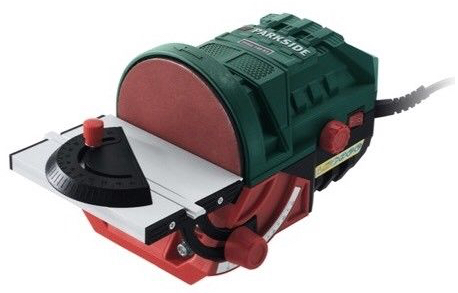
At just £29.99 the Parkside Mini Bench Sander was exactly within my means and it is tiny. Obviously, it's intended for lightweight materials of a small size, but that's exactly what I will be working with. It will be great for smoothing off and rounding off my peg figures and also will allow me to sand at specific angles.

It also - rather importantly - comes with a a nozzle so that you can attach a vacuum cleaner to the machine so that you can such away sawdust while working. This is great as I don't want to make too much mess if I can help it. Here's a handy video review...


Aside from a circular sander, I'm will also be looking for a similarly small circular bench saw, a vertical drilling rig for my Dremel multi-tool and, finally, a mini- lathe (for turning my own 'peg soldiers). I already have a Dremel fret-saw.

I'll be getting a chance to try this sander out this week as I will be experimenting with some ideas for arms and feet for my peg soldier, which I will be sanding into shape from popsicle sticks!