Showing posts with label Project 6. Show all posts

Monday, 14 October 2013

Heavy gun team complete

Huzzah! I have just completed my very first FLW unit! My Heavy Artillery team is all done and dusted and all that's left for me to do is do present them in all their glory. Phew!

Gilbert the Rammer!
Lt. Cuthbert - gunnery officer


I'm quite pleased with this set, I think Cuthbert in full uniform was the right choice as the contrast between the four characters makes the team look more authentic. I am definitely glad I went with this Belgian army inspired uniform - I was very impressed by some of the Belgian WW1 uniforms and I will be dipping into this reference source again no doubt.

I really have to give a mention to Black Hat Miniatures (UK) as the basic gun team figure is theirs, and it was a superb starting point for my conversion project. Big thank you to them.

Well, what now? I'll take stock and then decide which one of my back-log of projects to get on with - but finishing my first FLW unit has given me a bit of motivation. I hope you like them.

Saturday, 12 October 2013

Heavy gun crew nearly complete

I'm just putting the final touches to the last two of my Molaterian heavy artillery crew. I wasn't sure if the all black uniform of the officer would work, but I can now say that I'm very pleased with it...


Hardest part was carefully painting on the officer's cuff rank insignia. Boy, do I have wobbly hands!

...Soon have my very first completed Molaterian unit! (Albeit probably one of the smallest.)

Monday, 7 October 2013

Small things...

Creeping progress on Cuthbert, but some progress is still progress. I've been working on his arms and his pose and also on a small pair of binoculars.

Still some putty work to finish off but that's about it. So that's the four crewmen for my heavy field gun team

I've really enjoyed this set as they are such little characters, which makes me think that I'd like to focus on making the rest of my soldiers little characters too.

This means continuing with a similar style of face or head sculpt. I know this may mean my toy soldiers may be more caricatures than historical miniatures, but I find this more fun.

Tuesday, 1 October 2013

Lieutenant Cuthbert, gunnery officer

The last figure in my Molaterian heavy artillery team is the gunnery officer - Lt. Cuthbert. He is based - as with all my 'Berts' - on Black Hat's metal artillery crewman.

Unlike the rest of the Berts, however, I chose to start with a resin duplicate of Black Hat's figure as I imagined that tying to heavily modify a metal figure would be a bit of a pain. The resin that my brother is currently using is a joy to work with and very easy to cut and sand.

The job began with some major sanding back of the torso, removing the braces and shirt format of the original Black Hat figure. Once done I built up the officer's tunic with Milliput putty and added a double-breasted button arrangement based on a design from Osprey's 'The Belgian Army in World War 1'.

The head is my Mk. II 'Albert' resin head modified with new - and suitable 'upper-class' - facial hair and an officer's kepi (again, based on a Belgian army design).

Next I have to add his arms, I am thinking of poses but want him to be holding some binoculars in his right hand. The uniform will be mostly black - a nod to the Belgian influence - with tangerine detailing.

As I mentioned, this will be the last use of my Mk. II 'Albert' head for modelling my figures - I am working on a Mk III head sculpt to replace it - but it will be nice to have a unit in my army that will reflect the evolution of my sculpting skills (such as they are).

Monday, 23 September 2013

Gilbert joins the team!

1/32 converted toy soldier
My 1/32 semi-scratch built come semi-converted Molaterian gun crew is starting to come together. The third member - Gilbert - has just come off the spray booth!

Gilbert's pose is a little more mundane as someone has to be working the gun! (It's not all beer and skittles in the Molaterian army!)

The paint job should be pretty quick and straight forward and then it's on to the final member of the crew, Cuthbert the Subaltern. As is the tradition in the army of Molatero he will be dressed slightly differently and be wearing the officer's kepi.

By this time people will be noticing the family resemblance between the crew members, so in my next project - my completely scratch build soldiers - I will be creating a set of alternative heads! :)

Sunday, 15 September 2013

Albert, meet Hubert!

The painting was the easy part and didn't take long. So now I have my second gun crewman nearly complete...


Two more to do, another crewman and an officer and that will complete my 'berts!

Next: Cuthbert.

Thursday, 1 August 2013

Artillery crew - Sgt. Albert

Really good day today! Started with a lovely family day out in Dalby Forest - little nature ramble with my girls, my daughter's boyfriend, the wife and a crazy dog. Ended with me managing to get 'Albert' finished!

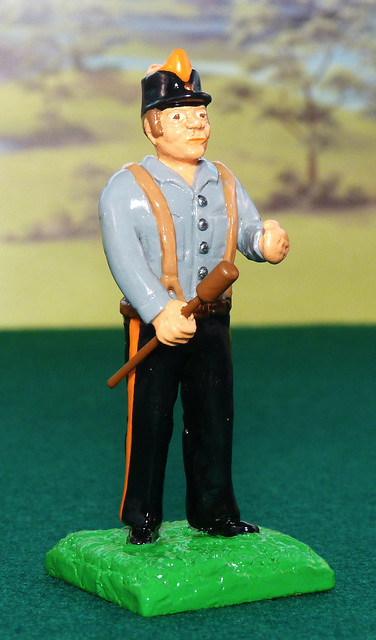
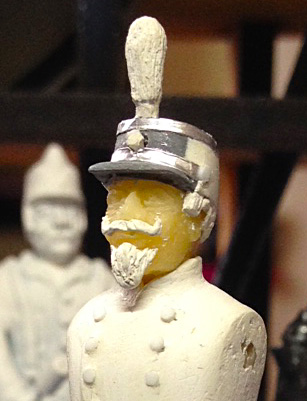
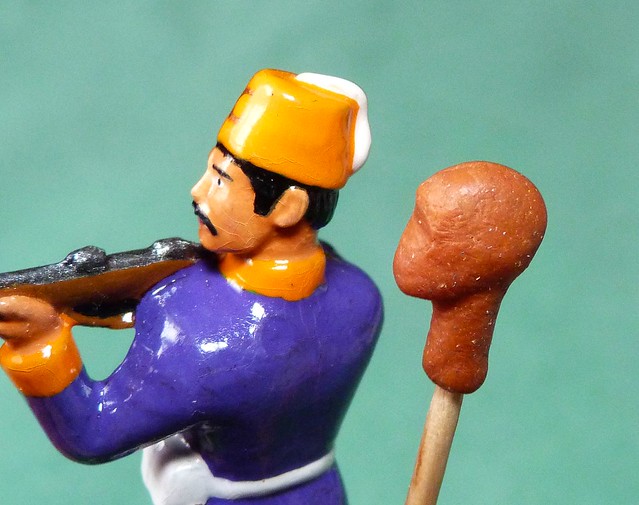
Left: 'Albert', or my Mk II head sculpture. To this I added my Romanian style hat - the capela.

I am really pleased with how this has turned out, when you consider I have just started sculpting figures in 1/32 scale. And best of all I managed not to make a complete hash of the paint job.

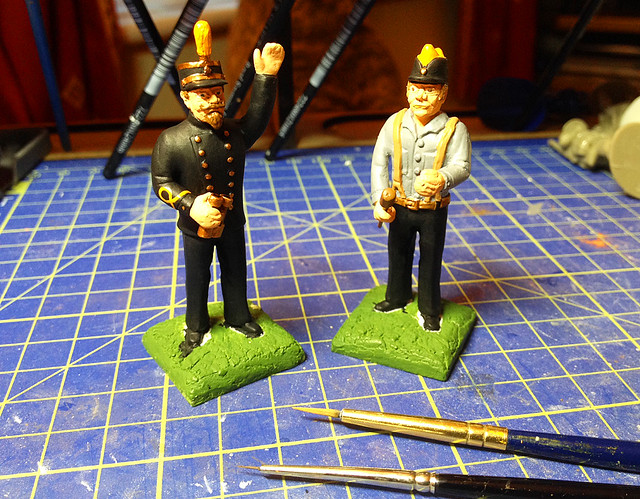
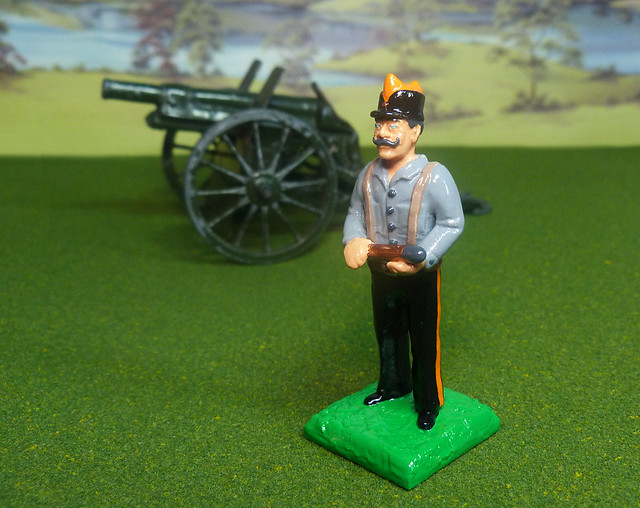
The uniform is my own design for Molatero's Royal regiment of Artillery and a lot of credit has to go to the really nice body which was crafted by Black Hat Miniatures.

The artillery shell was a quick scratch build based on an early Krupp shell and it seems to suit the Britains 1201 field gun nicely.


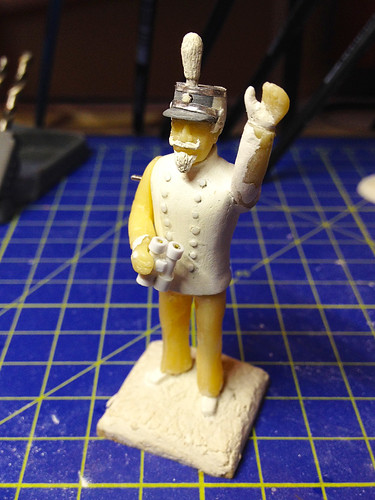
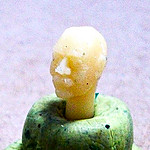
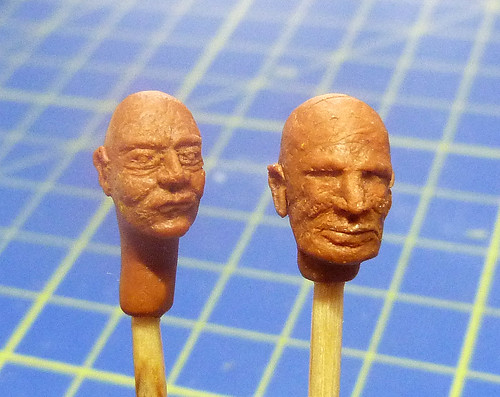
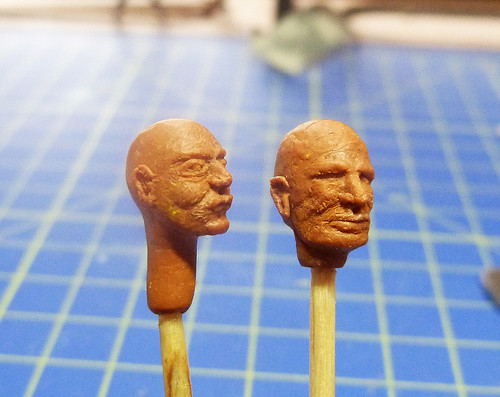
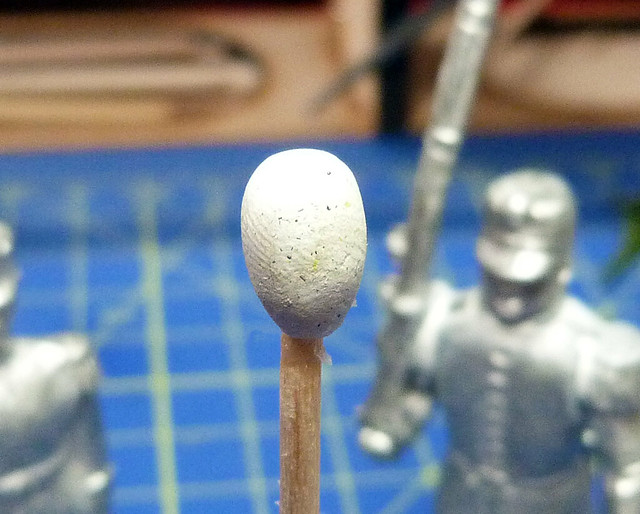
My Mk II head is - I feel - still a little over sized for 1/32, but I like the style. So I am now trying to make a Mk III head in a similar style only smaller. Hopefully this will match the MK I body sculpture that I am working on.

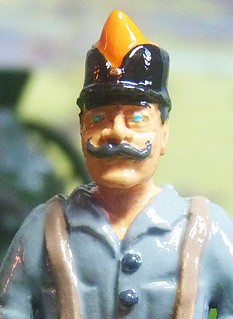
The hat is, again, my own design too, based on the traditional Romanian capela. The two colour design just seemed to feel right and may be a great way to delineate different regiments or service arms.

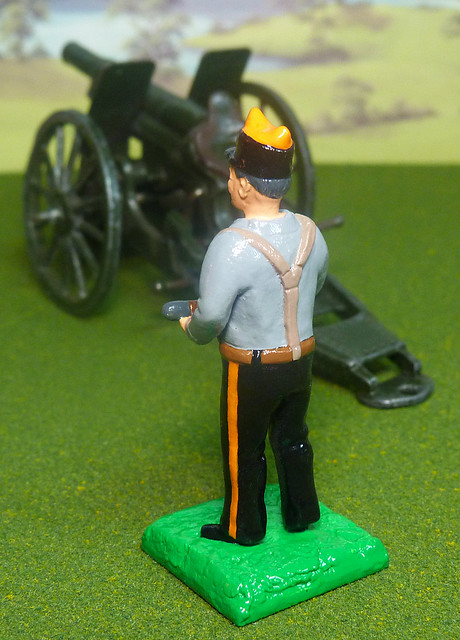
The stripes on the trousers were a bit of a pain to paint and probably took the longest to do out of the whole figure. But in the end I am happy with the uniform design (I imagine the tunic would be black as well, maybe with some tangerine decoration).

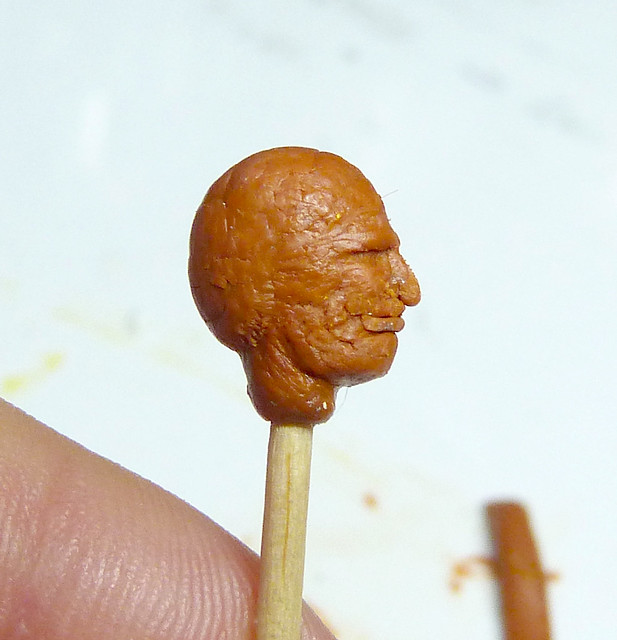
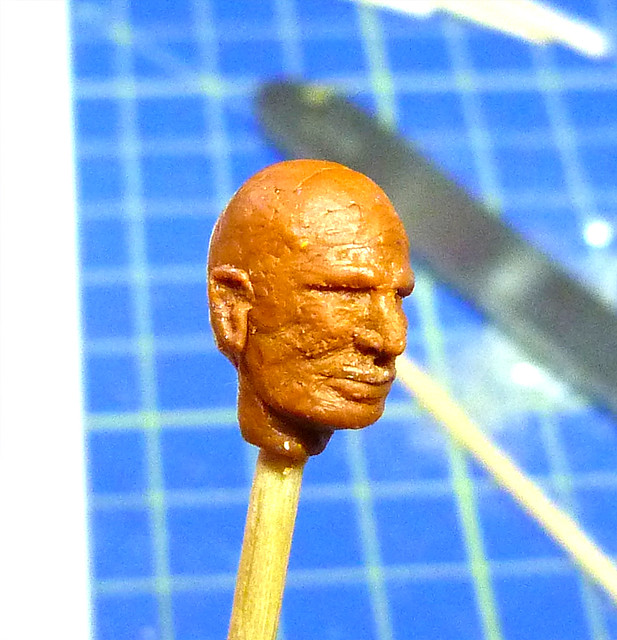
I have to admit that there is something a bit cheeky about the design of Albert's face which I like. I could have gone down the more realistic or generic facial design route (a la AiP), but I like the idea of keeping the 'toy' in toy soldier.

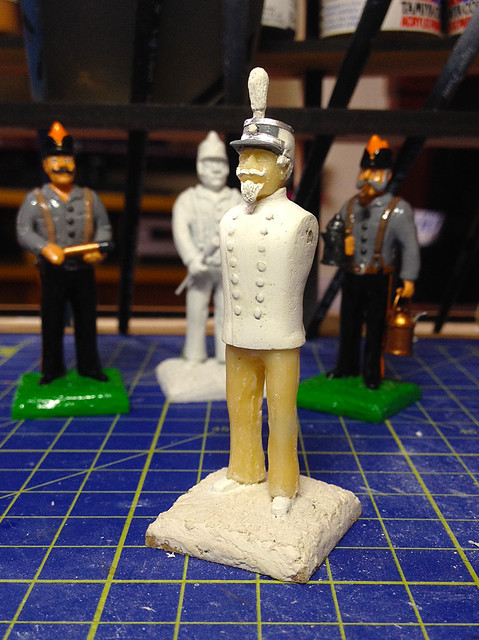
I really hope you like him - I intend to complete a full gun crew with the Mk II head before moving on to an improved head. Let's see what other little characters I can come up with! Once again, much appreciation to Black Hat and it's metal body casting as it matches Albert perfectly! ;)

Tuesday, 23 July 2013

Mk II head in resin

Albert
My brother sent a quick snap of the first of my MK II heads to come off the production line!

It's just to show me that samples will soon be winging their way to me.

So what - you ask - will I be doing with these? Well, I hope to use these in my next infantry regiment, my Molaterian Guards regiment. I also hope to start producing a body of my own design to go with it.

Friday, 19 July 2013

Mk II head complete!

A bit of progress. Scale is better and I am starting to be a bit more daring with detail, but still lots to learn...


Comparing my latest attempt (left) with my first try (right) I think I am pleased with the Mk II head.


Ears seem to be my problem area at the moment, though I am working on a method and they are better than my first go. The new head also has a bit of a Victoria Beckham pout going on, but this will be less noticeable once I get a nice moustache on the working version!

Next: Posting this head up to my brother for him to cast in resin. I will then use the resin copies as working models to customise and personalise (with hats and hair, etc...) before sending them back for final casting.

Mk II head...Putting on a brave face!

I started adding the features to my Mk II 'skull' today. I have found that the brown Milliput putty seemed to dry a lot quicker that the other types of Milliput that I have used before - so the trick seems to be to just make a small batch and work on a very specific area of the face before the putty hardens.

One thing I didn't consider until I started is what kind of expression to give my little head. I guess 'expressionless' is actually what I want to be going for as I want a generic head I can use for many different figures. A cheeky grin wouldn't do!

Next: My wee guy needs some ears! And that's that!

Wednesday, 17 July 2013

Head sculpting Mk II

Learning from my first attempt I have started another 1/32 head. This time I am taking the task in phases and hopefully I have the scale nearer the mark...

My Mk I head and the new Mk II 'skull'. The new head is
slightly smaller for compatibility with my AiP soldiers.
The first phase, which you see here, is to make a featureless mannequin head. This will just be the rough shape of the skull and will be the canvas onto which I sculpt the features. At this point shape and scale are my main priorities.

With regards to scale I repeatedly compared the size of my Mk II 'skull' with one of my Armies in Plastic soldiers...

While using the AiP head as inspiration, my head will be of
my own design and will have differing features.
I am aiming at compatibility with these toy soldiers as these will be the source of the bodies onto which I will be planting my custom heads.

Again, I used the red-brown Milliput putty and I let this head dry before I start the next phase. I will now start to plan out the features on my head, nose, brow, mouth and ears - I will probably draw them on first before starting to add the putty.

The goal is a generic head, with basic features but no hair. I will add this to the duplicated resin versions to make variations in the look of the head. The other thing that I will do when I get the resin versions is to cut the top of the head off to add the various types of hats that I want.

Once the hats are added to my head I will again send them back to my brother who will cast the final version. And there you go - an original head of my own design.

One issue is that the scale of heads differs from one manufacturer of toy soldiers to another - I would have to design different heads, of different style and size, for each type of soldier I wanted to convert or personalise. Still, progress.

Next: Facial features.

Tuesday, 16 July 2013

Sculpting heads! My first attempt.

I begun my first ever head sculpting session today! This is no more that a practise to get an idea of how I should go about doing things - I can see me doing several of these trial sculpts before I produce anything useful.

First things first, I needed something to sculpt onto - and it just so happens I had a spare bit of white Milliput which I rolled into a rough oval shape and stuck onto a cocktail stick last night...


When my base was nice and hard this morning I started to flesh out (excuse the pun) the basic shape of a 1/32 head with brown Milliput. The change in colour was because I have been finding it hard to make out detail with white Milliput...


Once the general skull shape was there I started to stick on small balls and rods of putty to represent the muscles and features in the face...


Tools were a cocktail stick and a sharp hobby knife...


And there we go. Not perfect by any means. The main problem I found was the propensity to over scale - I started with a  goal of a 1/32 head similar in size to those of the Armies in Plastic toy soldiers (for compatibility) but soon found that my head was quite a bit bigger.

It's easy to understand why this would be - it's simply easier to make things bigger.

So, my MK. II sculpt will be concentrating on getting closer to the scale I want.

Edit: Anyone else think it looks a bit like Patrick Stewart? :)

> To review to my series on making custom Molaterian infantry follow this 'Complete Series Link'.