Sunday, 24 January 2021

Wood versus Plastic! Crafting Versus Printing.

 Ok, so a bit of a talking point came up after I posted up my intension to 3D print some of my toy soldiers rather than my 'usual' technique of crafting the peg soldiers out of wooden dolly pegs. Some people were clearly not entirely happy about the idea! 😕

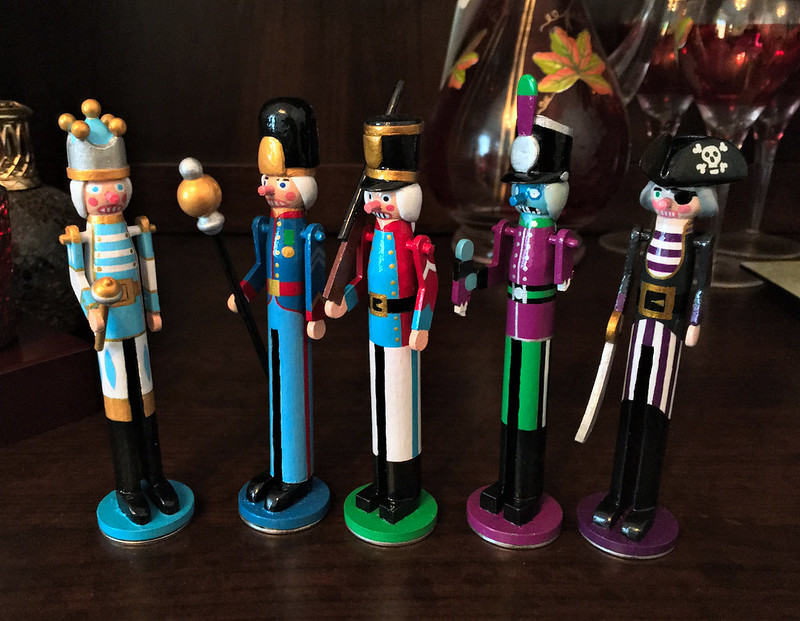
A couple of my early 3D printed prototypes, one of
my 'nutcracker' full-sized peg bodies and one of my
'50mm' half-sized bodies.

Typical of the comments was something along the lines of "...but if you 3D print them instead of crafting them out of real wood they will lose their charm!"

I was a bit taken aback, I didn't realise my toy soldiers were a thing that had 'charm'. I thought they were just daft little fun toys! But apparently, to some people, I'm somewhat spoiling part of the attraction of my peg soldiers. 😦

...My first though was along the lines of 'I didn't realise I had an obligation to others to maintain some sort of standards'! I thought I was just making these things to amuse myself. But, that's a bit ingenuous as I do get a kick from other peoples appreciation of what I do - that's why I post pictures on social media after all.

[Edit: Just read this back and it sounds like a bit of a moan! LOL But it's not, really. I like to hear other peoples' point of view.]

So, after pondering the issue I realised that some of these people had missed the point - I had never said I was replacing my original wood crafting technique of making peg soldiers with plastic 3D versions. I simply said that I would be investigating the possibilities that 3D might afford me for making prototyping easier PLUS I am thinking of making a range of easily duplicated plastic soldiers for war gaming where laborious wood crafting would be a bit of a hinderance.

I will still be making my wood crafted soldiers - but mainly for gifts, display and commissions! DON'T PANIC!

Phew! Anyway, I have begun my experimentation which involves learning how to 3D design the models, prepare them for printing and then learning how best to print them. This is not at all straight for ward as just pushing a 'PRINT' button and out would pop a finished model! 😁

I've certainly had a few minor print disasters! Luckily my printer allows me to monitor the printing remotely - via it's built-in camera - so I am able to hit the brakes if the print goes pear-shaped...

So, there's a learning curve which has to be overcome with 3D printing - it isn't such a hands-on 'build it and it will work out' experience that crafting with wood can be. But once this initial technical mechanics of building models in 3D and then printing them is understood - at least the basics - I should be able to do what I like to do best, tinker! 😁

In fact, this uneducated messing about started in earnest from day one of getting the printer, but now I am trying to get myself on a rather more methodical and formalised track, starting with the software.

I am starting with an easily accessible piece of software called (suitably enough) TINKERCAD, which is perfectly suited to my simple geometrically shaped figures...

 
At this stage I am just trying to understand how to combine primitive shapes - spheres, cubes, cones, tubes, etc - to recreate my 50mm wooden peg figure design.

Additionally, and perhaps a little more tricky, is my experiments in making multipart accessories and components that I can then add to the basic body to create different types of characters. I am finding the making of arms a bit of a challenge...


The main problem that I am encountering is that some of the shapes I used in my wooden figures simple do not translate well into a 3D printed model version. Due to the way my 3d printer works - which is to build up a model layer by layer - I have to reassess the way I construct components. In effect, I have to change my whole way of thinking.

Because of the changes I am having to make in the shape of my original component designs I am actually ending up with a slightly new style. Some small or thin parts - like the flat arm designs pictured above - have had to be made a little chunkier in order to work the way I want them to. Frustrating at times but also very interesting.


This has all given me an insight into why other small toy figure - like those made by Lego and Playmobile - look the way they look. It isn't all stylistic choices, some of the 'look' is led by the actual manufacturing process itself!

My arm designs changes from the old flat design into - first of all - tubes and then, eventually, half-tube shaped components...


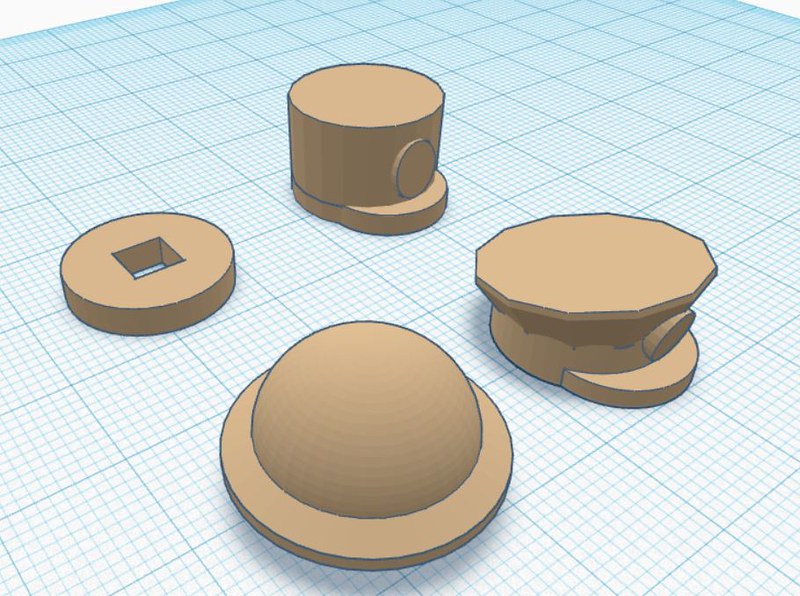
Similarly, hats had to become a little chunkier and like my arms I had to come up with a way of easily attaching the component to the body...


However, little design quandaries aside, 3D modelling has - as I had hoped - made it easier for my to work out my design ideas and quickly prototype my doodles on paper into fully formed 3D models.

It's been an evolutionary process with minor adjustments here, amending dimensions there and tweaking things I wasn't quite happy with, but I feel I got there eventually and have produced a little character shape that I am happy with. though, this has left me with a little army of test pieces...

NEXT: It's time to see what my 3D figures paint up like and how they compare to my wooden versions!

Saturday, 16 January 2021

Happy (Belated) New Year!

 Yes, I'm late restarting my blogging for 2021 - a bit late but it's been a bit of an hectic start to January. But things are starting to settle down again so it onwards and upwards...

But what is my strategy for the coming year? I look at 2020 as a learning period, even though I made some models that I was quite happy with everything still felt like prototypes and no two builds were the same. 2021 is about consolidating by build techniques.

As I mentioned in my last post of 2020 I now have a 3D printer and that will be taking over my build experiments and prototypes. I'll be reserving my wooden builds for special projects. This should speed up my learning process as working on wooden build only for them not to turn out the way I wanted is a annoying waste of time...

Anyway, I don't have anything to show off yet BUT I came across this interesting article by CNN which - although isn't about my sort of toy soldiers - is a very interesting look into how attitudes towards 'military toys' in general is changing...

"LEGO won't make modern war machines, but others are picking up the pieces. "

In the article an influential peace group remarked on the production of 'war' themed models...

"The basic aim is to avoid realistic weapons and military equipment that children may recognize from hot spots around the world and to refrain from showing violent or frightening situations when communicating about LEGO products. At the same time, the purpose is for the LEGO brand not to be associated with issues that glorify conflicts and unethical or harmful behaviour," the peace group quoted from a 2010 LEGO report.

As someone who in involved in one of  the hobbies driven by an interest in all things military - even one which is principally 'toy' in style - this sort of thought process is a little worrying. For my part, I do wonder how this sort of attitude will affect those model makers who see themselves as part 'historians' who make 'war models' in order to persevere moments in history.

Some modellers might suggest that this is the thin edge of the wedge - military themed models not, but in the future how will such an 'anti-war' perspective affect military re-enactments or even military museums?

Food for thought.

Thursday, 31 December 2020

New for 2021, 3D Printing!

 I better write this today as I can't see me doing much on Hogmanay... Not that I intend to drink that much booze tonight, it's just that I hope to spend a nice relaxing day with the wife watching old movies!

Anyway, I've already hinted at the new addition to my modelling tools, but I thought I'd add a bit more detail as this will be playing quite a big role in my model making in 2021...

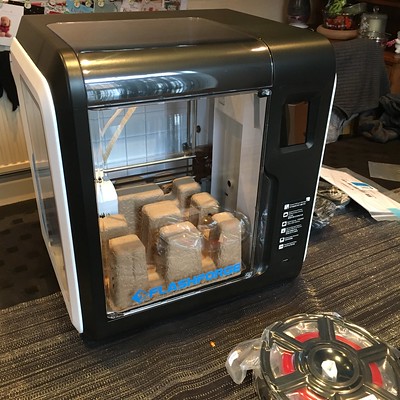
Santa was very kind to me (a big 'thank you' to all my lovely family who contributed to this present) and a BIG package arrived on my doorstep just after Christmas Day. It was a FLASHFORGE ADVENTURER 3 3D printer...

The above photo shows the newly unboxed printer with some of the protective packing still in place. Believe me when I say that I soon had all that peeled off, unstuck and dispensed with in very short shrift! 😁

I won't go into the details of this printer, it's specs and why I chose it (just yet) but suffice to say that it's aimed at complete 3D printing 'noobs' like myself and, indeed, it was not very long before it knocked out my very first test print...

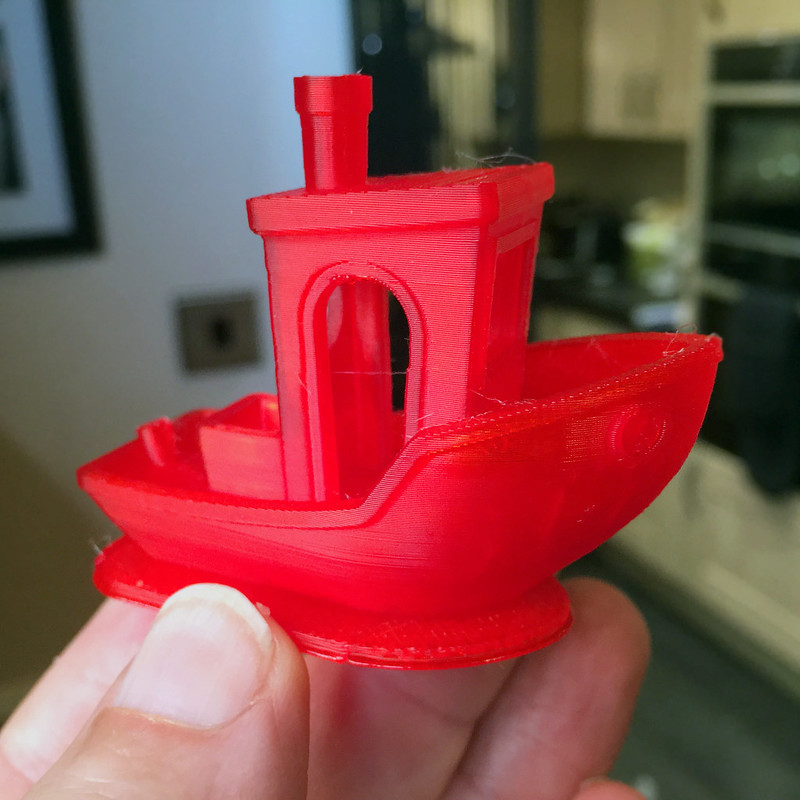
The end result of this was a cute little 'Bench' boat model - a standard model designed to test your printers set-up (every new 3D printer-er starts by printing this torture-test model)...

Despite it just being a generic test print 'Benchy' is kinda cute in it's own right and I even imagined that - scaled up and modified slightly - it might make a nice little boat for my 50mm peg figures! 😆

Anyway, so begins my adventure into 3D printing with my Adventurer 3 printer!

But before I leave things there you might be asking 'but why 3D printing'? Good question!

There are a lot of ideas I have for new (to me) modelling techniques that I want to try out this year. Different ways of putting my peg soldiers together and how to add different accessories and different kinds of models (like vehicles). The quickest and most convinient way of doing this for me - coming as I do from a plastic model-making background - is for my to prototype these new idea using a plastic printing method like 3D printing.

Using 3D software and this printer I can quickly try out new things and see how they might work without laboriously carving out little pieces of wood (which is quite messy)!

In fact, I can try out a lot of my initial idea in 3D software alone and only once satisfied - in principal - with the design do I need to go to print. So another new 'thing' for me this year will be to design my models using a 3D drawing application like TINKERCAD or BLENDER...


The above picture shows my early attempts to create a 3D version of a peg! Once I have a template for my pegs I can then start to work on 3D versions of the ideas that I have for accessories (This is the drawing of a full-sized dolly peg, but I'll also make a version of my 50mm 'half-sized' pegs as well).

And there we have it, bringing my peg making into the 21st century!

HOWEVER, I should say that I am not abandoning my more traditional wooden peg creations. I still very much enjoy the good old fashioned creative pleasure of making things by hand. The 3D printing - which is in a plastic material - is for very specific projects where traditional crafting is less suitable...

Imagine, for example, having to create a whole army of various but similar figures for a large scale war-game. A more streamlined production line process would be far more practical in this instance. Also, more complex models - like vehicles - would be far quicker to prototype virtually in 3D first in order to create a template for how exactly I would create them in wood.

So, quite aptly for New Year my new 'toy' nicely connects the old and the new!

HAPPY NEW YEAR!

Tuesday, 29 December 2020

And Goodbye 2020 - Huzzah!

 A bit early I know, but today I completed what will be the final peg figures for the year as I completed the two remaining nutcrackers I had left to do from Christmas...

I am now having a little break from making figure over the holiday and intend to think about what I will be doing in 2021. Santa was very generous and my main present will be playing a part in how I will be progressing with my little hobby. Here's a quick hint...

Flashforge Adventurer 3 - First Calibration Print


Sunday, 27 December 2020

Merry Christmas! The Grinch & Co...

 I know I'm a wee bit late, but - as some of you may know - I work in a hospital (Operating Theatre Domestic) and so like many key workers I was working on Christmas Day. Because of that my festivities have been a little delayed and all of a sudden it's the 27th! 😁

...So, the big question is - did I manage to get my nutcracker gifts completes in time?

Well, mostly!😏

First off, I did complete my Grinch (one down, 12 to go)...


I must just say that I'm a bit unhappy that I mixed styles with this one, it was an experiment that didn't entirely come of. Plonking a sculpted head onto my simplified peg style of body was perhaps a mistake? In future, if I want to model a caricature I should maybe sculpt the whole figure in order that the final figure has a consistent look.

Anyway, onto the next job, or I should say 'jobs' as I decided I really needed to pick up the pace. I had just a week to go before I handed out my gifts. I decided to work through the group two or three at a time...

At this point, my main attention was my 'lumberjack' as this was a gift
for a work colleague and had to be ready before the rest of my figures.

This turned out to not to be such a chore as it meant I could paint some of one figure and while that dried I could paint some parts of another. And so I went, back and forth, until I had a completed set - as usual I finished on the facial features before the slightly traumatic varnishing stage (more on that later).

I should explain at this point that, because of the rush to get these gifts ready in time, I did not have the luxury of being able to much about - in my usual half-arsed way - setting up a proper completion photo. Instead I had to be content with a rushed snap with my mobile phone! Still, the pics didn't turn out too bad.

I was actually quite pleased with the base I came up with for my lumberjack. It was a piece of a branch - a set of which I discovered at our local craft store. It seemed very appropriate! And weighed a good deal more than my usual small MDF bases!

About the bases. I realised, a little too late, that my small round (30mm x 3mm) MDF bases were not really such a good choice as these tall nutcracker figures are a little top heavy. The stability of the based figures came into question (I kept knocking them over with the slightest touch) and I had to think of an remedial modification.

What I came up with was to add a 30mm steel washer to the bottom of the MDF base. This extra weight added just a little extra weight and provided a little more stability to the model...


In future, I will have to rethink my base design for full sized peg figures and come up with a far more stable platform.

Anyway, time was ticking away - 19, 20, 21, 22, 23... 😲


I made a bit of a mess of recording the above models (I didn't photograph them in proper order), but I was in panic mode by this time. Christmas Eve and I still had two more models to complete. I mean, I hadn't even started painting them yet...


The last models are a pair of Christmas elves loosely based of my youngest daughter's favourite Christmas movie - 'Elf'. Though I have taken a bit of liberty and created a 'bad elf' and a 'good elf'.

However, while I'd love to tell you that there was a happy ending to this Christmas tale and that I managed to finished the last models by the skin of my teeth I'm afraid I can't. 😕

Christmas Eve arrived and I was starting to flag. As I mentioned I was still working and my energy was sapped. I made an effort and was still working at 11pm but I knew it was a lost cause as the major sticking point (literally) was the varnishing!

I have been applying a spray lacquer and aerosol paints are a little sensitive to temperatures. We've been having a cold wet snap and with my man-cave out of action I've been having to revert to spraying in our back yard. Not ideal. The varnish has been taken over-long to cure and remained tacky longer than usual, despite my placing the varnished figures near our radiators.

The upshot was that I knew I did not have a chance of completing the last two nutcrackers in time and this is how far I got by Christmas morning...


I still have the arms to complete before even getting to the dreaded varnishing. So, I had to accept defeat and settle for 6 nutcrackers each for my daughters instead of 7. I guess that's not a biggy, but I was annoyed at my own lack of planning. Next year I will definitely start my gift making a lot earlier!

The good news was that my daughters - Stacey and Kayleigh - were delighted  with what they received. And we all had a wonderful Christmas (despite the current lockdown restrictions).

I hope you all had as enjoyable festive season that I have. MERRY CHRISTMAS! 🎅