Priming is one of those necessary but often overlooked stages in the model making process. It's not a 'biggy', but there again it's am important foundation for a successful painting job so I thought I'd just quickly talk about it...
 |
| Above: Un-primed models can sometimes be made up of several materials, of different textures or colours. Priming can serve to unify these materials. |
I prime my models for a couple of reasons, firstly to provide a stable surface for the adhesion of the paint and secondly as a means of checking the quality of that surface before I start painting. Often priming can highlight potential problems that may be exacerbated later during painting - defects in the base surface that you didn't notice during construction and issues that were hard to see if the base material was a light colour.
 |
| Above: Preparing models for priming. I mount my figures to plastic shot glasses using BluTack and any extras - like arms - to the side ready for spraying. I have also 'capped' any parts I do not want spraying so that they can be glued. |
Priming prepares your painting 'canvas', but one of the reasons I like to prime using grey is that flattens light and dark areas of the model in which problem spots can lurk. It gives you one last chance - hopefully - to correct construction issues, things like gaps in joints, etc. (I have tried priming in white and black in the past but I eventually settled on grey.)
Priming with grey also gives you a happy neutral medium for the successful application of colours as you imagined they might look. Both white and black primers can subtly change colours and how they go on to the model, white can make colours brighter than expected and black can dull colours and their propensity to show through coast means that you might have to add additional layers to get a opaque top coat.
Priming paint can also help smooth out the canvas to differing degrees, this was particularly noticeable for me when I work with wooden peg figures as the natural grain of the wood can sometimes cause unwanted patterns. In these cases you can either repair particularly bad surfaces by adding some filler and re-priming or sometimes just an additional or thicker coat of primer with cover the problem.
 |
| Above: Models primed, I give the models a quick once over to check that for any issues that might need fixing. |
In fact, there are several types of priming paint specifically to help you in this, graded from 'fine' to 'thick'.
I uses aerosol spray paints for priming as I was never a 'display presentation modeller' even when I did plastic scale models. As a 'war-game' and toy-making modeller absolutely pristine levels of surface perfection hasn't been my main priority, but I do have a can of Tamiya's excellent fine grey primer knocking about somewhere! 😁 (This product is generally accepted as one of the best aerosol primers outside of airbrushing.)
Tamiya spray adds a gossamer thin and flat primer surface to a model and is not intended to hide or fill any defects to a top quality model - you should have done all this post-construction using proper fillers!
So, my go to primer is bog-standard (and cheap) automotive or furniture priming spray which has a slightly thicker consistency and can help smooth out slight surface defects, particularly if applied in multiple coats where required. I source mine from Wilkos or Halfords!
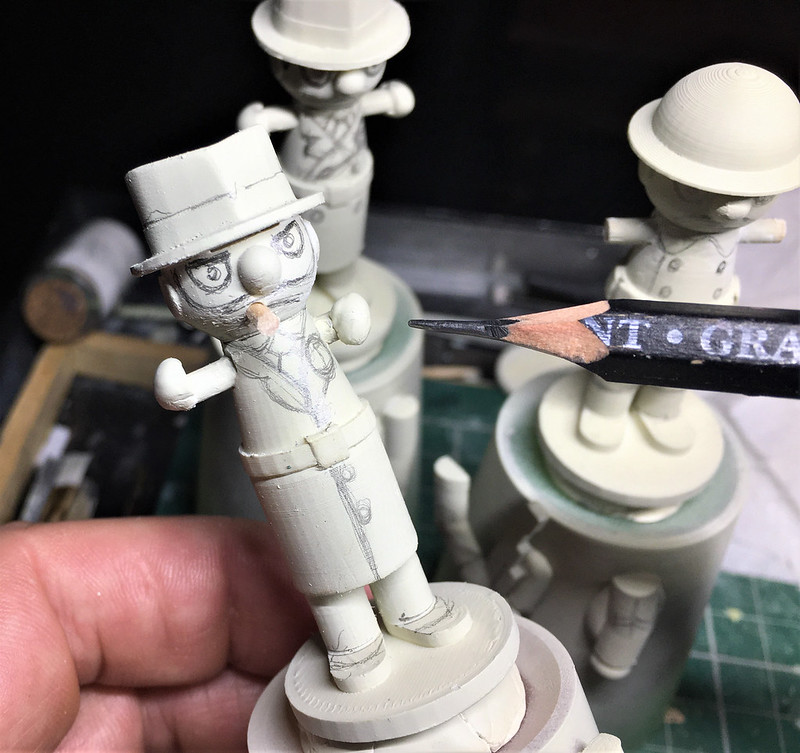 |
| Above: When I say that priming creates a canvas onto which I apply my painting I mean this literally, I sketch out my character's features using pencil. |
However, lately I have been experimenting with a third type of primer - the 'filler/primer', also known as putty primer. Now this is quite thick and gloopy - like a liquidised putty. It can also be what is known as 'self-levelling' which is a primer that is formulated to level out evenly over a surface as it dries, providing a smooth finish.

This is great for covering both the aggressive wood grain I sometime get with the cheap wooden pegs I use AND can be useful for helping alleviate the 3D printing texture I get when making my 3D printed peg figures.
This sound great BUT, a word of warning, this stuff - by definition - is extra thick! Being heavy handed or too close to your model when spraying can result is over-coverage which can easily cover details that you actually want to be seen! In this case you end up having to sand back the excess primer to uncover lost detail.
So, there you having it. Priming. Not rocket science but there are some considerations you should be aware of. I love this stage and I even like the look of my primed models, it's great when I get to this stage as it marks the start of the FUN!
 |
| Above: And the painting begins! |
No comments:
Post a Comment