Friday, 29 May 2015

Give the man a stripe!

A little aside with my Gatling crew regarding how I apply the trouser stripes. Now up until now I have hand painted the strips and being a graphic designer by trade I am a little persnickety about how straight a straight line is!

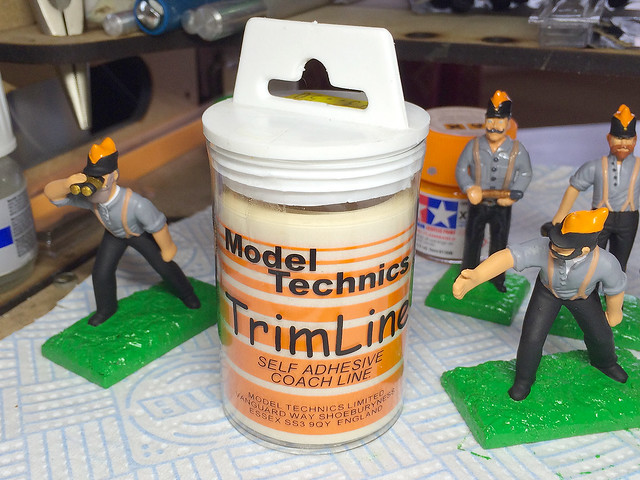
While perusing through my local model store I came across a decal product that I thought might help speed up and make more accurate trouser stripes. It's called Model Technics TrimLine...


What immediately caught my eye was that it was available in the very bright orange that I have been painting my Molatarian soldiers' stripes. Basically it's a long roll of self-adhesive vinyl strips of varying widths - three of which are ideal for the use I have in mind. (There is a range of colours and the roll is about three quid.)

I had two concerns about this product - how flexable is it (can it conform to bent legs) and how thick  are the stripes (would it stand out as being obviously a stuck on decal). Only one way to find out...


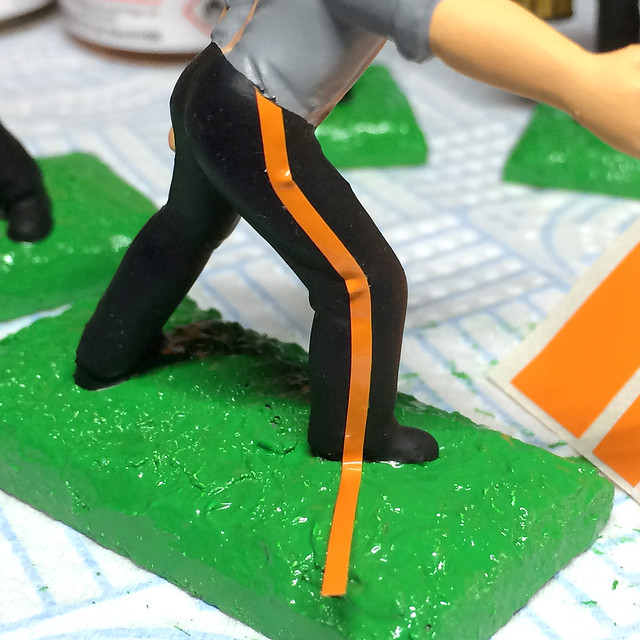
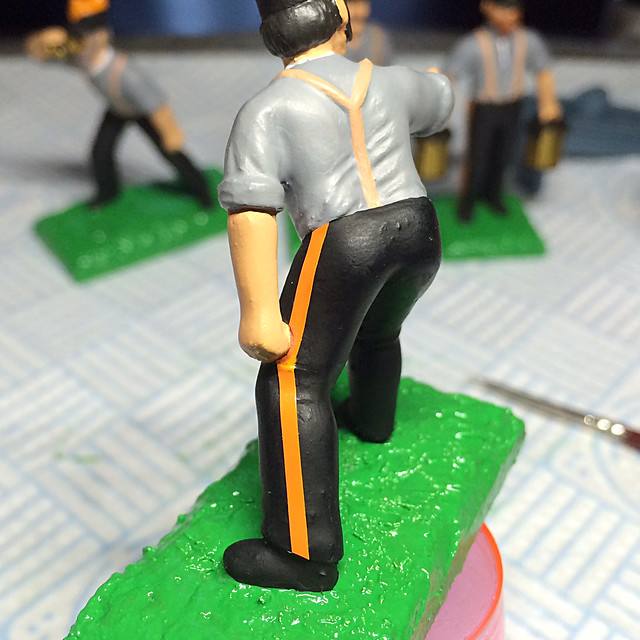
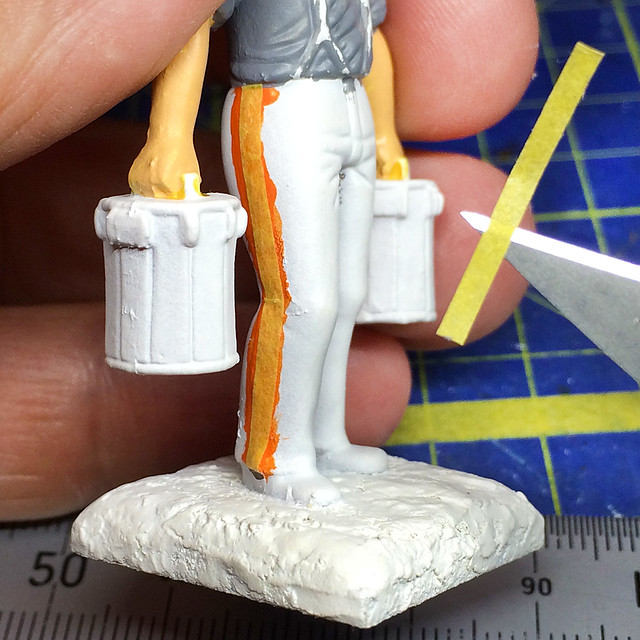
Well, while the stripes are not too thick they aren't all that flexible - they are really designed for coach-lining models and being applied in straight lines. So getting then to curve to the natural pose of a toy soldiers leg was a bit of a challenge and I had to do a wee bit of cutting with a scalpel to get them to 'bend' the way I wanted.

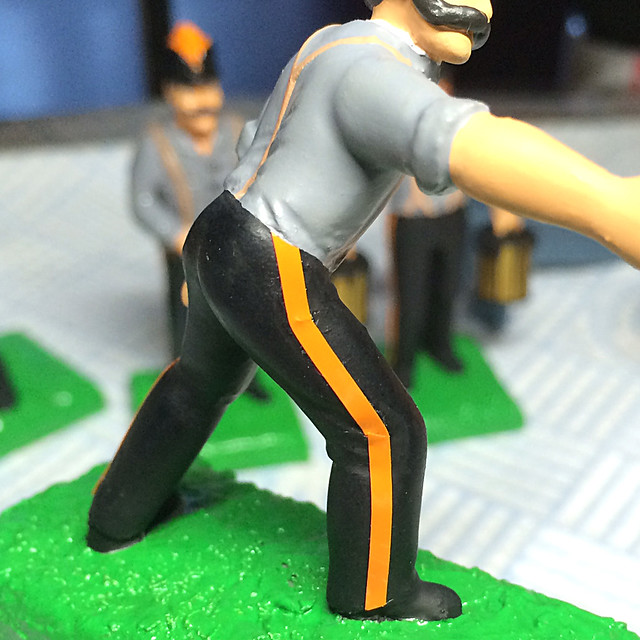
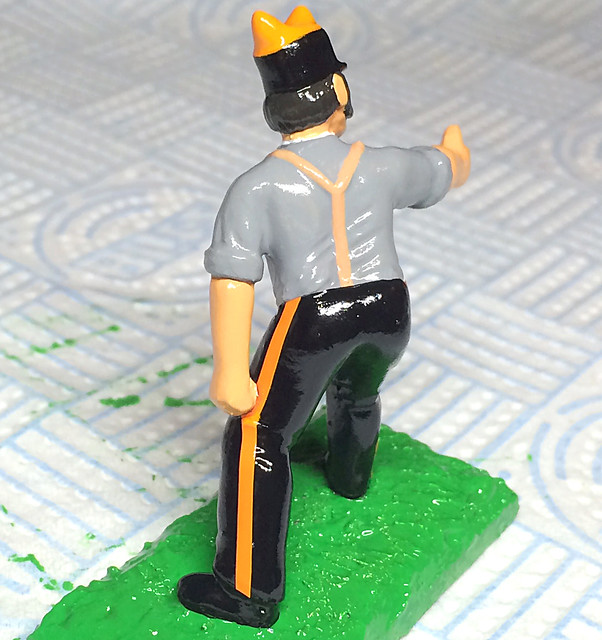
However, with perseverance I eventually managed to get them to applied in an acceptably realistic manner...


OK, so they don't bend very smoothly but I reckon it's good enough - to be honest I don't think I could have tried the TrimLine out on more difficult poses (except perhaps kneeling). As the majority of toy soldier models are in straight legged poses most will be a lot easier work than these little fellows.

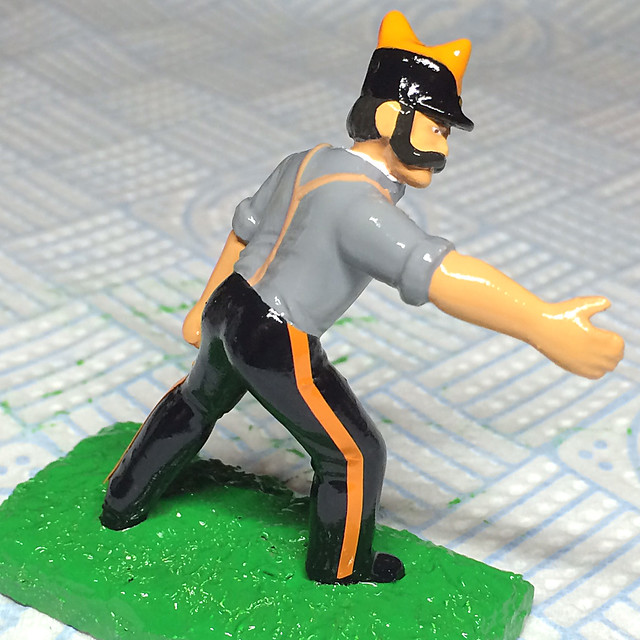
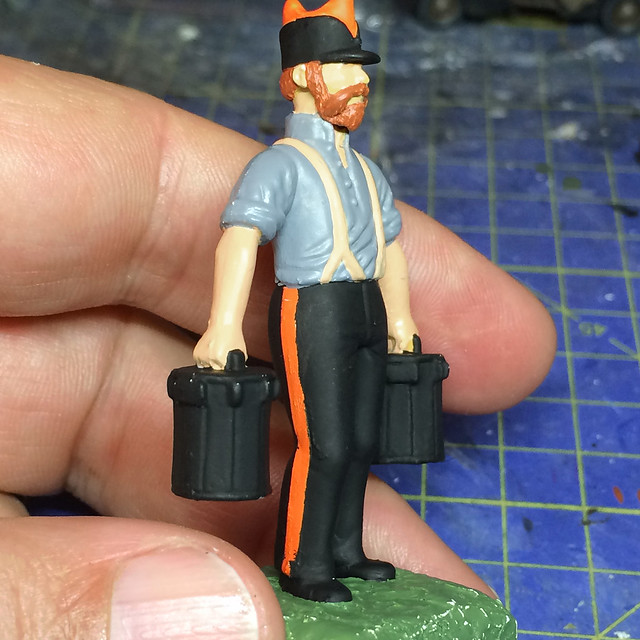
The next issue was just how noticeable these stripes would be as transfers as I was a little worried they would look stuck on. But they actually did look too bad (they are quite thin) and there was no noticeable 'white edge' to them to give the game away. So I carried on and went to the glossing stage...


As I had hoped the application of a coat of gloss seemed to smooth out any obvious 'step' between model and stripe, and the effect was to blend the transfer 'in'. At a distance the stripe looks as if it is just very carefully painted on! (Lovely straight edges!)

Experiment a success I should say - though I am probably open to accusations of 'cheating'. Still, when you think of the work involved in painting a whole regiment of these chaps (20 figures say) - that's 40 stripes in all and that's a lot of time and concentration. TrimLine would really speed up the creation of my figures and is an improvement over my less than perfect line painting methods.

(I am sure there are some modellers out there that would make short work of painting stripes freehand - but I'm afraid I am just not one of them.)

Sunday, 24 May 2015

Molatarian Gatling Gun crew - progress

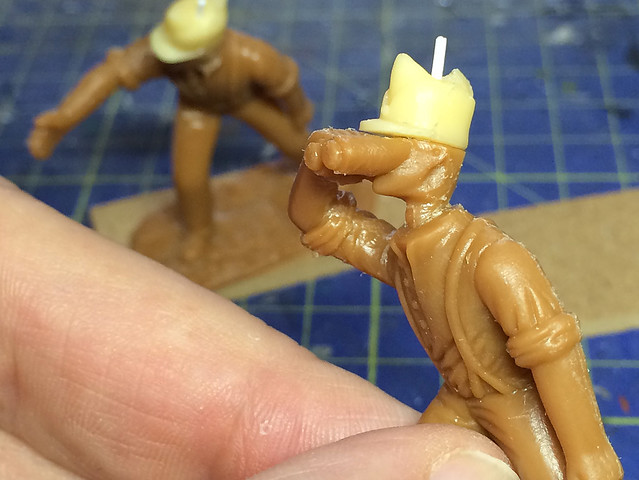
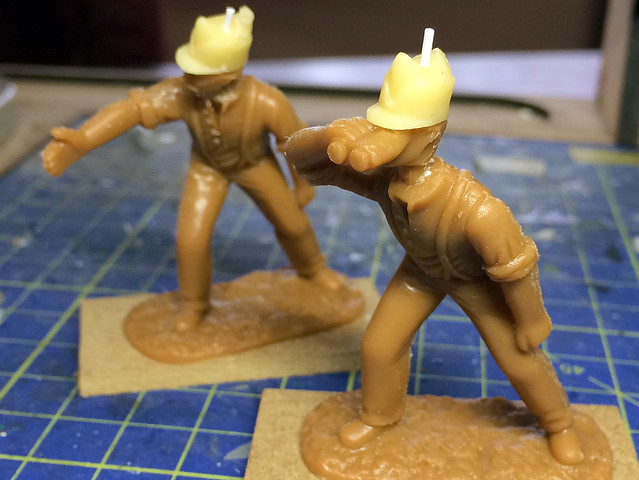
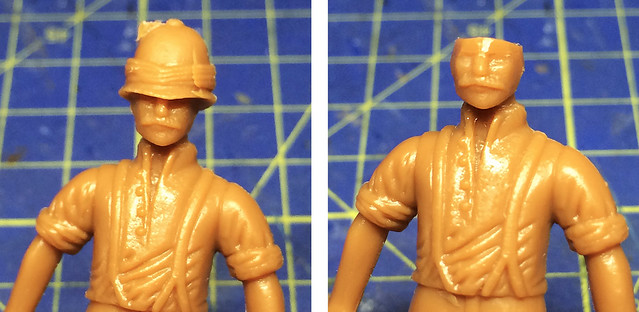
OK, I mentioned that I had a bit of an issue with the heads of the AiP gunners because I had removed the original pith helmets. To recap taking off the 'big hat' revealed that AiP had only done the most cursory sculpting of the head - particularly of the gunnery officer - as the hat largely obscured his features (as did the NCO/Officer's binoculars)...

"Oh gov! Me neck's so skinny and me ears have shrunk!"
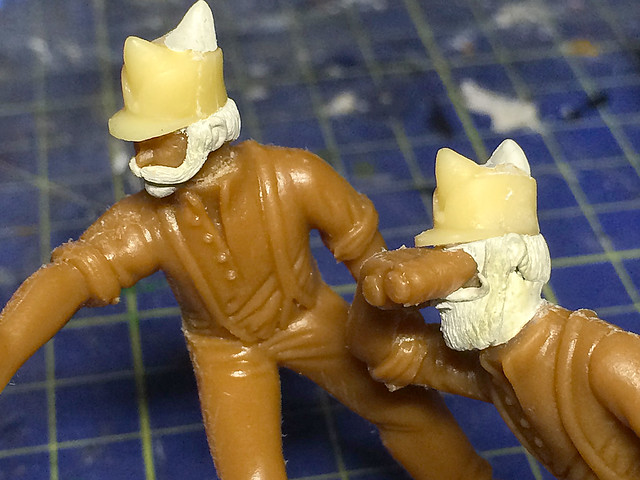
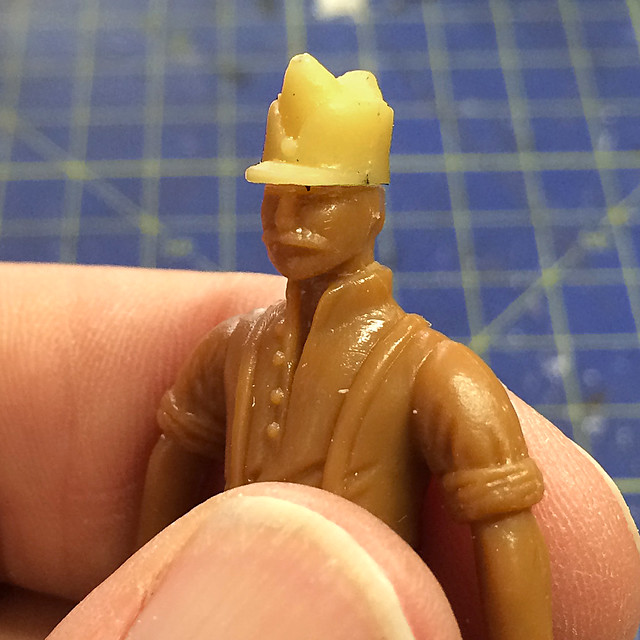
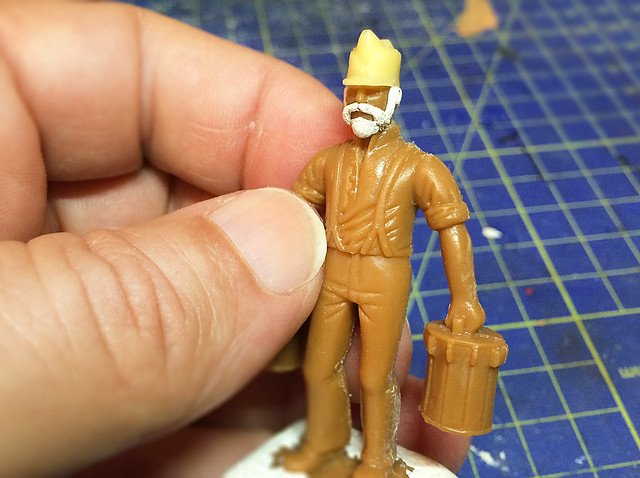
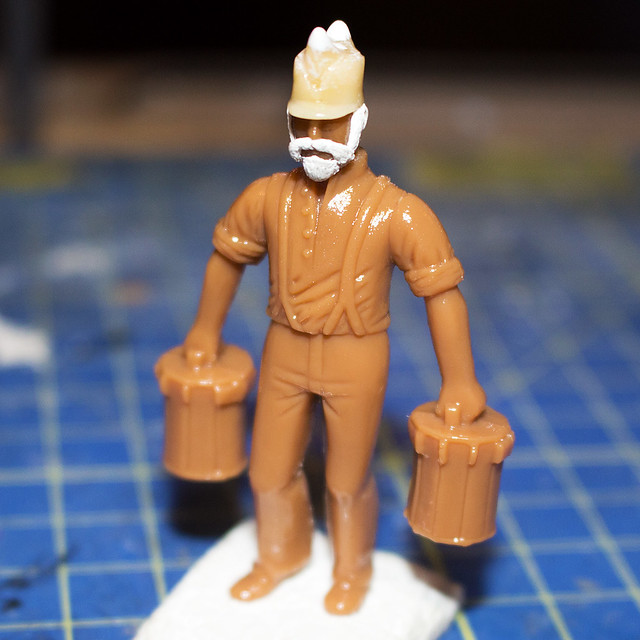
This left me with a little rebuilding to do as my Molatarian hats were more 'off the face'. So off I went with the Milliput and did some very amateurish 'plastic surgery' (having seen my efforts I can guarantee that I will not be having any visits from crime bosses who need a change of identity)!


Not great! But I feel a little better - plus it's given them 'the personal touch' so they are a little unique (even if it's not in a good way). :)


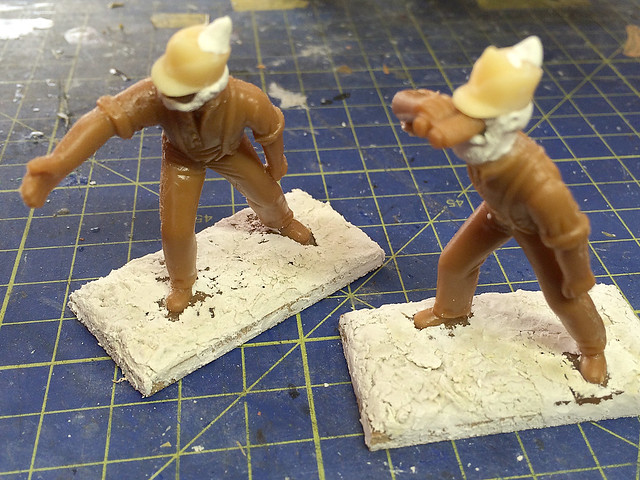
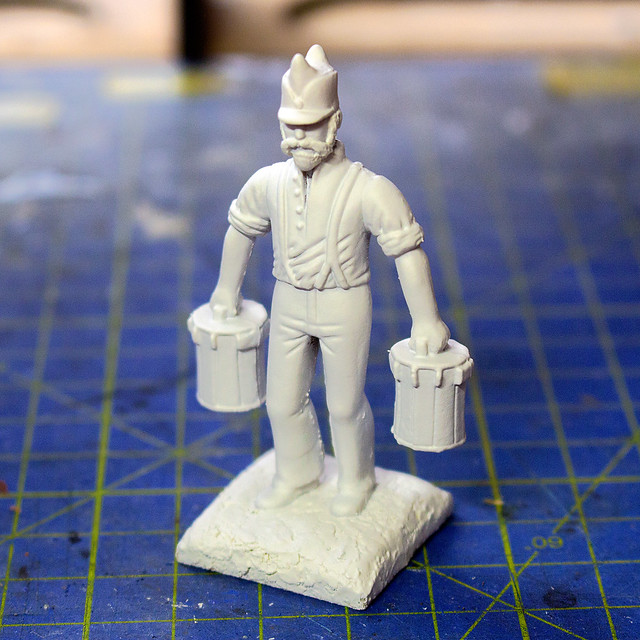
Just a minor point, I'm using (Quick Drying) Pollyfilla for the bases now. It's quick and easy to apply, dries quickly (naturally) and creates an interesting texture. Obviously this does make my bases quite thick (or is it deep?) as I already mount my figures on 3mm MDF bases, but I prefer the extra weight and stability this gives. It does mean my figures might be slightly taller on the game table than other peoples' though.

Link to UK MDF figure bases: Warbases

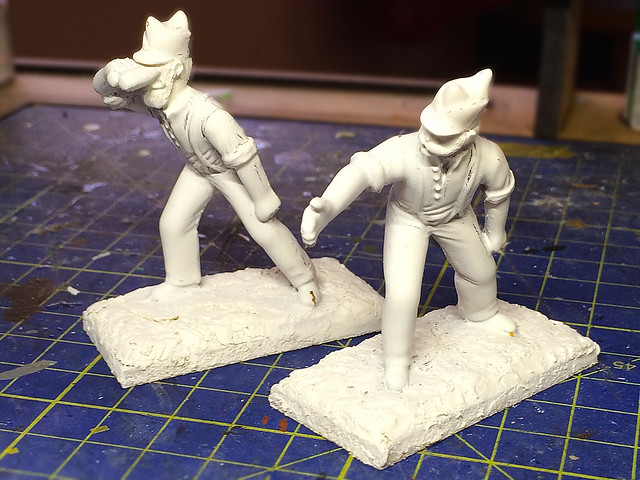
Well, that's the 'hard' work done, and so it's on to the paint preparation process. As before I used some spray on lacquer (Wilko's cheapest) just to smooth out the surface of the figures and help give them some rigidity. Then it was a quick spray of some white automotive primer...


The primer actually serves to highlights any overly rough areas that might need some additional attention. So it's out with the scalpel again to do some remedial work and then another quick squirt of white!

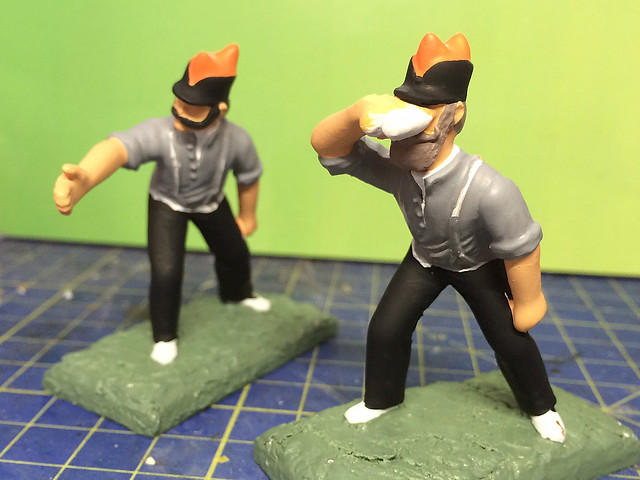
Satisfied with this, I move on to the base painting. As on my test I tend to do the first coat with my Vallajo Model Color paints before moving on to the more expensive and tricky Tamiya paints for the final coat...


The Vallejo colours are a bit flatter but help provide a good base for the bright Tamiya colours, which need help to create a good opaque coverage. I admit this is - by the end - a lot of coats of different types of paint, but you are looking for that 'traditional toy soldier' look which is epitomised by flawless and flat colour coverage. So it's worth going the extra yard to achieve this.

Well, that's these chaps well on their way to being finished so we will turn our attention to the Gattling Gun itself now.

NEXT: Head scratching about the AiP 'Gatling' and how to approach this model.

Monday, 18 May 2015

A Fist Full of Armoured Car!

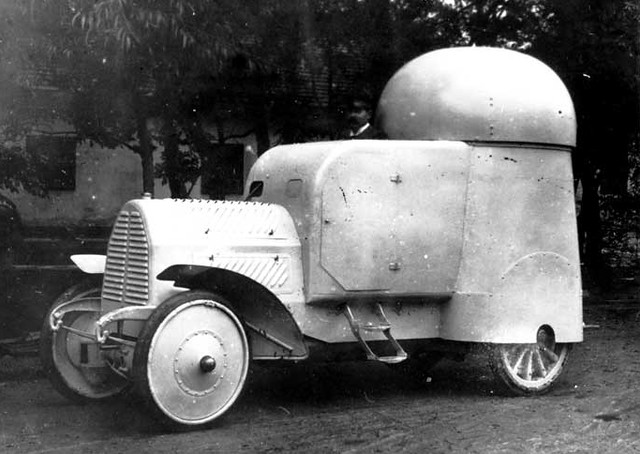
By complete chance I came across a photo of an early armoured car of the Edwardian period which happened to be the very car featured in Sergio Leone classic Spaghetti Western 'A Fistful of Dynamite' (1971)!


This is one of my favourite Spaghetti Westerns, based as it is during the 1913 Mexican Revolution. And I was always curious about the little armoured car driven by the arch-baddie - Colonel Günther "Gutierez" Reza (played by Antoine Saint-John) - and speculated that it might have been a 'made up' vehicle. Well as it turns out - it wasn't...

In fact the car was an authentic design (though still may have been assembled by the film-makers on a modern chassis perhaps) and is in fact a c. 1904 vintage Austro-Daimler armoured car!


Austro-Daimler 4x4 four-wheel-drive Armoured Car (1904). Source: Wikipedia
"It was first demonstrated during manoeuvres of the Austrian army in 1906. It was turned down because Emperor Franz-Josef said it was unsuitable for military use since "it would frighten the horses"." [Source: The History Of The 4 Wheel Drive.]

So there you go. Not only a real vehicle but one that was very advanced for it's day. But's what's more interesting - for me - is that's it's development date is within the target date I have set for my Molatarian Army!

A possible scratch build do you think? :)

Sunday, 17 May 2015

Molatarian Gatling gunners - test figure, complete...

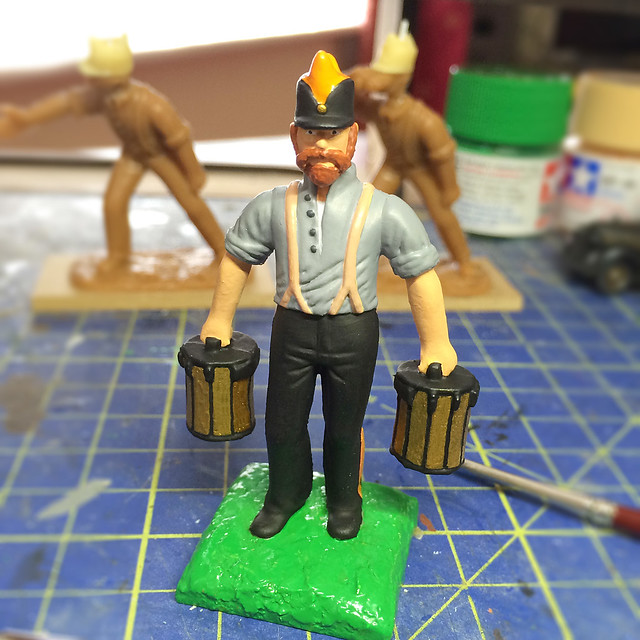
Well, the test figure is complete bar the gloss coat. But it's really nice to get back into the swing of FLW 'traditional' toy soldier painting - I had forgotten how relaxing it is. Then again painting with Tamiya paints can be challenging, they are like treacle and have to be thinned with Tamiya's own thinner for best results...

It was pointed out to me that this chap looks a like Chuck Norris!
The reason I like the Tamiya paints is because they do have a nice opaque quality to them and look a little like enamels, which suits this job (sometimes the Vallejo paints can be a bit thin resulting in a semi-transparent and streaky finish). But I have given up trying to use the the Tamiya for my normal plastic modelling, where the thinner opacity is an advantage for washes and weathering effects.

I chose a colour pattern for the Broadwell drums (Gatling magazines) incorporating 'brass' side panels. I will probably include a brass element on the gun itself with the overall colour of it and the gun carriage being black. I do think the Gatling rather splendid when done in brass!

(I *believe* the use of brass is an indication of earlier models of the Gatling [?]. Certainly by the Boer War the British Army seemed to prefer a fully painted Gatling - perhaps for tactical reasons. I really must buy Osprey's book on the Gatling come pay day.)

Anyway, now I'm happy I remember the process for painting FLW figures I'll get started on the other two members of the Gatling team...


Same procedure, the only noticeable difference being the stance of the figures which will require the use of larger rectangular bases. AiP have chosen to do quite dynamic poses for these gunner, I suppose you could say they are less 'traditional' compared to the style of original Edwardian toy soldiers but they look interesting.

However, there were a couple of problems while doing the head conversions. It turns out that there were a few shortcuts AiP had taken with the sculpting of the heads because they were effectively hidden by the big pith helmet the figures came with. Removing the helmets revealed my chaps had 'skinny' necks and practically no ears!


So now I have fitted my Molatarian hats I will have to rebuild some of the features of the heads. But no biggy as I kind of do that anyway with the extra facial hair I decided to do.

Next: The figures shouldn't take too long so now it's time to start on the Gatling Gun!

Thursday, 14 May 2015

Molatarian Gatling gunners - test figure, undercoat

Moving on to the painting of my Gatling crew test figure I have to solve one minor puzzle - how best to paint the trouser stripes. Better modellers than I might do this freehand, but even if I had the brush skill to do this there is the small matter of the figures arms being in the way!

Once I solve how to do the stripes the rest is pretty straight forward so let's get that out the way...


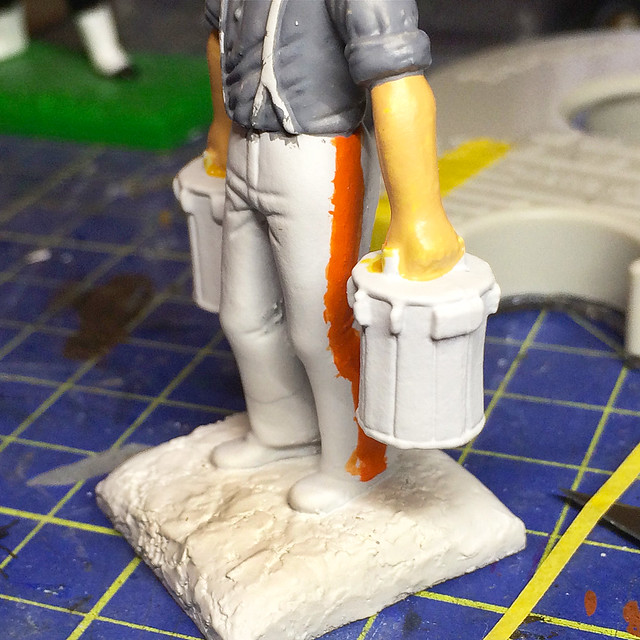
For these undercoat colours I am using my normal Vallejo Model Color paints. I began by painting a broad line down the side of the trousers, not easy with the magazines in the way. Then I cut some strips of masking tape to the correct width of the stripe I wanted...


I can then paint over these which - hopefully - will give me a fairly neat guideline when I peal the tape off.  It should just, then, be a matter of neatening these up with the Tamiya top coat.

Anyway, the stripes dealt with I can move on to the rest of the figure. The more opaque the base coat the more successful the Tamiya top coat will be - the Tamiya paint is tricky stuff so a good foundation coat really makes the job a little easier.


The painting was a little rough, but that doesn't matter so much as I do the real neatening up when I do the top coat. Still it gives an idea of what the finished figure might look like.

Update: Haven given the black trousers time to dry I removed the strips of masking tape to reveal the orange stripes. It sort of worked, a bit rough at the edges but wasn't meant to be a 'finished' effect but rather a guide for when I paint the top coat. 


Wednesday, 13 May 2015

Converting AiP's 1880/1902 British gunners into Molatarian gunners

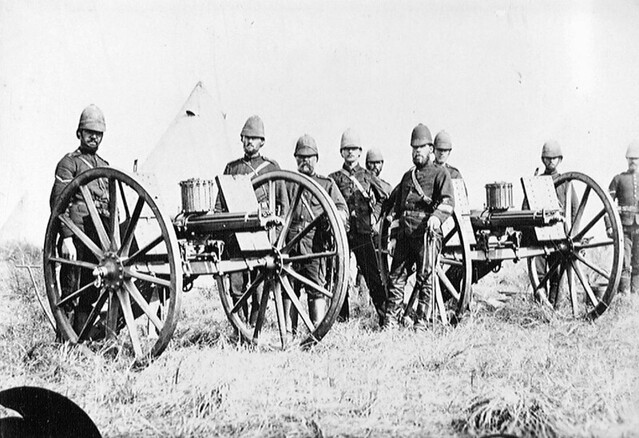
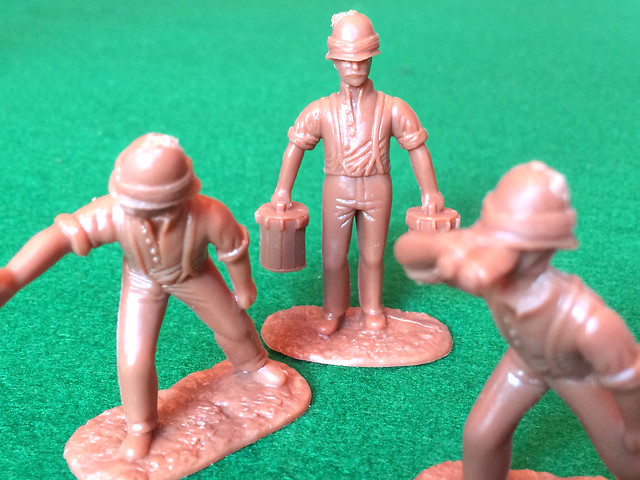
Technically speaking turing AiP's British Gatling crew into my FLW Motaraians is a pretty straight forward conversion. As the 'short sleeve' uniform was pretty universal for artillery men in action during this period the main body of the model can remain unchanged. Only the hat need be modified.

A British Gatling Gun detachment using 'high capacity' Broadwell Drums, South Africa c.1879
These fine chaps are not in 'shirt sleeve' order but are the period templates for the AiP Gatling
set. Turning them into 'Eastern Europeans' is my next challenge. Note the beards!
Source: National Army Museum Copyright
I already decided that the Romanian style 'capela' field cap would be the standard military dress for Molaterian lower ranks and had made a model of this which I then had duplicated by my brother. So it should be a case of a straight swap.

Left: The Romanian 'capela' field cap. I had imagined my FLW creation of Molatero as being an Eastern European nation *near* where Romania lays in our - real -  modern day Europe. So, naturally, my fictional realm would share much of the cultural flavour of what we would call the Balkan Peninsula.

First I have to cut off the British pith helmet, but even this is easy as the soft plastic of the model works in my favour. All that's required is a sharp craft knife and a steady hand and off comes the top of the my soldier's head just above the eye-brows...


One small consideration is facial hair. At the moment the soldiers all sport a very neat and very British looking moustache! But my preference is for rather more elaborate whiskers and I also favour big bushy beards as the fashionable trend for the well dressed Molaterian!

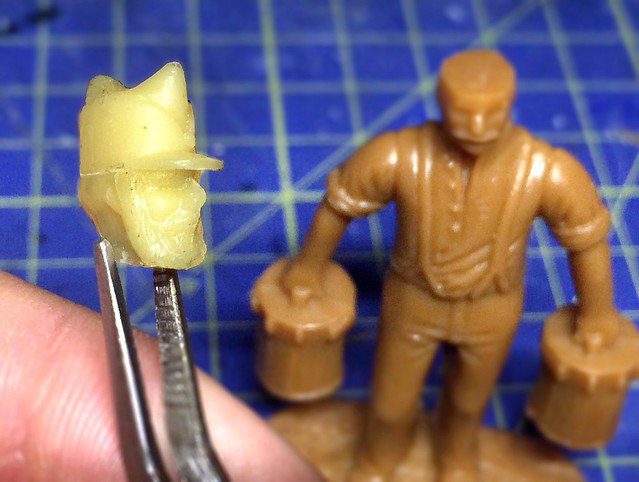
As I mentioned, the capelas are already made - in resin - and I have a bag of donor heads ready to either transplant directly onto the necks of model hosts or I can cut off just the hat and pop that on a head, as I have described above...


A little gruesome, but this Frankenstein approach is an easy and fun way of personalising commercial toy soldiers that even the beginners can employ. It's part of the FLW philosophy to 'do your own thing' and I really like the fact I can create my own mythology (if that's the right word) for my little army, with it's own traditions and fashions. It means that my army is completely unique from that of another FLW enthusiast's creation, even if we both use the same commercial soldiers. (And nobody can tell you that your design isn't historically correct!)

Anyhoo, having super-glued your replacement part onto the host body - and I tend to try and include some sort of securing pin where I can - it's time to fill any gaps with your favourite modelling putty.

And now it's a straight forward mounting and painting job. The process I have adopted - for soft plastic figures - is to apply a couple of coats of spray varnish onto the bare model before adding a colour priming coat. This helps stiffen the plastic, which is particularly important with riflemen, where soft plastic guns are notorious for bending.

Note: It should be remembered that if your soft plastic soldier does come out the box with a bent part (oh er, Matron!) that this can usually be remedied by immersing the part in very hot water for a short time and then pulling the part back into shape. You then quickly dunk the part into cold water, which 'sets' the new shape, and re-hardens the plastic molecules.


A nice big bushy beard! Nothing say 19th Century more than a extravagant
display of facial whiskers...On a man of course, otherwise that just says 'carnival'!

Having allowed the varnish a good amount of time to dry properly you can then add the colour priming coat of paint. Colour choice for primer vary but as my Molatarians are rather brightly coloured little chaps I prefer to start with a white primer - usually Hycote Matt White aerosol - as that makes primary colours 'pop'. It can be a little tricky painting dark colours onto white as you may have to apply a couple of coats to ensure opaqueness but it's worth it.

Hard to tell but the figure has now had two good coats of acrylic
gloss varnish. This not only helps stiffen the soft plastic but also
somewhat smooths out some of the rough edges.
The white primer applied we now have a nice bright canvas onto
which we can apply the colour coats.

And now your little soldier is ready for painting. I'll pause here, as I'm chomping at the bit to make the same amount of progress with the Gatling Gun piece.

Next: Tamiya paints (it's like painting with treacle)!

Monday, 4 May 2015

AiP's 'Gatling Gun' Set - Identifying the guns.

In the end the fact that Armies in Plastic did not include any kind of historic description of the optional gun types that it includes in it's Gatling Gun set was too much for me and I went hunting around the internet for clues.

Disclaimer: First off, I am NOT an artillery expert, and neither do I know exactly what the AiP model designers had in their minds when they produced the set. So what follows is sheer speculation on my part, but I have tried to find the best historical match I could for the AiP gun types in the set. Please feel free to disagree with me.

Gun No. 1 - A British Boer War 7/9 Pounder?
Despite me not being an artillery expert I feel that I have to disagree with AiP on the designation of it's 'muzzle loader' barrel. Although they do not give a description of this gun as contained in the Gatling Gun set they have issued this gun in it's own separate set and described it as being a British '7 Pounder'. If you look up British Boer War era 7 Pounders you may agree with me that this barrel looks too big to be a 7 Pounder so I have suggested here my own identification...


Despite the fact that Barrel No. 1 looks like a muzzle loading 'cannon' I went out on a limb and suggested in my early post on the AiP set that it was supposed to be - in fact - some sort of early 'screw breech' loader. It looks like I was wrong and despite the widespread deployment of breech-loading artillery by this time (c. 1899) the muzzle loader, it seems, had not completely disappeared!
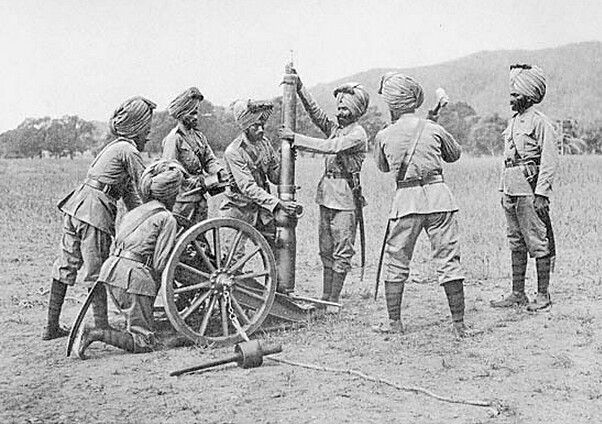
Sikh gunners assembling the RML 2.5 inch 'screw gun', circa. 1895.
This is more like the usual size of carriage of a 'mountain gun.
"In 1877 Colonel Frederick Le Mesurier of the Royal Artillery proposed a gun in 2 parts which would be screwed together...The gun was a rifled muzzle-loader. Gun and carriage were designed to be broken down into their basic parts so they could be transported by pack animals (4 mules) or men. The barrel and breech were carried separately, and screwed together for action, hence the name "screw gun"." [Source: Wikipedia.]

Although these screw-gun variants were intended as fairly light 'Mountain Guns' - their disassembly allowing portability - there were some examples of larger 'medium' field calibre. I strongly suspect that the AiP model is one of these, and in particular I think it may be a 9 Pounder 8 CWT 'screw gun' mounted on an  field carriage...

9 pdr. 'Screw Gun'. Source: The South African Military History Society
According to The South African Military History Society this was an obsolete piece of equipment that was deployed with Colonial Forces (local forces serving on the British side during the Boer War). The Natal Volunteer Hotchkiss Detachment had one 9 pr at the Siege of Ladysmith.

This fits in nicely with the theme of AiP's 'Boer War - Gatling Gun - British Royal Artillery in "Shirt Sleeve Order" - 1899-1902' set. And modeller's would relish the idea of creating a scale re-enactment of the Siege of Ladysmith (read the Wikipedia description of the siege via this link)!

However, conventional one-piece rifled 9 Pounder muzzle loaders were also in British Serviceduring the Boer War. So the AIP muzzle-loading barrel might also be intended to be one of these...


Conventional RML 9-pounder guns of the Northwest Mounted Police (NWMP)
Artillery Detachment, 
D & H Divisions with , Fort MacLeod, Alberta, 17 Dec 1890.
(Library and Archives Canada Photo, MIKAN No. 3574417)
Wikipedia reference for the (non-screw) British RML 9 pounder 8 and 6 cwt guns - these guns were obsolete by the Second Boer War (hence guns like it being relegated to Colonial forces perhaps). So if modelling the First Boer War of 1880-81 or colonial forces, or even pieces captured by the Boer from the second 1889 war this AiP barrel configuration is the most appropriate.

Gun No. 2 - A Boer 7.5cm Krupp L/24?
The second artillery barrel in the AiP set is obviously a proper breech 'block' loader. Now it's a very interesting design as the British breech loaders of the period were - it seems to me - still of the older 'screw breech' (round shaped) mechanism. So this 'square' breech may be another example of how the Boer Republican Army actually overtook the British technologically in some areas - as I suspect that this barrel may be a 7.5cm Krupp L/24!
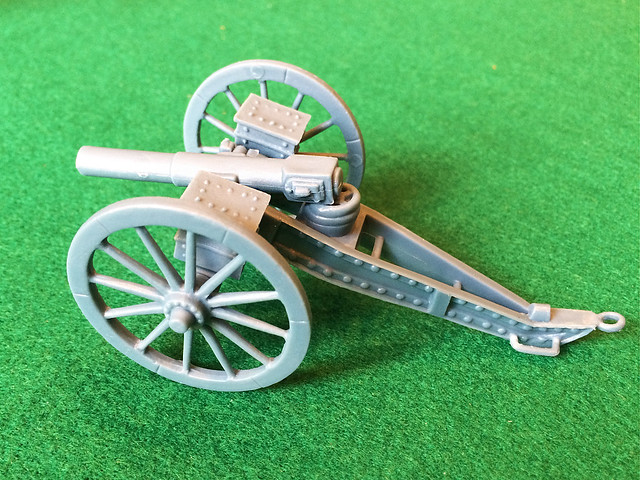
Ignore my erroneous addition of the Gatling Gun 'boxes', this
artillery piece should be fitted with the crew seats instead. 
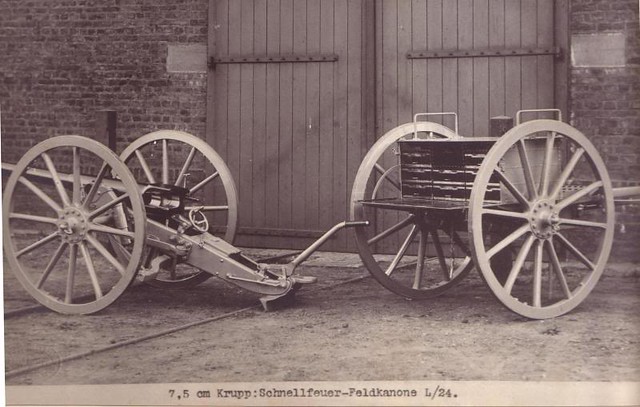
Just as the Germans supplied the superb Mauser bolt-action rifle to the Boers - superior to the British rifles of the time - it seems that the Boer also had the benefit of a small number of Krupp Field Guns. According to the Royal Australian Artillery Historical Company web site's artillery register entry for the 75 mm QF (Schnellfeuer-Feldkanone L/24) field gun...

"The assembly was known for its reliability and ease of movement, seldom requiring more than basic maintenance. The brass cartridge cases were filled with “ballistite” smokeless powder, and coupled with the gun’s small carriage and low mounting, made it ideal for Boer camouflaged gun tactics...Although outdated by European continental standards at the turn of the century, in Boer hands this gun was superior to the British 15 and 12-pr BL guns fielded against it. "

So this would be a nice model to pit against the British 9 pounder were you modelling a Boer army.

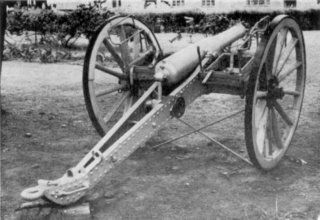
Photos of this gun from the period are a little blurry, but it looks to me like there is no additional carriage furniture used, so I would be tempted to trim off the fixing stumps which AiP has provided on the axel for the mounting of the crew seats. Here's the best quality photo I have found which, I think, illustrates the configuration of the Krupp gun on it's carriage...

Photo source: Victorian Wars Forum - www.victorianwars.com
Again, like the (alleged) 7 Pounder, the AiP 'Krupp' barrel looks a little chunky compared to the real thing. This may be to ensure that the soft plastic piece does not warp or bend, which is a nasty feature of soft plastic models.

I think this identification is pretty safe.

Gun No.3 - Boxer Dragon Gun?
Now, the identity of the last field gun option in the AiP Gatling set is probably the easiest to guess and yet hardest to confirm. Obviously the Dragon design of the barrel seems to be a clear indication that it is Oriental in origin and bearing in mind the historical military campaigns that AiP cover in their plastic soldiers range this would further narrow down the origin of the gun to the Boxer Rebellion (1899-1901).

Again, the Gatling boxes are not appropriate accessories.
AiP already do several sets which cover this theme and as the Gatling Gun and other artillery pieces seem relevant to this period and conflict (used by the European Powers) then it seems logical that this barrel is included with the set.

Unfortunately, in this case, I have been unable to find a reference photo from that conflict which positively identifies this particular style of gun. Neither a web search or by consulting Osprey's Men at Arms No. 95 'The Boxer Rebellion' turned up a picture of a 'Dragon Gun'.

Indeed the only photo I have come across of Imperial Chinese troops with artillery is one which shows them remarkably well equipped with some Krupp breech-loading field gins! [Men at Arms 'Boxer Rebellion', page 25.]

Still, it's a beautifully evocative model and you can imagine such a cannon in the use of the -normally - obsolescently equipped Boxers. It would make a wonderful diorama.
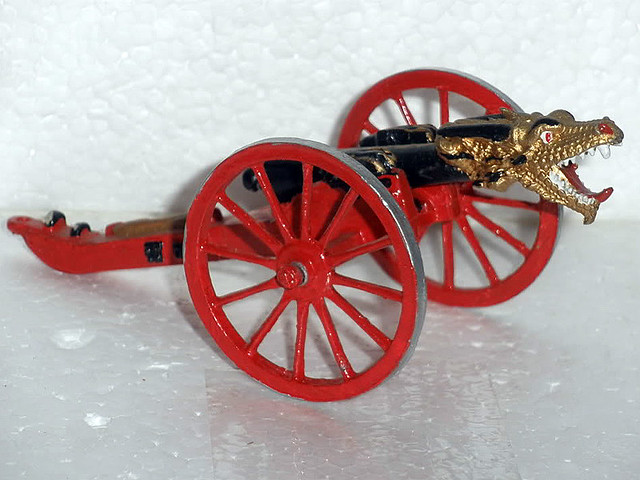
Unfortunately the only picture I could find on the web of a 'Dragon Gun' was this
spectacular metal model. Some nice ideas for painting the AiP gun!
Source: The Toy Soldier Forum
So, I'm afraid I will have to admit defeat on this occasion (for the moment) and simply say that the design of this gun is at least in keeping or the spirit of the Boxer equipment of the time. But if I do come across (or if you know of) a piece of reference for this amazing field gun I will post up teh information at a later date.
Sunday, 3 May 2015

Reinforcements for the Grand Army of Molatero

To help me jump start my re-introduction to the world of Funny Little Wars I decided - as it was pay day - to treat myself to something a little unusual. I reacquainted myself with some of the rough notes I made outlining how I would like a Molaterian army to develop and picked out a little stand alone project that would give me something modest - but useful - to work on first.

Bearing in mind my target era - roughly 1880 to 1905 - for the development of my army I went looking for something of that period that would be a fun, and what could possibly be more fun than a Gatling Gun?


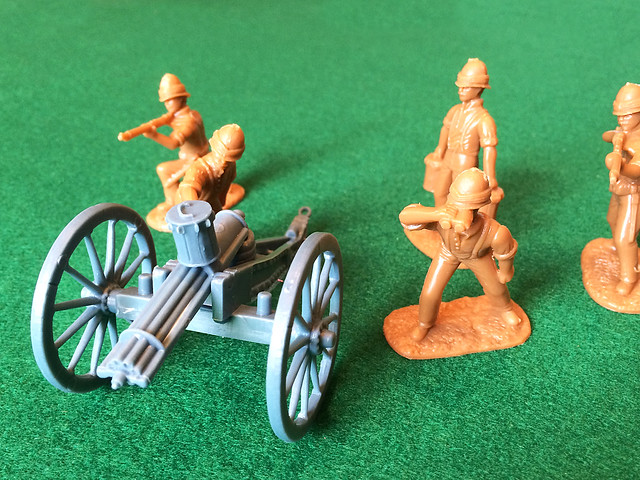
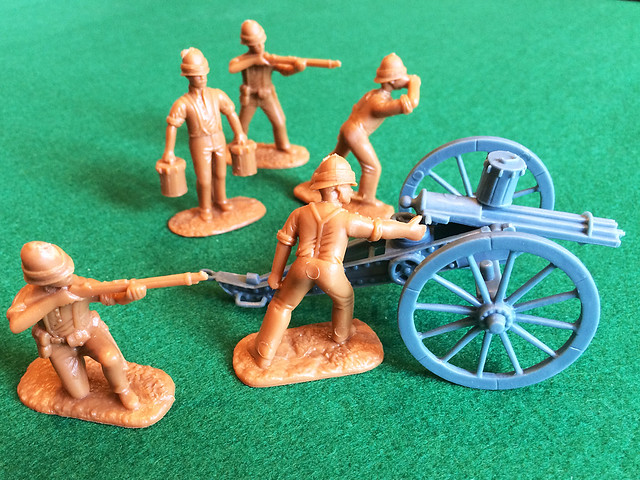
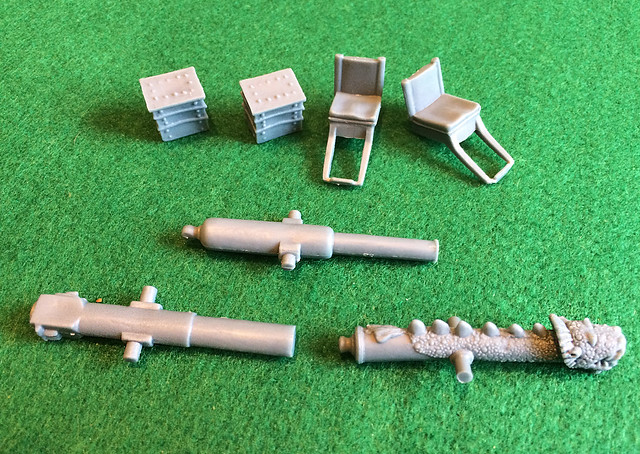
Armies in Plastic do a very nice box set which includes a British Army pattern Gatling Gun on a field carriage mount and five associated crew members. It's an interesting set as it includes several gun options so that you can vary the appropriateness of the piece depending on which period and campaign interests you. For example, it includes a pretty spectacular looking Chinese bronze 'Dragon' cannon barrel should you wish to model a 'Boxer Rebellion' gun team.

The AiP 'Gatling set' gun in it's many guises. You receive four different barrels and two different
types of carriage furniture to make up various types of field gun for different periods. 
These variations were unexpected but it now seems a shame to waste the additional options (I suppose I could always scratch build additional gun carriages), but I wonder why these extras were not mentioned in the set description or even on the item page on the AiP web site?

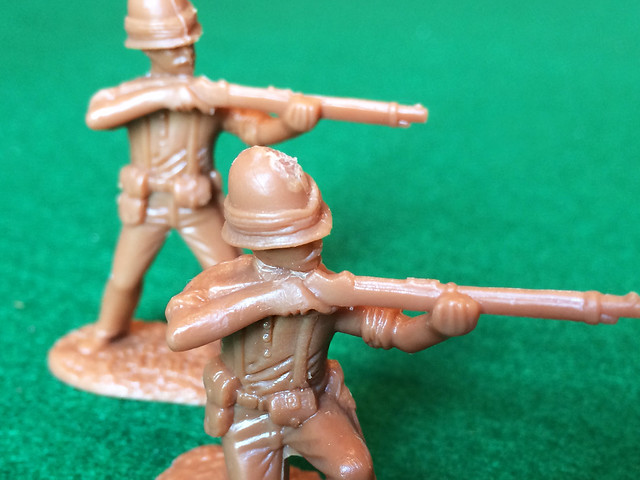
Anyway, the Gatling box set includes - aside from the gun options - five crew in British Army 'Shirt Sleeve' order intended to represent a gun section from the Second Boer War (1899-1902). Three of the figures are the actual gun servants and two are supporting riflemen armed with Martini-Henry rifles...


From the point of view of my Molatarian army the shirt sleeve order is perfectly fine (I have already  produced a heavy artillery section in this style of outfit) but the tropical pith helmet and Henry-Martini rifles are less appropriate. So I will have to do some head changes and maybe ditch the riflemen.

Quality of the Armies in Plastic Gatling set
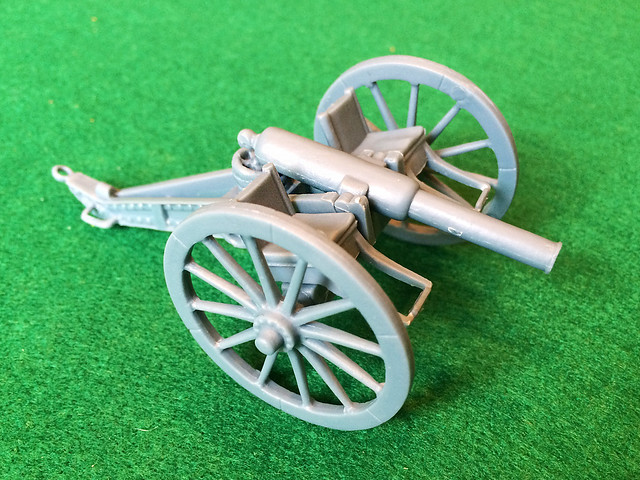
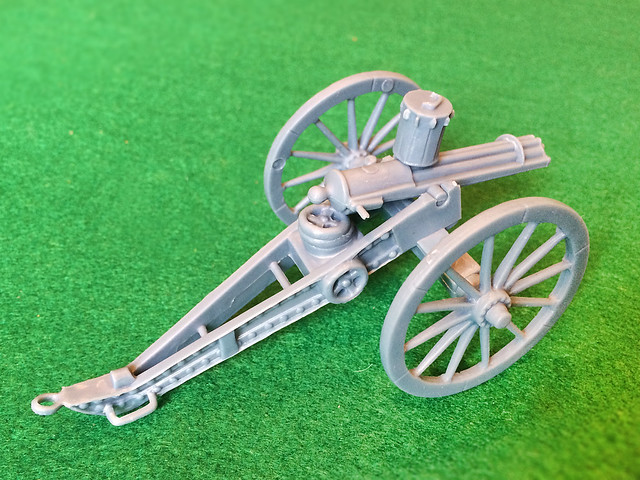
Well, I am pleased with the subject of the set and the crew figures are of a good quality but the gun itself is perhaps a little less satisfactory. The problem arises when you assemble the gun - in whichever option you prefer - as you will find that the barrel suffers from a rather unfortunate droop...

Annoyingly, because of the way the barrels fit onto the carriage, they all display
a very obvious downwards slant and you cannot adjust this without modifying
the carriage furniture.
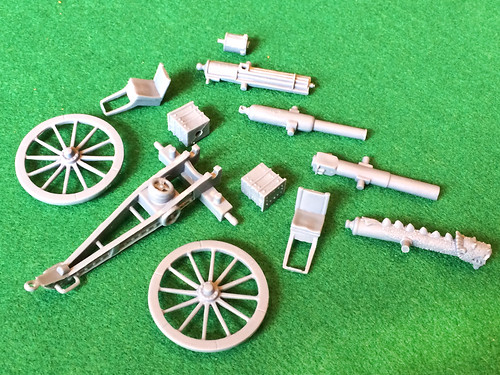
The problem is the gun carriage's elevation wheel - the screw that raises and lowers the vertical aspect of the barrel for aiming. This sits just under the rear of the barrel and in the AiP model it is a fixed moulded feature which is essentially 'too tall' and so the barrel is forced to point slightly downwards on it's axis. You can see the problem in this photo of the breech loading barrel configuration, the breech block rests on the elevation wheel and so the barrel points down...

Now, because the AiP models are moulded in fairly soft plastic there is an obvious and quick remedy for this. The elevation wheel consists of what looks like three circles of plastic - one on-top of the other - with the topmost having the moulded detail, so you could just carefully cut off the top wheel, trim off the 'wheel' underneath it and then glue the top wheel back on. This should be sufficient to raise the gun elevation.

Aside from this the gun detail is perfectly adequate, the barrels are nice and straight (thankfully) and the carriage and wheels enough detail to look the part. I can't speak of the authenticity of the design of the carriage and it's associated furniture options as I'm still research exactly what they are. The fact that AiP didn't include even the most cursory instruction sheet in the box or some information about the assembly options on their web site is a little frustrating.

Along with the Gatling barrel, carriage and magazine you get the above extras.
The extras you receive - aside from the barrels I have mentioned - are a set of two boxes or chests and a set of two crew seats, both of which fit snugly onto the carriage left and right of the barrel on the axel spar. As I have not - as yet - been able to exactly identify the actual gun barrels I cannot be sure of what set of extras go with what barrel configuration.

I *believe* the boxes are supposed to accompany the Gatling Gun and the carriage seats are supposed to go with the muzzle loader or the breech loader - but you do have the option to leave these accessories off all together for a less cluttered carriage, as I have done with this Gatling set up...

The Gatling Gun, without any carriage furniture. By Googling the history of the
gun I think I am satisfied that the 'box' accessories are meant to accompany this
gun, though I haven't discovered what the boxes are yet (ammo boxes perhaps).

The artillery pieces may - or may not - be some sort of British '12 Pounder' guns and I have seen some pictures which show these guns with the crew seats attached - the seats are designed to point backwards, by which I mean that when seated the crewmen are say facing the down the barrel and 'backwards' as they are being towed (if that makes sense). Oh, like this...

A British 12 Pounder? This maybe a muzzle loader or maybe an early
breech loading design, though there is an absence or breach detail.
Naturally you can do what you want with the Chinese gun - I can't find any matching historical reference for this though I imagine it is some sort of Chinese barrel fixed onto a European gun carriage. I seem to remember that during the siege of Peking the defenders cobbled together some sort of 'Frankenstein's artillery piece' made up of pieces of different guns, this Chinese gun may - or may not - be something like this.


I apologise that my knowledge of British field guns of this period is so shockingly vague. I will be sure to do some proper research before I put the model properly together.

Conclusion - What do I think of the AiP Gatling Set?
I'm happy. At £8.50 I guess you could say the value maybe up for debate - the model is plastic after all - but when you look into the available market options (which are mostly white metal) then the AiP Gatling Gun does look a little more reasonable in it's price mark.

I'm still disappointed that AiP didn't deem it suitable to include - at the very least - a small sheet of assemble instructions given the options available in the set. I mean, just how much would a hand drawn set of photocopied instructions set them back? But if you are buying such a niche product I guess they feel you are either the sort who relished the extra historical research or is someone who knows his onions in the first place!

There is some niggling moulding damage, particularly on the figures, which will have to be cleaned up but overall there isn't a whole lot of flash and things like barrels are not bent (which is the bain of soft plastic soldiers). All in all I am pleased to have all the various options and this in itself was such an unexpected bonus that it has made the AiP set a very satisfactory purchase.

(And the Chinese gun is simply delightful!)


Next: Modifying the crew for Molaterian service.