Showing posts with label Britains. Show all posts

Wednesday, 16 October 2013

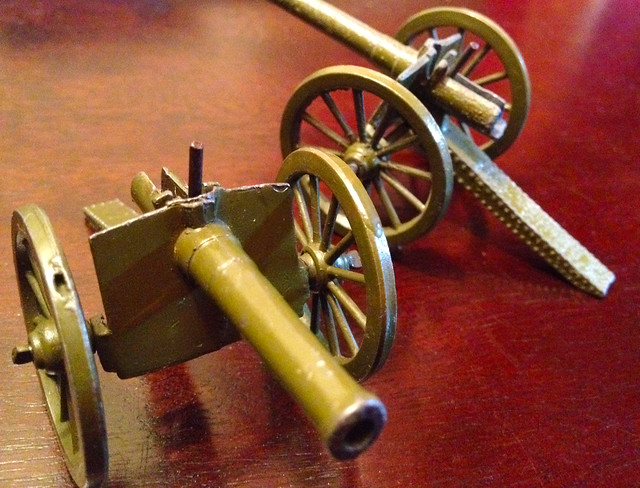
Britains No. 1263 '12 Pounder' light gun


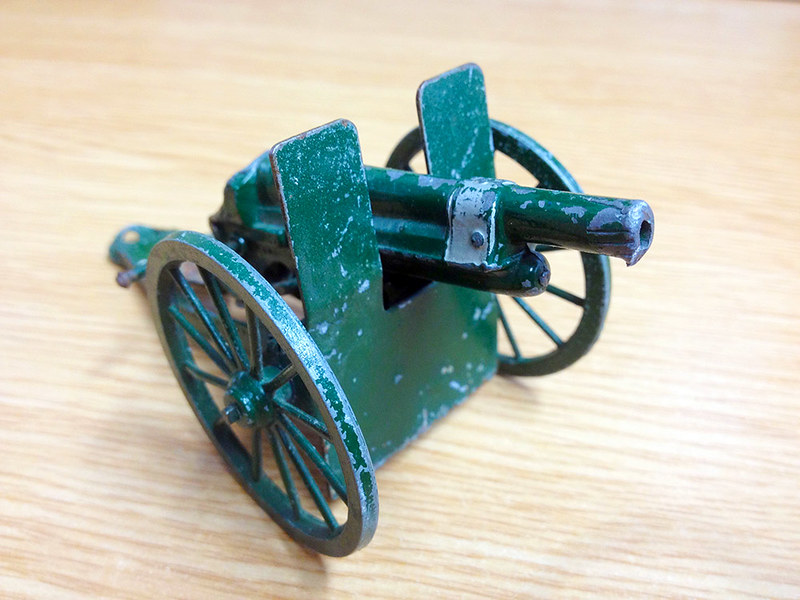
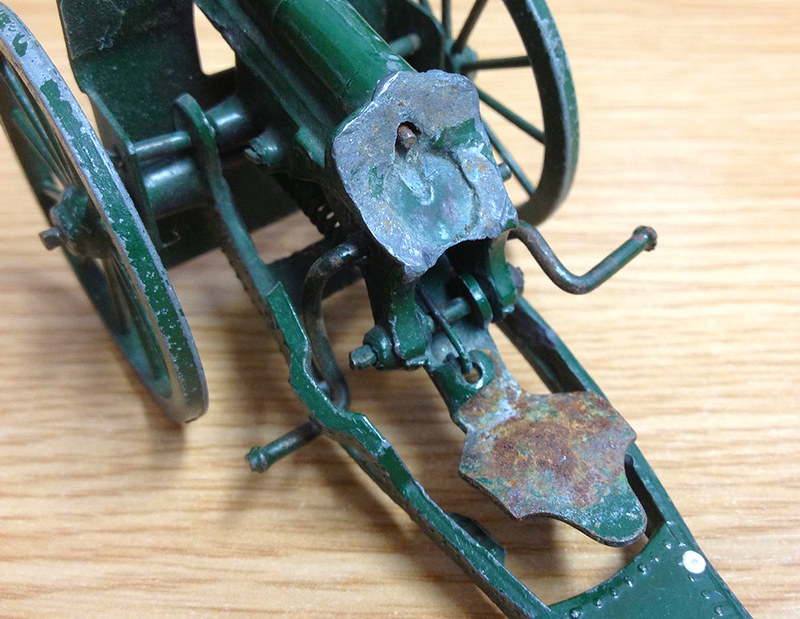
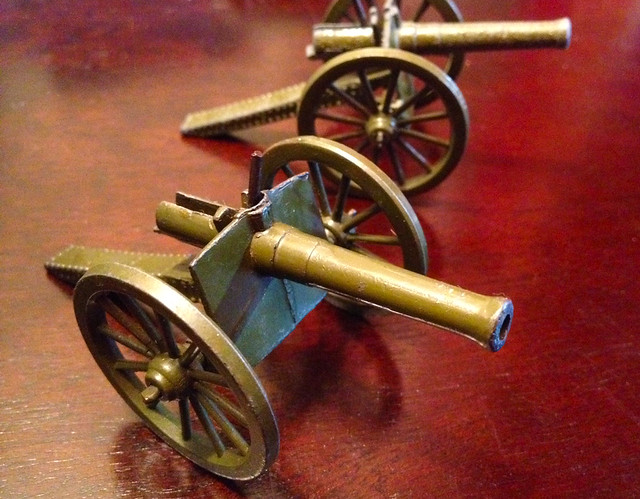
One of those fortuitous eBay finds, these two Britains No. 1263 '12 Pounder' light field guns. Now I was already undertaking my own conversion of a Britains 25 Pounder in order to make just such a light - or 'mountain' - gun. However, this bit of luck negates the necessity of all that hard work.*

They were going for peanuts - another of those sales that had been badly and misleadingly described and so wasn't picked up by the ardent diecast collectors - so I snapped them up immediately (despite having already gone over this months toy budget).

The toy is a pretty simple one and has neither the breech loading nor adjustable elevation of the Britains No. 1201 18 Pounder or the No. 1264 4.7 inch Naval Gun. It uses the spring 'pull back' lever system similar to Britains 25 Pounder gun (and so, in effect, is a muzzle loader). It's also relatively small - being roughly half of a 1/32 figure's height - which is understandable as it is, after all, a 'light' gun.

Historical note: I am not entirely sure what the basis for this model is - or was. It looks to me like an attempt to replicate an early breech-loading piece, a very early version at that as it has no recoil suppressor and is mounted on a cannon carriage. The closest historical piece I can find that is similar to the Britains toy is perhaps the British 1859 12 pdr. Armstrong Gun...

The 20 Pounder version of the Armstrong breech loader. Although these guns had no
shield fitted I no reason why at some point one might not have been retro-fitted.

EDIT UPDATE: My brother has done a bit of research and found a artillery piece which seems to fit the bill as the inspiration for this Britains toy gun. It's the 1892 Ordnance BL 12-pounder 6 cwt. In 1899 a primitive recoil system was rigged but in any case it had a short service life - seeing moves to replace it as early as 1901. Again, the problem is that this gun didn't have a shield in any reference I have been able to find so I must conclude that this *may* have been a bit of creative thinking on the part of Britains (unless anyone out there knows any different?).

BL 12 Pounder 6 cwt in use with the RHA in 1897. Source: Wikipedia

I have it in mind that these shall constitute the light artillery support for my Molaterian Jaegers (they being my designated mountain warfare specialists) and will complete my modest collection of light, medium and heavy artillery for my army, along side those Britains guns I have already collected.

They are well played with but functioning and with a bit of care and attention will provide good service.


*While I won't now need my 25 Pounder conversion for the role I had intended it for I do have a new role for it, so this conversion will continue but in a new guise.

Tuesday, 2 April 2013

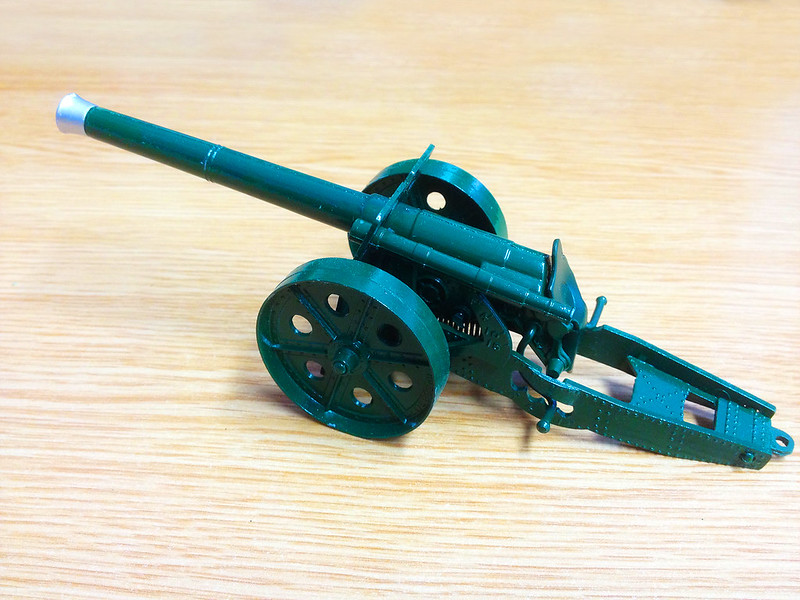
FLW - Second Britains' 4.7 Naval Gun arrives

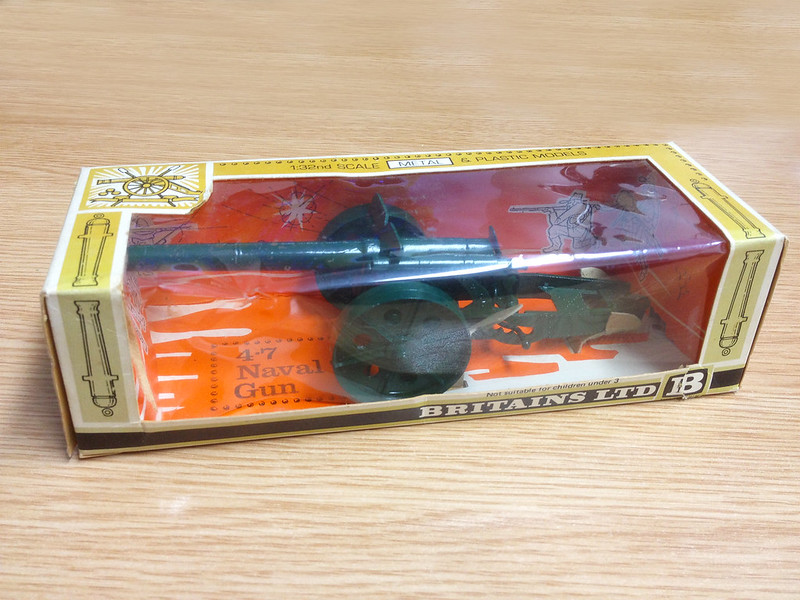
OK, I admit it - I don't understand the vintage toy market! Today I received my second classic Britains' 4.7 Naval Gun, another eBay bargain. This particular example comes boxed, not that that really maters to me as I intend to use it as a toy, but it's nice to have the original box anyway.

What was more useful to me was that this item was described as 'pristine' and despite having learnt to take eBay descriptions with a pinch of salt now I found that when it arrived it did actually look almost new. Only one small chip in the paint as far as I could see, and bright and shinny and new looking otherwise. I don't think it was ever played with by the looks of the breech.

In superb condition, this example of the '4.7' seems to be a late production
model (from the 1970s perhaps). It is lighter than my older 4.7, and the
construction is modified and less of it seems to be one-piece cast.
As I said in my post about my first 4.7 (which is play worn) I cannot understand the wildly fluctuating prices that these toys garner on eBay. I picked this one up with a box in near mint condition for a nice sum, and yet I know I could pop it back on eBay straight away and get double the price or more - it seems to be purely down to luck sometimes (and how good the seller is at describing and titling their item - as I only found this item with a more general 'diecast toy' search rather than the more sought after 'Britains 4.7 gun' search term).


Anyway - bemusement at eBay aside, this is a wonderful second gun for my Funny Little Wars heavy artillery battery and once my Crescent 5.5 inch gun conversion is done this unit will be complete..Aside from crew that is.

I am still struggling with my medium gun battery - all the Britains' Royal Horse Artillery guns (No. 1201) seem to have disappeared from eBay at the moment. But I will bide my time.

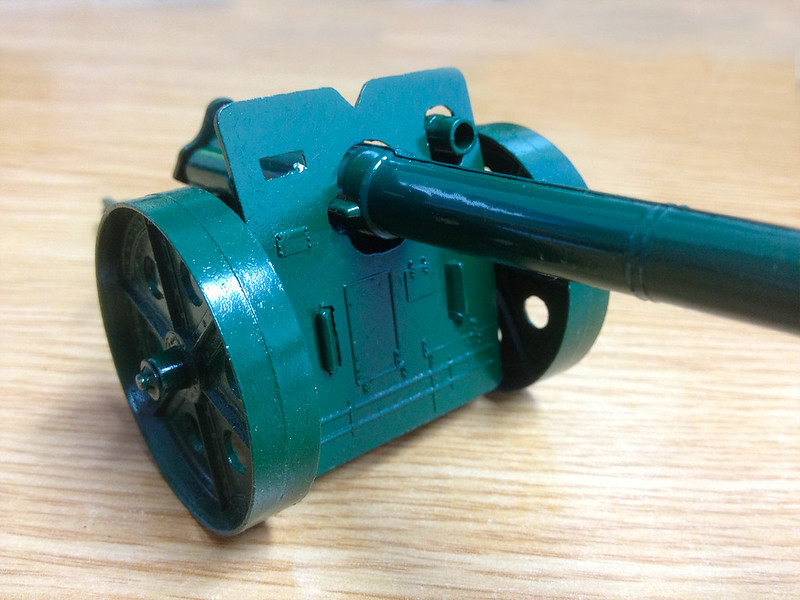
There is added detailing in the gun shield in this (presumably) late production
model and you may just be able to make out the split in the two-piece barrel.
I believe my other 4.7 has a single cast barrel. The lightness of this toy
makes me think it may be cast in aluminium?
Postscript: One of the things I have been trying to nail down since I started this side-interest in diecast toys is exactly what green the Britains' toy gun are. I want to know so I can repaint the ones I am renovating.

I've looked at a few different greens in the Humbrol enamel range but have found that Britains seems to have changed their shade of green over the years. The new gun (above) seems to be almost exactly Humbrol's No. 3 Brunswick Green, but my older 4.7 is a much more olive and darker green.

Saturday, 30 March 2013

New arrival - Britains 4.7 Naval Gun

My first Britains' 4.7! Patience on eBay paid off, though I still don't understand why the price of these toys varies so wildly. I picked this up for a few quid, yet elsewhere what appears to be the same gun is going for twenty or thirty pounds.


It did have some rust spots and chipped paint, but I treated the rust patches with some Hammerite Krust. You just paint this stuff onto the rust spots and in 15 minutes it acts chemically with the rust and becomes black and hard. These areas can then be cleaned up or painted over with a top coat - I decided to preserve the toys original state and just polished these spots up and will finish them off with some light engine oil to prevent any reoccurrence of the rust. I'm really impressed with it.

I hope to nab a second, I have several on my eBay watch list and I guess I just have to be lucky.

Friday, 22 March 2013

Renovating a 'spiked' Britains' 1201 gun - Part 1

Spiked - 'rendering a muzzle-loading gun inoperable by driving a nail into the touch hole' [Wikipedia]


In breech-loading times this act of rendering a gun inoperative - usually to prevent it falling into enemy hands - was achieved by obstructing ['plugging'] the barrel and then firing a charge. The resultant explosion burst or 'spiked' the barrel.

When I bought this Britains' Royal Horse Artillery gun (No. 1201) toy on eBay I was surprised that I picked it up so cheaply, but I can't imagine that others knew something I didn't when it turned out to be a bit of a lemon. What I thought was a simple obstruction in the barrel turned out to be a determined attempt to spike the gun!

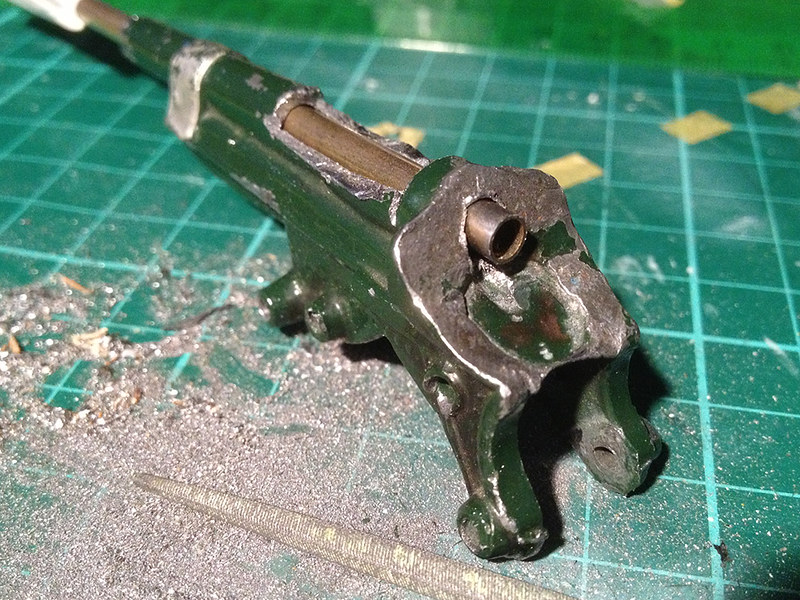
For whatever reason the original owner of this toy had driven - or glued - what I thought was a metal rod into the barrel. Despite all attempts it simply wouldn't budge and so in the end I had to resort to very drastic measures with my Dremel and having done so I was shocked to discover just how good a job had been done of breaking this lovely model...


I could not understand why someone would do such a thing, but my daughter quipped that perhaps some long suffering parent had finally tired of being assaulted by 'little Jonny's' barrage of match sticks and so resorted to capping his mischievous fun!

Anyway, having performed my surgery - once I determined how far the blockage extended up the barrel - I cleared not one but several metal spikes which had rusted themselves together...


Well, having taken this model appart I now had to think of a way to put it back together again. As well as the obstruction it seems like the toy had been stepped on as well - talk about adding insult to injury! The barrel was slightly bent, as was the gun carriage and one of the wheels, and the muzzel was deformed.

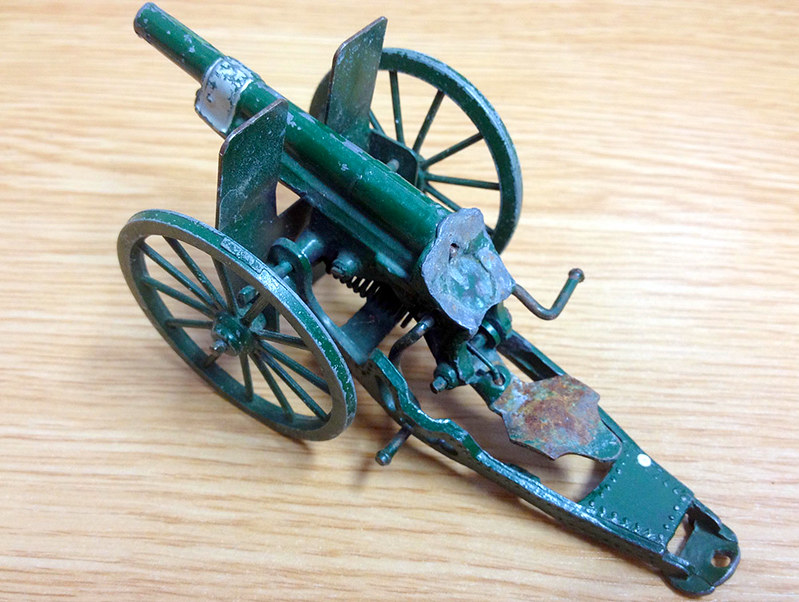
The extent of the damage done to this 'lemon' 1201 now clear I decided that a full renovation was in order. Obviously this toy would never again be considered a collectors piece after my butchery, but I hoped at least I could make the toy operational again.

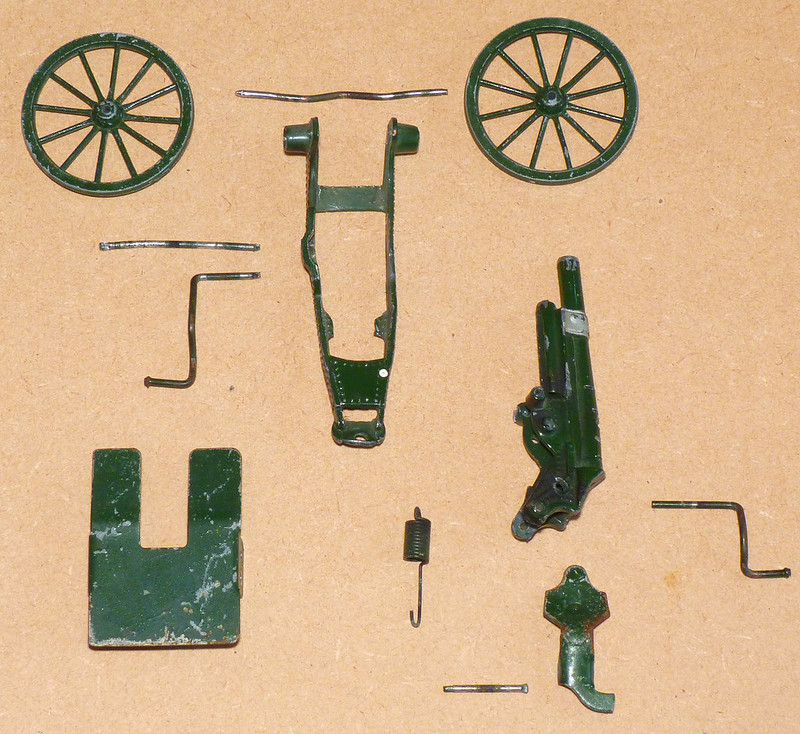
Above: I clipped the retaining pin heads and disassembled the 1201 before I
sawed my way through the rear of the barrel. Happily this turned out to be
quite easy and would allow me to strip the paint off the parts effectively.


I supposed that my rebuilding would involve two phases, first I would have to repair the barrel so that the to could operate again and then I would have to conceal my work. The easiest way to do this I reckoned was to strip the paint off the various parts and then to repaint the gun once I had performed my work.

First thing was to start to repair the bent, gouged and rusty inner barrel and the best way to do that - I thought - was to install a barrel sleeve or inner tube of some sort...


I bought a hollow brass rod from my local model shop (80p) and enlarged the existing barrel bore until it slid snuggly inside. The diameter of my new inner barrel matched the diameter of Britains' original bore. This new inner barrel gave me a smooth and straight barrel again and to finnish off all I had to do was to trim off the excess length at the mussel and at the breech.

Next I had to fill in the hole I had made in the upper barrel. There are various materials I could use - my trusty Milliput which is design to work with metal (among other things) or I could go the whole hog and try something like Evo-Stik's Hard and Fast Metal Epoxy Putty. The Evo-Stik is a true metal putty so would complement the die-cast of the toy very nicely, but the down side is that it dries within 10 minutes and can't be smoothed so easily (though it can be filed and sanded when dry).

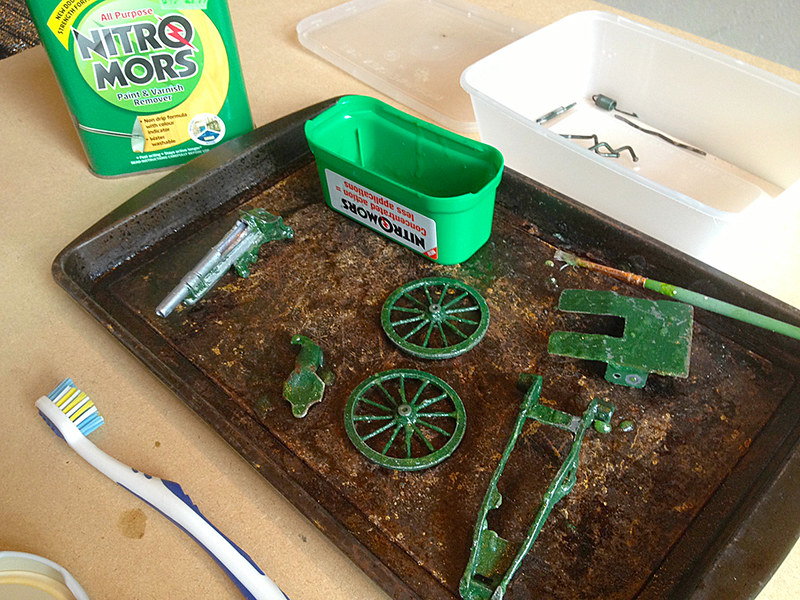
I am more comfortable with Milliput, it's slow hardening time means I can tinker with smoothing the surface to get the ultimate match to the barrel. It's not as hard as the Evo-Stik, but Milliput is hard, and it's shock absorbant. So Milliput it is - but first  must strip the paint off my toy and for that I brought out the big guns (pun there for Tim!) with Nitro Mors stripper...

Above: You can't quite tell from this photo but the Nitro Mors is bubbling
away nicely here as the thick Britains' paint slowly lifts off the toy. (Tip: Ventilation!)


Having stripped the parts down to the original metal - more or less - I'm ready to start my re-building...


In Part 2 of this renovation I put everything back together again and finish off by repainting the gun. Hopefully the finished toy won't look too much of a disaster,

Sunday, 10 March 2013

eBay bug - Britains' Royal Artillery Gun

I seem to have caught the eBay bug (I'm a late starter) and have been keeping an eye out for any of the Britains artillery toys for my Funny Little Wars project. I'm not entirely sure if this was a bargain, but I did really want one of these (No 1201 Royal Artillery Gun) so I felt it was £6 well spent...

As you can see it does have a spot of rust, but I don't think it's in that bad nick. £6 seems OK to me as there are some stupid prices being asked for these...

There again I have over-spent big style this month and am waiting for the wife to say something. The only way I can think of redeeming myself is to put my old Scalextric stuff that's been gathering dust in the attic for years on eBay to fund my new addiction!


Second 1201 Gun arrived - photo studies
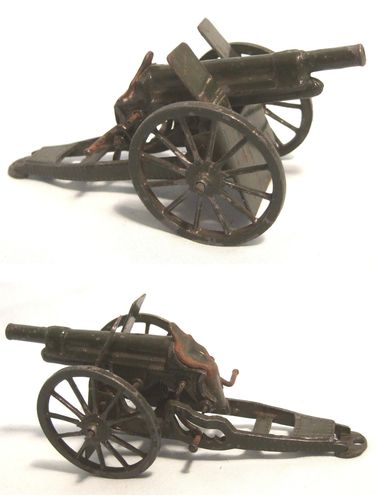
I managed to pick up a bit of a clunker at a ridiculously low price (due to being badly titled on eBay I think), it actually cost more in postage than to buy. This poor thing has obviously see a fair bit of action on the play room floor and the mechanism is shot (excuse the pun) and the wheels and barrel are a little crooked. But it seems to me to be a good 'fixer upper'.


UPDATE (again!):
Two things - first I think you can see from the last photo exactly why the gun will not fire - there is an obstruction in the breech. So I have to remove this (it's pretty tightly stuck whatever it is), once this is done the gun *should* fire as intended.

Talking of which, I tracked down the original instructions:-

Box: The latest pattern Royal Artillery Gun Patent No 34218/30 FIRING Pull back breech cover, place shell in breech, leaving about quarter inch exposed. Depress lever on right to fire. The Gun is also designed to fire a shell by an Amorce Cap. Pull back breech cover as for ordinary firing, place Amorce Cap in circular depression, insert shell and depress firing lever. Note, the gun is more powerful and realistic by this method. (Amorce Caps are not supplied with the gun). R.A. Gun No 1201 Copyright Models Manufactured by W Britain in London, England Trade Mark Regd No 459993

Wow! I gotta try firing with a cap! :)