Friday, 29 January 2021

Poor man's 4.7 Naval Gun Part 6

 Now here's a blast from the past! The continuation of a long 'dead' project, reanimated due to my new 3D printer acquisition...

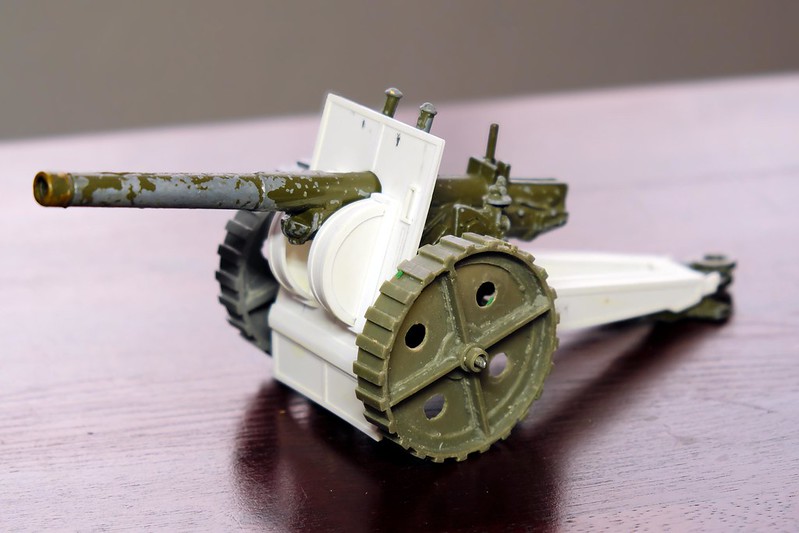
It all began way back in 2013, when I was first beginning to dip my toe in the murky waters of scratch-building model conversions. My intension was simple - I could not initially afford to buy the classic Britain's 4.7inch Naval Gun model as the prices were stupidly high on eBay, so I decided to see if I could make a cheaper 'look-a-likely' artillery piece for my Funny Little Wars collection.

Above: Britains' 4.7 Naval Gun model the classic FLW artillery
piece. Now out of production and limited in supply, this die-cast
model much sought-after and prices can be astronomical!

You can read all about the project and how it initially progressed by following this link (opens in new window): Poor man's 4.7 Naval Gun Project Series

Anyway, to cut to the chase, a couple of things happened that put this project into moth balls, so to speak. First of all, my reach out exceeded my grasp as back then my scratch building skills were pretty basic and I got stuck when it came to the - for me - trickier building. And secondly, a change in my personal finances meant that affording the real Britains 4.2 gun model became less of an issue (in fact, I ended up buying two and so my need for a fake copy became somewhat redundant)...

Fast Forward Eight Years! >>
First of all, I can't believe I started this project eight yeas ago! But having dusted off this old job (literally) I now feel a lot more confident that I can actually complete the thing - thanks mainly to my new 3D printer!

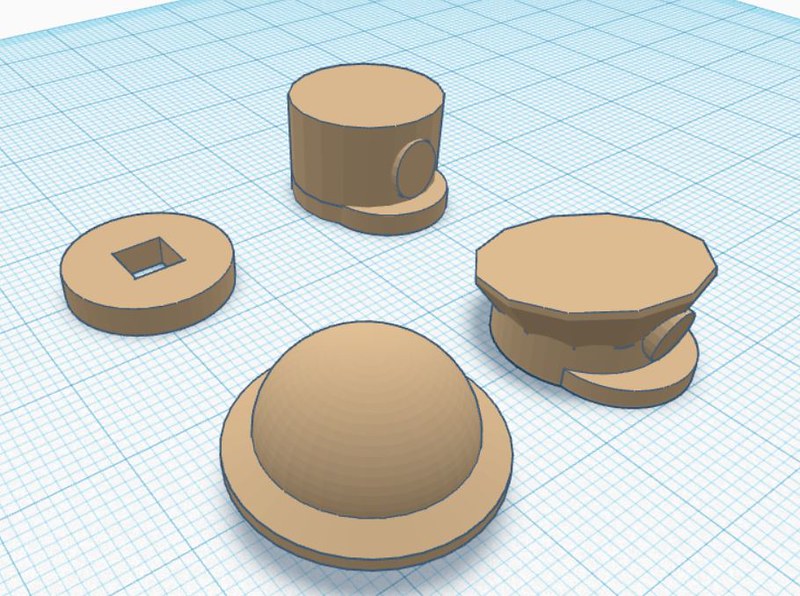
What makes the difference is being able to model design ideas in virtually before committing to a build. Whereas before my scratch constructions were very much 'suck it and see' affairs I can now - thanks to the TINKERCAD software - experiment with objects and components to see if they are viable...

Above: The result of a short session in TinkerCad, playing about with
shapes and ways to connect shapes together... No cut fingers here!

As the name suggests, I can tinker away to my hearts content - never worrying about spoiling a laboriously crafted wooden or plastic component and then having to start all over again! I soon had a collection of small parts which solved the quandary I originally had with my faux-Naval gun - how to attach the modified plating to the die-cast model.

Yes, I could have probably - eventually after lots of trial and error - have produced exactly the same components the traditional way with pieces of styrene cut to shape, but being able to model these shapes and alter them on the fly in the software meant I ended up with a more accurate end product in a fraction of the time.

Everything fitted together exactly how I wanted them and if something was slightly wrong it was ridiculously easy to tweak the dimensions and run off another component. This also solved another of traditional modelling's great bug-bears - 3D printing kinda kills the 'carpet monster'! I no longer have to worry about losing some small component as I can simply print off another. 😁

NEXT: Parts now assembled it's time to strip off the old paint!
Sunday, 24 January 2021

Wood versus Plastic! Crafting Versus Printing.

 Ok, so a bit of a talking point came up after I posted up my intension to 3D print some of my toy soldiers rather than my 'usual' technique of crafting the peg soldiers out of wooden dolly pegs. Some people were clearly not entirely happy about the idea! 😕

A couple of my early 3D printed prototypes, one of
my 'nutcracker' full-sized peg bodies and one of my
'50mm' half-sized bodies.

Typical of the comments was something along the lines of "...but if you 3D print them instead of crafting them out of real wood they will lose their charm!"

I was a bit taken aback, I didn't realise my toy soldiers were a thing that had 'charm'. I thought they were just daft little fun toys! But apparently, to some people, I'm somewhat spoiling part of the attraction of my peg soldiers. 😦

...My first though was along the lines of 'I didn't realise I had an obligation to others to maintain some sort of standards'! I thought I was just making these things to amuse myself. But, that's a bit ingenuous as I do get a kick from other peoples appreciation of what I do - that's why I post pictures on social media after all.

[Edit: Just read this back and it sounds like a bit of a moan! LOL But it's not, really. I like to hear other peoples' point of view.]

So, after pondering the issue I realised that some of these people had missed the point - I had never said I was replacing my original wood crafting technique of making peg soldiers with plastic 3D versions. I simply said that I would be investigating the possibilities that 3D might afford me for making prototyping easier PLUS I am thinking of making a range of easily duplicated plastic soldiers for war gaming where laborious wood crafting would be a bit of a hinderance.

I will still be making my wood crafted soldiers - but mainly for gifts, display and commissions! DON'T PANIC!

Phew! Anyway, I have begun my experimentation which involves learning how to 3D design the models, prepare them for printing and then learning how best to print them. This is not at all straight for ward as just pushing a 'PRINT' button and out would pop a finished model! 😁

I've certainly had a few minor print disasters! Luckily my printer allows me to monitor the printing remotely - via it's built-in camera - so I am able to hit the brakes if the print goes pear-shaped...

So, there's a learning curve which has to be overcome with 3D printing - it isn't such a hands-on 'build it and it will work out' experience that crafting with wood can be. But once this initial technical mechanics of building models in 3D and then printing them is understood - at least the basics - I should be able to do what I like to do best, tinker! 😁

In fact, this uneducated messing about started in earnest from day one of getting the printer, but now I am trying to get myself on a rather more methodical and formalised track, starting with the software.

I am starting with an easily accessible piece of software called (suitably enough) TINKERCAD, which is perfectly suited to my simple geometrically shaped figures...

 
At this stage I am just trying to understand how to combine primitive shapes - spheres, cubes, cones, tubes, etc - to recreate my 50mm wooden peg figure design.

Additionally, and perhaps a little more tricky, is my experiments in making multipart accessories and components that I can then add to the basic body to create different types of characters. I am finding the making of arms a bit of a challenge...


The main problem that I am encountering is that some of the shapes I used in my wooden figures simple do not translate well into a 3D printed model version. Due to the way my 3d printer works - which is to build up a model layer by layer - I have to reassess the way I construct components. In effect, I have to change my whole way of thinking.

Because of the changes I am having to make in the shape of my original component designs I am actually ending up with a slightly new style. Some small or thin parts - like the flat arm designs pictured above - have had to be made a little chunkier in order to work the way I want them to. Frustrating at times but also very interesting.


This has all given me an insight into why other small toy figure - like those made by Lego and Playmobile - look the way they look. It isn't all stylistic choices, some of the 'look' is led by the actual manufacturing process itself!

My arm designs changes from the old flat design into - first of all - tubes and then, eventually, half-tube shaped components...


Similarly, hats had to become a little chunkier and like my arms I had to come up with a way of easily attaching the component to the body...


However, little design quandaries aside, 3D modelling has - as I had hoped - made it easier for my to work out my design ideas and quickly prototype my doodles on paper into fully formed 3D models.

It's been an evolutionary process with minor adjustments here, amending dimensions there and tweaking things I wasn't quite happy with, but I feel I got there eventually and have produced a little character shape that I am happy with. though, this has left me with a little army of test pieces...

NEXT: It's time to see what my 3D figures paint up like and how they compare to my wooden versions!

Saturday, 16 January 2021

Happy (Belated) New Year!

 Yes, I'm late restarting my blogging for 2021 - a bit late but it's been a bit of an hectic start to January. But things are starting to settle down again so it onwards and upwards...

But what is my strategy for the coming year? I look at 2020 as a learning period, even though I made some models that I was quite happy with everything still felt like prototypes and no two builds were the same. 2021 is about consolidating by build techniques.

As I mentioned in my last post of 2020 I now have a 3D printer and that will be taking over my build experiments and prototypes. I'll be reserving my wooden builds for special projects. This should speed up my learning process as working on wooden build only for them not to turn out the way I wanted is a annoying waste of time...

Anyway, I don't have anything to show off yet BUT I came across this interesting article by CNN which - although isn't about my sort of toy soldiers - is a very interesting look into how attitudes towards 'military toys' in general is changing...

"LEGO won't make modern war machines, but others are picking up the pieces. "

In the article an influential peace group remarked on the production of 'war' themed models...

"The basic aim is to avoid realistic weapons and military equipment that children may recognize from hot spots around the world and to refrain from showing violent or frightening situations when communicating about LEGO products. At the same time, the purpose is for the LEGO brand not to be associated with issues that glorify conflicts and unethical or harmful behaviour," the peace group quoted from a 2010 LEGO report.

As someone who in involved in one of  the hobbies driven by an interest in all things military - even one which is principally 'toy' in style - this sort of thought process is a little worrying. For my part, I do wonder how this sort of attitude will affect those model makers who see themselves as part 'historians' who make 'war models' in order to persevere moments in history.

Some modellers might suggest that this is the thin edge of the wedge - military themed models not, but in the future how will such an 'anti-war' perspective affect military re-enactments or even military museums?

Food for thought.