Friday, 28 August 2015

AiP 1/32 Gatling Gun carriage re-made - Part 1.5

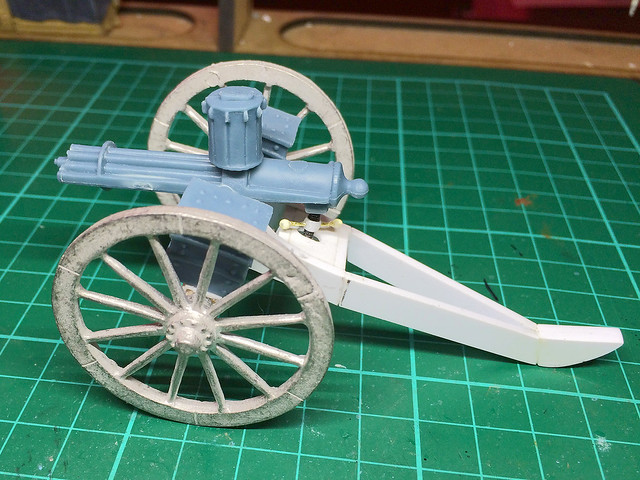
...I wasn't happy. The job I made of the new Gatling carriage just wasn't quite right (a reminder)...


The problem is that the gun's breech mechanism is laying right on top of the 'box' where the elevation mechanism should go (a wheel and screw arrangement which lifts and lowers the gun). At the moment there is no room for the screw to go between the box and the breech. Here's an idea of how it should look...

The elevation screw (inside red circle) lifts and lowers the gun barrels.

I hated to acknowledge what obviously had to be done...I was going to have to raise the trunnion holes in order to make space between the carriage and gun breech. Bugger!

Damn! No space between the breech and the elevation 'box'.

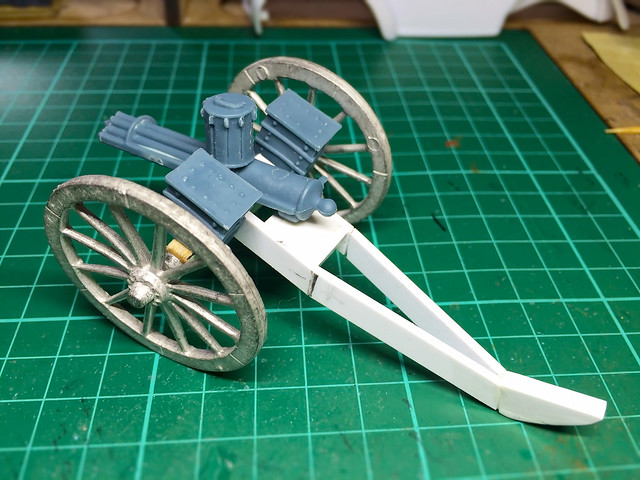
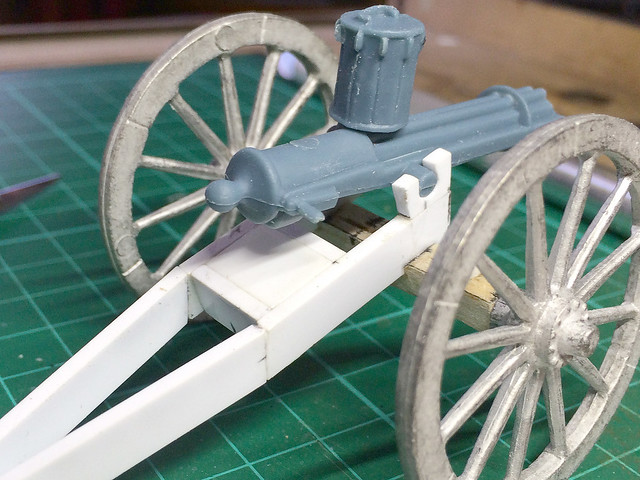
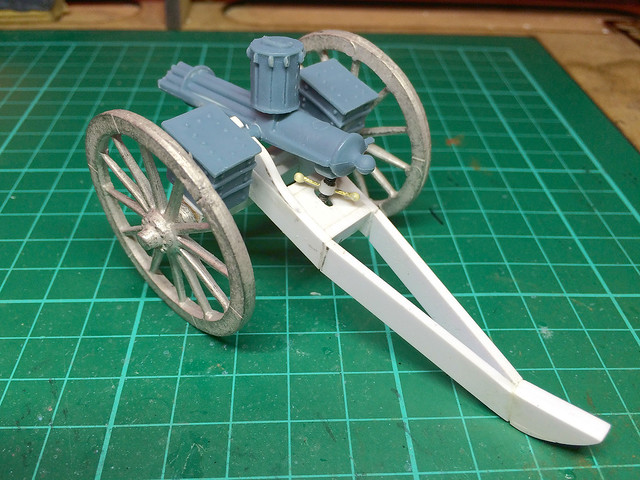
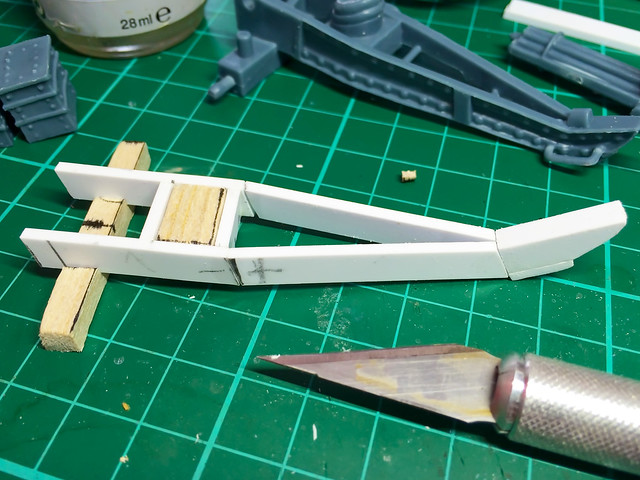
Well, after a lot of cursing and sawing away with my craft knife (must buy a micro-saw) I detached the end of the carriage with the trunnion holes and added a new 'end' piece and then re-attached the trunnion pieces on top on the new end pieces...Phew!

A bit rough and ready, but whatever works!

It's all getting a bit slap-dash now and a little messy but if I can get this first attempt to work and look right I'll know how to tackle any further carriages I make.

Messy maybe, but it did the trick...


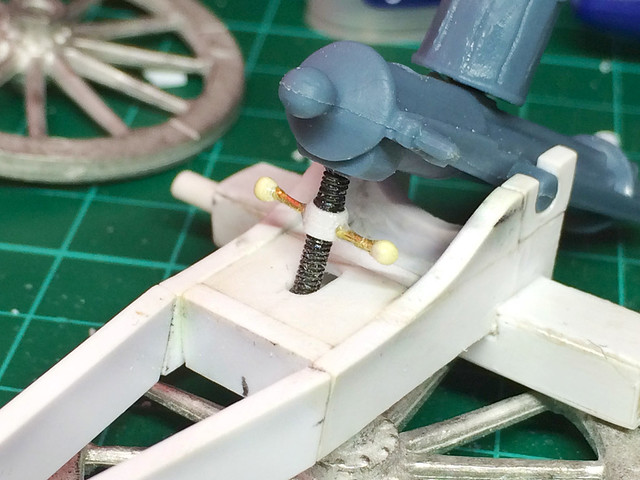
I now have adequate space between the breech and 'elevation box' on the carriage (don't know if that's the correct term for it) to insert the screw mechanism. Obviously, now I'm satisfied, I will have to tidy the job up, but I'll add the elevation screw first.


Well, it's not the best piece of scale modelling but it's better than the original AiP attempt (sort of). I really wanted to do a little wheel but just couldn't find a suitable part in my scraps box.

I'm back on course now - this model has turned out to be a bit of a prototype really, as I work out the best way to make a 1/32 gun carriage with my chosen materials. Though I hope that once I have added the extra detail and painted this attempt it will look OK.


Back to square one, but I'm a bit happier now!

The good thing about modifying the way the gun attached to the carriage - and raising it - is that it solves one of the main issues with the original AiP model. It get's rid of the annoying 'droopy gun'!

Next: Adding the detail and painting.

Historical note: I mentioned that this form of Gatling - mounted on a conventional artillery gun carriage - was an earlier form of the gun. But there seems to have been another reason this 'heavy' carriaged version of the gun was in use - apparently it was useful for engaging fixed (or fortified) positions. In this case the ability to transverse - sweep left and right quickly - was not such a big issue (perhaps). I'm still reading but what amazed me was how very large calibre automatic guns were in use quite early on, guns like the Hotchkiss and Maxim 'Pom-Poms' were mounted on gun carriages (Wikipedia: "...37 mm Nordenfelt-Maxim or "QF 1-pounder" introduced during the Second Boer War, the smallest artillery piece of that war. It fired a shell one pound in weight accurately over a distance of 3,000 yd (2,700 m)".

Tuesday, 25 August 2015

AiP 1/32 Gatling Gun carriage re-made - Part 1

OK, while the crew figures should progress quite easily now let's turn our attention to the Gatling Gun itself. I have two issues with the gun as it is provided by AiP, it has been given a simplified and somewhat generic gun carriage (to expedite it's use for the other three gun barrels supplied ) and it's rather droopy gun elevation.
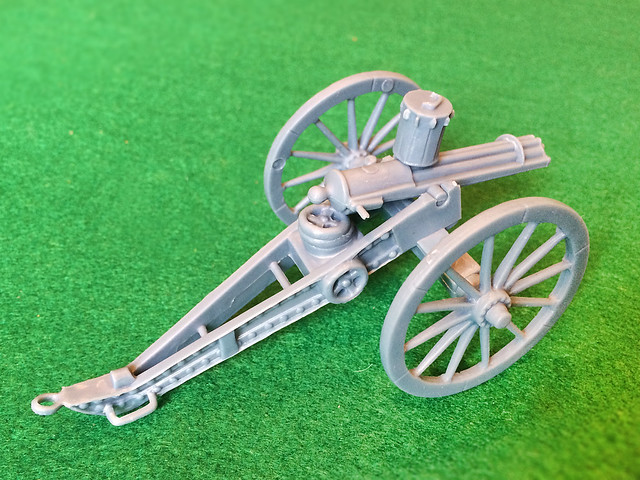
AiP's Gatling Gun. Unfortunately I can't identify exactly which version of
the historic Gatling Gun this is supposed to be.

In the end I decided that the best way to deal with both these issues (and ensure I can make use of the optional artillery barrels) is to build my own custom gun carriage from scratch - using the AiP carriage as a guide. Not a hard job as the carriage is a pretty simple in design...


I was a bit dubious about how AiP had chosen to mount the Gatling Gun, as the way they have done it is to 'pin' it into place using conventional cannon-style trunnions. This means there is no lateral movement of the gun unless you move the whole carriage left and right. I had thought that the Gatling was mounted on some sort of simple swivel mounting?
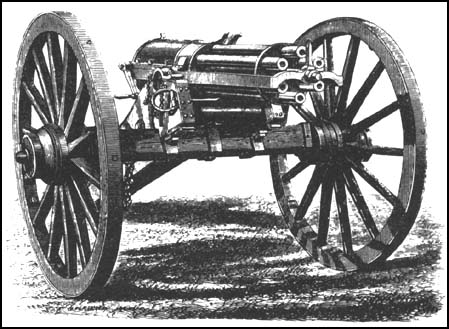
A 1 inch 1865 Gatling mounted using trunnions on a field carriage. This form of
mounting seems to have been an early type of mount, with fully articulated swivel
mounts 
coming later perhaps. This is the format of AiP's model.

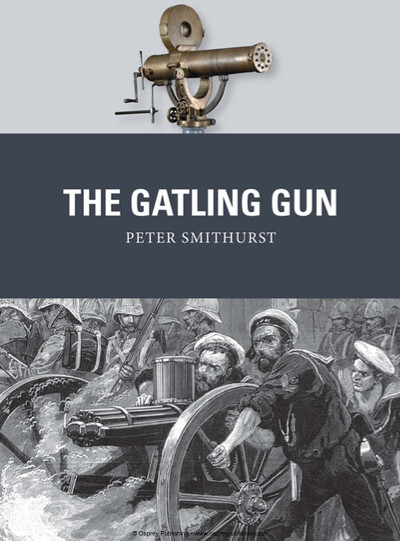
Osprey's book on the Gatling Gun (By Peter Smithhurst) was just recently released and it provided me with some information which leads me to believe that AiP's British Gatling is meant to be one of the earlier guns made by W. Armstrong, first used in action during Third Anglo-Ashanti War of 1873–74:

"The Gatling guns which accompany the expedition are those known as the 0.45 inch. They will be mounted on carriages somewhat similar to the guns [i.e. artillery], and, we presume, are mainly intended for the defence of stockade positions."
~ The Times of 6 October 1873
[Osprey 'The Gatling Gun', Page 50.]


My reading leads me to believe that these Gatlings were probably similar to Model 1865 guns in 1in calibre (as in the illustration above). The fact that this type of mount existed is good enough for me as it happens to be easier to recreate.

Just bear in mind that if you do want to model later Gatling Guns that their carriages did evolve to include better transverse rail or swivel mounts which provided easier lateral movement. These include British Army Gatlings that were deployed in the later Boer War...

Anyhoo...Onto construction...

Making a feasible circa. 1870 Gatling Gun carriage
All the barrels included in the set (see earlier post) are so delightfully appropriate for my Molatarian artillery company that it would be a great shame to simply consign three of them to my scraps box and just make up the Gatling Gun using the one carriage that AiP includes in the set.

The solution to this problem was simple...Make three more gun carriages, starting with one for my Gatling!

One must remind oneself that this is a 'toy gun' carriage and so the liberties taken are excusable, certainly from the point of view of the Funny Little Wars enthusiast. But even so I wanted to modify the Gatling version of the carriage to something I felt was more appropriate.
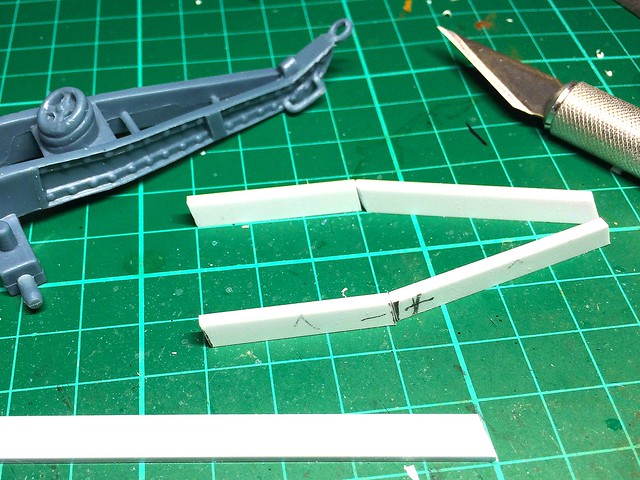
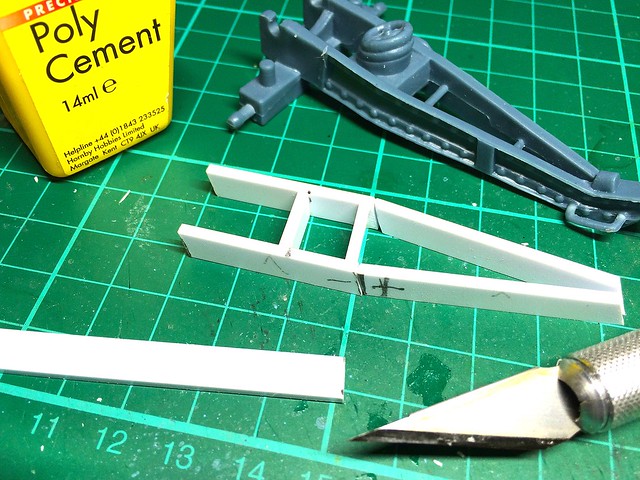
And so it begins. I didn't buy any special materials but used just what
happened to be on hand in my styrene collection and of the nearest
dimensions. Though it'll be a slightly lighter carriage, which is good.

It's a simple 'box' frame design so poses no tricky modelling issues. My main concern was getting some form of reference material on which to base my model, this opened up a whole 'research' can of worms. The AiP carriage, as I said, is a generic artillery carriage rather than one of the more specialised Gatling carriages that were developed - which provided movement in the horizontal as well as vertical firing plane - which is more appropriate to the earlier models of Gatling Guns.


Anyway, historical worries aside, I simply wanted some ideas about how I would furnish and ornament my carriage frame. I particularly wanted to replace the 'lump' which is supposed to be the elevation wheel on the AiP original. The AiP carriage also looks like it is a metal riveted affair and I wanted to see if there were indeed such metal carriages in use with the Gatling (as it turned out there were).


As is obvious from the pictures I have taken of the construction process I am working in light-weight materials - styrene and balsa wood. While these will not make the sturdiest of models they are nearly as good as the original AiP plastic and are, naturally, very easy to work with. Actually I haven't worked much with Balsa before and I am finding it a very nice medium (if you aren't too concerned about the hardiness of the model.)

I suppose the ideal way to ensure a fairly strong toy - for playing with - would be to cast my model in resin when I have finished making it. This would make it more resilient and durable. I'll think about that (it depends how good a job I make of it and whether I feel this carriage may be just a 'one off' or not).


So, onto fitting the AiP Gatling Gun model to my carriage. The trunnion arrangement - the metal pivots which are used to attach the gun to the carriage - are those parts which mark this gun out as being an earlier version of the gun. What this means is that, while the gun could be elevated freely, moving the gun from side to side - an basic requirement of a machine-gun - was only achievable by rotating the whole gun carriage (like a cannon).


Well, I completed the basic carriage frame construction, but there is a lot of detailing work left to do. Still, it looks OK and I found a spare set of white-metal wheels that finish off the compliment of parts, the AiP original items being those moulded in the blue-grey plastic.

Now I have to plan how to add all the carriage furniture and detailed accessories - like the elevation screw - and clean up the AiP gun itself (which has a little flash and some seam lines). But, not a bad start.

Next: Adding all the fancy details to finish off the model.

Monday, 24 August 2015

The Zimmerman Incident - FLW scenario for the invasion of the USA!

Here's a little FLW related tid-bit that intrigued me and hopefully might be of interest to other FLW enthusiasts. It related to a nice little co-incidence that links a recent purchase of toy Japanese soldiers to a bit of forgotten history which together make for an exciting idea for a war game scenario.

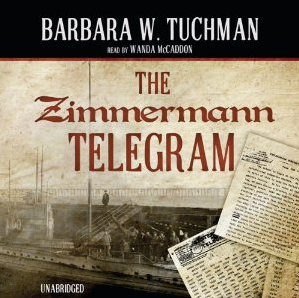
I am a big fan of the - now sadly departed - Barbara W. Tuchman. Her history of the 14th Century is an absolute wonder and is a constant feature of my audio-book playlist. Because of this I have been working my way through her other historical works and as a result I came across 'The Zimmermann Telegram'.

Without going too much into the book - as I highly recommend you read it - it outlines a World War One intelligence intercept by the British which brought to light a 'plan' (or suggestion) made by the Germans that Japan and Mexico should invade the United States of America!

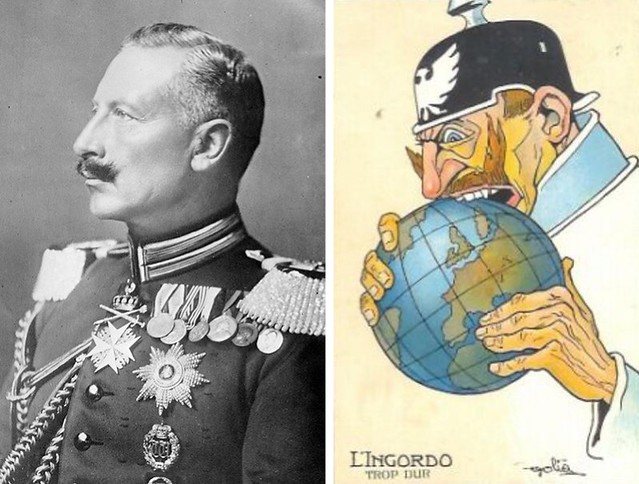
Kaiser Wilhelm II...Booo-hisss! Full of Machiavellian intrigue apparently and
a great one for encouraging others to get into fights. All round bad egg really!


Now, I have deliberately simplified the crux of this fascinating book just so I could emphasis the spectacular notion that this was an actual plan, not a fictional 'what if', and to let it sink in with you for a while. Believe me when I say that as the story of 'The Zimmerman Telegram' unfolded to me I was genuinely stunned that such a sensational plan had ever been seriously proposed! It sounds so fantastic (H. G. Wells himself would have delighted in such an idea for a work of fiction).

Anyway, as history shows this plan never came to fruition but (and it's a big fat and somewhat scary but) I was completely unaware of just how far into execution such a idea seems to have gone on the part of the Japanese. Again, I will not give away the story (read the book) but suffice to say that this sort of idea is absolute solid gold material for the ardent Funny Little Wars enthusiast.

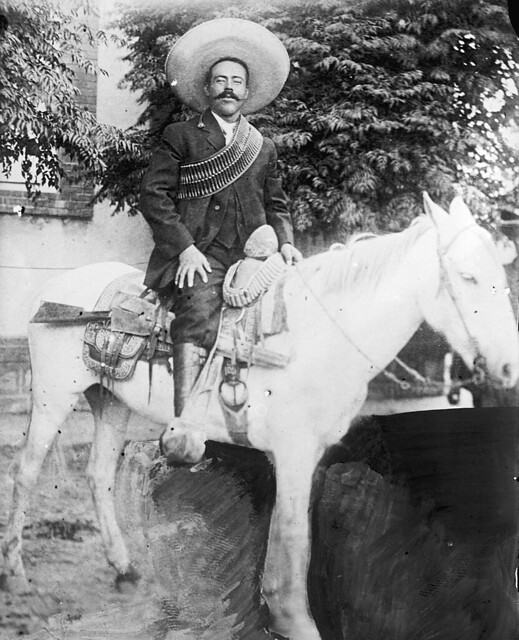
I've for some time been interested in Mexico as a setting for a FLW scenario. The only thing that held me off putting any really serious thought into it is that I didn't really like the conventional campaign scenarios that are knocking about for this part of the world and era. These usually involve the actual Mexica Revolution campaigns of 1910–20 (Emiliano Zapata and Pancho Villa and all that sort of thing).

Left: Doroteo Arango Arámbula (June 5, 1878 – July 23, 1923), better known as Francisco or "Pancho" Villa, a Mexican Revolutionary general. Source: Wikipedia.

I mean I love the movies 'Viva Zapata!', 'A Fistful of Dynamite' and 'The Wild Bunch', but the whole 'Sombrero Western' thing just doesn't quite do it for me. But the idea of a Japanese-Mexican force invading Texas...Well, what is there not to like (scenario wise)?

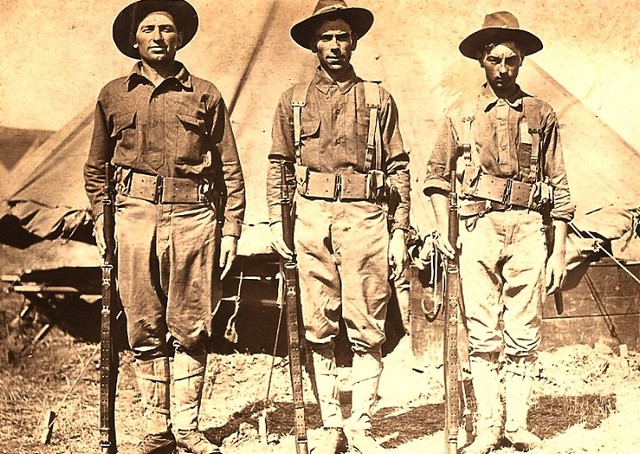
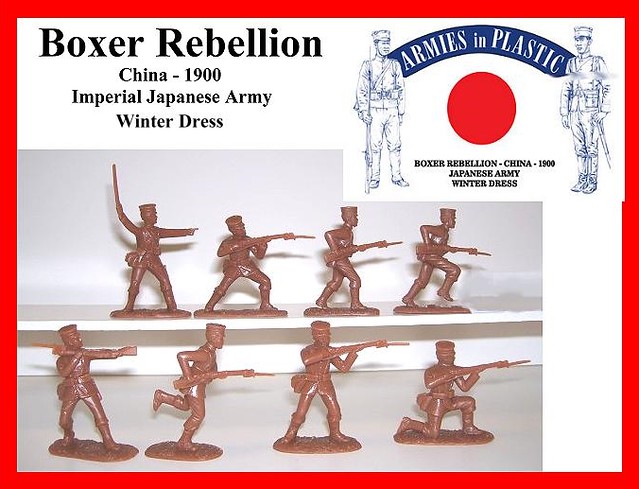
It's not as exotic a scenario - from a toy soldier point of view - as you might at first think. After all, Armies in Plastic do 1/32 figures of both Japanese and American troops for (roughly) this period in their Boxer Rebellion (1900) series, or you could plump for the 'American Doughboys' WW1 set for US regulars of 1917.

This photo post card with a post mark date of Dec 1911, shows three [US] soldiers
wearing the pre 1910 uniform and field gear. Though this is an early photograph,
it is typical of how National Guard units were uniformed and equipped during
their service on the Mexican Border, 1916-1917.
Source: www.aef-doughboys.com
Mexican 'Federales' of the period require a little more imagination, but passible facsimiles can be produced from Armies in Plastic's 'Boer War - British Army - (1899 - 1902)' set.

Mexican Federal Troops from the movie 'A Fistful of Dynamite'. These pith-
helmet wearing soldiers are intended to represent Mexican infantry of 1913.

Of course, these figures are all only loosely historically accurate for the period but good enough to provide a basis for a FLW fictional campaign. The Japanese troops are from AiP's range are probably more appropriate for the period of 1890-1911, but what the heck they are close enough...


For me the 'Zimmerman Incident' (had it come to fruition) is the very epitome of what Funny Little Wars is all about - imperial intrigue, exotic armies and bonkers military thinking! And it gives you the opportunity to come up with some very creative units and pieces for your battlefield - how about a gaggle of sombrero adored Mexican irregulars, of an fabulous early Japanese flying machine?

If you want to get a feel for the 'plot' behind the Zimmerman Telegram you can get a fleeting outline from the Wikipedia entry, but that by no means gives you a true impression of the seriousness with which the idea was proposed (certainly the British gave the plot credence). But also the Wikipedia entry does not - I think - sufficiently outline the Japanese role in the plot (there is no mention, for example, of the scheme for Japanese troops to snatch the Panama Canal). For all this and to grasp the full sensational brazenness of the Kaiser's plan you will have to read Tuchman's book (or listen to the excellent audiobook version as I am).