I'm back from a week in hospital! That was unexpected... It was hugely annoying as I was bored out my mind and yet I have a load of little projects sitting on my work bench. 😠
Still, home now, so lets' start working through the backlog with a little -perhaps uninteresting looking - job which will actually be quite a useful bit of modelling to have under my belt. I am making a 'Brodie Helmet' - the tin hat that was worn by British and American soldiers from 1915 to the Second World War (when the Yanks replaced it with the M1 pot).

It'll be such a handy little sculpt to have available to me as it will open up a large range of possible models to me. I already have several ideas in mind.
This job will be to make a 'master sculpt' which I can then duplicate so I have a little collection of spares for when I need them. I'll probably just press cast these using Oyumaru Instant Mold, probably the simplest way to make small duplicates of objects.

Making the 'Master'...
I did some quick measurements of the heads of my peg soldiers and determined that I wanted a helmet diameter of 20mm and so cut a little disc of thin wooden sheet..

As I still do not have a mini-lathe - with which I could easily turn out simple shapes like this in wood - I have had to resort to sculpting the bowl shape of the helmet using Milliput putty...

It was then just a case of smoothing down the blob of putty into my desired shape. Generally a half-sphere, the Brodie gracefully curves out into the peak. Once I had sculpted the general shape of teh helmet with the putty I left it to cure overnight - Milliput dries stone hard and then can be easily filed and sanded to a smooth shape. [It's this hardness that I prefer about Milliput over other modelling putties. I have tried others - like Green Stuff - but they have a slightly softer texture and don't sand as well.]

Phase 2 - Casting Duplicates
Now that I have my 'master' model of the helmet it's time to begin the mould and casting phase of the project. As mentioned above I am using Oyumaru Instant Mold as this is a very simple object and so the press moulding technique is perfectly adequate.
Press moulding - as the name suggests - means that you simply press your original object into a moulding material to form an impression of the object you want to duplicate. Here's some photos of the process of casting the helmet model I want...
1. Drop the Oymaru gel block into boiling water for a few minutes to soften...


2. Once the gel is squishy (about as soft as Plasticine) you can set the block on a clean smooth surface and then you can press your original 'master' object into the soft gel...

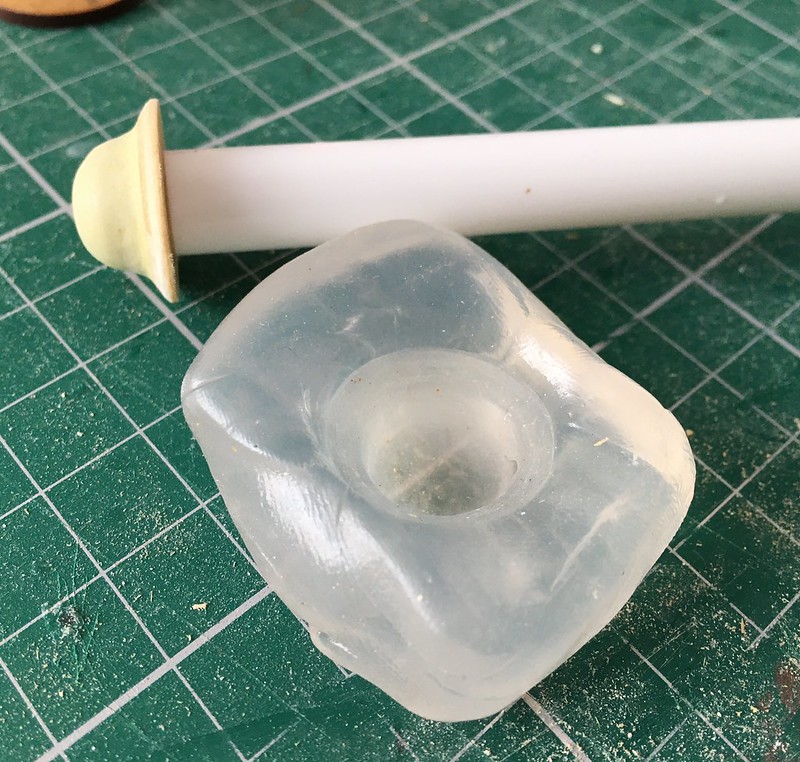
3. Once the mould has hardened (I usually run the mould under very cold water to help it set with the master object still in it to help create an accurate impression) I leave it for five or ten minutes and then it should be hard enough to use as a mould.
Note: Before the next stage of putting putty into your mould check the impression to see if there are any air bubbles or damage caused by grains of dust or whatever. You want as good and clean an impression as you can get. If there is any damage you might need to start the mould-making process all over.
I then press small balls of my modelling putty into the mould, pressing the putty firmly into the impression using the rounded end of a stick I have made for the purpose (a pencil will do) to make sure that the putty gets right into the nooks and crannies of the mould.
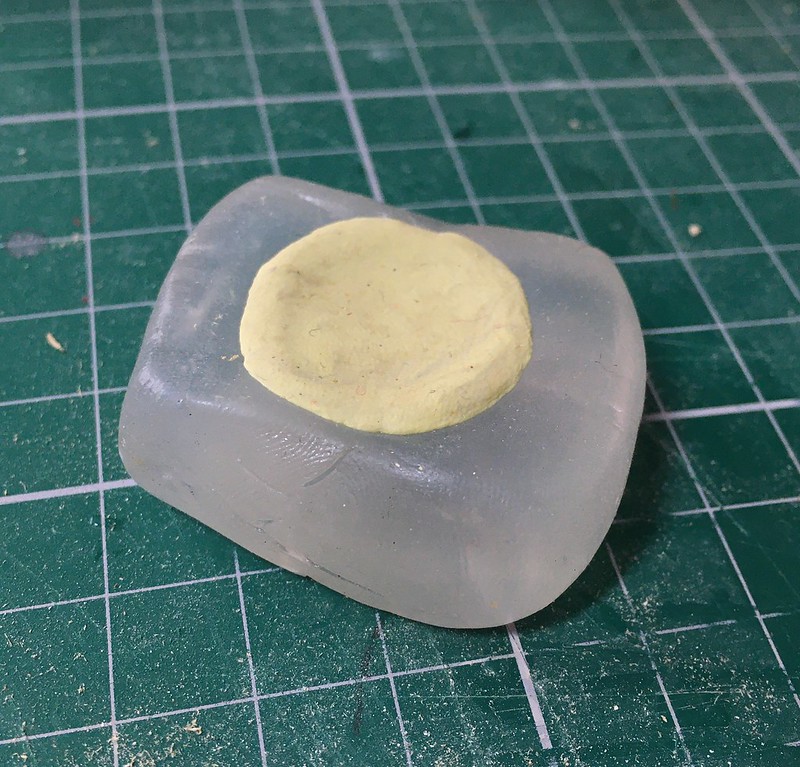
I fill the mould impression a little over the top to ensure I have everything so I will have to cut away a little bit of excess Milliput once the casting comes out the mould.
Now the annoying part - the wait for the Milliput to cure. I like my Milliput to be rock solid so leave it over night, but I believe you could pop out a fairly solid casting out the mould in a few hours if you are in a hurry to make several duplicates (you'd have to experiment to see if this would work without malforming the casting).
4. The moment of truth... Popping the hardened casting out of the mould.
While the gel mould is pretty solid it does have the consistency of hard rubber so you can bend it to help pop out your casting. Hopefully, you will end up with a nice duplicate of your original model object...
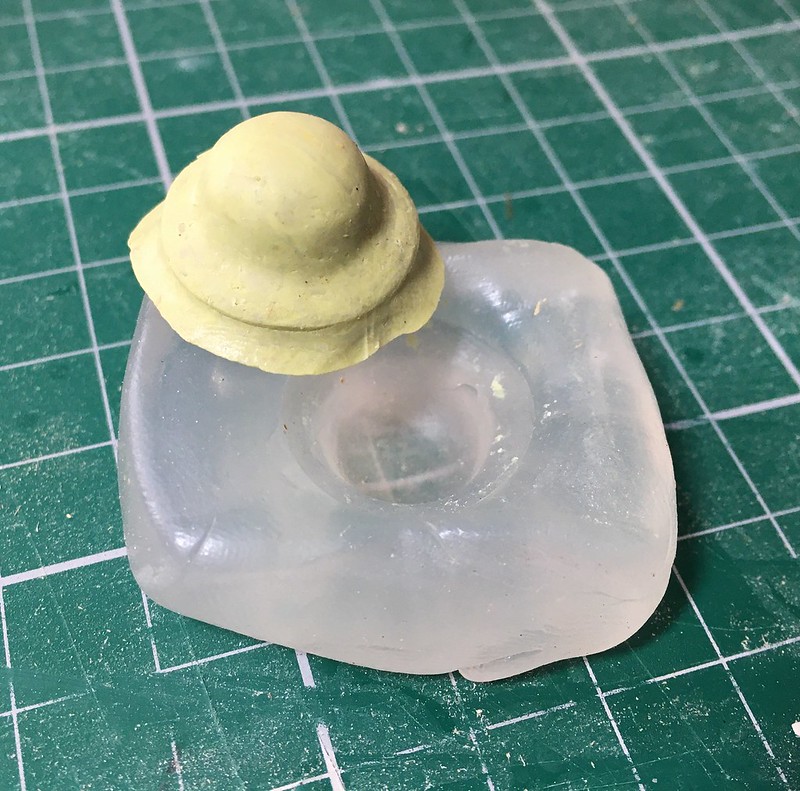
As you can see from the above photo there is a excess of Milliput around the bottom of the helmet. But this is OK as it has helped create a nice sharp edge to the peak of the tin hat. All I have to do is saw off - using my Dremmel and a cutting disc - this unwanted material and job's a good 'un! 😁
And there you go - simple press moulding. Great for small simple one-off objects.
I wouldn't use this material for anything complicated or if I needed to make a large number of duplicates. In these cases I would either source a 3D printer or go down the traditional resin casting route. In theory, you can do a a slightly more sophisticated two-part mould using Oyumaru gel - I have tried that - but the original still cannot have too much complex detail.
In the future I intend to invest in a resin casting starter kit as I will undoubtedly want to cast multiple objects and more complex objects. But for small jobs like this Oyumaru is quick and easy! 👍
No comments:
Post a Comment