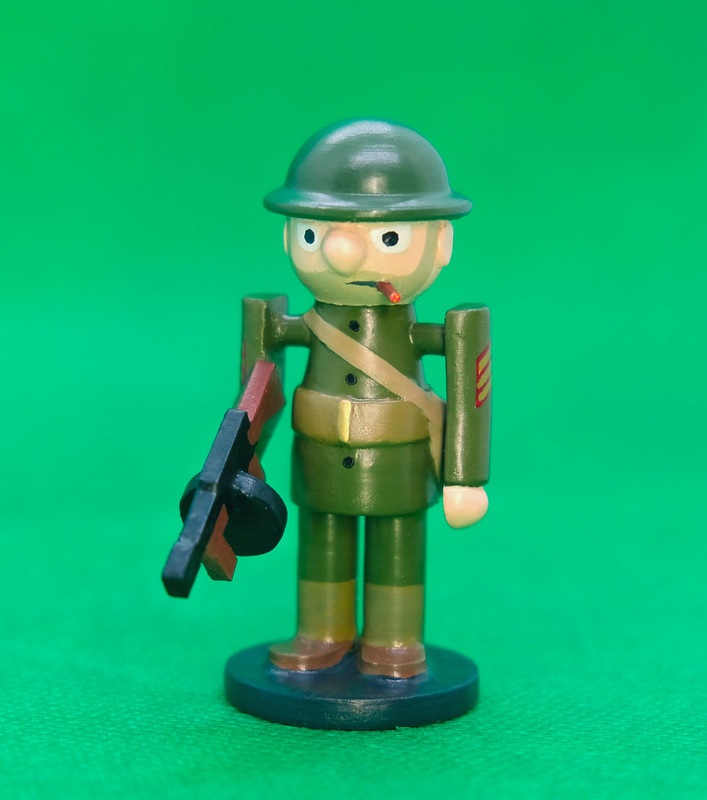
First of my 'good guys' for my Assault on Innsmouth' series, 'Sarge' is the lynch-pin of my little RPG team. Hopefully, you will be somewhat familiar with the mythos of H. P. Lovecraft but if not think of a darker version of Scooby-Doo with lots of tentacles involved! (LOL - I simplify a lot here!) 😂
Anyway, I simplified the 1920s era USMC uniform a bit but I think it's been done in the right spirit. I'm really quite interested in this Inter-War period of the 1920 & 30s as it has a lot of potential for Pulp/Steampunk sci-fi and horror tabletop game scenarios.
I quite like this figure, he has a lot of character and it did tempt me to make a whole squad made up of marines turning a Lovecraftian scenario into a sort of retro 'Aliens' bug hunt! 😆 But, in the end, I'm sticking to my original idea of making a more diverse investigative team.
Starting to get a small army of peg figures - going to have to start looking at getting a display cabinet of some type.
Just a very quick introduction to my new figure set project (now I've finally gotten my mojo back after my furious Christmas flurry). 😊
Introduction to Innsmouth For those of you unfamiliar with the Mythos works by H. P . Lovecraft here's a very brief account of the scenario which my new project is based upon:
The Esoteric Order of Dagon was the primary religion in Innsmouth after Marsh returned from the South Seas with the dark religion circa 1838. It quickly took root due to its promises of expensive gold artifacts and fish, which were desired by the primarily-fishing town.
The central beings worshipped by the Order were the Father Dagon and Mother Hydra, and, to a lesser extent, Cthulhu. Dagon and Hydra were seen largely as intermediaries between the various gods rather than as gods themselves. Even so, the cultists sacrificed various locals to the Deep Ones at specific times in exchange for a limitless supply of gold and fish. When they ran out of locals, they would go to other places to kidnap people to be sacrificed. Eventually, things became so bad that the US government sent the police force to apprehend Marsh and his cult. [Wikipedia.]
Above: The raid on Inssmouth from Osprey Publishing's 'The Cthulhu Wars'.
My figure set will include two groups of six figures, one set made up of the 'Federal Forces' who made the assault on Innsmouth and the other representing the citizens of Innsmouth. I hope to use the figures in a tabletop RPG mini-scenario pitting one force against the other.
On With the Good Guys! As usual there will be figures which might be considered 'the good guys' and those some might consider 'the bad guys'. I leave the matter for others to argue over but for ease let's start with how I intend to make up the 'good guys'!
The first thing to consider is the 'historical' period we are talking about - in the Lovecraft mythology the raid on Innsmouth is said to have been taken place in 1927. This is a rather interesting as I have always wanted to do an 'Inter-War' years project based on H. G. Wells 'Funny Little Wars' rules intermixing historic military with a Science fiction/horror cross-over.
So, all the figures will be of this late 20s pulp style...
The Federal Assualt Team: - USMC Sergeant armed with a Tommy Gun. - USN Landing Team seaman armed with a B.A.R. - FBI/Treasury Agent armed with pump shotgun. - Photographer/Journalist with camera to record event. - 'Priest' - though I am still a bit uncertain about this character. - Lead Investigator - Some sort of professor, again a bit undecided.
For sources from which I can make my scenario I am using Osprey's 'Cthulhu Wars' for background and am trying to local a copy of 1992 Chaosim's 'The Raid on Innsmouth' for hints on how to run the game. But this is a work in progress.
Completed my latest peg duo, a couple of Pulp Lovecraftian RPG figures.
I'm still working on low and middle level NPC characters - I'll leave the scary high level Mythos creatures until last - so here's a couple of more figures that can add some spice to the narrative but are easily disposable early to mid game (pre-boss level if you like).
'Mr. Mustafa' is a rather nasty middleman, a collector (and sometimes fence) of rare ancient artefacts. He is loosely based of the Hollywood actor Peter Lorre (with a bit of Sydney Greenstreet from 'The Maltese Falcon' and the character Beni Gabor from 'The Mummy' thrown in)...
The second figure is - I would imagine - quite a useful but not vital character, a policeman. In this case he is a New York police sergeant (a nice counterpart to the British Bobby I did last year) and I guess you might consider him as being a 'ambiguous' entity as he might be good but also - dependant on the storyline - he could be belligerent character.
These are the first of my new 3D printed peg characters and as such they include a few new ways of doing things that make them slightly different from my original wooden pegs. I've also departed from my original gloss finish of my peg soldiers, I've applied a satin varnish finish which seems more fitting for these gaming figures.
Although I've not posted much since Christmas I've not been idle. I've actually been quite busy figuring out (excuse the pun) how best to utilise my new 3D printer for helping me with my peg figure building.
Well, I've actually managed to complete some 3D printed peg characters who I am quite happy with and think I've come up with a design that works with the printer and works for me too! (I've had to modify the way I build my figures a little.)
The above screenshot shows the sort of 3D design work I've been working on, exploring new ways of making parts for my figures and ways of including accessories that are easy to print. One of my frustration with my 'traditional' wooden peg figures was how limited I felt I was with poses and also how fiddly hats were to make (particularly if I wanted multiple copies of the same design). 😄
I had originally considered resin casting to make copies of components that I'd want to use again and again, but my new 3D printer is a terrific way of prototyping and is a lot less messy that dealing with resin and moulds.
I can now experiment unhindered and quickly in a way that wasn't so easy to do with wood. Being able to plan and design components virtually in software took a lot of the guesswork out of making new ideas. Working in wood was a little more convoluted as most times I would never really know if a design would work until I actually carved it, and that could be a lot of wasted time if it wasn't right (as well as a waste of material).
Working with software designs I can be pretty certain something is 'in the ball park' before committing it to print. This saves time and money and materials.
Above: Experimenting with arm poses and ways to attach accessories to them in software means I can try out endless ideas and combinations.
That's not to say I am abandoning wood, just that I now have the best of both worlds as I can mix mediums to get the figure design that I want (often with wood I made some compromises and had to settle for less dynamic looking or overly simplistic components or poses).
Anyway, after a lot of tinkering about and prototype parts I ended up making a few wholly 3D printed peg figures which I intend to paint. I am please with some of my new ways of doing things - like the rod attachment for arms - and the improved designs - like the semi-rounded arms instead of the old flat ones.
Some of the new features of my 3D peg figures were totally unexpected but fortuitous discoveries. Like the ability to incorporate facial features into a one-piece head and that my PLA prints are a lot lighter than my wooden characters, which will be great come next Christmas as they will be great for hanging on the tree!
Are there any downsides? Well, it has been remarked that being plastic instead of wood kinda detracts from this home-crafted charms a bit (according to some people). But that's a point of view, personally I always thought the 'charm' came from the design and finished painted figure as much as what it was made from. (Though I repeat, I won't be ditching wooden pegs, it will all depend on what I am making the figures for.)
Now here's a blast from the past! The continuation of a long 'dead' project, reanimated due to my new 3D printer acquisition...
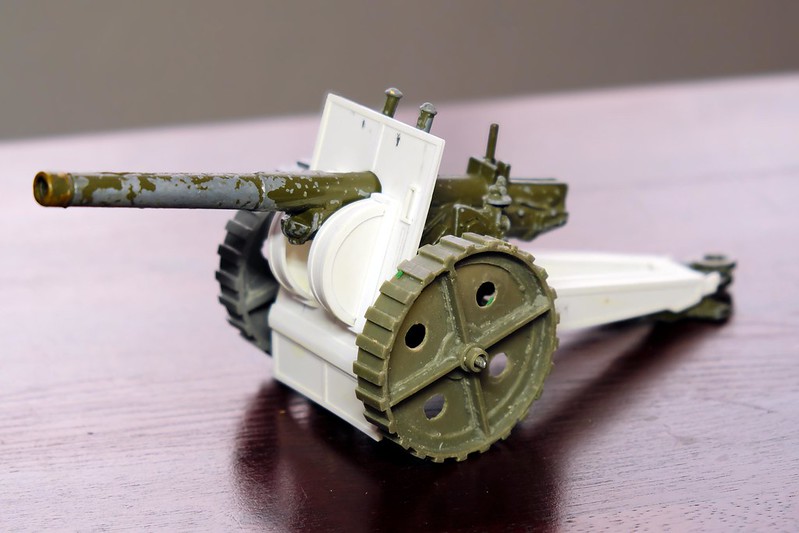
It all began way back in 2013, when I was first beginning to dip my toe in the murky waters of scratch-building model conversions. My intension was simple - I could not initially afford to buy the classic Britain's 4.7inch Naval Gun model as the prices were stupidly high on eBay, so I decided to see if I could make a cheaper 'look-a-likely' artillery piece for my Funny Little Wars collection.
Above: Britains' 4.7 Naval Gun model the classic FLW artillery piece. Now out of production and limited in supply, this die-cast model much sought-after and prices can be astronomical!
Anyway, to cut to the chase, a couple of things happened that put this project into moth balls, so to speak. First of all, my reach out exceeded my grasp as back then my scratch building skills were pretty basic and I got stuck when it came to the - for me - trickier building. And secondly, a change in my personal finances meant that affording the real Britains 4.2 gun model became less of an issue (in fact, I ended up buying two and so my need for a fake copy became somewhat redundant)...
Fast Forward Eight Years! >> First of all, I can't believe I started this project eight yeas ago! But having dusted off this old job (literally) I now feel a lot more confident that I can actually complete the thing - thanks mainly to my new 3D printer!
What makes the difference is being able to model design ideas in virtually before committing to a build. Whereas before my scratch constructions were very much 'suck it and see' affairs I can now - thanks to the TINKERCAD software - experiment with objects and components to see if they are viable...
Above: The result of a short session in TinkerCad, playing about with shapes and ways to connect shapes together... No cut fingers here!
As the name suggests, I can tinker away to my hearts content - never worrying about spoiling a laboriously crafted wooden or plastic component and then having to start all over again! I soon had a collection of small parts which solved the quandary I originally had with my faux-Naval gun - how to attach the modified plating to the die-cast model.
Yes, I could have probably - eventually after lots of trial and error - have produced exactly the same components the traditional way with pieces of styrene cut to shape, but being able to model these shapes and alter them on the fly in the software meant I ended up with a more accurate end product in a fraction of the time.
Everything fitted together exactly how I wanted them and if something was slightly wrong it was ridiculously easy to tweak the dimensions and run off another component. This also solved another of traditional modelling's great bug-bears - 3D printing kinda kills the 'carpet monster'! I no longer have to worry about losing some small component as I can simply print off another. 😁
NEXT: Parts now assembled it's time to strip off the old paint!